- 0 Facebook
- 163 Pinterest
- 10 Email
- Copy Link
- 173 shares
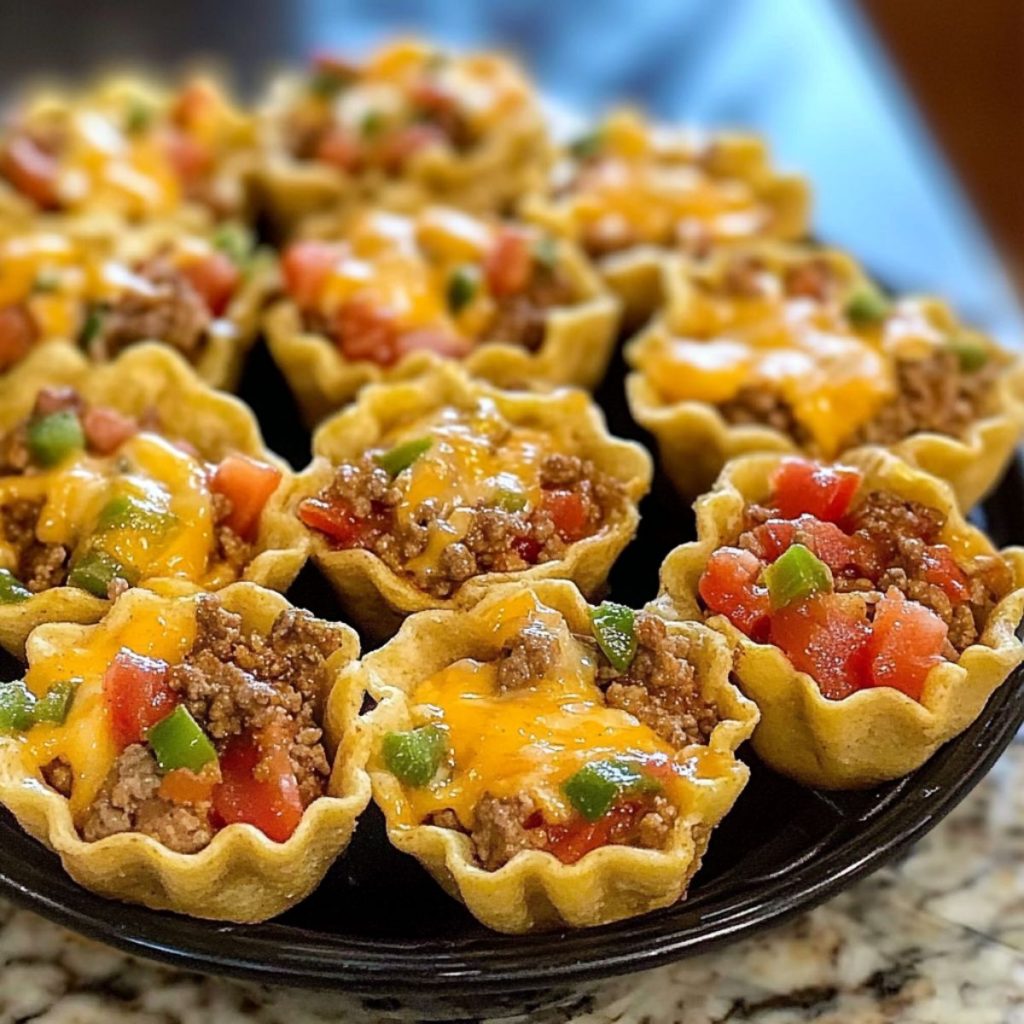
This recipe takes me back to my sister’s housewarming party five years ago, when I was scrambling to bring something crowd-pleasing on short notice. I had ground beef, taco seasoning, and some cheese in my fridge – nothing fancy, but somehow these little bites became the hit of the evening. The aroma of seasoned beef mingling with melted cheddar cheese filled her kitchen, and I watched plate after plate disappear within minutes. I’ve made these Taco Ranch Bites over forty times since then, perfecting the balance of spicy taco seasoning and creamy melted cheese. The beauty lies in how four simple ingredients – ground beef, taco seasoning, diced tomatoes with green chiles, and sharp cheddar – transform into something absolutely irresistible. Now whenever I need something guaranteed to please a crowd, these little flavor bombs are my go-to choice.
Why You’ll Love This Recipe
I’ve served these at countless gatherings, and they never fail to impress. Here’s why:
• Quick Assembly: These come together in under 30 minutes using simple pantry staples and basic cooking techniques.
• Perfect Texture: Each bite delivers tender, juicy beef topped with gloriously melted cheese that stretches beautifully.
• Bold Flavor: The taco seasoning and green chiles create a zesty, slightly spicy kick that’s addictive.
• Endless Versatility: Serve as appetizers, game day snacks, or even light dinners with endless topping possibilities.
• Beginner-Friendly: No special skills required – if you can brown meat, you can master this recipe.
These little bites prove that sometimes the simplest recipes create the most memorable moments around your table.
Ingredients Notes
• Lean Ground Beef: I always choose 93/7 or 90/10 lean beef to prevent greasy bites. Fresh beef with bright red color ensures the best flavor and texture in every bite.
• Taco Seasoning: A quality packet adds the perfect blend of cumin, chili powder, and spices. I prefer mild seasoning for crowds, but spicy works beautifully too.
• Diced Tomatoes and Green Chiles: The undrained liquid adds moisture and prevents dry meat. Look for cans with visible chile pieces for the best texture and flavor.
• Shredded Cheddar Cheese: Sharp cheddar melts beautifully and provides the perfect tangy contrast. Freshly shredded cheese melts better than pre-shredded varieties for optimal results.
How to Make This Recipe
- Preheat your oven to 375°F and lightly grease a mini muffin tin or small baking cups. I find that a light spray of cooking oil works perfectly here.
- Brown the ground beef in a large skillet over medium-high heat, breaking it apart with a wooden spoon. This usually takes about 6-8 minutes until no pink remains.
- Drain any excess fat, then stir in the taco seasoning packet. Cook for another minute until fragrant and the beef is well-coated with spices.
- Add the undrained diced tomatoes and green chiles to the skillet . Simmer for 3-4 minutes, stirring occasionally, until the mixture thickens slightly and most liquid evaporates.
- Let the beef mixture cool slightly before assembly—this helps prevent premature cheese melting and makes filling the cups easier.
- Spoon the beef mixture into your prepared mini muffin cups, filling each about three-quarters full. Top each cup generously with shredded cheddar cheese.
- Bake for 12-15 minutes until the cheese is melted and lightly golden around the edges. The bites should hold their shape when you remove them from the tin.
- Cool for 3-4 minutes before serving – they’ll be extremely hot! Use a small spoon or fork to gently remove them from the cups. Optional: Top each bite with a dollop of sour cream or a cilantro leaf for presentation.
Expert Cooking Tips
• Don’t Skip the Rest: Let the beef mixture cool slightly before adding cheese to prevent premature melting and messy assembly.
• Perfect Portions: I use a small cookie scoop to ensure evenly sized bites that cook uniformly and look professional.
• Cheese Coverage: Completely cover the meat mixture with cheese – this creates a beautiful golden top and prevents the filling from drying out.
• Test for Doneness: The cheese should be bubbly and lightly golden, not just melted, for the best flavor and texture.
• Easy Release: Let bites cool in the pan for a few minutes before removing to prevent them from falling apart.
• Make-Ahead Magic: Assemble these up to 4 hours ahead and refrigerate, then bake when guests arrive for fresh, hot appetizers.
How to Store Leftovers
• Refrigerator Storage: Store covered bites in the refrigerator for up to 3 days in an airtight container.
• Freezer Option: I freeze assembled unbaked bites for up to 2 months, then bake directly from frozen.
• Reheating Method: Warm leftover bites in a 350°F oven for 5-7 minutes until cheese melts again.
• Microwave Alternative: Heat individual bites for 20-30 seconds, though oven reheating maintains better texture and crispness.
• Prevent Sogginess: Place paper towels under bites when reheating to absorb excess moisture from condensation.
Variations and Substitutions
• Turkey Swap: Ground turkey works beautifully, though I add an extra tablespoon of oil for moisture.
• Cheese Alternatives: Pepper jack adds heat, while Monterey Jack provides creaminess without the sharp cheddar bite.
• Vegetarian Version: Replace beef with seasoned black beans or lentils for a protein-packed meatless option that’s equally satisfying.
• Spice Level: Add diced jalapeños or use hot taco seasoning to kick up the heat for spice lovers.
• Ranch Addition: Combine one packet of ranch dressing mix with taco seasoning for a bold, zesty twist.
• Mini Bell Peppers: Use halved mini bell peppers instead of muffin cups for a low-carb, colorful presentation.
Perfect Pairings & Serving Ideas
• Fresh Guacamole: Creamy avocado dip provides cool contrast to the warm, spiced beef and balances the richness perfectly.
• Crisp Tortilla Chips: Serve alongside for extra crunch and to help guests scoop up any cheese that melts out.
• Cold Beer Selection: Light lagers or Mexican beers complement the taco flavors without overwhelming the delicate bite-sized portions.
• Garden Salad: A simple mixed greens salad with lime vinaigrette cuts through the richness and adds fresh vegetables.
• Salsa Verde: Tangy tomatillo salsa brightens each bite and adds another layer of authentic Mexican-inspired flavor.
• Lime Wedges: Fresh lime juice squeezed over the bites adds brightness and enhances all the existing flavors beautifully.
Your Questions Answered
Q: Can I make these ahead of time? A: As mentioned above, you can assemble up to 4 hours ahead and refrigerate.
Q: What if I don’t have mini muffin tins? A: Use regular muffin cups and increase baking time to 18-20 minutes total.
Q: Can I freeze the assembled bites before baking? A: Yes, freeze for up to 2 months and bake directly from frozen.
Q: How do I prevent the bites from sticking? A: Generously grease cups or use paper liners for easiest removal every time.
Q: What’s the best way to reheat leftovers? A: Oven reheating at 350°F maintains texture better than microwave heating methods.
Q: Can I double this recipe for larger crowds? A: Absolutely! This recipe scales perfectly – just use multiple muffin tins as needed.
- 0 Facebook
- 163 Pinterest
- 10 Email
- Copy Link
- 173 shares
Taco Ranch Bites
Ingredients
Instructions
Preheat your oven to 375°F and lightly grease a mini muffin tin or small baking cups. I find that a light spray of cooking oil works perfectly here.
Brown the ground beef in a large skillet over medium-high heat, breaking it apart with a wooden spoon. This usually takes about 6-8 minutes until no pink remains.
Drain any excess fat, then stir in the taco seasoning packet. Cook for another minute until fragrant and the beef is well-coated with spices.
Add the undrained diced tomatoes and green chiles to the skillet. Simmer for 3-4 minutes, stirring occasionally, until the mixture thickens slightly and most liquid evaporates.
Let the beef mixture cool slightly before assembly—this helps prevent premature cheese melting and makes filling the cups easier.
Spoon the beef mixture into your prepared mini muffin cups, filling each about three-quarters full. Top each cup generously with shredded cheddar cheese.
Bake for 12-15 minutes until the cheese is melted and lightly golden around the edges. The bites should hold their shape when you remove them from the tin.
Cool for 3-4 minutes before serving – they’ll be extremely hot! Use a small spoon or fork to gently remove them from the cups. Optional: Top each bite with a dollop of sour cream or a cilantro leaf for presentation.