- 0 Facebook
- 5 Pinterest
- 0 Email
- Copy Link
- 5 shares
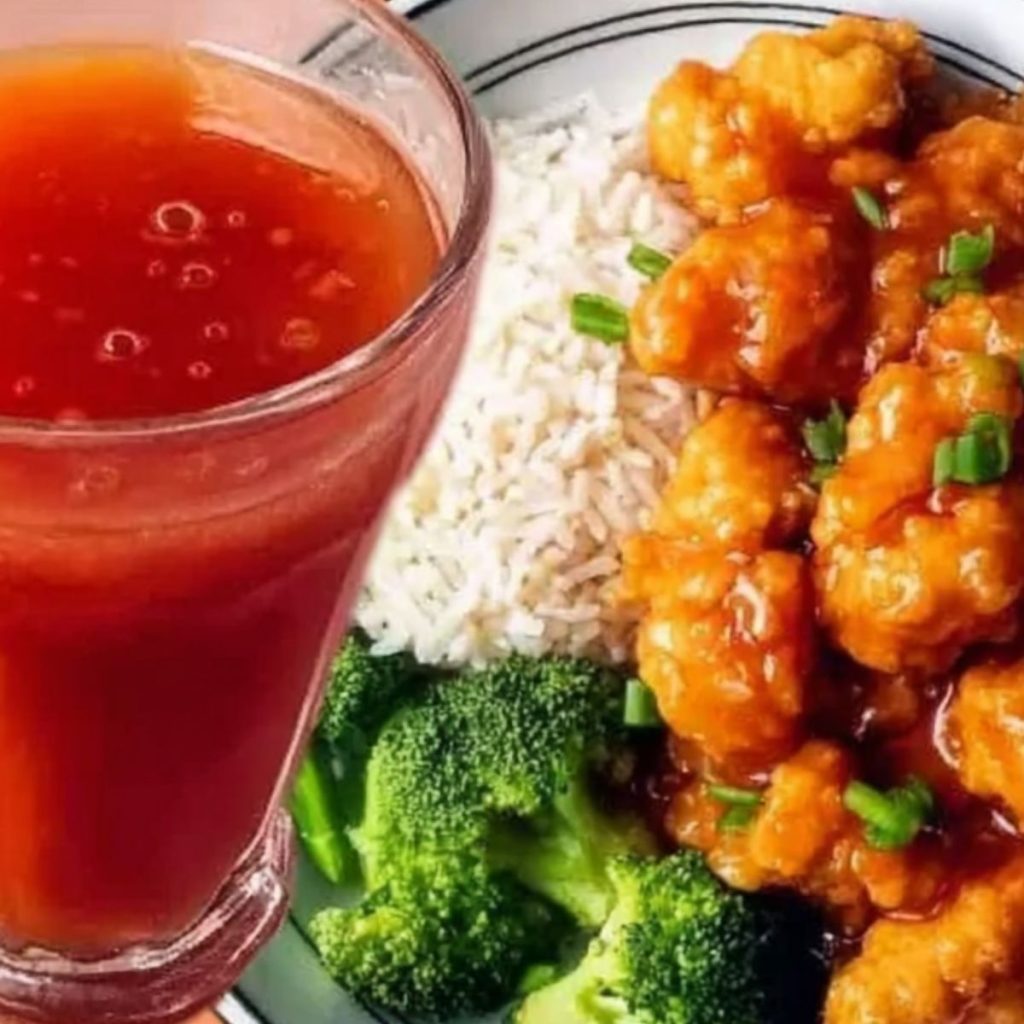
This vibrant sweet and sour sauce transforms ordinary dishes into something extraordinary with its perfect balance of tangy pineapple juice and rich sweetness. Ready in just 15 minutes, the sauce develops a gorgeous glossy sheen as it thickens on the stovetop , creating that classic restaurant-quality finish home cooks crave. Each spoonful delivers a harmonious blend of fruity, tangy, and savory notes — making it the ideal companion for crispy chicken, tender pork, or freshly made spring rolls that need that extra pop of flavor.
Why You’ll Love This Recipe
This homemade sweet and sour sauce transforms ordinary meals into restaurant-worthy feasts with minimal effort and maximum flavor. Here’s why it deserves a permanent spot in your cooking repertoire:
- Restaurant-Quality Results : The perfect balance of tang and sweetness creates that authentic flavor you’ve been trying to replicate from your favorite takeout spots.
- Pantry-Friendly Preparation : Most ingredients are likely already in your kitchen, making this an accessible recipe when you need to elevate a meal without a special shopping trip.
- Versatility Champion : This sauce works brilliantly on chicken, pork, tofu, as a dipping sauce for egg rolls, or drizzled over rice—truly a culinary multi-tasker.
- Quick Kitchen Win : From start to finish in just 15 minutes, this sauce delivers maximum flavor impact with minimum time investment—perfect for busy weeknight cooking.
- Customizable Intensity : Easily adjust the sweet-to-sour ratio to match your personal preference, making the recipe adaptable to everyone at your table.
Ingredient Breakdown with Tips
Every element in this sweet and sour sauce recipe plays a crucial role in creating that perfect balance of flavors that makes this condiment so irresistible. Understanding each ingredient will help you master this homemade sweet and sour sauce recipe with confidence.
- Pineapple juice : The fruity backbone of authentic sweet and sour sauce, providing natural sweetness and tropical tang. Use 100% pure pineapple juice (not from concentrate) for the best flavor profile and avoid pineapple cocktail drinks which contain added sugars.
- Rice vinegar : Creates the essential tanginess that balances the sweetness in the sauce. Opt for plain rice vinegar rather than seasoned varieties, which contain salt and sugar that could throw off the carefully balanced flavors.
- Ketchup : Adds both tomato flavor and rich color while contributing to the sauce’s smooth texture. Quality brands with natural ingredients deliver better flavor than budget alternatives which often contain more corn syrup.
- White sugar : Amplifies the sweetness and helps create the glossy consistency of the sauce. Superfine sugar dissolves more quickly, but regular granulated works perfectly well with a bit more stirring.
- Soy sauce : Provides umami depth and saltiness that rounds out the flavor profile. Low-sodium varieties allow better control over the final salt level while still delivering that essential savory backbone.
- Cornstarch and water : Creates the slurry that thickens the sauce to its characteristic glossy consistency. Always mix cornstarch with cold water before adding to hot liquids to prevent clumping and ensure a silky-smooth texture.
- Black pepper : Adds subtle warmth and complexity that balances the sweetness. Freshly ground pepper provides more aromatic qualities than pre-ground versions, enhancing the sauce’s depth.
- Salt : Fine-tunes the overall flavor balance by enhancing both sweet and sour notes. Use kosher or sea salt for cleaner flavor, adding just enough to brighten the sauce without making it noticeably salty.
How to Make Mouthwatering Sweet and Sour Sauce Recipe for All Home Chefs
- Combine the pineapple juice, rice vinegar, ketchup, white sugar, soy sauce, black pepper, and salt in a medium saucepan. Whisk everything together until the sugar begins to dissolve.
- Create the cornstarch slurry by mixing 3 tablespoons of cold water with 1 tablespoon of cornstarch in a small bowl. Stir until completely smooth with no lumps remaining—I always use a fork for this as it breaks up clumps better than a spoon.
- Pour the cornstarch slurry into the saucepan with the other ingredients, whisking continuously to incorporate it evenly throughout the mixture.
- Heat the mixture over medium heat, stirring frequently with a wooden spoon or heat-resistant silicone spatula to prevent sticking at the bottom of the pan.
- Bring the sauce to a gentle simmer and continue cooking for about 5-7 minutes. The sauce should noticeably thicken and take on a beautiful glossy appearance. When it properly coats the back of a spoon, you’ll know it’s ready.
- Taste and adjust the seasoning if needed. Sometimes I add a touch more sugar if I want it sweeter or a splash of rice vinegar for extra tang, depending on what I’m serving it with.
- Remove from heat and allow the sauce to cool slightly before using. The sauce will continue to thicken a bit more as it cools.
Remember, this sweet and sour sauce should have a vibrant reddish-orange color and a glossy sheen—visual indicators that you’ve nailed the cooking time and consistency!
Tips for the Best Mouthwatering Sweet and Sour Sauce Recipe for All Home Chefs
Master this sweet and sour sauce with these tried-and-true techniques:
- Perfect your slurry first : Always mix cornstarch with cold water using a fork rather than a spoon – this breaks up those stubborn lumps that can ruin the silky texture of your sauce.
- Watch the simmer carefully : Keep the heat at medium and look for gentle bubbling, not a rolling boil. Too much heat can break down the cornstarch’s thickening power and burn the sugar.
- The spoon test matters : When the sauce properly coats the back of a spoon and you can draw a line through it with your finger that holds its shape, you’ve reached the perfect thickness.
- Balance is everything : I find the pineapple juice-to-vinegar ratio is crucial for that classic flavor. If your sauce tastes flat, try adding rice vinegar in ¼ teaspoon increments rather than more sugar.
- Cool for thickness : Remember that sweet and sour sauce continues thickening as it cools, so don’t panic if it seems slightly thinner than desired when hot – removing it from heat at the right moment prevents over-reduction.
Storage & Freezing
This homemade sweet and sour sauce keeps beautifully in an airtight container in the refrigerator for up to 2 weeks—much longer than most homemade sauces! The high acidity from the vinegar and pineapple juice acts as a natural preservative, extending its shelf life while maintaining that vibrant flavor.
For longer storage, this sauce freezes exceptionally well for up to 3 months. Pour cooled sauce into ice cube trays for convenient single-serving portions that thaw quickly. I like to label freezer bags with the date so I always know how long they’ve been stored. The cornstarch may cause slight separation after freezing, but don’t worry—this is normal.
When reheating, warm the sauce gently on the stovetop over medium-low heat, whisking occasionally to restore its smooth, glossy texture. If the sauce has thickened too much during storage, simply whisk in 1-2 teaspoons of water or pineapple juice until you reach your desired consistency. The bright flavor profile remains wonderfully intact even after freezing, making this a perfect make-ahead condiment for busy home chefs.
Variations & Substitutions
The beauty of this sweet and sour sauce lies in its adaptability to whatever you have on hand or your dietary preferences. Here are some simple ways to make this recipe your own:
Juice alternatives: Out of pineapple juice? Try orange juice or apple juice instead – each brings a different fruity character while maintaining that essential sweet-tart balance. For a more tropical twist, mango nectar works beautifully.
Sugar options: Swap white sugar for brown sugar to add a subtle molasses depth, or use honey for a more complex sweetness. For those watching sugar intake, substitute with coconut sugar or even a keto-friendly sweetener (though you may need less as these tend to be sweeter).
Vinegar variations: While rice vinegar provides the traditional flavor, apple cider vinegar or white wine vinegar make excellent substitutes. I sometimes use a splash of fresh lemon juice alongside the vinegar when I want an extra bright note.
Ketchup substitutes: If you’re avoiding ketchup, try tomato paste mixed with a little extra sweetener, or even pureed red bell pepper for a fresher twist. For a completely different but equally delicious sauce, use hoisin sauce instead of ketchup for a more savory profile.
Spice it up: Add minced garlic, fresh ginger, or red pepper flakes for heat. A touch of five-spice powder creates an intriguing complexity that works wonderfully with duck or pork dishes.
Color boost: For that vibrant red restaurant-style color, add a few drops of natural red food coloring or a tablespoon of tomato paste. Paprika also deepens the color while adding a subtle smoky note.
Make Ahead Options
This Sweet and Sour Sauce Recipe is a meal prep champion that saves precious time during busy weeknights! You can prepare the entire sauce up to 5 days in advance and store it in an airtight container in the refrigerator , where it actually develops even richer flavors as it sits. The sauce maintains its glossy texture beautifully when chilled, and you can use it straight from the fridge for cold applications like dipping sauces. For hot dishes, simply reheat gently in a small saucepan over low heat (stirring frequently to prevent scorching) or microwave in 15-second intervals until warmed through. The consistency stays perfectly smooth, and you’ll have restaurant-quality sweet and sour sauce ready to transform any weeknight dinner into something special.
Serving Suggestions
This homemade sweet and sour sauce is incredibly versatile and can elevate so many dishes from ordinary to extraordinary with just a generous drizzle or dunk!
For Asian-inspired meals, use it as a glossy finishing sauce for crispy sweet and sour chicken, pork, or tofu. The sauce’s vibrant color and tangy-sweet flavor transform simple stir-fries into restaurant-worthy dishes. I love how the sauce’s pineapple notes complement vegetables like bell peppers, onions, and pineapple chunks in a colorful stir-fry.
As a dipping sauce, it’s absolutely perfect with appetizers like egg rolls, spring rolls, wontons, or crispy chicken strips. The balance of sweet pineapple juice and tangy rice vinegar creates that classic flavor that makes everyone reach for just one more bite. For a delightful fusion dish, try it with coconut shrimp or as a glaze for grilled salmon.
For a complete meal, serve your sweet and sour dish with steamed jasmine rice or fried rice to soak up all that delicious sauce. Add a side of steamed broccoli or a simple Asian slaw dressed with a bit of rice vinegar and sesame oil for a fresh contrast to the rich, glossy sauce. The textural contrasts between crispy proteins, tender vegetables, and this silky sauce create the perfect balanced bite!
Recipe FAQs
Can I substitute fresh pineapple juice? Yes, freshly squeezed works beautifully.
How can I make the sauce less sweet? Add more rice vinegar, 1/4 teaspoon at a time.
Can I make this sauce without cornstarch? Arrowroot powder works as an excellent alternative.
How long does homemade sweet and sour sauce keep? Refrigerated, it lasts about two weeks.
Can I freeze this sweet and sour sauce? Yes! Freeze in ice cube trays for portions.
What’s the best way to thicken if too runny? I simmer longer until it coats a spoon perfectly.
- 0 Facebook
- 5 Pinterest
- 0 Email
- Copy Link
- 5 shares
Mouthwatering Sweet and Sour Sauce Recipe for All Home Chefs
Ingredients
Instructions
- Combine
the pineapple juice, rice vinegar, ketchup, white sugar, soy sauce, black pepper, and salt in a medium saucepan. Whisk everything together until the sugar begins to dissolve.
- Create
the cornstarch slurry by mixing 3 tablespoons of cold water with 1 tablespoon of cornstarch in a small bowl. Stir until completely smooth with no lumps remaining—I always use a fork for this as it breaks up clumps better than a spoon.
- Pour
the cornstarch slurry into the saucepan with the other ingredients, whisking continuously to incorporate it evenly throughout the mixture.
- Heat
the mixture over medium heat, stirring frequently with a wooden spoon or heat-resistant silicone spatula to prevent sticking at the bottom of the pan.
- Bring
the sauce to a gentle simmer and continue cooking for about 5-7 minutes. The sauce should noticeably thicken and take on a beautiful glossy appearance. When it properly coats the back of a spoon, you’ll know it’s ready.
- Taste
and adjust the seasoning if needed. Sometimes I add a touch more sugar if I want it sweeter or a splash of rice vinegar for extra tang, depending on what I’m serving it with.
- Remove
from heat and allow the sauce to cool slightly before using. The sauce will continue to thicken a bit more as it cools.
Notes
Perfect your slurry first : Always mix cornstarch with cold water using a fork rather than a spoon – this breaks up those stubborn lumps that can ruin the silky texture of your sauce.
Watch the simmer carefully : Keep the heat at medium and look for gentle bubbling, not a rolling boil. Too much heat can break down the cornstarch’s thickening power and burn the sugar.
The spoon test matters : When the sauce properly coats the back of a spoon and you can draw a line through it with your finger that holds its shape, you’ve reached the perfect thickness.
Balance is everything : I find the pineapple juice-to-vinegar ratio is crucial for that classic flavor. If your sauce tastes flat, try adding rice vinegar in ¼ teaspoon increments rather than more sugar.
Cool for thickness : Remember that sweet and sour sauce continues thickening as it cools, so don’t panic if it seems slightly thinner than desired when hot – removing it from heat at the right moment prevents over-reduction.
Nutrition
| Serving Size | 1/4 cup |
|---|---|
| Calories | 100 calories |
| Sugar Content | 20g |
| Sodium Content | 300mg |
| Fat Content | 0g |
| Saturated Fat Content | 0g |
| Unsaturated Fat Content | 0g |
| Trans Fat Content | 0g |
| Carbohydrate Content | 25g |
| Fiber Content | 0g |
| Protein Content | 1g |
| Cholesterol Content | 0mg |