- 0 Facebook
- 18 Pinterest
- 0 Email
- Copy Link
- 18 shares
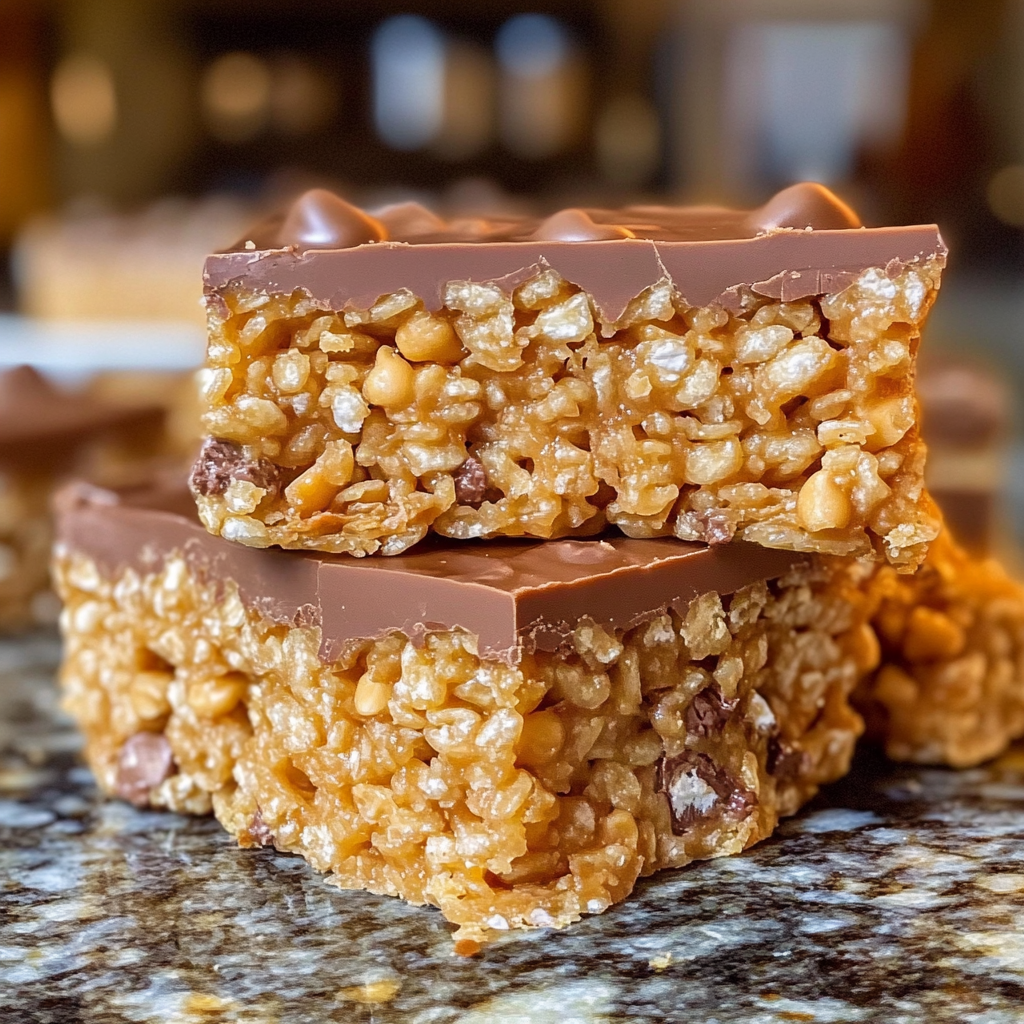
I’ll never forget the first time I bit into a Scotcheroo—that magical combination of crunchy Rice Krispies, creamy peanut butter, and the sweet duo of chocolate and butterscotch that melts in your mouth. These treats have become my go-to whenever I need a foolproof crowd-pleaser. There’s something about that perfect balance of textures that takes me right back to childhood, wouldn’t you agree? Every time I make a batch, they disappear faster than I can say “dessert.” Whether you’re whipping these up for a bake sale, family gathering, or just treating yourself after a long day (we all deserve it!), these irresistible bars never fail to bring smiles all around.
Why You’ll Love This Recipe
Here’s why Scotcheroos are a perfect dessert:
- Balance simplicity and indulgence
- Chewy-yet-crunchy base contrasts with smooth topping
- Peanut butter adds rich, nutty depth
- No baking required
- Bakery-quality results
- Suitable for beginner cooks and seasoned bakers
- Versatile recipe
- Travel well for potlucks
- Hold up beautifully for days
- Can be customized to suit preferences
Ingredients for This Recipe
- Rice Krispies cereal : The foundation that gives these bars their signature light crunch and airy texture. I find that name-brand Rice Krispies maintain their crispness best, preventing the bars from becoming soggy.
- Light corn syrup : This creates the sticky binding that holds everything together. I’ve found it gives the perfect chewy texture while helping the sugars caramelize slightly for depth of flavor.
- Peanut butter : The creamy backbone that transforms these from ordinary cereal treats to something special. I prefer using commercial brands like Jif or Skippy for their stability in recipes.
- Light brown sugar : Adds moisture, depth, and a slight molasses flavor that plain sugar can’t deliver. I always pack it firmly for consistent sweetness in every batch.
- Granulated sugar : Works with the brown sugar to create the perfect sweetness level. The fine crystals dissolve quickly, ensuring a smooth mixture with no grittiness.
- Salt : Don’t skip this! I’ve learned that salt balances the sweetness and enhances the peanut butter flavor. It’s the unsung hero that makes all the other flavors pop.
- Vanilla extract : Adds that warm, aromatic quality that elevates the entire dessert. I always opt for pure vanilla extract rather than imitation for the most authentic flavor.
- Butterscotch chips : These create that nostalgic, caramel-like flavor that makes Scotcheroos unique. I look for chips that melt smoothly without any waxy texture for the best topping.
- Semi-sweet chocolate chips : The perfect chocolate partner to butterscotch, providing depth without overwhelming sweetness. I prefer semi-sweet over milk chocolate for its balanced flavor profile.
How to Make This Recipe
- Prepare Your Pan: I always start by lining a 9×13 inch pan with parchment paper, leaving some overhang on the sides. This makes for incredibly easy removal and cleaning later. A light spritz of cooking spray on the parchment ensures nothing sticks.
- Make the Base Mixture: In a large, heavy-bottomed pot, I combine the corn syrup and both sugars over medium heat. I stir frequently until the mixture reaches a gentle simmer and the sugars completely dissolve—you’ll know it’s ready when it looks smooth rather than grainy. Be careful not to let it boil vigorously, as this can create a hard, candy-like result.
- Add the Peanut Butter: Once the sugar mixture is simmering, I remove it from heat and immediately stir in the peanut butter, salt, and vanilla. This is where the magic happens—the mixture transforms into a glossy, aromatic blend that smells absolutely heavenly. Stir until completely smooth with no streaks remaining.
- Fold in the Cereal: Working quickly but gently, I add the Rice Krispies to the peanut butter mixture. I’ve found that folding with a silicone spatula coats the cereal evenly without crushing it. Every piece should be glistening with the mixture, creating that perfect combination of chewy and crispy textures.
- Press Into the Pan: I transfer the mixture to my prepared pan, using the back of a spatula (or slightly damp hands) to press it into an even layer. The key is applying enough pressure to ensure the bars hold together without compacting them so much that they become dense.
- Prepare the Topping: For the crowning glory, I combine the butterscotch and chocolate chips in a microwave-safe bowl. I heat in 30-second intervals at 50% power, stirring between each, until just melted and smooth. This gentle melting prevents scorching and ensures a glossy, spreadable topping.
- Add the Topping: I pour the melted chocolate-butterscotch mixture over the cereal base, using an offset spatula to spread it into a smooth, even layer that reaches all the corners. Those swirls of golden butterscotch mingling with rich chocolate create an irresistible marbled effect.
- Let Set: Patience is key! I let the bars set at room temperature for about 2 hours, or pop them in the refrigerator for about 1 hour if I’m in a hurry. They’re ready when the topping is firm but not hard, allowing for a clean cut.
- Cut and Serve: I lift the entire slab out using the parchment paper overhang, then cut into squares or rectangles with a sharp knife . For the cleanest cuts, I wipe the knife with a warm, damp cloth between slices.
Expert Cooking Tips
- Temperature Matters: I never let my sugar mixture reach a full boil. Keeping it at a gentle simmer prevents the bars from becoming too hard after cooling—the difference between chewy perfection and dental danger!
- The Pressing Technique: I slightly dampen my hands with cold water before pressing the mixture into the pan. This prevents sticking while allowing just the right pressure for bars that hold together without becoming dense.
- For Perfect Topping: I’ve found that adding 1 tablespoon of butter to the chips while melting creates a smoother, more spreadable topping that slices cleanly without cracking.
- Cutting Strategy: For professional-looking squares, I chill the bars completely, then cut with a hot knife (run under hot water and wiped dry). This technique gives me clean edges every time.
- Storage Timing: I’ve learned through many batches that these bars actually taste better on day two when the flavors have had time to meld. If you can resist, make them a day ahead!
Proper Storage
- Room Temperature: Store in an airtight container with parchment between layers for 3-4 days. I find this preserves the perfect chewy-crispy texture balance better than refrigeration.
- Refrigerator Option: For longer storage (up to a week), place in the refrigerator . I always bring them to room temperature before serving to restore that perfect texture.
- Freezer Method: Wrap individual pieces in plastic, then store in a freezer bag for up to 3 months. I thaw uncovered at room temperature to prevent condensation making them soggy.
- Maintaining Freshness: To keep the crispness intact, I place a piece of bread in the storage container. It absorbs moisture that would otherwise soften the cereal base.
Variations and Substitutions
- Nut-Free Version: I’ve successfully substituted sunflower butter for peanut butter in equal amounts. It creates a slightly different but equally delicious flavor while keeping the same texture.
- Extra Crunch: Sometimes I fold in 1/2 cup chopped peanuts or rice cereal to the base mixture for additional texture contrast. The surprising crunch elevates an already perfect treat.
- Festive Scotcheroos: During holidays, I’ve sprinkled the top with colorful sprinkles, crushed peppermint, or drizzled white chocolate before the topping sets. The decorative touch makes them party-ready.
- Lower Sugar Option: I’ve reduced the granulated sugar to 1/3 cup with minimal difference in texture or binding. The peanut butter and butterscotch still provide ample sweetness.
- Gluten-Free Check: Most ingredients are naturally gluten-free, but I always verify that my Rice Krispies are certified gluten-free if serving to those with sensitivities.
What Goes with This Recipe
- Glass of Cold Milk: The classic pairing that allows the rich flavors to shine while cleansing the palate between bites. I find that whole milk stands up best to the sweet, nutty flavors.
- Coffee or Espresso: The slight bitterness beautifully counters the sweetness of the bars. I particularly enjoy a dark roast whose robust notes complement the chocolate-butterscotch topping.
- Vanilla Ice Cream: For an over-the-top dessert, I sometimes serve slightly warmed Scotcheroo pieces atop quality vanilla ice cream. The temperature contrast creates a delightful sensory experience.
- Fresh Berries: A small side of raspberries or sliced strawberries adds a bright, tart contrast that balances the rich, sweet bars beautifully.
- Afternoon Tea: A subtle Earl Grey or English Breakfast tea provides elegant contrast to these sweet treats, making them appropriate for more formal gatherings.
FAQ
Can I use natural peanut butter? I don’t recommend it; the oils separate and affect texture. Stick with commercial creamy peanut butter for best results.
Why are my bars too hard? Likely overcooked sugar mixture. Gentle simmer, not boil, and remove from heat immediately when sugars dissolve.
Can I make these in advance? Absolutely! They actually improve after 24 hours when flavors meld. Store properly for up to 5 days.
How to prevent the topping from cracking? Add 1 tablespoon butter to the melting chips and don’t refrigerate too long before cutting.
Can I double the recipe? Yes! Use a larger pan or two 9×13 pans. The thickness remains perfect and they set properly.
- 0 Facebook
- 18 Pinterest
- 0 Email
- Copy Link
- 18 shares
Scotcheroos Recipe
Ingredients
Instructions
Line 9×13 pan with parchment paper.
Heat corn syrup and sugars in pot until simmering and dissolved.
Remove from heat; stir in peanut butter, salt, and vanilla until smooth.
Fold in Rice Krispies until coated.
Press mixture into prepared pan.
Melt butterscotch and chocolate chips together.
Spread topping over cereal mixture.
Let set at room temperature (2 hours) or refrigerate (1 hour).
Cut into squares and serve.