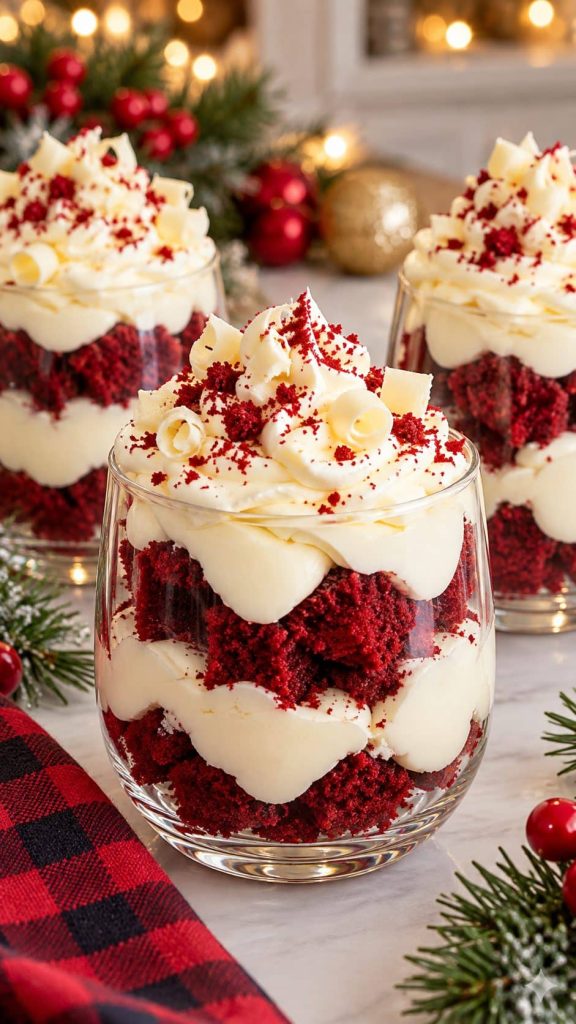
Red velvet trifle cups are single servings of red velvet cake cubes layered with a whipped cream cheese filling, then finished with cake crumbs and white chocolate curls. One box of cake mix fills 12 clear cups, which suits a Christmas crowd or any holiday table where you would rather not slice and plate a whole cake. They need at least 2 hours in the fridge, so you build them ahead and pull them out when guests arrive.
Save this recipe for later:
What goes into red velvet trifle cups
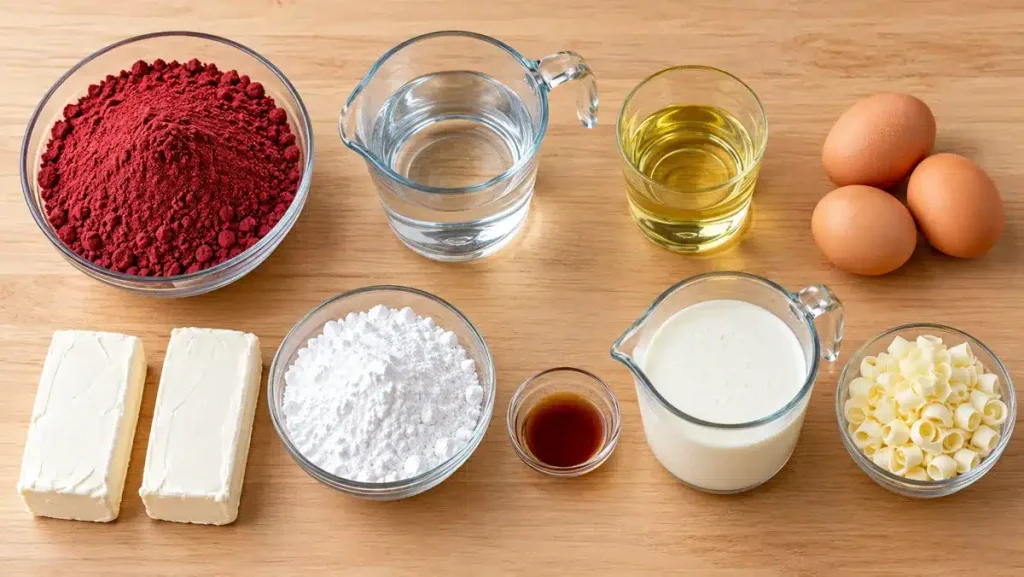
The cake comes from a box, and the filling is a simple mix of cream cheese and whipped cream. Here is the full list.
- 1 box (15.25 oz) red velvet cake mix
- 1 cup water
- 1/2 cup vegetable oil
- 3 large eggs
- 2 blocks (8 oz each) cream cheese, softened
- 1 cup powdered sugar
- 1 tsp vanilla extract
- 1 1/2 cups cold heavy cream
- 1/4 cup white chocolate curls
Let the cake cool all the way before you cut it
This is the step people rush, and it shows. Warm red velvet cake is soft and sticky, so it tears when you cube it and leaves you with ragged pieces and a pile of extra crumbs. Worse, any heat left in the cake will start to melt the whipped filling the moment the two meet, and the layers slump into a pink puddle at the bottom of the cup.
Once the cake has cooled completely in the 9×13 inch pan, it firms up enough to cut into neat 3/4 inch cubes. That size fits a 9 oz cup well: big enough to look like cake through the glass, small enough to get a cube and some cream on the same spoon. Set aside about 1 cup of crumbled cake before you start cubing, since that becomes the topping.
How to keep the cream filling light and smooth
The filling has two parts, and each one has its own trap. The cream cheese has to be properly softened. Cold blocks fight the beaters and leave small white lumps that no amount of folding will fix later. Beat it with the powdered sugar and vanilla until it is completely smooth before anything else goes in.
The heavy cream works the other way around. It needs to be cold, straight from the fridge, so it whips up to stiff peaks. Stiff peaks matter here because the filling has to hold its shape between two layers of cake for hours. Soft, droopy cream will sink into the cubes. When you combine the two bowls, fold the whipped cream into the cream cheese with a spatula instead of beating it in. Folding keeps the air you just whipped in, and that air is what makes the filling taste light next to the rich cake.
Clean layers against the glass
Spooning the cream into a narrow cup tends to smear it down the sides. Instead, scoop the filling into a zip bag, cut off one corner and pipe it over the cake. You can aim it right to the edge of the cup, and the layers stay sharp and easy to see from the outside.
For a lighter dish before dessert, serve our clementine and pomegranate Christmas salad with the main meal.
If you want a second sweet that needs no oven, our Christmas tree cake dip comes together in 10 minutes and serves 10 with graham crackers.
For another no-bake option on the dessert table, these Christmas tree cake balls with red stripes come together from five ingredients.
For a second make-ahead treat on the same table, try our pretzel toffee Christmas crack , which keeps up to a week in an airtight tin.
Building the cups step by step
- Heat the oven to 350°F. Mix the cake mix with the water, oil and eggs. Pour the batter into a greased 9×13 inch pan and bake 27 to 30 minutes. Let the cake cool completely.
- Beat the cream cheese, powdered sugar and vanilla until smooth. In another bowl, whip the cold heavy cream to stiff peaks, then fold it into the cream cheese mixture.
- Cut the cooled cake into 3/4 inch cubes, saving about 1 cup crumbled cake for the top.
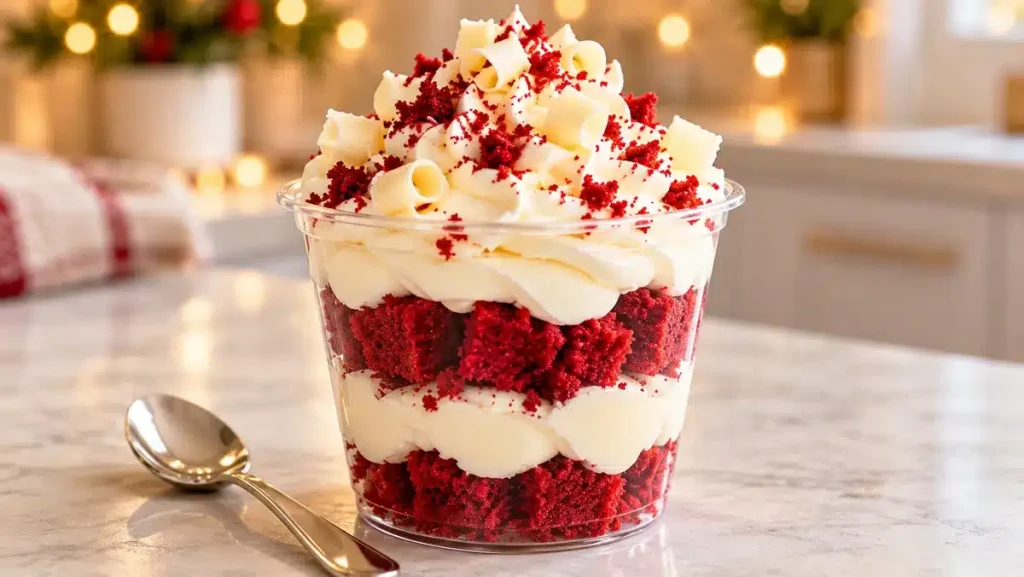
- Layer cake cubes and cream twice in 12 clear 9 oz cups, piping the cream from a zip bag with the corner cut off.
- Top each cup with the saved cake crumbs and the white chocolate curls. Chill at least 2 hours before serving.
Each cup gets two rounds of cake and cream, and it helps to work in passes. Put a layer of cake cubes in all 12 cups, pipe cream over every one, then go back and repeat the cake and cream across all 12 again. Filling cup by cup tends to leave the last few short on cake or filling. Doing one layer at a time lets you see how much is left before the second round and adjust as you go, so no guest ends up with a cup that is mostly cream. Keep the saved crumbs off to the side until both layers are in.
The Foodie Yummy Cookbook
12 reader-favorite recipes in one printable PDF. Enter your email and download it instantly.
Serving them at a holiday party
The 2 hour chill does real work. It gives the cake cubes time to soak up a little moisture from the cream, and the filling sets so the layers hold when someone digs in with a spoon. Because the cups have to sit in the fridge anyway, you can assemble them before the party starts and have dessert done while you deal with everything else.
Keep them in the fridge until it is time for dessert and serve them cold. Lined up on a tray, the clear cups show off the red and white stripes, which looks festive without any extra decorating. Set out small spoons next to them, and guests can help themselves without anyone cutting slices.
If you are planning a full Christmas dessert spread, our chocolate yule log sits nicely next to these cups. For more red velvet, try the red velvet cinnamon rolls for a holiday breakfast or the red velvet cheesecake , and berry fans will like our blackberry velvet cake .
Red velvet trifle cup questions
Why save crumbs instead of cubing all the cake?
The crumbs give the top of each cup a dark red finish that contrasts with the white chocolate curls. They also use up the uneven edges and corners of the cake that will not cut into tidy cubes, so nothing goes to waste.
My cream will not reach stiff peaks. What went wrong?
Usually the cream was not cold enough. Use it straight from the fridge and keep whipping until it stands up on the whisk. Fold it in only after it gets there, because the cream cheese will not add any stiffness of its own.
Do I really need to grease the pan?
Yes. The cake gets cut into cubes, and a cake that sticks to the pan comes out in torn pieces. A greased 9×13 inch pan lets it release in one sheet that is easy to cube.
Why do the cups need to chill for at least 2 hours?
Right after assembly the filling is soft and the cake is dry next to it. The chill firms up the cream and lets the cake soften slightly, which is what gives a trifle its spoonable texture.
Made it or loved it? Share this recipe
Written and edited by The Foodie Yummy Kitchen Team
The Foodie Yummy Kitchen Team writes and edits the recipes on Foodie Yummy: classic American potluck salads, holiday sides and easy comfort food, with a few low-carb options. Every recipe lists exact quantities, numbered steps and a printable recipe card, plus notes on swaps, storage and make-ahead timing. Spot a problem with a recipe? Tell us through the contact page and we will correct it. About us
Red Velvet Trifle Cups
Ingredients
Instructions
Heat the oven to 350°F. Mix the cake mix with the water, oil and eggs, bake in a greased 9×13 inch pan 27 to 30 minutes and cool completely.
Beat the cream cheese, powdered sugar and vanilla until smooth. In another bowl, whip the cream to stiff peaks and fold it into the cream cheese.
Cut the cake into 3/4 inch cubes, saving about 1 cup crumbled for the top.
Layer cake cubes and cream twice in 12 clear 9 oz cups.
Top with the cake crumbs and white chocolate curls and chill at least 2 hours.
Notes
Pipe the cream from a zip bag with the corner cut off so the layers stay clean against the glass.
Let the cake cool completely before cutting it into cubes.
Chill the assembled cups at least 2 hours before serving.