- 0 Facebook
- 0 Pinterest
- 1 Email
- Copy Link
- 1 share
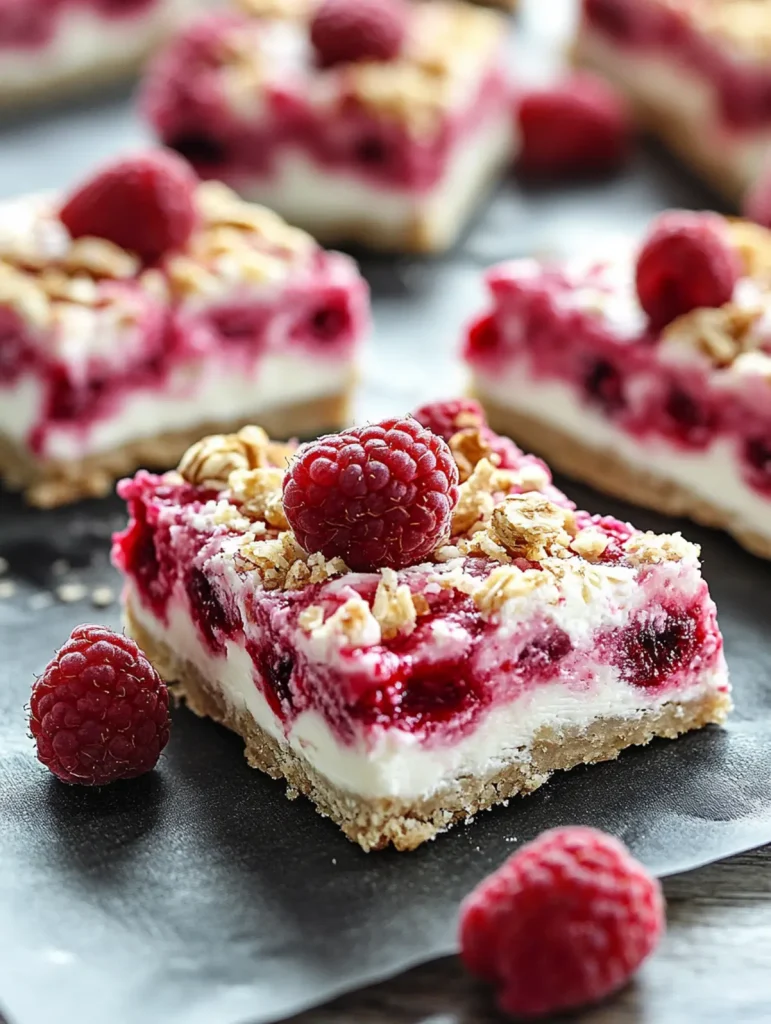
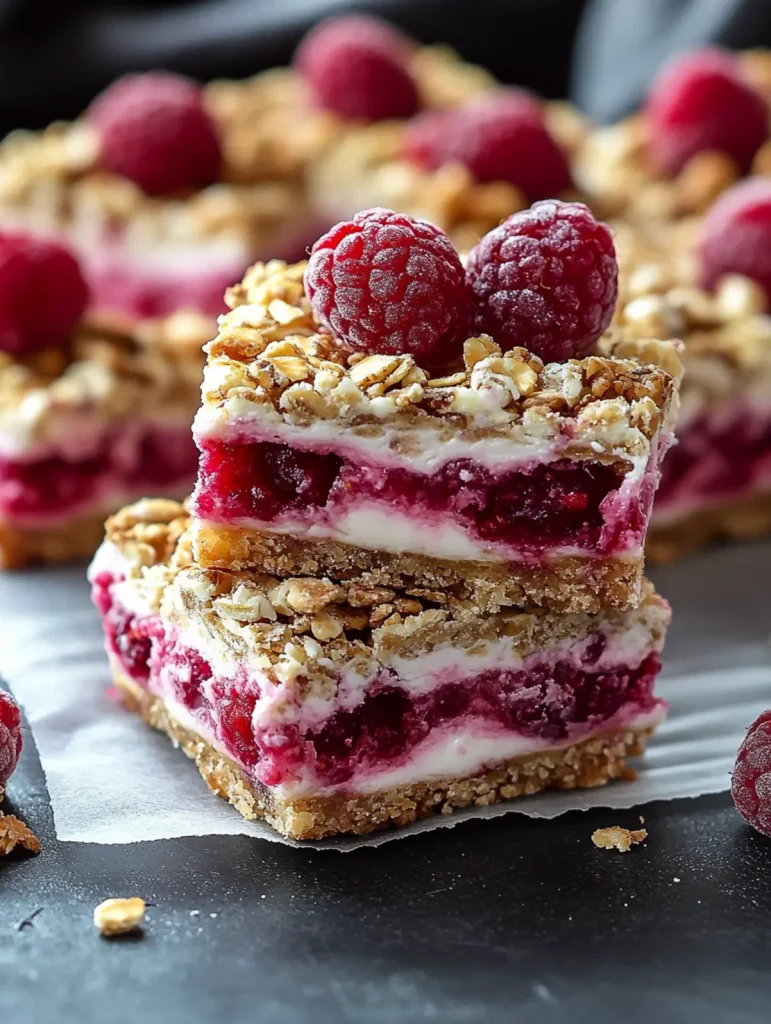
These Raspberry Yogurt Bars strike the perfect balance between dessert indulgence and wholesome treat. The buttery oat crumble—brightened with fresh lemon zest—provides a delicious contrast to the creamy Greek yogurt filling studded with juicy, tart raspberries. Each bite delivers a harmonious marriage of textures: crumbly, creamy, and slightly jammy from the baked fruit. Remarkably simple to prepare yet impressive enough for company, these bars make a delightful afternoon treat—especially when paired with a steaming cup of Earl Grey tea.
Why You’ll Love This Recipe
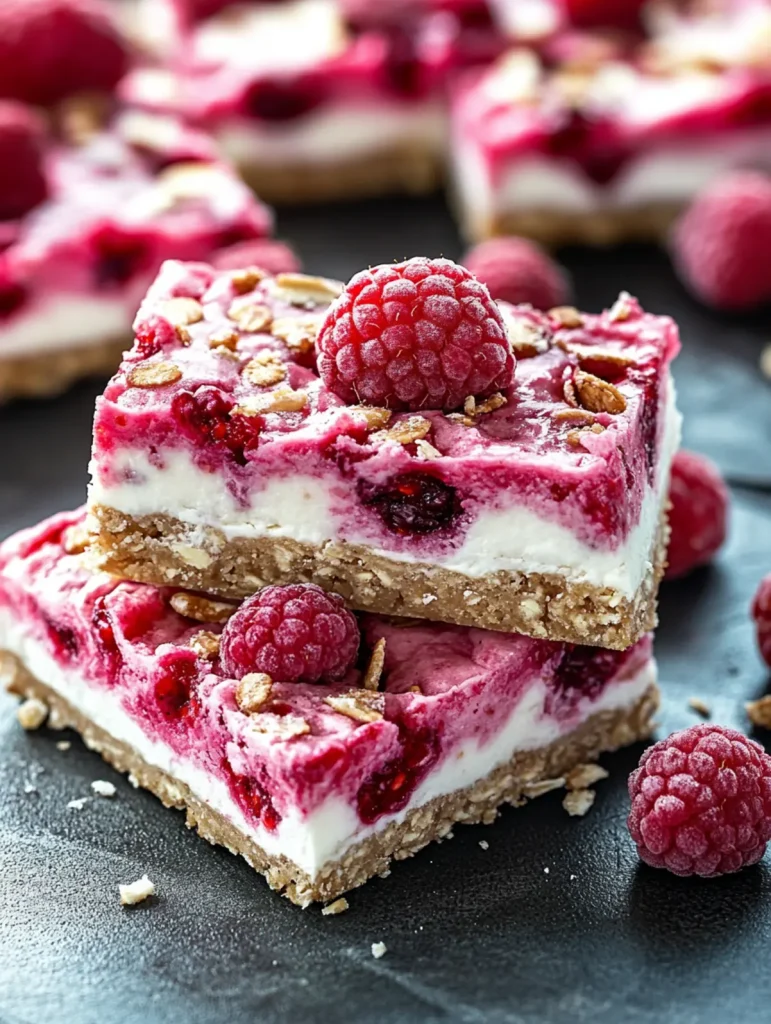
These Raspberry Yogurt Bars aren’t just another dessert recipe—they’re the perfect balance of wholesome ingredients and irresistible flavor that keeps everyone coming back for seconds.
- Perfect Texture Contrast : The buttery crumble provides a satisfying crunch against the silky-smooth Greek yogurt layer, creating that ideal bite that’s neither too soft nor too firm.
- Bright, Balanced Flavor : The tangy raspberries and zesty lemon cut through the richness of the yogurt, creating a sophisticated flavor profile that isn’t cloyingly sweet like store-bought alternatives.
- Make-Ahead Marvel : These bars actually improve after chilling overnight, making them perfect for stress-free entertaining or meal prep—the flavors meld and the bars set for clean, beautiful slices.
- Pantry-Friendly Creation : Most ingredients are likely already in your kitchen, eliminating the need for special shopping trips when the craving for something homemade strikes.
- Versatile Treat : Works beautifully as a breakfast on busy mornings, an afternoon pick-me-up with coffee, or a lighter dessert option that won’t leave you feeling weighed down.
- Foolproof Success : The two-step layering method provides consistent results every time, making this recipe accessible even for those who don’t consider themselves bakers.
Ingredient Breakdown with Tips
Every component in these Raspberry Yogurt Bars plays an essential role in creating that perfect balance of textures and flavors that makes them so irresistible. Quality ingredients will elevate these bars from good to exceptional.
- All-purpose flour : Forms the foundation of the crumble mixture, providing structure and stability. For a more wholesome version, substitute up to half with whole wheat pastry flour without sacrificing texture.
- Rolled oats : Adds a hearty texture and nutty flavor to the crumble. Choose traditional old-fashioned oats rather than quick oats for better texture and visual appeal.
- Light brown sugar : Contributes moisture, caramel notes, and a tender crumb to the base and topping. The molasses content helps the crumble develop a beautiful golden color while baking.
- Baking powder : Provides a slight lift to the crumble layer, preventing it from becoming too dense. Check that yours is fresh (less than 6 months old) for optimal performance.
- Salt : Enhances all the flavors in the recipe and balances the sweetness. Even in sweet recipes, this small amount makes the difference between flat and vibrant flavor.
- Unsalted butter : Creates the rich, tender texture in the crumble mixture. Room temperature butter incorporates more evenly—leave it out for at least 30 minutes before mixing.
- Lemon zest : Provides bright, aromatic citrus notes that complement the raspberries perfectly. Use only the colored part of the peel, avoiding the bitter white pith underneath.
- Vanilla extract : Adds depth and warmth to both the crumble and yogurt layers. Pure extract offers superior flavor compared to imitation varieties.
- Greek yogurt : Creates the creamy, tangy filling that makes these bars special. Full-fat varieties produce the richest, most satisfying texture, but 2% works well too.
- Sugar : Balances the tartness of the yogurt and raspberries in the filling. Superfine sugar dissolves more readily, but granulated works perfectly well.
- Cornstarch : Stabilizes the yogurt filling and prevents it from becoming watery during baking. Always mix it thoroughly with the sugar before adding to avoid clumping.
- Fresh raspberries : Provide bursts of tart-sweet flavor and beautiful color throughout the bars. If using frozen berries, don’t thaw them first—add them frozen to maintain their shape.
How to Make Irresistible Raspberry Yogurt Bars with Lemon Zest Crumble
- Preheat your oven to 350°F (175°C) and line a 9×9-inch baking pan with parchment paper, leaving overhang on the sides for easy removal later. Lightly grease any exposed areas of the pan.
- Combine the flour, oats, brown sugar, baking powder, and salt in a large bowl. Add the softened butter and lemon zest, then use your fingers or a pastry cutter to work the mixture until it resembles coarse crumbs with pea-sized butter pieces throughout.
- Press about two-thirds of this crumb mixture firmly into the bottom of your prepared pan. I like to use the bottom of a measuring cup to create an even, compact layer—this provides a sturdy foundation for the filling.
- Mix the Greek yogurt, sugar, cornstarch, and vanilla extract in a medium bowl until completely smooth. Gently fold in about three-quarters of the raspberries, being careful not to crush them too much.
- Spread the yogurt mixture evenly over the pressed crumb base. This layer should be smooth and level—an offset spatula works wonders here if you have one.
- Scatter the remaining raspberries over the yogurt layer, then sprinkle the reserved crumb mixture evenly on top. Press down very lightly to help it adhere to the filling.
- Bake for 30-35 minutes until the top is golden brown and the filling appears set but still has a slight jiggle in the center. The bars will continue to firm up as they cool.
- Allow the bars to cool completely in the pan on a wire rack, then refrigerate for at least 2 hours before cutting. These bars actually taste even better the next day when the flavors have had time to meld together.
Storage & Freezing
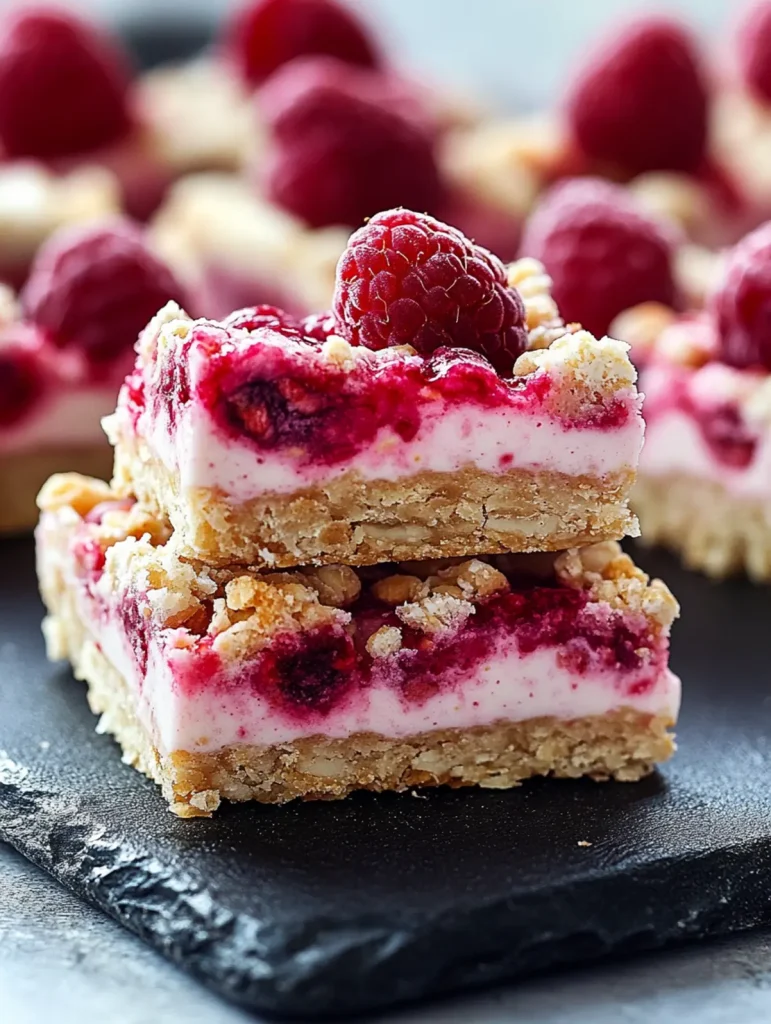
These Raspberry Yogurt Bars keep beautifully in the refrigerator for up to 5 days when stored in an airtight container. The yogurt filling actually continues to set and the flavors deepen over the first 24 hours, making them perfect for make-ahead preparation. I often find they taste even better on day two!
For longer storage, these bars freeze exceptionally well. Place completely cooled bars (either whole or pre-cut) on a baking sheet and freeze until solid, about 2 hours. Then wrap individual pieces tightly in plastic wrap and store in freezer bags for up to 3 months. This method prevents the bars from sticking together and allows you to thaw just what you need.
To thaw frozen Raspberry Yogurt Bars, transfer them to the refrigerator overnight or let them sit at room temperature for about 30-45 minutes. The yogurt layer may release a small amount of moisture when thawed, but the texture remains largely intact. For the best texture, avoid microwaving to speed up thawing, as this can make the yogurt filling weep and the crumble topping soggy.
Make-Ahead Tips for Raspberry Yogurt Bars
These Raspberry Yogurt Bars are a meal prep dream, actually improving in flavor and texture when prepared ahead! You can assemble the entire recipe up to 24 hours in advance—simply cover tightly with plastic wrap after the bars have cooled completely and refrigerate overnight. The crumble mixture can also be prepared up to 3 days ahead and stored in the refrigerator (bring to room temperature before using). For ultimate convenience, bake the bars completely and store them covered in the refrigerator for up to 5 days. When ready to serve, let them sit at room temperature for 10-15 minutes to soften slightly, and you’ll have bakery-quality treats with minimal last-minute effort.
Serving Suggestions
These Raspberry Yogurt Bars are as versatile as they are delicious—equally at home at a fancy brunch or as a simple afternoon treat with tea.
For a delightful breakfast option, serve a slightly chilled bar alongside a dollop of extra Greek yogurt and a small handful of fresh raspberries for a visually stunning plate. The extra berries provide bursts of fresh flavor that complement the baked ones beautifully.
For dessert, try warming the bars just slightly (about 10 seconds in the microwave) and serving with a small scoop of vanilla bean ice cream. The contrast between the warm, crumbly bar and cold, creamy ice cream is absolutely divine—the lemon zest in the crumble really shines when served this way.
I love to serve these Raspberry Yogurt Bars as part of an afternoon tea spread with Earl Grey or a bright herbal tea like mint. The tangy-sweet flavor profile of the bars complements the subtle bitterness of tea perfectly, creating a balanced taste experience that keeps everyone reaching for seconds.
Tips for the Best Raspberry Yogurt Bars
These little tricks will help you achieve bakery-quality Raspberry Yogurt Bars every time!
- Perfect butter consistency : Room temperature butter should indent slightly when pressed but not be greasy or melty—this ensures your crumble has the ideal texture with visible butter pockets.
- Crumble technique matters : When mixing the oats and flour with butter, stop once you have pea-sized crumbs. Overmixing will create a paste rather than the desirable crumbly texture.
- Prevent soggy bottoms : I’ve found pressing the base layer firmly with a measuring cup creates a more compact foundation that prevents the yogurt filling from seeping through.
- Manage your berries : Gently pat fresh raspberries dry before adding them to the yogurt mixture—excess moisture can make the filling too loose and prevent proper setting.
- Patience pays off : The hardest part is waiting, but these bars truly need the full refrigeration time to set properly—rushing this step will result in messy slices and underdeveloped flavor.
- Clean-cut trick : For picture-perfect bars, dip your knife in hot water and wipe clean between cuts when slicing the chilled dessert.
Variations & Substitutions
These bars are wonderfully adaptable to what you have on hand or what your taste buds are craving. Don’t let missing ingredients stop you from enjoying this treat!
- Berry swap magic : While raspberries shine here, blackberries, blueberries, or strawberries (quartered) work beautifully too. I’ve even made a mixed berry version that creates a gorgeous purple-hued filling.
- Gluten-free option : Replace the all-purpose flour with a 1:1 gluten-free flour blend and ensure your oats are certified gluten-free for a celiac-friendly treat that maintains the same delicious texture.
- Yogurt flexibility : Any thick Greek yogurt works here—try vanilla flavored for extra sweetness, dairy-free coconut yogurt for a tropical twist, or even lemon Greek yogurt to amplify the citrus notes.
- Switch up the citrus : No lemons? Orange or lime zest make excellent substitutions that pair wonderfully with the berries and create an entirely new flavor profile.
- Make it less sweet : Reduce the brown sugar in the crumble to 1/2 cup if you prefer a less sweet treat. The tanginess of the yogurt and berries will become more pronounced.
- Nutty enhancement : Add 1/3 cup of chopped almonds, pecans, or walnuts to the crumble mixture for added crunch and nutritional benefits—this makes the bars even more satisfying.
Recipe FAQs
Can I use frozen raspberries instead of fresh? Yes! Add them frozen, no need to thaw.
How do I know when the bars are done baking? Golden top with slight jiggle in center.
Can I make these bars gluten-free? Use certified gluten-free oats and 1:1 baking flour.
Why use Greek yogurt specifically? Its thickness prevents soggy bars when baking.
How far ahead can I make these? Up to 2 days—they actually improve overnight!
Can I substitute the lemon zest? Orange zest works beautifully too.
- 0 Facebook
- 0 Pinterest
- 1 Email
- Copy Link
- 1 share
Irresistible Raspberry Yogurt Bars with Lemon Zest Crumble
Ingredients
Instructions
Preheat your oven to 350°F (175°C) and line a 9×9-inch baking pan with parchment paper, leaving overhang on the sides for easy removal later. Lightly grease any exposed areas of the pan.
Combine the flour, oats, brown sugar, baking powder, and salt in a large bowl. Add the softened butter and lemon zest, then use your fingers or a pastry cutter to work the mixture until it resembles coarse crumbs with pea-sized butter pieces throughout.
Press about two-thirds of this crumb mixture firmly into the bottom of your prepared pan. I like to use the bottom of a measuring cup to create an even, compact layer—this provides a sturdy foundation for the filling.
Mix the Greek yogurt, sugar, cornstarch, and vanilla extract in a medium bowl until completely smooth. Gently fold in about three-quarters of the raspberries, being careful not to crush them too much.
Spread the yogurt mixture evenly over the pressed crumb base. This layer should be smooth and level—an offset spatula works wonders here if you have one.
Scatter the remaining raspberries over the yogurt layer, then sprinkle the reserved crumb mixture evenly on top. Press down very lightly to help it adhere to the filling.
Bake for 30-35 minutes until the top is golden brown and the filling appears set but still has a slight jiggle in the center. The bars will continue to firm up as they cool.
Allow the bars to cool completely in the pan on a wire rack, then refrigerate for at least 2 hours before cutting. These bars actually taste even better the next day when the flavors have had time to meld together.
Notes
Perfect butter consistency : Room temperature butter should indent slightly when pressed but not be greasy or melty—this ensures your crumble has the ideal texture with visible butter pockets.
Crumble technique matters : When mixing the oats and flour with butter, stop once you have pea-sized crumbs. Overmixing will create a paste rather than the desirable crumbly texture.
Prevent soggy bottoms : I’ve found pressing the base layer firmly with a measuring cup creates a more compact foundation that prevents the yogurt filling from seeping through.
Manage your berries : Gently pat fresh raspberries dry before adding them to the yogurt mixture—excess moisture can make the filling too loose and prevent proper setting.
Patience pays off : The hardest part is waiting, but these bars truly need the full refrigeration time to set properly—rushing this step will result in messy slices and underdeveloped flavor.
Clean-cut trick : For picture-perfect bars, dip your knife in hot water and wipe clean between cuts when slicing the chilled dessert.
Nutrition
| Serving Size | 1 bar |
|---|---|
| Calories | 180 calories |
| Sugar Content | 10g |
| Sodium Content | 50mg |
| Fat Content | 7g |
| Saturated Fat Content | 4g |
| Unsaturated Fat Content | 2g |
| Trans Fat Content | 0g |
| Carbohydrate Content | 25g |
| Fiber Content | 2g |
| Protein Content | 4g |
| Cholesterol Content | 15mg |