- 0 Facebook
- 8 Pinterest
- 1 Email
- Copy Link
- 9 shares
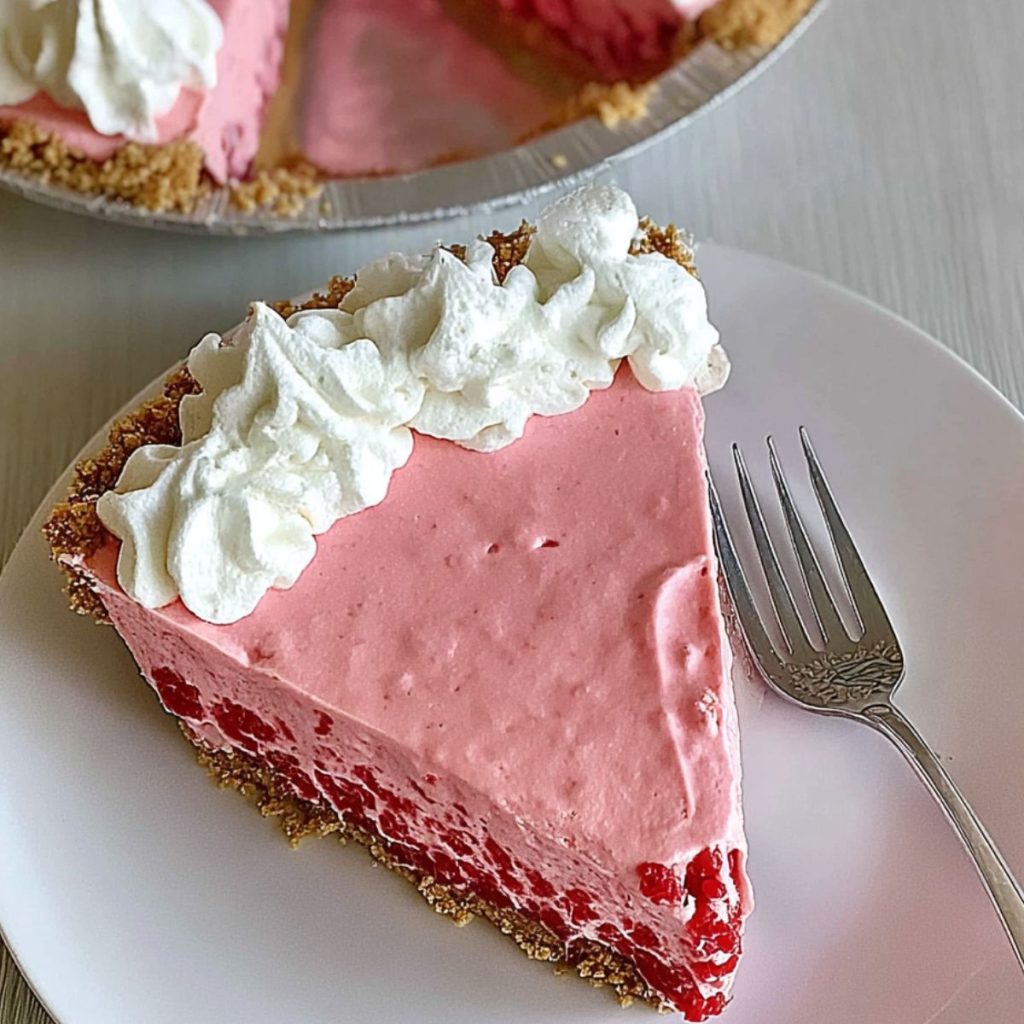
The first time I made this Raspberry Jello Cream Pie, I was helping my neighbor Mrs. Henderson prepare for her granddaughter’s birthday party. She pulled out this handwritten recipe card, yellowed at the edges, and said, “Honey, this is the easiest showstopper you’ll ever make.” As we whisked the gelatin into that ruby-red mixture, I knew she was right. The kitchen filled with the sweet aroma of summer raspberries, and when we cut into that perfectly set pie hours later, watching the creamy layers reveal themselves, I understood why this recipe had been passed down through three generations.
This isn’t just another dessert—it’s a time-saver that delivers restaurant-quality results with pantry staples. Whether you’re hosting a dinner party or treating yourself to something special, this pie transforms simple ingredients into pure magic that’ll have everyone asking for the recipe.
Why You’ll Love This Raspberry Jello Cream Pie
- Effortlessly elegant – Creates stunning presentation with minimal effort
- Make-ahead friendly – Perfect for busy schedules and entertaining
- Foolproof technique – Even beginners achieve professional results
- Refreshing and light – Ideal for warm weather or after heavy meals
- Customizable flavors – Easy to adapt with different gelatin flavors
- No-bake convenience – Requires zero oven time
Ingredients Notes
- Pre-made graham cracker crust: I always choose a high-quality store-bought crust for convenience. The sweet, crumbly texture provides the perfect foundation that won’t compete with our creamy filling.
- Raspberry-flavored gelatin: This is our flavor star and structural hero. I prefer name-brand gelatin for consistent setting. The raspberry flavor creates that beautiful pink hue and tart-sweet balance.
- Boiling water: Essential for completely dissolving gelatin crystals. I use filtered water when possible—it ensures the clearest, most vibrant color and prevents any off-flavors from affecting our pie.
- Cold water: This temperature contrast helps the gelatin begin its setting process. I sometimes add ice cubes to make it extra cold, which speeds up the initial thickening.
- Whipped cream: The luxurious element that transforms this from simple jello to an elegant dessert. I prefer heavy cream whipped to soft peaks for the silkiest texture and richest flavor.
- Fresh raspberries: These jewel-like berries aren’t just garnish—they add textural contrast and reinforce our flavor profile. I choose plump, deeply colored berries for maximum visual impact and taste.
How to Make Raspberry Jello Cream Pie
Step 1: Empty the raspberry gelatin packet into a medium mixing bowl. Pour the boiling water over the powder and whisk vigorously for 2 minutes until completely dissolved. You’ll know it’s ready when the mixture is crystal clear with no granules visible.
Step 2: Stir in the cold water and place the bowl in the refrigerator for 45 minutes. You’re looking for the consistency that’s thicker than liquid but still pourable—like runny syrup or unset jelly. It should coat a spoon but drip off slowly. This partial setting is crucial for the next step.
Step 3: Remove the gelatin from the refrigerator and gently fold in the whipped cream using a rubber spatula. Use broad, sweeping motions to maintain the cream’s airy texture. The mixture should be smooth and pale pink with no streaks.
Step 4: Pour the creamy gelatin mixture into your graham cracker crust, using the spatula to spread it evenly to the edges. The filling should dome slightly in the center—this is perfect.
Step 5: Refrigerate for at least 4 hours or overnight until completely set. The pie is ready when the center feels firm to a gentle touch and doesn’t jiggle when moved.
Step 6: Just before serving, arrange fresh raspberries around the edge and a few in the center for a beautiful presentation. Cut with a sharp knife dipped in warm water for clean slices.
Expert Cooking Tips
- Temperature matters: I always test my gelatin’s consistency with a spoon—it should coat but drip off slowly before adding cream.
- Folding technique: Use gentle, upward motions when combining cream to prevent deflating and maintain that light, airy texture throughout.
- Crust protection: I cover the crust edges with plastic wrap if storing overnight to prevent them from becoming soggy.
- Clean cuts: Dip your knife in warm water between slices—this prevents the filling from sticking and creates professional-looking portions.
- Timing is key: I make this pie a day ahead for best results, allowing flavors to meld and achieve perfect firmness.
Storage Tips
- Refrigerator storage: Cover tightly with plastic wrap and store up to 3 days for optimal freshness and texture.
- Freezing option: Wrap entire pie in foil after setting; freeze up to 1 month. Note: Freezing may result in a slightly spongier texture upon thawing, best for leftovers.
- Serving temperature: Remove from refrigerator 10 minutes before serving for easiest slicing and best flavor release.
- Leftover slices: Store individual pieces in airtight containers with parchment between layers to prevent sticking and moisture buildup.
Variations and Substitutions
- Sugar-free option: Use sugar-free gelatin and light whipped topping for a reduced-calorie version without sacrificing flavor.
- Gluten-free crust: Substitute with a gluten-free graham cracker crust or make your own using gluten-free cookies.
- Flavor variations: Try strawberry, cherry, or mixed berry gelatin for different color and taste combinations while keeping the same technique.
- Dairy-free version: Replace whipped cream with coconut whipped cream or dairy-free whipped topping for lactose-intolerant guests.
- Chocolate twist: Use a chocolate graham crust and add mini chocolate chips to the filling for extra indulgence.
- Adult version: Add 2 tablespoons of raspberry liqueur to the cold water for a sophisticated flavor boost.
What to Serve with Raspberry Jello Cream Pie
- Fresh fruit salad: Light, seasonal fruits complement the pie’s richness while adding natural sweetness and varied textures to your dessert course.
- Vanilla ice cream: A small scoop alongside each slice creates temperature contrast and adds extra creaminess without overwhelming the delicate flavors.
- Coffee or tea: The slight bitterness of coffee or the warmth of herbal tea balances the pie’s sweetness perfectly for afternoon entertaining.
- Sparkling water: Lemon or lime sparkling water cleanses the palate between bites, enhancing the raspberry flavor and preventing sweetness overload.
- Light lunch: Serve after grilled chicken salad or soup for a refreshing finish that won’t leave guests feeling too heavy.
FAQ
Q: Can I use fresh raspberries in the filling instead of just for garnish? A: Yes, fold in ½ cup of fresh berries gently after adding whipped cream for extra texture.
Q: Why didn’t my pie set properly? A: Ensure gelatin fully dissolved in boiling water and mixture reached proper consistency before adding cream.
Q: Can I make this pie without a crust? A: Absolutely! Pour into individual glasses or ramekins for elegant parfait-style servings instead.
Q: How do I prevent the crust from getting soggy? A: Brush crust lightly with melted white chocolate before adding filling to create moisture barrier.
Q: Can I double this recipe for a larger crowd? A: Yes, double all ingredients and use a 10-inch pie pan or make two standard pies.
Q: What if I don’t have whipped cream? A: Cool Whip or homemade whipped topping work perfectly as substitutes in equal amounts.
- 0 Facebook
- 8 Pinterest
- 1 Email
- Copy Link
- 9 shares
Raspberry Jello Cream Pie
Ingredients
Instructions
- Step 1
Empty the raspberry gelatin packet into a medium mixing bowl. Pour the boiling water over the powder and whisk vigorously for 2 minutes until completely dissolved. You’ll know it’s ready when the mixture is crystal clear with no granules visible.
- Step 2
Stir in the cold water and place the bowl in the refrigerator for 45 minutes. You’re looking for the consistency that’s thicker than liquid but still pourable—like runny syrup or unset jelly. It should coat a spoon but drip off slowly. This partial setting is crucial for the next step.
- Step 3
Remove the gelatin from the refrigerator and gently fold in the whipped cream using a rubber spatula. Use broad, sweeping motions to maintain the cream’s airy texture. The mixture should be smooth and pale pink with no streaks.
- Step 4
Pour the creamy gelatin mixture into your graham cracker crust, using the spatula to spread it evenly to the edges. The filling should dome slightly in the center—this is perfect.
- Step 5
Refrigerate for at least 4 hours or overnight until completely set. The pie is ready when the center feels firm to a gentle touch and doesn’t jiggle when moved.
- Step 6
Just before serving, arrange fresh raspberries around the edge and a few in the center for a beautiful presentation. Cut with a sharp knife dipped in warm water for clean slices.