- 0 Facebook
- 21 Pinterest
- 4 Email
- Copy Link
- 25 shares
Last summer, my neighbor Mrs. Henderson knocked on my door with a covered dish and a knowing smile. “Try this,” she said, “and tell me it doesn’t remind you of those lazy afternoons we used to have as kids.” One spoonful of her creamy, citrusy creation transported me straight back to childhood summers spent on my grandmother’s porch, where the sweet-tart taste of fresh lemonade was the cure for every hot day.
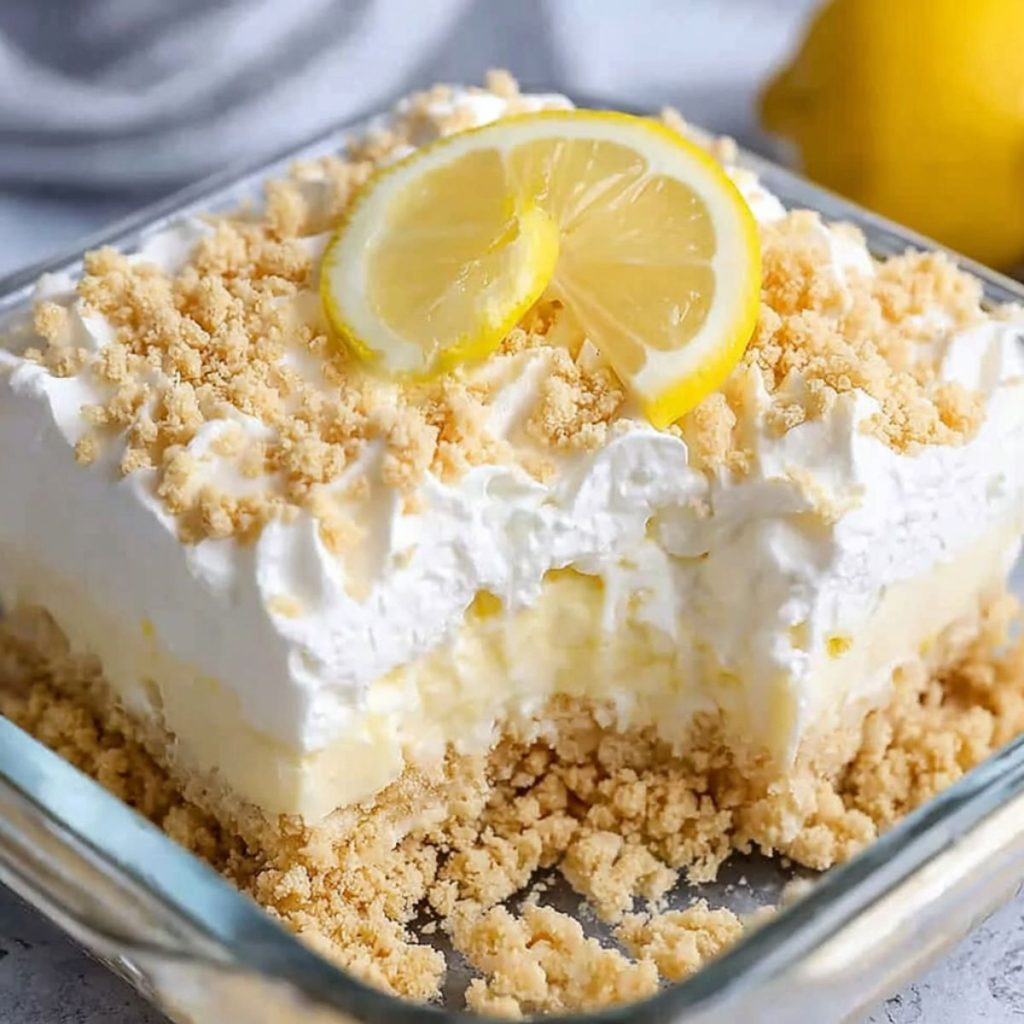
That dessert became my obsession. After weeks of experimenting, I finally perfected this No-Bake Lemon Dream Dessert that captures all the bright, refreshing flavors of summer without ever turning on your oven . This recipe has become my go-to for potluck dinners, family gatherings, and those moments when you need something special but don’t want to spend hours in a hot kitchen.
Why You’ll Love This No-Bake Lemon Dream Dessert
What makes this dessert truly special is how it balances the tangy brightness of fresh lemons with the rich creaminess that melts on your tongue. I’ve discovered that the secret lies in the perfect ratio of cream cheese to sweetened condensed milk, creating a filling that’s neither too heavy nor too light. The graham cracker crust adds just the right amount of texture contrast, while the whipped topping keeps everything cloud-like and dreamy.
- No baking required : Perfect for hot summer days or when your oven is occupied
- Make-ahead friendly : Actually tastes better after chilling overnight
- Beginner-proof : Simple techniques that guarantee success every time
- Crowd-pleaser : Appeals to both lemon lovers and dessert skeptics
- Versatile serving : Equally delicious for casual weeknight treats or elegant dinner parties
Ingredients Notes
- Cream Cheese, Softened : I always leave mine at room temperature for 2-3 hours. Properly softened cream cheese blends effortlessly, preventing lumps in your silky filling.
- Sweetened Condensed Milk : This is your dessert’s backbone, providing both sweetness and that characteristic rich, velvety texture that makes each bite irresistible.
- Lemon Juice : Fresh is non-negotiable here. Bottled juice lacks the bright acidity needed to balance the richness and create that perfect tangy-sweet contrast.
- Lemon Zest : The aromatic oils in the zest intensify the lemon flavor dramatically. I use a microplane grater for the finest, most flavorful zest.
- Vanilla Extract : Pure vanilla adds warmth and depth, rounding out the citrus notes without competing with the lemon’s starring role in this dessert.
- Whipped Topping, Thawed : This creates the “dream” texture, lightening the dense filling into something that practically floats on your spoon when properly incorporated.
- Graham Cracker Crumbs : I prefer making my own by crushing whole crackers. The slightly coarse texture provides the perfect textural contrast to the smooth filling.
- Unsalted Butter, Melted : Binds the crust together while adding richness. Unsalted gives you control over the sweetness level in your finished dessert base.
- Granulated Sugar : Balances the graham crackers’ subtle saltiness and helps create a crust that holds together beautifully when sliced and served.
How to Make No-Bake Lemon Dream Dessert
Step 1: Prepare the crust In a medium bowl, combine graham cracker crumbs, melted butter, and granulated sugar. Mix thoroughly until the mixture resembles wet sand and holds together when pressed. The crumbs should be evenly moistened but not soggy. Press this mixture firmly into the bottom of a 9×13 inch dish, using the bottom of a measuring cup to create an even, compact layer. Note: For a thicker crust, increase crumbs to 2 cups and butter to 2/3 cup.
Step 2: Create the filling base In a large bowl, beat the softened cream cheese with an electric mixer until completely smooth and fluffy, about 2 minutes. Gradually add the sweetened condensed milk, beating continuously until the mixture is silky and free of any lumps. The filling should be smooth, rich, and thick—easy to spread without being runny.
Step 3: Add the lemon elements Slowly incorporate the fresh lemon juice, beating on low speed to prevent curdling. Add the lemon zest and vanilla extract, mixing just until evenly distributed. The filling should have a beautiful pale yellow color and smell intensely citrusy.
Step 4: Fold in the whipped topping Using a large spoon or rubber spatula, gently fold in the thawed whipped topping in three additions. Work carefully to maintain the light, airy texture while ensuring everything is evenly combined. The final mixture should be fluffy and cloud-like.
Step 5: Assemble and chill Spread the lemon filling evenly over the prepared crust, smoothing the top with an offset spatula. Cover tightly with plastic wrap and refrigerate (do not freeze at this stage) for at least 4 hours, though overnight is ideal. The dessert is ready when the filling is completely set and holds its shape when sliced.
Expert Cooking Tips
- Temperature matters : I always bring cream cheese to true room temperature. Cold cream cheese forms lumps that won’t fully blend, leaving your filling less smooth.
- Gradual mixing : Add sweetened condensed milk slowly while beating. This prevents the mixture from breaking and ensures the silkiest possible texture throughout.
- Fresh lemon technique : Roll lemons on the counter while pressing firmly before juicing. This breaks down internal membranes and yields significantly more juice.
- Folding method : Use a gentle folding motion when incorporating whipped topping. Aggressive mixing deflates the airiness that creates this dessert’s signature texture.
- Overnight advantage : This dessert actually improves after 24 hours in the refrigerator . The flavors meld beautifully and the texture becomes perfectly set.
Storage Tips
- Refrigerator storage : Cover tightly with plastic wrap or aluminum foil. Keeps fresh for up to 5 days with optimal texture and flavor.
- Freezer option : Wrap individual portions in plastic wrap, then foil. Frozen dessert keeps for 3 months without compromising flavor. Note: The texture may become slightly denser after freezing, but the flavor remains delicious.
- Thawing guidance : Move frozen portions to refrigerator 4 hours before serving. Place frozen portions on a plate before transferring to avoid condensation pooling under slices.
- Serving preparation : Use a sharp knife dipped in warm water between cuts. This ensures clean slices that showcase the beautiful layered appearance.
Variations and Substitutions
- Lime twist : Replace lemon juice and zest with fresh lime for a tropical variation that’s equally refreshing and bright.
- Berry version : After folding in the whipped topping, gently fold in 1 cup fresh blueberries or diced strawberries to avoid breaking them.
- Gluten-free option : Substitute graham crackers with gluten-free cookies or crushed vanilla wafers for the same delicious crust texture.
- Dairy-free adaptation : Use vegan cream cheese and coconut whipped cream. The texture differs slightly but remains deliciously creamy.
- Chocolate crust : Replace graham crackers with chocolate cookie crumbs for a dessert that tastes like lemon meringue pie’s sophisticated cousin.
- Orange alternative : Swap lemon for fresh orange juice and zest. Add a pinch of cardamom for an exotic flavor profile that’s slightly sweeter and milder than lemon—perfect for brunch or holiday tables.
What to Serve with No-Bake Lemon Dream Dessert
- Fresh berries : Mixed strawberries, blueberries, and raspberries provide color contrast and complementary tartness that enhances the lemon flavors beautifully.
- Mint garnish : Fresh mint leaves add aromatic freshness and visual appeal. The herb’s coolness pairs perfectly with citrus brightness.
- Shortbread cookies : Buttery cookies offer textural contrast and help balance the dessert’s richness with their crisp, crumbly texture.
- Iced tea : Cold brew or classic sweet tea creates the perfect beverage pairing for this refreshing, creamy dessert experience.
- Sparkling beverages : Sparkling lemonade or lemon soda adds a playful, bubbly contrast that echoes the dessert’s citrus notes perfectly.
- Vanilla ice cream : A small scoop alongside each slice creates temperature contrast and amplifies the overall indulgent dessert experience.
- Lemon slices : Thin lemon wheels as garnish reinforce the citrus theme while adding elegant visual appeal to each serving plate.
FAQ
Q: Can I use bottled lemon juice instead of fresh? A: Fresh juice is essential for proper acidity and bright flavor. Bottled lacks the tartness needed.
Q: Why is my filling runny? A: Ensure cream cheese is properly softened and sweetened condensed milk is gradually incorporated while mixing.
Q: How do I prevent a soggy crust? A: Press crust firmly and chill 30 minutes before adding filling. Proper butter distribution prevents sogginess.
Q: Can I make this ahead for parties? A: Absolutely! This dessert tastes better after overnight chilling. Make 1-2 days ahead for best results.
Q: What if I don’t have whipped topping? A: Whip 1 cup heavy cream with 2 tablespoons powdered sugar until soft peaks form.
Q: How do I know when it’s properly set? A: The filling is fully set when it holds its shape and doesn’t jiggle or sink when lightly pressed.
Q: Can I double this recipe? A: Yes, use two 9×13 pans or one large sheet pan. Adjust chilling time accordingly.
Q: Why did my cream cheese mixture curdle? A: Cold ingredients or adding acid too quickly causes curdling. Use room temperature ingredients always.
- 0 Facebook
- 21 Pinterest
- 4 Email
- Copy Link
- 25 shares
No-Bake Lemon Dream Dessert
Ingredients
Instructions
- Step 1: Prepare the crust
In a medium bowl, combine graham cracker crumbs, melted butter, and granulated sugar. Mix thoroughly until the mixture resembles wet sand and holds together when pressed. The crumbs should be evenly moistened but not soggy. Press this mixture firmly into the bottom of a 9×13 inch dish, using the bottom of a measuring cup to create an even, compact layer. Note: For a thicker crust, increase crumbs to 2 cups and butter to 2/3 cup.
- Step 2: Create the filling base
In a large bowl, beat the softened cream cheese with an electric mixer until completely smooth and fluffy, about 2 minutes. Gradually add the sweetened condensed milk, beating continuously until the mixture is silky and free of any lumps. The filling should be smooth, rich, and thick—easy to spread without being runny.
- Step 3: Add the lemon elements
Slowly incorporate the fresh lemon juice, beating on low speed to prevent curdling. Add the lemon zest and vanilla extract, mixing just until evenly distributed. The filling should have a beautiful pale yellow color and smell intensely citrusy.
- Step 4: Fold in the whipped topping
Using a large spoon or rubber spatula, gently fold in the thawed whipped topping in three additions. Work carefully to maintain the light, airy texture while ensuring everything is evenly combined. The final mixture should be fluffy and cloud-like.
- Step 5: Assemble and chill
Spread the lemon filling evenly over the prepared crust, smoothing the top with an offset spatula. Cover tightly with plastic wrap and refrigerate (do not freeze at this stage) for at least 4 hours, though overnight is ideal. The dessert is ready when the filling is completely set and holds its shape when sliced.