- 0 Facebook
- 38 Pinterest
- 0 Email
- Copy Link
- 38 shares
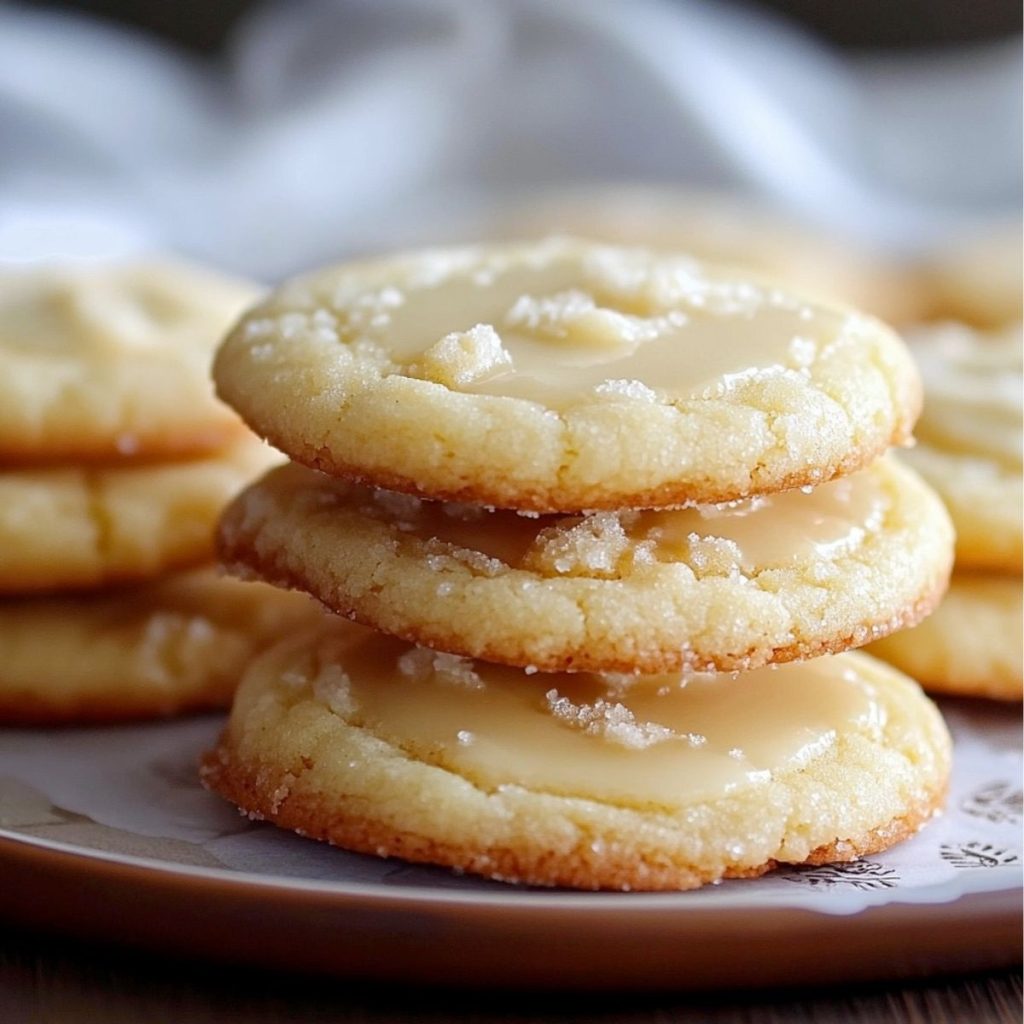
I’ve discovered these Kentucky Butter Cake Cookies are impossibly soft and buttery with a sweet glaze that creates the most delectable sugar crust, transforming a simple cake mix into cookies that taste completely homemade.
My Story
I remember the first time I stumbled upon these Kentucky Butter Cake Cookies; it was during a holiday baking marathon when I was searching for something simple yet impressive to add to my cookie platter. Following my grandmother’s advice about elevating store-bought ingredients, I experimented with a cake mix base and was astonished by how these cookies captured the essence of the beloved southern cake in bite-sized form. This recipe holds a special place in my heart because it effortlessly blends ease and elegance, making it perfect for both last-minute gatherings and thoughtful gifting.
Why You’ll Love This Recipe
I believe these Kentucky Butter Cake Cookies are truly special because:
- Simplicity at Its Best: Starting with a cake mix means anyone, regardless of baking experience, can create these bakery-quality cookies without hassle.
- Buttery Perfection: The combination of butter in both the dough and glaze creates an irresistible rich flavor that melts in your mouth with each bite.
- Time-Saving Wonder: From mixing to eating can take less than 30 minutes, making these perfect for impromptu dessert cravings or last-minute guests.
- Impressive Results: Despite their simplicity, these cookies consistently earn rave reviews, with friends often asking for the “complicated” recipe.
- Versatile Treat: They’re equally delicious freshly glazed or the next day when the flavors have melded together even more beautifully.
Ingredients for This Recipe
Cookies:
- White Cake Mix: The foundation that provides structure and sweetness. I always choose a high-quality brand for the best flavor and texture.
- Eggs: These bind everything together while adding richness. Room temperature eggs incorporate more easily, creating a smoother dough.
- Melted Butter: The secret to that signature Kentucky butter cake flavor. Use unsalted to control the saltiness, and real butter only – no substitutes for authentic taste.
Glaze:
- Butter: Creates the rich, velvety base of our glaze. I prefer unsalted butter for its clean, sweet flavor that lets the vanilla shine.
- Granulated Sugar: Unlike powdered sugar glazes, this granulated version creates that characteristic crackly crust that makes these cookies exceptional.
- Water: Just enough to dissolve the sugar without thinning the glaze too much. The small amount ensures a concentrated flavor.
- Vanilla Extract: The aromatic finishing touch that elevates the entire cookie. I always use pure vanilla extract rather than imitation for depth of flavor.
How to Make This Recipe
Prepare the Cookie Dough:
- Preheat your oven to 350°F (175°C) and line a baking sheet with parchment paper. This prevents sticking and makes cleanup a breeze.
- In a large mixing bowl, combine the white cake mix, whisked eggs, and melted butter. The mixture will seem thick and sticky at first – that’s exactly what we want for these rich cookies.
- Stir until everything is well incorporated and no dry patches remain. The dough should be soft but firm enough to roll into balls. If it feels too sticky, refrigerate for 15 minutes.
- Using a cookie scoop or tablespoon, portion the dough into 1-inch balls. Place them on the prepared baking sheet, leaving about 2 inches between each cookie to allow for spreading.
- Gently press down on each ball with the bottom of a glass to flatten slightly. The cookies should be about ½-inch thick discs.
- Bake for 8-10 minutes, just until the edges are set but the centers still look slightly underdone. They’ll continue cooking on the hot baking sheet after removal.
Create the Glaze: 7. While the cookies are baking, prepare the glaze. In a small saucepan, combine butter, granulated sugar, and water over medium heat.
- Stir constantly until the butter melts and the sugar dissolves completely, about 2-3 minutes. You’re looking for a smooth, slightly thickened consistency.
- Remove from heat and stir in the vanilla extract, which will release a wonderful aroma as it hits the warm mixture.
Finish the Cookies: 10. When the cookies come out of the oven , let them cool on the baking sheet for just 2 minutes – they should still be quite warm.
- Using a pastry brush, generously brush the warm glaze over each cookie. The heat will help the glaze sink in partially while leaving a sweet crust on top.
- Allow the cookies to cool completely on the baking sheet, where they’ll firm up and develop that characteristic sweet, crackly top.
Expert Cooking Tips
- I always use room temperature eggs to ensure they incorporate more easily into the melted butter, preventing any unwanted scrambling or uneven mixing.
- For uniform cookies, I use a cookie scoop – this ensures even baking times and that perfect bakery-style appearance that elevates these simple treats.
- The glaze is magic when applied to warm cookies. I’ve found that applying it while they’re still hot allows some to absorb while creating that perfect sugar crust on top.
- Don’t overbake! These cookies should come out of the oven looking slightly underdone in the center. Trust me, they’ll continue cooking on the hot baking sheet.
- For an extra special touch, I sometimes add a tiny pinch of salt to the glaze, which creates a subtle contrast that enhances the buttery sweetness.
Proper Storage
- Room Temperature Storage: Store glazed cookies in an airtight container with parchment between layers for up to 3 days. The glaze maintains its texture best at room temperature.
- Refrigeration: While not ideal for texture, refrigeration extends freshness to 5-7 days. Allow cookies to come to room temperature before serving for best flavor.
- Freezing Baked Cookies: Freeze in single layers, then stack with parchment in between. Thaw at room temperature for 1-2 hours before serving.
- Freezing Dough: Roll into balls, freeze on a tray, then transfer to a freezer bag. Bake from frozen, adding 1-2 minutes to the baking time.
Variations and Substitutions
Flavor Variations: I’ve experimented with several delightful variations of these cookies over the years:
- Lemon Burst: Add 1 tablespoon of lemon zest to the dough and substitute lemon extract for vanilla in the glaze. The citrusy brightness offers a refreshing twist on the original.
- Almond Joy: Mix in ½ cup shredded coconut and ¼ cup chopped almonds to the dough, then add ¼ teaspoon almond extract to the glaze for a tropical-inspired treat.
- Chocolate Lover’s: Start with chocolate cake mix instead of white, and add ½ cup chocolate chips to the dough. The double chocolate with buttery glaze is absolutely decadent.
Dietary Adaptations:
- Gluten-Free Option: Substitute the regular cake mix with a gluten-free white cake mix. The texture remains remarkably similar, making this an easy adaptation.
- Dairy Sensitivities: Plant-based butter can work in both the dough and glaze, though the flavor profile will change slightly. I recommend using a high-quality brand that’s made for baking.
- Egg Alternative: For each egg, substitute ¼ cup unsweetened applesauce or a commercial egg replacer. The cookies may spread slightly differently but will still have that tender texture.
What Goes with This Recipe
- Vanilla Bean Ice Cream: The cold creaminess against the warm, buttery cookie creates a delightful temperature contrast that enhances both desserts.
- Coffee or Espresso: The bitter notes in a good dark coffee cut through the sweetness perfectly, creating a balanced flavor experience.
- Fresh Berries: A side of strawberries or raspberries adds a tart brightness that complements the rich, buttery cookies beautifully.
- Hot Chocolate: For a truly indulgent dessert experience, I serve these cookies alongside rich hot chocolate for dunking – the flavors meld magnificently.
- Bourbon Cream Sauce: For an adults-only treat, drizzle with a simple bourbon cream sauce to emphasize the Southern heritage of these delectable cookies.
FAQ
- Can I make the dough ahead of time? Yes! Refrigerate dough for up to 2 days or freeze for 3 months.
- Why did my cookies spread too much? Your butter was likely too hot. Cool slightly before mixing with other ingredients.
- Can I double the glaze recipe? Absolutely! Extra glaze creates an even more decadent cookie experience.
- How do I know when they’re done baking? Edges should be set but centers slightly soft. They’ll finish cooking while cooling.
- Can I use yellow cake mix instead? Yes! It creates a slightly different flavor profile but works beautifully.
- 0 Facebook
- 38 Pinterest
- 0 Email
- Copy Link
- 38 shares
Kentucky Butter Cake Cookies
Ingredients
Instructions
Preheat your oven to 350°F (175°C) and line a baking sheet with parchment paper. This prevents sticking and makes cleanup a breeze.
In a large mixing bowl, combine the white cake mix, whisked eggs, and melted butter. The mixture will seem thick and sticky at first – that’s exactly what we want for these rich cookies.
Stir until everything is well incorporated and no dry patches remain. The dough should be soft but firm enough to roll into balls. If it feels too sticky, refrigerate for 15 minutes.
Using a cookie scoop or tablespoon, portion the dough into 1-inch balls. Place them on the prepared baking sheet, leaving about 2 inches between each cookie to allow for spreading.
Gently press down on each ball with the bottom of a glass to flatten slightly. The cookies should be about ½-inch thick discs.
Bake for 8-10 minutes, just until the edges are set but the centers still look slightly underdone. They’ll continue cooking on the hot baking sheet after removal.
Stir constantly until the butter melts and the sugar dissolves completely, about 2-3 minutes. You’re looking for a smooth, slightly thickened consistency.
Remove from heat and stir in the vanilla extract, which will release a wonderful aroma as it hits the warm mixture.
Using a pastry brush, generously brush the warm glaze over each cookie. The heat will help the glaze sink in partially while leaving a sweet crust on top.
Allow the cookies to cool completely on the baking sheet, where they’ll firm up and develop that characteristic sweet, crackly top.