- 0 Facebook
- 43 Pinterest
- 0 Email
- Copy Link
- 43 shares
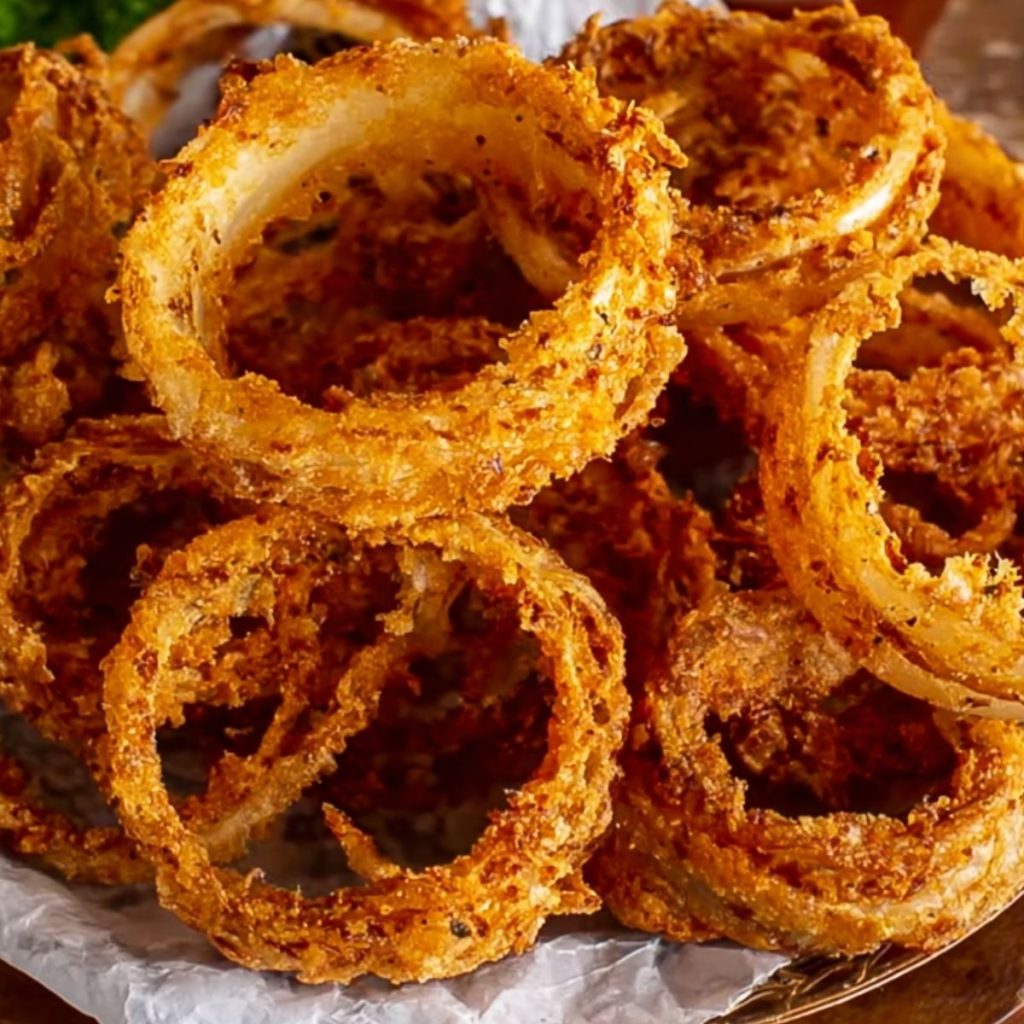
These golden-brown onion rings deliver the ultimate savory crunch with every bite — proving homemade versions truly outshine their fast-food counterparts. The magic happens when thick slices of sweet onion meet a seasoned flour mixture, creating that perfect contrast between tender vegetable and crispy, flavorful coating. The buttermilk bath adds subtle tanginess while ensuring the batter adheres beautifully during their quick swim in hot oil. Serve these irresistible rings piping hot alongside ranch or spicy ketchup for a snack that disappears from the plate almost as quickly as it arrives.
Why You’ll Love This Recipe
These Homemade Deep Fried Onion Rings elevate a classic side dish from ordinary to extraordinary. Here’s why they deserve a permanent spot in your cooking rotation:
- Restaurant-Quality Results : These rings achieve that perfect golden crunch that rivals any steakhouse offering, with a substantially lower price tag.
- Foolproof Technique : The buttermilk bath followed by seasoned flour creates a foolproof coating that stays put during frying, eliminating the frustration of batter sliding off.
- Flavor-Forward Seasoning : Smoked paprika and garlic salt in the coating create depth that plain fast-food versions simply can’t match.
- Crowd-Pleasing Versatility : Perfect as a game day snack, burger companion, or unexpected dinner party appetizer that consistently earns rave reviews.
- Quick Cooking Time : From cutting onions to final frying, the entire process takes less than an hour, making homemade indulgence entirely weeknight-possible.
- Customization Potential : The basic recipe serves as a reliable foundation for variations like adding cornmeal for extra crunch or cayenne for heat.
Ingredient Breakdown with Tips
Every component in these Homemade Deep Fried Onion Rings plays a crucial role in achieving that perfect golden crunch and savory flavor that makes them irresistible. The right ingredients, properly prepared, are what separate mediocre rings from restaurant-quality ones.
- Extra large sweet onion : Sweet varieties like Vidalia or Walla Walla produce rings with natural sweetness that balances the savory coating. Slice them 1/4-inch thick for the ideal tender-crisp texture.
- Buttermilk : This tangy liquid tenderizes the onion while helping the flour coating adhere properly. No buttermilk on hand? Mix 1 cup milk with 1 tablespoon lemon juice or vinegar and let stand 5 minutes.
- All-purpose flour : Creates the foundation for your crispy exterior. For extra crunch, try replacing up to 1/4 of the flour with cornstarch or cornmeal.
- Garlic salt : Provides essential savory notes throughout the coating. If controlling sodium, substitute with garlic powder plus a smaller amount of regular salt.
- Smoked paprika : Adds depth and subtle smokiness without overpowering. Regular paprika works but lacks the same dimension.
- Vegetable oil : Choose a neutral oil with a high smoke point like canola or peanut oil for the cleanest flavor and consistent results at high frying temperatures.
- Baking powder : A small amount creates micro-bubbles in the batter for extra lightness. Always check that it’s fresh for maximum effectiveness.
- Eggs : Help bind the coating and create a richer flavor profile. Room temperature eggs incorporate more evenly into the batter.
How to Make Homemade Deep Fried Onion Rings
- Slice the extra large sweet onion into 1/4-inch thick rings, then separate the rings and place them in a large bowl. Pour buttermilk over the onion rings, ensuring they’re completely submerged, and let them soak for at least 15 minutes.
- Meanwhile, prepare the coating by whisking together all-purpose flour, garlic salt, and smoked paprika in a shallow dish. I like to add a pinch of cayenne for a subtle kick that complements the sweet onion perfectly.
- Heat vegetable oil in a large Dutch oven or heavy pot to 375°F. The oil should be about 2 inches deep – you’ll need enough to fully submerge the rings without overcrowding.
- Working with a few rings at a time, lift them from the buttermilk and let excess liquid drip off. Dredge each ring thoroughly in the seasoned flour mixture, pressing gently to ensure the coating adheres to all surfaces.
- Carefully lower the coated rings into the hot oil using tongs. Fry in small batches for 2-3 minutes, turning occasionally, until they achieve that beautiful golden-brown color and crispy texture.
- Transfer the fried onion rings to a baking sheet lined with paper towels to drain excess oil. Working in batches keeps the oil temperature consistent – it should bounce back to 375°F between each round.
- Sprinkle the hot rings with a touch of salt while they’re still warm. This is when the seasoning adheres best, enhancing that irresistible savory flavor we’re after.
- Serve immediately with your favorite dipping sauces. Trust me, these are at their absolute best when piping hot and fresh from the fryer!
Storage & Freezing
Homemade Deep Fried Onion Rings are best enjoyed immediately after frying, but if you have leftovers, proper storage is key to maintaining as much of that signature crunch as possible. Store completely cooled onion rings in an airtight container lined with paper towels to absorb excess moisture in the refrigerator for up to 2 days.
For the best texture when reheating refrigerated onion rings, avoid the microwave which will make them soggy. Instead, place them on a baking sheet in a preheated 375°F oven for 5-7 minutes until heated through and crispy again. I’ve found that using a wire rack on the baking sheet allows for better air circulation and more even crisping.
While freezing is possible, it’s not ideal for these homemade treats. The moisture from the onions tends to affect the breading when frozen and thawed. If you must freeze them, arrange cooled rings in a single layer on a baking sheet and freeze until solid, then transfer to a freezer-safe container with parchment paper between layers. Frozen onion rings can be stored for up to 1 month and should be reheated directly from frozen in a 400°F oven until crispy and hot throughout, about 10-12 minutes.
Make Ahead Tips for Homemade Deep Fried Onion Rings
These Homemade Deep Fried Onion Rings are perfect for meal prep enthusiasts looking to save time on busy weeknights! You can slice the onions and soak them in buttermilk up to 24 hours in advance, storing the covered bowl in the refrigerator (the longer soak actually enhances flavor penetration). The seasoned flour mixture can also be prepared and stored in an airtight container for up to 3 days ahead. When ready to serve, simply remove the onion rings from their buttermilk bath, dredge in the pre-mixed coating, and fry as directed. This advance prep cuts your active cooking time in half while ensuring you’ll have restaurant-quality results with minimal effort when hunger strikes.
Expert Tips for Homemade Deep Fried Onion Rings
These tried-and-true tricks will help you achieve onion ring perfection every time:
- Watch the oil temperature : I always keep a thermometer handy because oil that’s too cool makes greasy rings, while too hot burns the coating before the onion softens.
- Dry thoroughly after soaking : Pat onion rings with paper towels after removing from buttermilk – excess moisture creates steam that can make your coating separate.
- Double-dredge for extra crunch : For restaurant-style thickness, dip rings in buttermilk, then flour, then quickly back in buttermilk and flour again.
- Use the freezer trick : Placing coated rings on a baking sheet in the freezer for 10 minutes before frying helps the coating adhere better to the onion.
- Serve immediately : Onion rings lose their magic quickly – arrange your frying schedule so everyone gets them at peak crispness, within 5 minutes of cooking.
Variations & Substitutions
These classic onion rings are delicious as-is, but don’t be afraid to experiment based on your taste preferences or what’s available in your pantry. The beauty of homemade cooking is making each recipe truly your own!
- Gluten-free adaptation : Swap all-purpose flour for a cup-for-cup gluten-free flour blend or rice flour for an equally crispy coating that works for those with gluten sensitivities.
- Spice it up : I sometimes add 1/2 teaspoon of cayenne pepper or hot sauce to the buttermilk soak for rings with a pleasant heat that builds with each bite.
- Coating enhancers : Add 2 tablespoons of cornmeal or panko breadcrumbs to the flour mixture for extra crunch and texture that takes these rings to the next level.
- Beer batter option : Replace half the buttermilk with cold beer for a lighter, airier coating that fries up exceptionally crisp with subtle malty notes.
- Healthier alternative : For a lighter version, try air-frying the prepared rings at 400°F for 8-10 minutes, flipping halfway through – while different from deep-fried, they’ll still satisfy that onion ring craving.
- Change the flavor profile : Experiment with different seasoning blends like Cajun, Italian herbs, or curry powder (1-2 teaspoons) in the flour mixture to complement specific meals or themes.
Perfect Pairings & Serving Ideas
These Homemade Deep Fried Onion Rings deserve to be the star of the show, but they also play beautifully with the right supporting cast. I love serving them piping hot, stacked in a tower with a small bowl of dipping sauce on the side.
For a classic pub-style meal, pair these golden rings with a juicy burger or crispy fried fish. The contrasting textures—crunchy onion rings alongside something hearty—create that perfect bite every time. A cold beer or creamy milkshake provides the ideal beverage counterpoint to cut through the richness.
For dipping options beyond the standard ketchup, try a smoky chipotle mayo, tangy barbecue sauce, or my personal favorite—a sriracha-spiked ranch that complements the subtle sweetness of the onions. The garlic salt and smoked paprika in the coating shine even brighter with these flavor-forward dips.
These onion rings also elevate an ordinary weeknight dinner into something special. Serve them alongside grilled steaks or roasted chicken, and I guarantee your family will be fighting over the last ring. For a fun presentation at parties, serve them in paper cones with dipping sauces in small ramekins for an irresistible finger food that vanishes in minutes.
Recipe FAQs
Can I use other types of onions? Yes! Yellow onions work great too.
How do I keep the batter from falling off? Pat rings dry before dredging in flour.
Can I make these without buttermilk? Substitute with milk mixed with lemon juice.
What’s the best oil temperature? 375°F gives perfect golden-brown results.
Can I bake these instead of frying? Not recommended – frying creates the signature crunch.
How do I know when they’re done? They’ll turn deep golden-brown with bubbling edges.
- 0 Facebook
- 43 Pinterest
- 0 Email
- Copy Link
- 43 shares
Ultimate Homemade Deep Fried Onion Rings with Golden Crunch
Ingredients
Instructions
Slice the extra large sweet onion into 1/4-inch thick rings, then separate the rings and place them in a large bowl. Pour buttermilk over the onion rings, ensuring they’re completely submerged, and let them soak for at least 15 minutes.
Meanwhile, prepare the coating by whisking together all-purpose flour, garlic salt, and smoked paprika in a shallow dish. I like to add a pinch of cayenne for a subtle kick that complements the sweet onion perfectly.
Heat vegetable oil in a large Dutch oven or heavy pot to 375°F. The oil should be about 2 inches deep – you’ll need enough to fully submerge the rings without overcrowding.
Working with a few rings at a time, lift them from the buttermilk and let excess liquid drip off. Dredge each ring thoroughly in the seasoned flour mixture, pressing gently to ensure the coating adheres to all surfaces.
Carefully lower the coated rings into the hot oil using tongs. Fry in small batches for 2-3 minutes, turning occasionally, until they achieve that beautiful golden-brown color and crispy texture.
Transfer the fried onion rings to a baking sheet lined with paper towels to drain excess oil. Working in batches keeps the oil temperature consistent – it should bounce back to 375°F between each round.
Sprinkle the hot rings with a touch of salt while they’re still warm. This is when the seasoning adheres best, enhancing that irresistible savory flavor we’re after.
Serve immediately with your favorite dipping sauces. Trust me, these are at their absolute best when piping hot and fresh from the fryer!
Notes
Watch the oil temperature : I always keep a thermometer handy because oil that’s too cool makes greasy rings, while too hot burns the coating before the onion softens.
Dry thoroughly after soaking : Pat onion rings with paper towels after removing from buttermilk – excess moisture creates steam that can make your coating separate.
Double-dredge for extra crunch : For restaurant-style thickness, dip rings in buttermilk, then flour, then quickly back in buttermilk and flour again.
Use the freezer trick : Placing coated rings on a baking sheet in the freezer for 10 minutes before frying helps the coating adhere better to the onion.
Serve immediately : Onion rings lose their magic quickly – arrange your frying schedule so everyone gets them at peak crispness, within 5 minutes of cooking.
Nutrition
| Serving Size | 8 rings |
|---|---|
| Calories | 300 calories |
| Sugar Content | 4g |
| Sodium Content | 600mg |
| Fat Content | 20g |
| Saturated Fat Content | 3g |
| Unsaturated Fat Content | 15g |
| Trans Fat Content | 0g |
| Carbohydrate Content | 30g |
| Fiber Content | 2g |
| Protein Content | 3g |
| Cholesterol Content | 70mg |