- 0 Facebook
- 13 Pinterest
- 3 Email
- Copy Link
- 16 shares
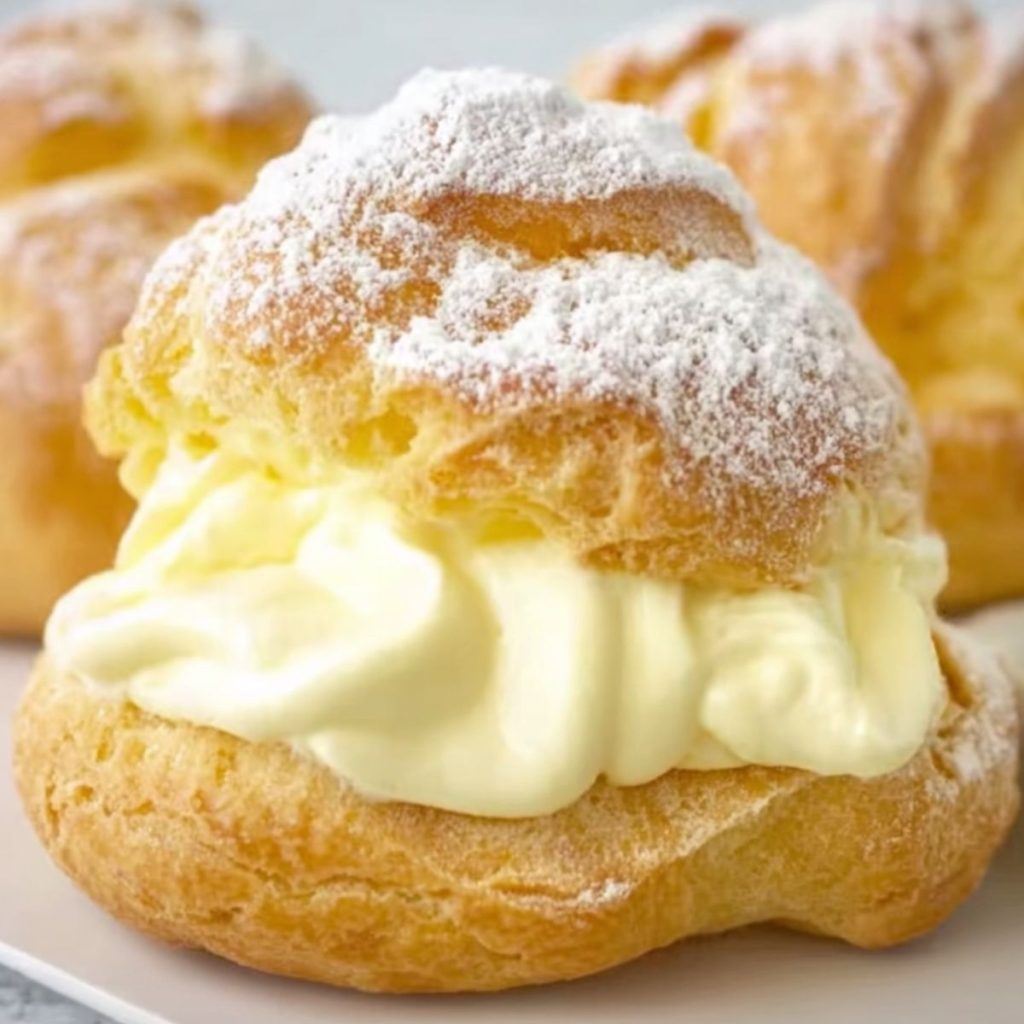
These cloud-like cream puffs transform basic pantry ingredients into the most elegant of French pastries. Golden, crisp exteriors give way to airy, hollow centers—the perfect vessels for piping with sweetened whipped cream. The delicate choux pastry requires no special skills, just careful attention to the stovetop technique that creates those signature steam pockets. Each bite delivers a heavenly contrast between the light-as-air shell and rich, vanilla-scented filling—absolutely irresistible when served with a handful of fresh berries and that final dusting of powdered sugar.
Why You’ll Love This Recipe
These classic cream puffs balance impressive presentation with surprisingly straightforward technique, making them perfect for both special occasions and weekend baking projects.
- Bakery-Quality Results : The signature crisp exterior and hollow interior creates the perfect vessel for cream, rivaling any pastry shop offering.
- Make-Ahead Friendly : The unfilled puffs can be frozen for up to a month, allowing for last-minute assembly when unexpected guests arrive.
- Impressive Yet Approachable : Despite their elegant French pedigree, the step-by-step method eliminates guesswork and builds confidence even for pastry beginners.
- Versatile Canvas : Beyond classic vanilla cream, these puffs welcome countless variations—try chocolate pastry cream, coffee-flavored whipped cream, or even savory fillings.
- Temperature Magic : The high-heat baking technique creates dramatic rise through steam, teaching valuable pastry science while producing those signature airy pockets.
Ingredient Breakdown with Tips
The secret to perfect homemade cream puffs lies in understanding exactly what each ingredient contributes to both the delicate choux pastry and the silky cream filling. Quality ingredients handled with the right technique transform simple components into extraordinary results.
- Unsalted butter : The foundation of choux pastry, providing richness and helping create steam pockets. Use high-quality European-style butter with higher fat content for the most luxurious texture and flavor.
- Water : Creates the essential steam that makes cream puffs rise and hollow out during baking. Always measure precisely, as the water-to-flour ratio is critical for proper puff development.
- Whole milk : Adds richness and tenderness to the choux pastry that water alone cannot provide. Avoid substituting with lower-fat alternatives, as they won’t deliver the same tender structure.
- Salt : Enhances all flavors in the pastry without making it taste salty. Diamond Crystal kosher salt is preferred by pastry chefs, but fine sea salt works beautifully as well.
- Sugar (for dough) : Promotes browning and adds subtle sweetness to the pastry shells. The small amount balances flavors without making the shells overly sweet, allowing the filling to shine.
- All-purpose flour : Provides structure to the pastry while remaining tender. For best results, use unbleached flour and measure by weight (125g per cup) if possible for perfect consistency.
- Eggs (room temperature) : Create structure, richness, and that signature golden color. Room temperature eggs incorporate more smoothly—place cold eggs in warm water for 5 minutes to quickly bring to temperature.
- Heavy cream : The star of the filling, whipping up to create that cloud-like texture. Look for cream with at least 36% fat content for the most stable whipped cream that won’t weep or deflate.
- Vanilla : Infuses the cream with aromatic warmth. Pure vanilla extract delivers classic flavor, but vanilla bean paste offers more intense flavor with those beautiful specks throughout.
- Sugar (for filling) : Sweetens and stabilizes the whipped cream. Superfine sugar dissolves more quickly than granulated, but either works well for homemade cream puffs.
- Powdered sugar : Creates that bakery-style finishing touch while adding subtle sweetness. Sift before dusting to prevent any lumps for the most professional presentation.
Let’s Cook It
- Preheat the oven to 425°F and line a baking sheet with parchment paper. In a medium saucepan, combine the butter, water, milk, salt, and 2 teaspoons sugar over medium heat until the butter is completely melted and the mixture comes to a full boil.
- Remove from heat and immediately add all the flour at once. Stir vigorously with a wooden spoon until the mixture forms a smooth ball and pulls away from the sides of the pan—I’ve found this typically takes about 30-45 seconds of energetic stirring.
- Return the pan to low heat and continue stirring for 1-2 minutes to dry out the dough slightly. You’ll know it’s ready when a slight film forms on the bottom of the pan and the dough feels somewhat dry to the touch.
- Transfer the dough to a mixing bowl and let it cool for 5 minutes. Add the eggs one at a time, beating thoroughly after each addition until the dough becomes smooth and glossy. The proper consistency should form a “V” shape when you lift your spoon from the dough.
- Spoon the dough into a piping bag and pipe 12 mounds (about 2 inches in diameter) onto the prepared baking sheet, spacing them about 2 inches apart. Alternatively, use two spoons to drop mounds of dough if you don’t have a piping bag.
- Bake for 15 minutes at 425°F, then reduce the temperature to 375°F and bake for another 10 minutes until the puffs are golden brown and feel light and hollow. Don’t open the oven door during baking or your puffs might collapse!
- Remove from the oven and quickly pierce the side of each puff with a small knife to release steam. Transfer to a wire rack to cool completely.
- For the filling, whip the heavy cream with 2 tablespoons sugar and vanilla until stiff peaks form. Cut the cooled puffs horizontally, fill the bottom halves with whipped cream using a piping bag or spoon, replace the tops, and dust with powdered sugar just before serving.
The puffs are best enjoyed the same day they’re filled, but unfilled shells can be frozen for up to a month and recrisped in a 350°F oven for 5 minutes before filling.
Serving Suggestions
These homemade cream puffs are delightful on their own, but a few thoughtful serving ideas can elevate them from simple treats to an impressive dessert experience.
I love arranging cream puffs on a beautiful cake stand or tiered platter for special occasions, creating an elegant dessert tower that rivals any patisserie display. For an extra special presentation, dust with powdered sugar just moments before serving so it looks pristine when your guests take their first bite.
For a complete dessert experience, serve your cream puffs alongside small bowls of complementary toppings. Fresh berries—especially strawberries, raspberries, or blueberries—provide a perfect tart contrast to the sweet cream filling. A drizzle of warm chocolate sauce or caramel over the top transforms these simple pastries into a decadent dessert worthy of any celebration.
Cream puffs pair wonderfully with hot beverages. A cup of freshly brewed coffee balances the sweetness beautifully, while a pot of Earl Grey or vanilla-infused tea creates a perfect afternoon tea service. For evening gatherings, I sometimes serve these with small glasses of dessert wine like Moscato d’Asti or even champagne for a truly celebratory touch.
Variations & Substitutions
Don’t hesitate to put your own spin on these classic cream puffs! The basic recipe is wonderfully adaptable while still maintaining that signature light, airy texture we all love.
- Flavor the filling : Beyond classic vanilla, try infusing your whipped cream with 1-2 tablespoons of coffee liqueur, 1 teaspoon of almond extract, or the zest of one lemon or orange for a delightful twist on tradition.
- Chocolate lovers’ version : I often fold 2-3 tablespoons of unsweetened cocoa powder into the flour before adding it to the liquid mixture for chocolate-flavored puffs. Pair with chocolate whipped cream by adding 2 tablespoons of cocoa powder to your cream filling.
- Go savory : Skip the sugar in the dough and fill with herbed cream cheese, smoked salmon mousse, or chicken salad for elegant appetizers. I’ve served these at dinner parties and they disappear faster than the dessert versions!
- Dairy-free adaptation : Replace the butter with plant-based butter, use almond or oat milk instead of whole milk, and substitute coconut cream (chilled overnight and whipped) for the heavy cream filling.
- Gluten-free option : Substitute the all-purpose flour with a 1:1 gluten-free flour blend that contains xanthan gum. The texture may be slightly different, but the puffs will still rise beautifully with the proper technique.
- Decadent topping : Transform these into profiteroles by drizzling with warm chocolate ganache (equal parts heated heavy cream and chopped chocolate) just before serving for an extra-special dessert.
Make Ahead Options
These homemade cream puffs are a meal prep enthusiast’s dream, allowing you to create bakery-quality results with strategic advance planning! The unfilled choux pastry shells can be baked up to 3 days ahead and stored in an airtight container at room temperature, or frozen for up to one month (simply recrisp frozen shells in a 350°F oven for 5 minutes before filling). The whipped cream filling can be prepared up to 24 hours in advance and refrigerated in a covered bowl, though you’ll want to give it a quick re-whip to restore its fluffy texture. When ready to serve, simply slice the shells, pipe in the cream, dust with powdered sugar, and you’ll have elegant cream puffs that taste freshly made with just minutes of final assembly time.
Storage & Freezing
These homemade cream puffs require special storage consideration to maintain their delightful texture. The filled cream puffs are best enjoyed on the same day they’re made, as the moisture from the whipped cream will gradually soften the crisp shells.
For unfilled puff shells, you have excellent make-ahead options. Store completely cooled shells in an airtight container at room temperature for up to 24 hours. If they lose their crispness, simply reheat them in a 350°F oven for 3-5 minutes and let cool before filling. I’ve found this rejuvenates the shells beautifully without drying them out.
Freezing works wonderfully for unfilled shells! Place them in a single layer in a freezer-safe container, separating layers with parchment paper, and freeze for up to one month. When ready to serve, thaw at room temperature for about 30 minutes, then recrisp in a 350°F oven for 5 minutes. This is my favorite trick for entertaining—prepare the shells weeks ahead, then simply whip the cream filling before guests arrive.
Never freeze filled cream puffs, as the whipped cream filling will break down and become watery upon thawing. For the freshest presentation, store any leftover filled puffs in the refrigerator for no more than 24 hours, though be prepared for softer shells.
Expert Tips
After years of making cream puffs, I’ve learned these crucial techniques that transform good puffs into spectacular ones:
- Perfect Your Panade : The butter-milk-water mixture must reach a full, rolling boil before adding flour—this ensures your homemade cream puffs rise properly with those signature hollow centers.
- Watch the Dough Consistency : When adding eggs, look for that “V” shape when lifting your spoon. If your dough is too stiff, beat in 1 teaspoon of warm water at a time until perfect.
- Create Steam Vents : I always pierce each puff immediately after baking while they’re still hot. This releases trapped moisture and prevents soggy interiors that would collapse when cool.
- Chill Your Tools : For the fluffiest whipped cream filling, refrigerate your mixing bowl and beaters for 15 minutes before whipping the heavy cream, sugar, and vanilla.
- Temperature Matters : Room temperature eggs incorporate much more smoothly into the dough. When I forget to set them out early, I place them in warm (not hot) water for 5 minutes.
Frequently Asked Questions
Why did my cream puffs collapse? Opening the oven door too soon causes collapse.
Can I make cream puffs without a piping bag? Yes! Use two spoons to drop dough mounds.
Can I substitute the heavy cream? No substitutes work as well for proper structure.
How do I know when my choux pastry is ready? It forms a “V” shape when lifted with spoon.
Can I freeze filled cream puffs? Never freeze filled puffs—only empty shells.
How do I make my cream puffs extra crispy? Pierce sides immediately after baking to release steam.
- 0 Facebook
- 13 Pinterest
- 3 Email
- Copy Link
- 16 shares
Classic Cream Puffs: Irresistibly Airy Homemade Delights
Ingredients
Instructions
Preheat the oven to 425°F and line a baking sheet with parchment paper. In a medium saucepan, combine the butter, water, milk, salt, and 2 teaspoons sugar over medium heat until the butter is completely melted and the mixture comes to a full boil.
Remove from heat and immediately add all the flour at once. Stir vigorously with a wooden spoon until the mixture forms a smooth ball and pulls away from the sides of the pan—I’ve found this typically takes about 30-45 seconds of energetic stirring.
Return the pan to low heat and continue stirring for 1-2 minutes to dry out the dough slightly. You’ll know it’s ready when a slight film forms on the bottom of the pan and the dough feels somewhat dry to the touch.
Transfer the dough to a mixing bowl and let it cool for 5 minutes. Add the eggs one at a time, beating thoroughly after each addition until the dough becomes smooth and glossy. The proper consistency should form a ‘V’ shape when you lift your spoon from the dough.
Spoon the dough into a piping bag and pipe 12 mounds (about 2 inches in diameter) onto the prepared baking sheet, spacing them about 2 inches apart. Alternatively, use two spoons to drop mounds of dough if you don’t have a piping bag.
Bake for 15 minutes at 425°F, then reduce the temperature to 375°F and bake for another 10 minutes until the puffs are golden brown and feel light and hollow. Don’t open the oven door during baking or your puffs might collapse!
Remove from the oven and quickly pierce the side of each puff with a small knife to release steam. Transfer to a wire rack to cool completely.
For the filling, whip the heavy cream with 2 tablespoons sugar and vanilla until stiff peaks form. Cut the cooled puffs horizontally, fill the bottom halves with whipped cream using a piping bag or spoon, replace the tops, and dust with powdered sugar just before serving.
Notes
The puffs are best enjoyed the same day they’re filled, but unfilled shells can be frozen for up to a month and recrisped in a 350°F oven for 5 minutes before filling.
Nutrition
| Serving Size | 1 cream puff |
|---|---|
| Calories | 150 calories |
| Sugar Content | 2g |
| Sodium Content | 100mg |
| Fat Content | 11g |
| Saturated Fat Content | 7g |
| Unsaturated Fat Content | 2g |
| Trans Fat Content | 0g |
| Carbohydrate Content | 10g |
| Fiber Content | 0g |
| Protein Content | 2g |
| Cholesterol Content | 70mg |