- 0 Facebook
- 13 Pinterest
- 5 Email
- Copy Link
- 18 shares
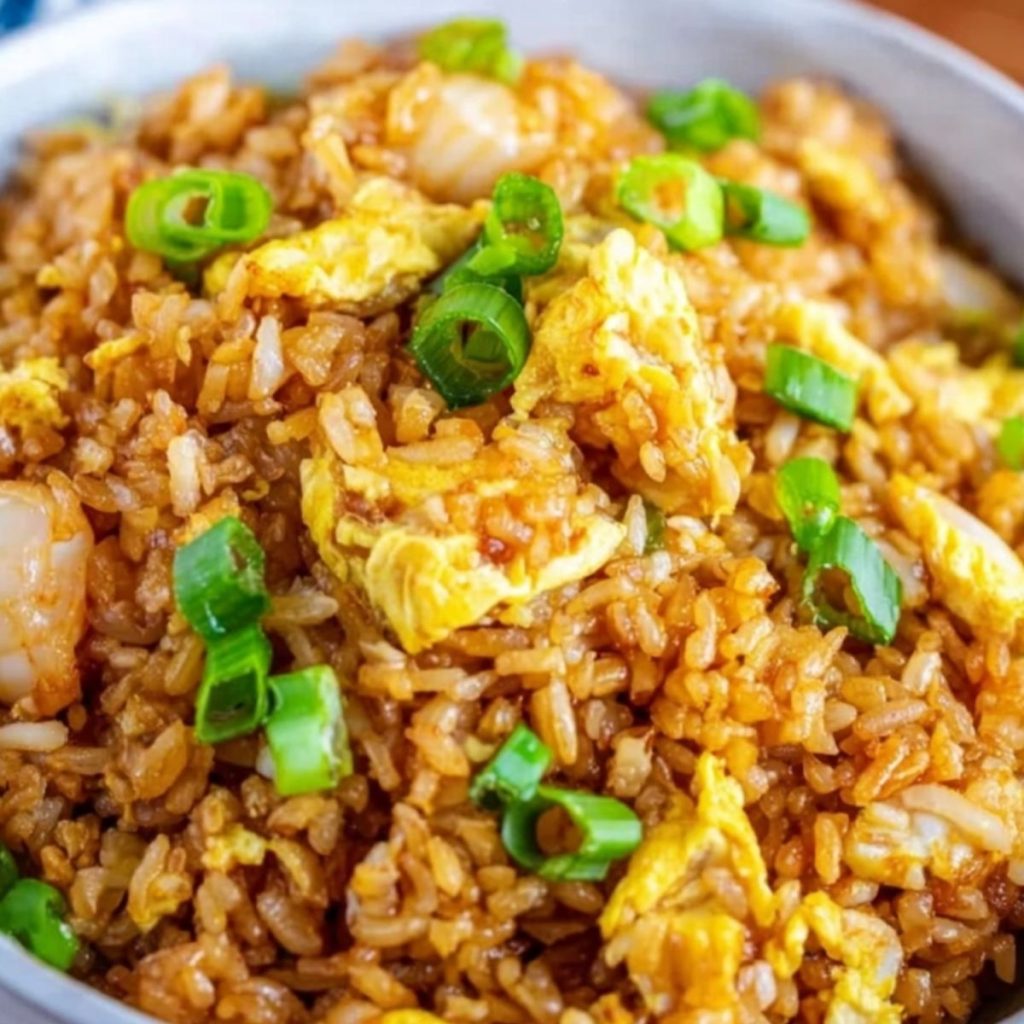
This steamy, golden Hibachi Fried Rice transforms ordinary leftover rice into a restaurant-worthy sensation with just minutes at the stovetop . The secret lies in the aromatic combination of butter-sautéed sweet onions and garlic that coat each fluffy grain, while soy sauce adds that signature umami depth that makes hibachi cooking so irresistible. Finished with the fresh bite of green onions, this simplified Japanese steakhouse classic pairs beautifully with any grilled protein or stands confidently on its own as a satisfying meal.
Why You’ll Love This Recipe
This restaurant-quality Hibachi Fried Rice brings authentic Japanese steakhouse flavor right to your home kitchen, with surprisingly simple ingredients and techniques.
- Restaurant-Quality at Home : The combination of butter and soy sauce creates that unmistakable hibachi flavor profile without specialized equipment or hard-to-find ingredients.
- Quick Weeknight Wonder : Ready in just 20 minutes from start to finish, this dish transforms leftover rice into something special even on your busiest evenings.
- Versatile Base Dish : Perfect as a standalone meal or as a complementary side to grilled chicken, steak, shrimp, or tofu for a complete hibachi experience.
- Budget-Friendly Satisfaction : Using pantry staples and leftover rice makes this dish incredibly economical while delivering the taste of a $25 restaurant meal.
- Customization Champion : The basic recipe welcomes additions like peas, carrots, mushrooms, or protein mix-ins based on what’s available in your refrigerator .
- Fool-Proof Technique : The step-by-step method ensures perfectly separated rice grains with that signature hibachi texture every single time.
Ingredient Breakdown with Tips
Every component in this Hibachi Fried Rice plays a crucial role in creating that authentic Japanese steakhouse experience, from building the proper foundation to adding the final aromatic touches that make this dish truly special.
- Vegetable oil : Creates the perfect high-heat cooking surface for stir-frying without burning. Use a neutral oil with a high smoke point like canola or refined peanut oil for best results.
- Eggs : Provides protein and creates those signature golden bits throughout authentic hibachi rice. For the fluffiest texture, beat them thoroughly before adding to the hot pan.
- Butter : Delivers that distinctive hibachi richness and nutty aroma that sets restaurant-style fried rice apart. Use unsalted butter to better control the overall saltiness of the dish.
- Sweet onion : Adds natural sweetness and aromatic depth as it caramelizes in the butter. Dice it finely for quicker cooking and better integration with the rice grains.
- Garlic : Forms the aromatic backbone of hibachi fried rice with its distinctive pungent flavor. Mince it freshly just before cooking for maximum flavor impact.
- Long-grain white rice : The essential canvas for this dish, providing the perfect texture when properly prepared. Day-old refrigerated rice works best as it’s drier and less likely to become mushy.
- Soy sauce : Contributes the signature umami depth and golden-brown color of authentic hibachi rice. Low-sodium varieties allow for better flavor control while maintaining authenticity.
- Green onions : Adds a fresh, bright finish and visual appeal to the completed dish. Slice them on a diagonal for professional presentation and reserve some for garnishing.
How to Make Hibachi Fried Rice
- Heat 1 tablespoon of vegetable oil in a large skillet or wok over medium-high heat. Pour in beaten eggs and quickly scramble until just set but still slightly moist, about 30 seconds. Transfer to a plate and set aside.
- Return the skillet to medium-high heat and add butter. Once melted and bubbling, add diced sweet onion and sauté for 3-4 minutes until translucent and slightly golden at the edges.
- Add minced garlic to the onions and cook for just 30 seconds until fragrant. I always watch this step carefully—garlic can go from perfect to burned in seconds!
- Break up any clumps in your cold rice with your fingers, then add it to the skillet . Use a wooden spoon to fold the rice with the onion-garlic mixture, ensuring each grain gets coated with the flavorful butter.
- Increase heat to high and spread the rice in an even layer. Let it cook undisturbed for 1-2 minutes to develop some crispy bits, then stir and repeat. This creates that signature hibachi texture with slightly toasted grains.
- Drizzle soy sauce around the perimeter of the pan (this helps it caramelize nicely on the hot surface) and immediately toss everything together until the rice turns a uniform golden-brown color.
- Fold in the scrambled eggs and sliced green onions, reserving some green onions for garnish. The residual heat will warm everything through without overcooking.
- Taste and adjust seasonings if needed—I sometimes add an extra splash of soy sauce or a small pat of butter for richness. Serve hot, garnished with the remaining green onions.
Variations & Substitutions
Take this hibachi fried rice recipe and make it your own! The beauty of this dish is its flexibility while still maintaining that authentic Japanese steakhouse experience.
- Protein powerhouse : Add diced chicken, shrimp, steak, or tofu during step 3 with the garlic. Cook until just done before adding the rice to create a complete one-pan meal.
- Veggie boost : I love mixing in frozen peas and carrots, diced bell peppers, or corn kernels for added color and nutrition. Add them with the onions for proper cooking time.
- Rice alternatives : Short on white rice? Brown rice works beautifully for a nuttier flavor and extra fiber, though it may need an extra splash of soy sauce to achieve the same depth.
- Make it gluten-free : Simply swap regular soy sauce for tamari or certified gluten-free soy sauce without sacrificing any of the authentic hibachi flavor.
- Seasoning twists : Add a drizzle of sesame oil at the finish, a dash of white pepper, or a teaspoon of oyster sauce for deeper umami notes that elevate the restaurant experience.
- Spice it up : For those who enjoy heat, incorporate a teaspoon of sriracha or a sprinkle of red pepper flakes when adding the soy sauce to create a gentle warming effect.
Make Ahead Options
This Hibachi Fried Rice is perfect for meal prep enthusiasts looking to streamline their weeknight dinners! You can prepare the rice component up to 3 days in advance by cooking and refrigerating it (which actually improves the texture for stir-frying). The vegetables can also be prepped ahead—dice the sweet onion and mince the garlic, storing them in separate airtight containers in the refrigerator for up to 24 hours before cooking. For maximum convenience, scramble the eggs and store them covered in the fridge for up to 2 days. When ready to serve, simply reheat your prepped components in the skillet following the original cooking method, and you’ll have restaurant-quality Hibachi Fried Rice on the table in just 5 minutes with minimal effort.
Storing and Reheating
Hibachi Fried Rice stores exceptionally well, making it perfect for meal prep or enjoying as leftovers. Store in airtight containers in the refrigerator for up to 4 days. The flavors actually develop nicely overnight as the rice continues to absorb the buttery soy sauce essence.
For freezing, portion the cooled rice into freezer-safe containers or heavy-duty freezer bags, removing as much air as possible. I find that adding a small pat of butter on top before freezing helps maintain moisture when reheating. Frozen hibachi rice maintains quality for up to 2 months.
When reheating refrigerated portions, sprinkle 1-2 teaspoons of water over the rice and microwave in 30-second intervals, stirring between each until heated through. For frozen portions, thaw overnight in the refrigerator first. The best method for reviving the authentic texture is actually a quick stir-fry in a hot pan with a touch of butter, which restores the signature hibachi crispness that can be lost during storage.
Tips for the Best Hibachi Fried Rice
Here are some insider secrets to elevate your homemade hibachi rice to restaurant-quality perfection:
- Use day-old rice : I swear by refrigerated leftover rice for hibachi-style cooking—the drier grains separate beautifully without clumping or becoming mushy.
- High heat is essential : Keep your pan consistently hot throughout cooking to achieve those crispy rice bits and authentic wok hei flavor that defines hibachi fried rice.
- Master the egg technique : Cook eggs just until set but still glossy before removing from the pan—they’ll finish cooking when folded back in with the hot rice.
- Prep before cooking : Having all ingredients chopped and ready beside your stove prevents overcooking, as this dish comes together in minutes once you start.
- Season carefully : Soy sauce contains significant sodium, so add it gradually and taste as you go to achieve perfect umami balance.
- Create texture contrast : Let rice sit undisturbed for 30-second intervals during cooking to develop those prized crispy bottom pieces that hibachi chefs are known for.
Serving Suggestions
This Hibachi Fried Rice is versatile enough to shine as both a main attraction or supporting player on your dinner table. The buttery, savory flavors make it incredibly adaptable to various dining occasions.
For the full Japanese steakhouse experience, serve your Hibachi Fried Rice alongside some protein options like teriyaki chicken, grilled steak, or sautéed shrimp. I love adding a small dish of yum yum sauce on the side—that creamy, slightly sweet condiment you get at hibachi restaurants really complements the savory rice perfectly.
For a complete meal, pair with simple steamed or stir-fried vegetables like broccoli, zucchini, or mushrooms tossed in a light sesame oil. The crisp vegetables provide a wonderful textural contrast to the rice. If you’re hosting a dinner party, consider serving family-style on a large platter with the rice as the base and proteins arranged beautifully on top, garnished with extra green onions and sesame seeds.
When I’m serving this for a casual weeknight dinner, I often just add a fried egg on top with a drizzle of sriracha for a comforting bowl meal. The runny yolk creates an instant rich sauce that takes the Hibachi Fried Rice to another level of satisfaction!
Recipe FAQs
Can I use freshly cooked rice instead? Day-old rice works best for proper texture.
How do I prevent my rice from sticking? Use high heat and break up clumps beforehand.
Can I make this vegetarian? Yes, just add more vegetables instead.
What proteins pair best with hibachi rice? Chicken, steak, shrimp, or tofu work perfectly.
Is this gluten-free? Use tamari instead of regular soy sauce.
How can I make it spicier? Add sriracha or a dash of chili oil.
- 0 Facebook
- 13 Pinterest
- 5 Email
- Copy Link
- 18 shares
Classic Hibachi Fried Rice: Authentic Restaurant Flavor At Home
Ingredients
Instructions
Heat 1 tablespoon of vegetable oil in a large skillet or wok over medium-high heat. Pour in beaten eggs and quickly scramble until just set but still slightly moist, about 30 seconds. Transfer to a plate and set aside.
Return the skillet to medium-high heat and add butter. Once melted and bubbling, add diced sweet onion and sauté for 3-4 minutes until translucent and slightly golden at the edges.
Add minced garlic to the onions and cook for just 30 seconds until fragrant.
Break up any clumps in your cold rice with your fingers, then add it to the skillet. Use a wooden spoon to fold the rice with the onion-garlic mixture, ensuring each grain gets coated with the flavorful butter.
Increase heat to high and spread the rice in an even layer. Let it cook undisturbed for 1-2 minutes to develop some crispy bits, then stir and repeat.
Drizzle soy sauce around the perimeter of the pan and immediately toss everything together until the rice turns a uniform golden-brown color.
Fold in the scrambled eggs and sliced green onions, reserving some green onions for garnish.
Taste and adjust seasonings if needed. Serve hot, garnished with the remaining green onions.
Notes
Use day-old rice for the best texture.
Keep your pan consistently hot during cooking.
Cook eggs just until set before folding back in.
Have all ingredients prepped before cooking.
Add soy sauce gradually to taste.
Allow rice to sit undisturbed to create crispy bottom bits.
Nutrition
| Serving Size | 1 cup |
|---|---|
| Calories | 300 calories |
| Sugar Content | 1g |
| Sodium Content | 600mg |
| Fat Content | 14g |
| Saturated Fat Content | 7g |
| Unsaturated Fat Content | 5g |
| Trans Fat Content | 0g |
| Carbohydrate Content | 40g |
| Fiber Content | 2g |
| Protein Content | 8g |
| Cholesterol Content | 200mg |