- 0 Facebook
- 24 Pinterest
- 76 Email
- Copy Link
- 100 shares
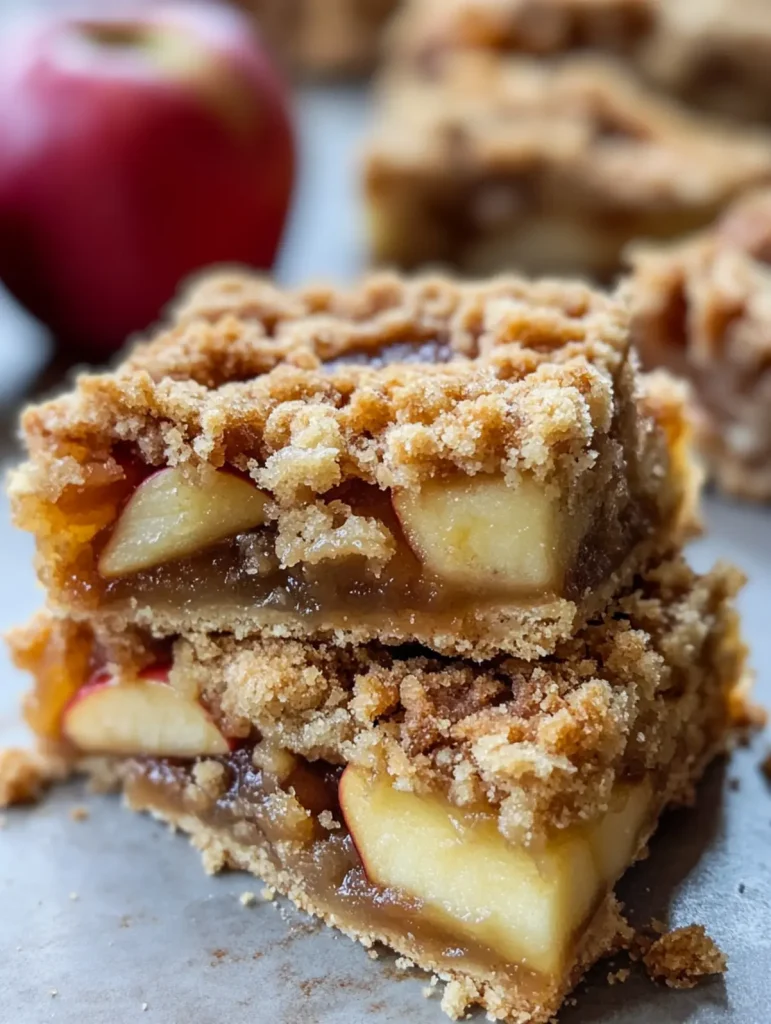
These apple crumb bars transform the cozy warmth of grandma’s kitchen into a perfectly portable treat. Each bite delivers layers of buttery shortbread crust, tender spiced apples, and a golden crumbly topping that creates the ideal balance of textures. Made with fresh sliced apples tossed in cinnamon and a hint of lemon juice, these bars capture the essence of homemade apple pie without all the fuss. The delightful aroma of these baking bars will fill any kitchen with nostalgic comfort—perfect with afternoon coffee or warmed slightly with a scoop of vanilla ice cream melting into the corners.
Why You’ll Love This Recipe
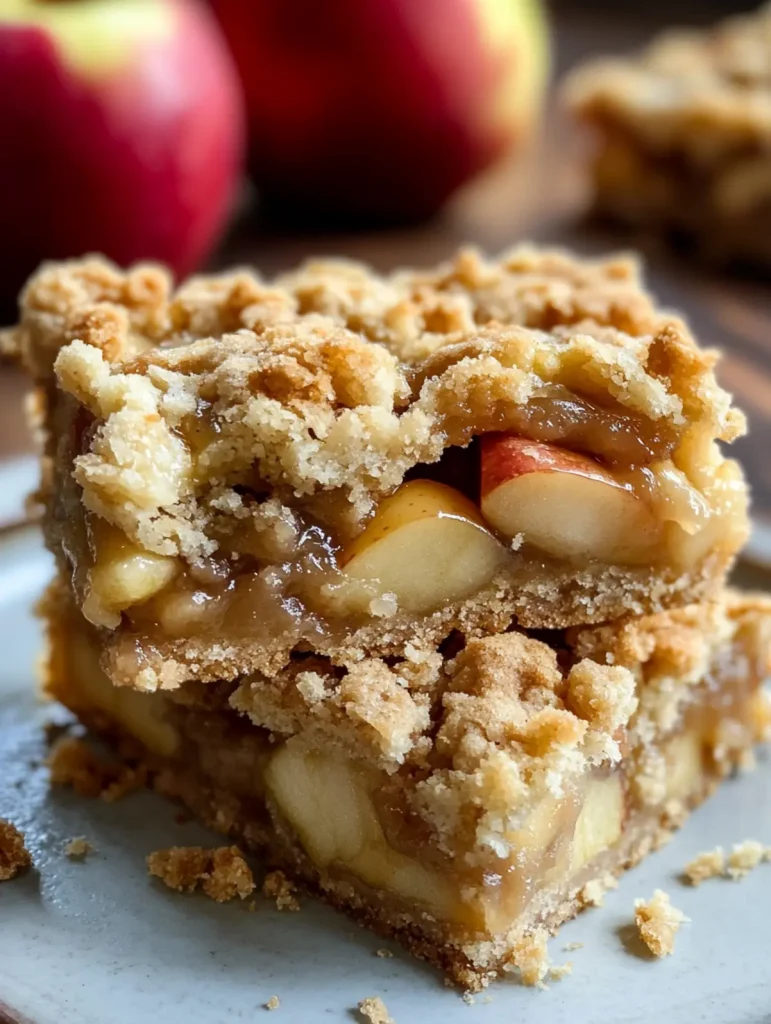
These Grandma’s Apple Crumb Bars deliver that perfect blend of nostalgia and irresistible flavor that keeps everyone coming back for seconds. Here’s why they deserve a permanent spot in your recipe collection:
- Perfect Texture Balance : The contrast between the tender, buttery base, juicy cinnamon-spiced apples, and the crisp crumbly topping creates a multi-dimensional bite every single time.
- Weeknight-Friendly Timeline : Unlike traditional apple pie that demands hours of attention, these bars come together in just 15 minutes of prep time before the oven does the rest of the work.
- Make-Ahead Marvel : These bars actually improve after sitting for a few hours, making them the ideal dessert to prepare in the morning for an evening gathering or potluck.
- Foolproof Formula : The same dough works for both the bottom crust and top crumble, eliminating extra steps while ensuring a consistent flavor throughout the entire dessert.
- Seasonal Adaptability : While traditional apples like Granny Smith or Honeycrisp work beautifully, this forgiving recipe accommodates whatever varieties are freshest or on sale at your local market.
- Temperature Versatility : Enjoy these bars warm from the oven with ice cream melting into the crevices, at room temperature in lunchboxes, or straight from the refrigerator for a firmer, more portable treat.
Ingredient Notes
The secret to truly exceptional Grandma’s Apple Crumb Bars lies in understanding how each ingredient contributes to that perfect homemade taste and texture. Every component plays a crucial role in creating those nostalgic layers of buttery crust, tender apples, and crumbly topping.
- All-purpose flour : Forms the foundation of both the crust and crumble topping. For a more tender result, measure by spooning flour into measuring cups rather than scooping directly from the bag, which can compact it.
- Granulated sugar : Provides sweetness and helps create that golden color as the bars bake. Its fine texture incorporates perfectly into the buttery base, ensuring even distribution of sweetness.
- Baking powder : Adds a subtle lift to the crust and crumble, preventing them from becoming too dense. Even this small amount makes a noticeable difference in the final texture.
- Salt : Enhances all the flavors and balances the sweetness. Don’t skip this ingredient—even in sweet recipes, salt is essential for bringing out depth of flavor.
- Unsalted butter : Creates the rich, tender texture in both the crust and crumble. Using unsalted allows precise control over the saltiness, but if you only have salted butter, simply reduce the added salt by ¼ teaspoon.
- Vanilla extract : Adds aromatic warmth that complements the apples. Pure vanilla extract provides the best flavor, though artificial works in a pinch.
- Apples : The star of the show—choose firm varieties like Granny Smith, Honeycrisp, or Braeburn that hold their shape when baked. A mix of varieties creates a more complex flavor profile.
- Ground cinnamon : Provides that classic apple pie warmth. Freshly ground or recently purchased cinnamon will have the strongest, most aromatic flavor.
- Lemon juice : Brightens the apple filling and prevents browning. Fresh lemon juice tastes significantly better than bottled in this recipe.
- Brown sugar : Adds a caramel-like depth to the apple filling that granulated sugar alone can’t provide. Dark brown sugar offers even more molasses flavor if you prefer a richer taste.
Step-by-Step Instructions
- Preheat the oven to 350°F (175°C) and line a 9×13-inch baking pan with parchment paper, leaving some overhang on the sides for easy removal later. Lightly grease any exposed parts of the pan.
- Combine the flour, granulated sugar, baking powder, and salt in a large mixing bowl. Add the softened butter and vanilla extract, then use a pastry cutter or fork to work the mixture until it resembles coarse crumbs with pea-sized butter pieces throughout.
- Press about half of the crumb mixture firmly into the bottom of the prepared baking pan to form an even crust layer. I find using the bottom of a measuring cup helps create a nice, flat surface.
- Toss the peeled and sliced apples in a separate bowl with the ground cinnamon, lemon juice, and brown sugar until evenly coated. The lemon juice adds brightness while preventing the apples from browning too quickly.
- Arrange the apple mixture in an even layer over the crust, making sure to distribute the slices uniformly for consistent baking.
- Sprinkle the remaining crumb mixture evenly over the apple layer, gently pressing down just slightly. The top should remain somewhat loose and crumbly for that perfect texture contrast.
- Bake for 40-45 minutes, or until the top is golden brown and the apple filling is bubbling at the edges. You’ll know they’re done when your kitchen fills with that irresistible aroma of cinnamon and baked apples.
- Allow the bars to cool in the pan for at least 20 minutes before lifting out using the parchment paper. For cleaner slices, I recommend cooling completely before cutting into bars, though it’s hard to resist serving them slightly warm!
Storage & Freezing
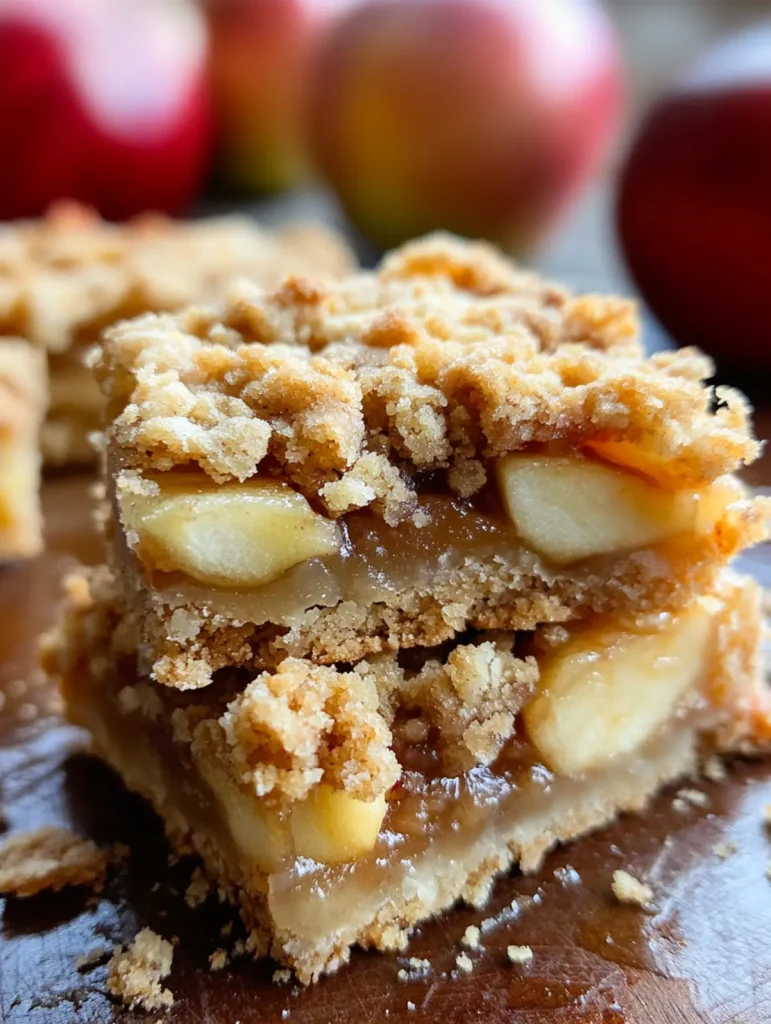
These Grandma’s Apple Crumb Bars store beautifully for both short-term enjoyment and long-term planning. For counter storage, cool the bars completely before transferring to an airtight container. They’ll maintain their perfect texture at room temperature for up to 3 days, though the crumb topping may soften slightly after the first day.
For longer storage, refrigerate the bars in a sealed container for up to a week. I’ve found that layering parchment paper between stacked bars prevents them from sticking together. The refrigerated bars develop an even deeper flavor profile as the apple and cinnamon notes meld together – they’re actually delicious cold straight from the fridge!
These apple crumb bars freeze exceptionally well for up to 3 months. For best results, wrap individual portions in plastic wrap then store in a freezer-safe container or bag. Thaw overnight in the refrigerator or for about 2 hours at room temperature. To restore that fresh-baked texture, warm refrigerated or thawed bars in a 300°F oven for 10 minutes or microwave individual portions for 20-30 seconds – this brings back that wonderful contrast between the tender apple filling and crisp crumb topping.
Serving Suggestions
These Grandma’s Apple Crumb Bars are versatile treats that can be presented in multiple delightful ways, depending on the occasion or your personal preference.
For a simple yet elegant dessert, serve the bars slightly warm and top with a scoop of vanilla ice cream that melts gently into the cinnamon-apple filling. The contrast between the warm, spiced apples and cold ice cream creates an irresistible temperature play. I love drizzling a little caramel sauce over the top for an extra touch of indulgence that complements the brown sugar notes in the bars.
For a cozy breakfast or afternoon coffee break, try serving the bars on their own with a dollop of lightly sweetened whipped cream or Greek yogurt. The tanginess of the yogurt beautifully balances the sweetness of the apple filling. These bars make an excellent companion to hot beverages—the buttery crust pairs wonderfully with coffee, while the cinnamon-spiced apples complement tea or hot apple cider.
When hosting guests, create a dessert board featuring these apple crumb bars cut into smaller pieces alongside other seasonal treats like cheese slices, fresh apple wedges, and candied nuts. This presentation style encourages sampling and conversation, making Grandma’s Apple Crumb Bars the star of your next gathering.
Make Ahead Tips for Grandma’s Apple Crumb Bars
These Grandma’s Apple Crumb Bars are a meal prep champion, perfect for busy home cooks who want homemade desserts without last-minute stress! You can prepare the entire crumb mixture up to 24 hours in advance and store it covered in the refrigerator , then simply press half into your pan when ready to bake. The apple filling can also be prepped and refrigerated for up to 2 days ahead (the lemon juice prevents browning beautifully). For ultimate convenience, assemble the complete unbaked bars, cover tightly with plastic wrap, and refrigerate overnight before baking—just add an extra 5-10 minutes to the baking time since they’ll start cold. The bars actually taste even better after sitting for a few hours, making them ideal for entertaining!
Expert Tips
These insider tricks will help you create the ultimate batch of Grandma’s Apple Crumb Bars:
- Keep butter cold : For the perfect crumbly topping, refrigerate the reserved crumb mixture while preparing the apple layer. Cold butter creates those distinctive, crispy pockets in the finished bars.
- Choose the right apples : I’ve found firm varieties like Granny Smith, Honeycrisp, or Jonagold work best. They hold their shape during baking and provide that perfect balance of sweetness and tartness.
- Slice uniformly : Cut your apples into even, thin slices (about ¼ inch thick) for consistent baking. If some slices are too thick, they’ll remain crunchy while others turn mushy.
- Perfect your crust pack : When pressing the bottom layer, use firm pressure around the edges to prevent crumbling when serving. The center can be slightly less compacted for a tender bite.
- Test for doneness : Beyond golden color, look for bubbling apple juices at the edges. If the top browns too quickly but the filling isn’t bubbling yet, loosely cover with foil for the remaining bake time.
- Patience pays off : While warm bars are heavenly, allowing them to cool completely (about 2 hours) before cutting delivers cleaner slices and lets the flavors fully develop.
Variations & Substitutions
Feel free to make these apple crumb bars your own! The classic recipe is perfection, but sometimes you need to adapt based on what’s in your pantry or your personal preferences.
Flour flexibility: You can substitute up to half of the all-purpose flour with whole wheat flour for a nuttier flavor and added nutrition. For a gluten-free version, use a 1:1 gluten-free baking flour blend – I find the ones with xanthan gum already included work best for maintaining the proper texture.
Sugar swaps: Replace the granulated sugar with coconut sugar for a deeper caramel flavor, or use light brown sugar instead for added moisture and richness. If you prefer less sweetness, you can reduce the granulated sugar to ¾ cup without compromising structure.
Butter alternatives: For dairy-free bars, substitute the butter with solid coconut oil (same amount) or a plant-based butter stick. The texture will be slightly different but still delicious – just make sure whatever you use is solid at room temperature.
Apple varieties: While any baking apple works well, mixing apple types creates complex flavor. Try combining tart Granny Smith with sweeter Honeycrisp or Gala. In fall, seek out heirloom varieties like Winesap or Northern Spy for exceptional flavor.
Spice it up: Enhance the classic cinnamon flavor by adding ½ teaspoon of nutmeg, ¼ teaspoon of cardamom, or a pinch of cloves to the apple mixture. For a subtle warmth, add ½ teaspoon of ground ginger to complement the cinnamon.
Fruity twists: Add ½ cup of fresh cranberries or blueberries to the apple mixture for beautiful color and tangy flavor bursts. For a delightful fall variation, substitute 1 cup of the apples with 1 cup of diced pears for a sophisticated flavor combination.
Recipe FAQs
What type of apples work best for these bars? Granny Smith, Honeycrisp, or Braeburn hold shape while baking.
Can I use salted butter instead of unsalted? Yes, just reduce added salt by 1/4 teaspoon.
How do I know when the bars are done baking? Golden top with bubbling apple filling at edges.
Can I make these bars gluten-free? Use a 1:1 gluten-free flour blend instead.
Why add lemon juice to the apples? Prevents browning and adds brightness to flavor.
Should I serve these bars warm or cold? Delicious both ways—warm with ice cream, cold for cleaner slices.
- 0 Facebook
- 24 Pinterest
- 76 Email
- Copy Link
- 100 shares
Irresistible Grandma's Apple Crumb Bars: Buttery Homemade Bliss
Ingredients
Instructions
Preheat the oven to 350°F (175°C) and line a 9×13-inch baking pan with parchment paper, leaving some overhang on the sides for easy removal later. Lightly grease any exposed parts of the pan.
Combine the flour, granulated sugar, baking powder, and salt in a large mixing bowl. Add the softened butter and vanilla extract, then use a pastry cutter or fork to work the mixture until it resembles coarse crumbs with pea-sized butter pieces throughout.
Press about half of the crumb mixture firmly into the bottom of the prepared baking pan to form an even crust layer. I find using the bottom of a measuring cup helps create a nice, flat surface.
Toss the peeled and sliced apples in a separate bowl with the ground cinnamon, lemon juice, and brown sugar until evenly coated. The lemon juice adds brightness while preventing the apples from browning too quickly.
Arrange the apple mixture in an even layer over the crust, making sure to distribute the slices uniformly for consistent baking.
Sprinkle the remaining crumb mixture evenly over the apple layer, gently pressing down just slightly. The top should remain somewhat loose and crumbly for that perfect texture contrast.
Bake for 40-45 minutes, or until the top is golden brown and the apple filling is bubbling at the edges. You’ll know they’re done when your kitchen fills with that irresistible aroma of cinnamon and baked apples.
Allow the bars to cool in the pan for at least 20 minutes before lifting out using the parchment paper. For cleaner slices, I recommend cooling completely before cutting into bars, though it’s hard to resist serving them slightly warm!
Notes
Keep butter cold: For the perfect crumbly topping, refrigerate the reserved crumb mixture while preparing the apple layer.
Choose the right apples: Firm varieties like Granny Smith, Honeycrisp, or Jonagold work best.
Slice uniformly: Cut your apples into even, thin slices (about ¼ inch thick) for consistent baking.
Perfect your crust pack: Use firm pressure around the edges when pressing the bottom layer.
Test for doneness: Look for bubbling apple juices at the edges and golden color.
Patience pays off: Allowing them to cool completely before cutting delivers cleaner slices.
Nutrition
| Serving Size | 1 bar |
|---|---|
| Calories | 240 calories |
| Sugar Content | 15g |
| Sodium Content | 150mg |
| Fat Content | 10g |
| Saturated Fat Content | 6g |
| Unsaturated Fat Content | 3g |
| Trans Fat Content | 0g |
| Carbohydrate Content | 35g |
| Fiber Content | 2g |
| Protein Content | 2g |
| Cholesterol Content | 30mg |