- 0 Facebook
- 15 Pinterest
- 1 Email
- Copy Link
- 16 shares
I still remember the first time my grandmother showed me how to make these Garlic Toast Pizzas. It was during a sleepover at her house when I was about ten years old. With a hungry grandchild and limited ingredients in her pantry, she transformed simple garlic bread into the most magnificent mini pizzas I’d ever tasted. That evening started my lifelong love affair with this delightfully simple recipe.
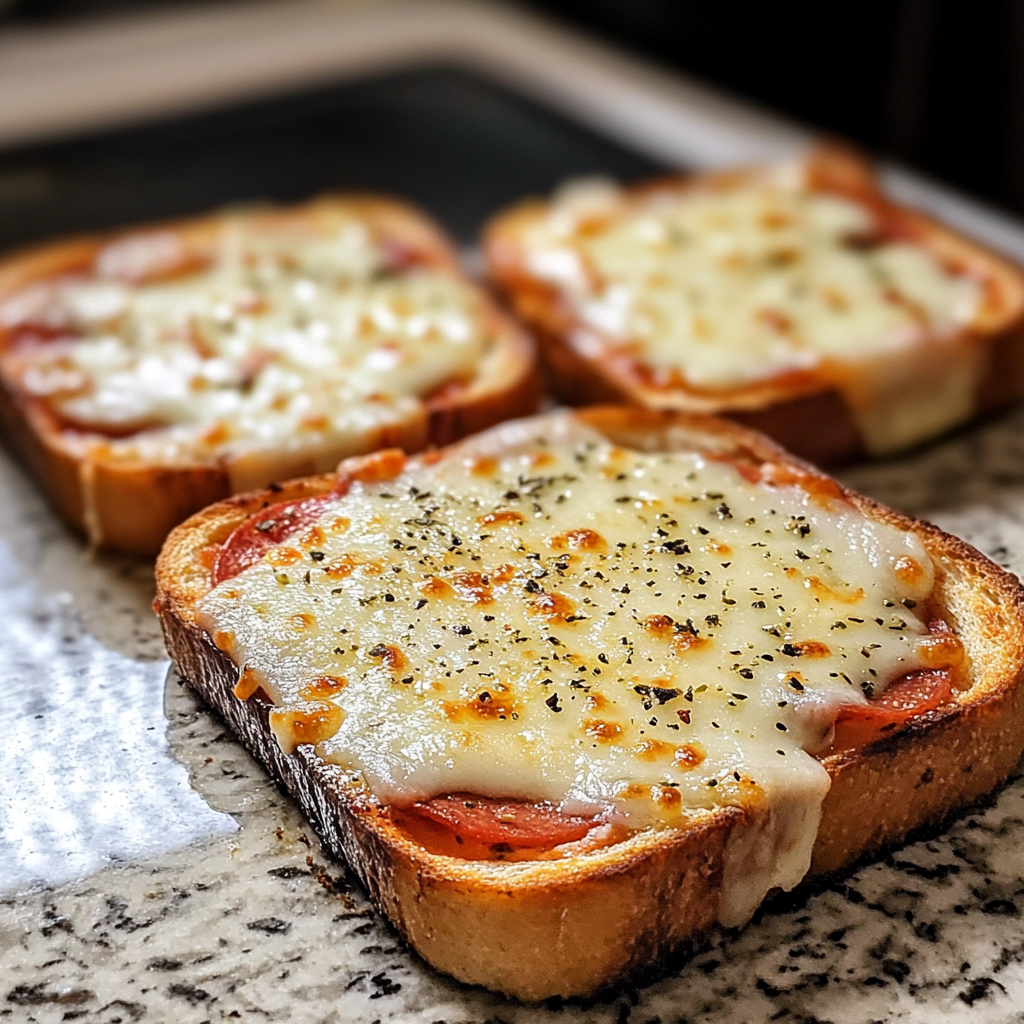
The magic of these Garlic Toast Pizzas lies in their perfect balance of flavors and textures. The buttery, crisp garlic toast creates an irresistible foundation, while the tangy pizza sauce and gooey mozzarella bring that authentic pizzeria experience right to your kitchen. With each bite, you get the perfect harmony of garlic-infused crunch and stretchy cheese that simply melts in your mouth.
I encourage you to try these Garlic Toast Pizzas whenever you need a quick meal that doesn’t sacrifice flavor. Whether you’re feeding hungry kids after school or looking for an easy dinner after a long day, this recipe has been my reliable companion for years. The beauty is in its simplicity – just a few minutes of prep time, and you’ll be rewarded with a dish that brings smiles all around the table.
Why You’ll Love This Recipe
I’ve found that Garlic Toast Pizzas aren’t just convenient – they’re a culinary shortcut that doesn’t taste like one. Here’s why I think you’ll fall in love with them too:
- Incredibly Quick: These mini pizzas come together in less than 15 minutes from start to finish. I’ve made them countless times when hunger strikes and patience is thin!
- Foolproof Method: Even on my most distracted cooking days, this recipe delivers consistent results. The pre-seasoned garlic toast eliminates several prep steps.
- Versatile Canvas: I’ve discovered that garlic toast creates the perfect foundation for countless topping combinations. It’s sturdy enough to hold generous toppings yet cooks to a perfect crisp.
- Kid and Adult Approved: I’ve served these at everything from children’s birthday parties to casual dinner gatherings, and they disappear within minutes every single time.
- Budget-Friendly: When my grocery budget is tight, this recipe has been my saving grace. It transforms affordable ingredients into something that tastes decidedly gourmet.
- No Special Equipment: Unlike traditional pizza, I don’t need to fuss with pizza stones, special pans, or dough skills. Just a basic baking sheet does the trick!
Ingredients for This Recipe
- Garlic Texas Toast: The foundation of this recipe. I always select bread with real butter and fresh garlic for that authentic flavor. The thick-cut style provides the perfect balance of crisp exterior and soft interior.
- Pizza Sauce: The tangy backbone that pulls everything together. I prefer a sauce with basil and oregano notes, avoiding overly sweet varieties that can overwhelm the garlic flavors.
- Mozzarella Cheese: I find that a quality whole-milk mozzarella melts beautifully and creates that irresistible cheese pull. Pre-shredded works well, but freshly grated elevates the dish considerably.
- Pepperoni Slices: These add a savory depth and slight spice. I particularly love how the edges crisp up slightly during baking, creating textural contrast in each bite.
- Parmesan Cheese: This adds a sharp, salty dimension that complements the milder mozzarella. I always recommend grating it fresh rather than using the pre-packaged variety for superior melt and flavor.
- Italian Seasoning: I sprinkle this on top to enhance the aromatic profile. The blend of oregano, basil, and thyme creates that authentic Italian pizzeria fragrance that fills the kitchen.
- Fresh Basil & Red Pepper Flakes: These optional garnishes add brightness and heat, respectively. I find that adding fresh basil after baking preserves its vibrant flavor and beautiful green color.
How to Make This Recipe
- Prepare the Oven : I always start by preheating my oven to 425°F (220°C). This high temperature ensures the perfect balance of crispy toast and melted cheese.
- Arrange the Texas Toast: I lay the frozen garlic toast slices on a baking sheet, buttered side up. Leaving a small space between each piece allows for even heat circulation and maximum crispiness.
- Add the Pizza Sauce: Carefully spread about 2-3 tablespoons of pizza sauce on each piece of toast. I’ve learned to leave a small border around the edges to create a “crust” that stays delightfully crisp.
- Sprinkle the Cheese Layer: I generously distribute the mozzarella cheese over the sauce, ensuring even coverage. The cheese acts as a delicious “glue” for the additional toppings.
- Add Toppings: I arrange pepperoni slices (or other preferred toppings) over the cheese. This is where I let my creativity shine, sometimes adding vegetables or different meats based on what’s in my refrigerator .
- Finish with Seasonings: Before baking, I sprinkle each mini pizza with Parmesan cheese and a light dusting of Italian seasoning, which enhances the aroma and adds depth of flavor.
- Bake to Perfection: I place the baking sheet in the preheated oven for 8-10 minutes, watching for that moment when the cheese becomes bubbly and golden at the edges.
- Garnish and Serve: After removing from the oven , I add optional fresh basil leaves or red pepper flakes. I find that serving immediately provides the best texture contrast between the crisp base and molten cheese.
Expert Cooking Tips
- Perfect Your Base: I always bake the garlic toast for 2 minutes before adding toppings. This creates a sturdier foundation that prevents sogginess from the sauce.
- Cheese Strategy: I’ve found that a combination of pre-shredded mozzarella with a handful of freshly grated cheese on top creates the perfect melt while adding visual appeal.
- Control Moisture: If using fresh vegetables like tomatoes or mushrooms, I always pre-cook them briefly to release excess moisture. This prevents the dreaded soggy pizza syndrome!
- Temperature Matters: I never skip preheating the oven completely. A truly hot oven is the secret to achieving that perfect balance of crispy bottom and melted toppings.
- Customize Wisely: When adding extra toppings, I limit them to 2-3 per pizza. Overloading leads to undercooked toast and toppings falling off – a lesson I learned through many messy attempts!
Proper Storage
- Refrigerator Storage: I place completely cooled leftovers in an airtight container with parchment between layers. They maintain quality for up to 2 days in the refrigerator .
- Freezer Method: For make-ahead convenience, I freeze fully assembled but unbaked pizzas until solid, then transfer to freezer bags. They stay fresh for about 1 month.
- Reheating Technique: I never microwave leftovers! Instead, I use a 350°F oven for 5-7 minutes, which restores the crispy texture that makes these pizzas special.
- Room Temperature Warning: I never leave these pizzas at room temperature for more than 2 hours. The cheese and toppings can quickly become unsafe at warm temperatures.
Variations and Substitutions
- Gluten-Free Option: I’ve successfully made this recipe with gluten-free garlic bread. The key is selecting a brand that doesn’t become too crumbly when baked. Canyon Bakehouse works wonderfully.
- Vegetarian Delight: One of my favorite variations substitutes the pepperoni with a colorful mix of bell peppers, red onions, and black olives. The vibrant vegetables create a beautiful contrast against the cheese.
- BBQ Chicken Twist: I sometimes swap traditional pizza sauce for BBQ sauce and top with diced rotisserie chicken, red onions, and cilantro. The sweet and smoky flavors transform this into a completely different experience.
- Breakfast Pizza: On lazy weekend mornings, I’ve created breakfast versions with scrambled eggs, crumbled bacon, and cheddar cheese. Adding a drizzle of maple syrup creates an irresistible sweet-savory combination.
- Dairy-Free Adaptation: When cooking for my lactose-intolerant friend, I use dairy-free butter on the bread and top with a quality plant-based mozzarella. While the melt is slightly different, the flavor remains delicious.
What Goes with This Recipe
- Garden Salad: I pair these rich pizzas with a crisp garden salad dressed simply with vinaigrette. The fresh, acidic notes balance the savory flavors and add nutritional value to the meal.
- Roasted Vegetable Soup: During colder months, I serve alongside a bowl of roasted tomato or vegetable soup. The combination creates a comforting and complete meal that satisfies deeply.
- Antipasto Platter: For casual entertaining, I arrange an antipasto plate with marinated vegetables, olives, and cured meats. This Italian-inspired pairing creates a grazing-style dinner that impresses guests.
- Sweet Potato Fries: The slight sweetness of these fries complements the savory garlic toast perfectly. I toss them with parmesan and herbs to enhance the Italian flavor profile.
- Fruit Salad: When serving these to children, I balance the meal with a colorful fruit salad. The fresh, natural sweetness provides a pleasant contrast to the savory, cheesy pizzas.
FAQ
Can I make these ahead of time? Assemble up to 24 hours ahead and refrigerate covered. Bake directly from the refrigerator , adding 1-2 minutes to cooking time.
Why is my garlic toast soggy? Use less sauce or pre-toast the bread for 2 minutes before adding toppings.
Can I use regular bread instead? Yes, brush with garlic butter first. The texture will be different but still delicious.
How do I know when they’re done? Look for bubbly, golden cheese and crispy edges. The bottom should be firm when lifted with a spatula.
Can I make these in an air fryer? Absolutely! Cook at 375°F for about 5 minutes, checking frequently to prevent burning.
- 0 Facebook
- 15 Pinterest
- 1 Email
- Copy Link
- 16 shares
Garlic Toast Pizzas
Ingredients
Instructions
Preheat oven to 425°F (220°C).
Place garlic toast on baking sheet, buttered side up.
Spread 2-3 tablespoons pizza sauce on each slice.
Sprinkle with mozzarella cheese.
Add pepperoni or desired toppings.
Sprinkle with Parmesan and Italian seasoning.
Bake 8-10 minutes until cheese is bubbly and golden.
Garnish with optional fresh basil or red pepper flakes.
Serve immediately.