- 0 Facebook
- 125 Pinterest
- 5 Email
- Copy Link
- 130 shares
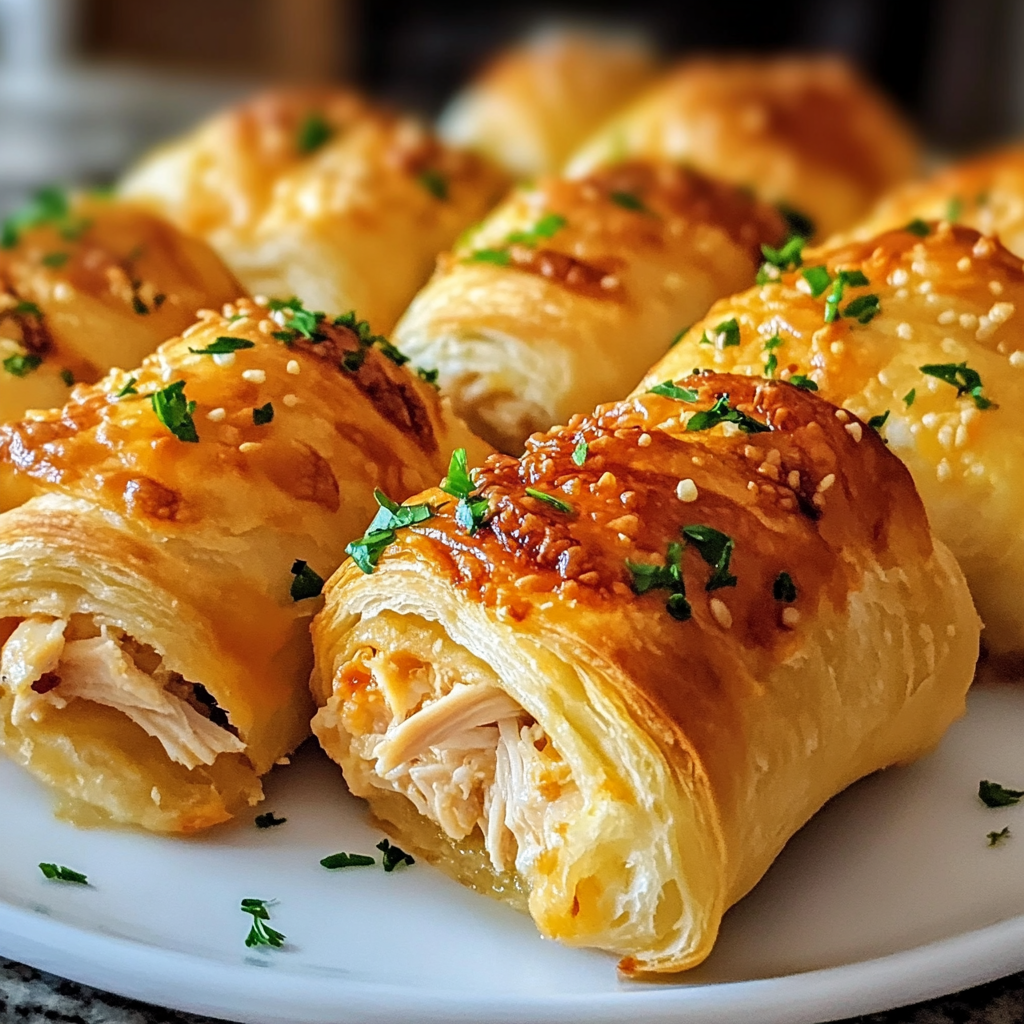
I still remember the first time I discovered these Easy Cheesy Chicken Crescent Rolls – it was during one of those chaotic weeknight dinners when I had a hungry family to feed and precious little time to prepare something delicious. Rummaging through my refrigerator , I spotted a can of crescent rolls and some leftover rotisserie chicken from the night before. What started as a desperate kitchen experiment quickly became a family favorite that I’ve perfected over the years.
This recipe holds a special place in my heart because it effortlessly blends ease and elegance. Whether you’re counting calories or looking to impress guests with minimal effort, these crescent rolls offer a delectable and time-saving solution. The combination of tender chicken, creamy cheeses, and flaky pastry creates a comforting dish that tastes like you spent hours in the kitchen – when in reality, you’ll be enjoying these golden pockets of goodness in less than 30 minutes!
Why You’ll Love This Recipe
I’ve found that these Easy Cheesy Chicken Crescent Rolls are not just a breeze to whip up but also delightfully delicious with their savory chicken filling, melty cheese, and buttery, flaky exterior. Here’s why they’ve become a staple in my kitchen:
- Simplicity at Its Best: Using refrigerated crescent rolls as the base saves incredible time while still providing that homemade taste and golden, flaky texture.
- Versatile Crowd-Pleaser: I’ve served these at everything from casual family dinners to elegant appetizer parties, and they disappear within minutes every single time.
- Perfect Balance of Flavors: The combination of sharp cheddar and creamy cream cheese creates a velvety texture that coats the chicken perfectly, while the garlic and onion powders add depth without overwhelming.
- Budget-Friendly Comfort: I often use leftover rotisserie chicken, making this an economical way to transform yesterday’s dinner into something completely new and exciting.
- Customizable Creation: The basic recipe is foolproof, but I love how easily it can be adapted with different cheeses, herbs, or add-ins depending on what I have on hand.
Ingredients for This Recipe
I believe the magic of these Cheesy Chicken Crescent Rolls lies in the quality and combination of these simple ingredients:
- Refrigerated Crescent Rolls: The flaky, buttery backbone of this recipe. I prefer name brand for consistent results, as they bake up with perfect layers and golden color.
- Cooked Chicken: I typically use rotisserie chicken for its convenience and flavor depth. The tender, pre-seasoned meat shreds beautifully and saves significant prep time.
- Shredded Cheddar Cheese: The sharp, tangy flavor cuts through the richness. I recommend freshly shredded rather than pre-packaged for superior melting qualities.
- Cream Cheese: The creamy cornerstone that binds everything together. I always bring it to room temperature first for smooth incorporation with the other ingredients.
- Garlic Powder: Just a touch provides aromatic depth without overpowering. I find it distributes more evenly than fresh garlic in this particular filling.
- Onion Powder: Adds subtle savory notes without the texture of raw onion. I appreciate how it enhances without dominating the chicken’s flavor.
- Salt and Pepper: These basic seasonings are crucial for highlighting the other flavors. I adjust based on how seasoned my chicken already is.
- Fresh Parsley: The optional bright finish that adds color and freshness. I almost always include it as the herbal notes elevate the rich filling beautifully.
How to Make This Recipe
I’ve refined my process for these Cheesy Chicken Crescent Rolls over countless meals, and I’m excited to share my step-by-step approach with you:
- Preheat and Prepare: I start by preheating my oven to 375°F (190°C) and lining a baking sheet with parchment paper for easy cleanup. This simple step prevents sticking and ensures even browning.
- Create the Filling: In a medium bowl, I combine the shredded chicken, softened cream cheese, shredded cheddar, garlic powder, onion powder, salt, and pepper. I mix gently but thoroughly until everything is well incorporated. The filling should be creamy and cohesive, but still have texture from the chicken.
- Prepare the Crescents: I unroll the crescent dough carefully and separate along the perforated lines to create triangles. If the dough feels too warm and sticky, I pop it in the refrigerator for 5 minutes before working with it.
- Fill and Shape: Working with one triangle at a time, I place about 2 tablespoons of the chicken mixture on the wide end of each triangle. The exact amount depends on the size of your crescents – you want them full but not overflowing. Then I carefully roll from the wide end toward the pointed tip, gently tucking in any filling that tries to escape.
- Arrange for Baking: I place each roll on the prepared baking sheet, making sure to leave about an inch between them. I slightly curve the ends inward to create the classic crescent shape, which not only looks beautiful but helps keep the filling secure.
- Bake to Golden Perfection: I bake for 11-13 minutes, watching carefully as oven temperatures can vary. I’m looking for that moment when they transform into perfectly golden-brown crescents with just a hint of the cheese bubbling at the edges.
- Rest and Garnish: I let them cool for just 2-3 minutes before serving. This brief rest helps the filling set slightly so it doesn’t all run out with the first bite. Just before serving, I sprinkle with fresh parsley for a pop of color and fresh flavor.
Expert Cooking Tips
I’ve learned a few tricks over the years that make a significant difference:
- Keep It Cool: I chill the filling for 10 minutes before assembling. Cold filling is easier to control and less likely to leak during baking.
- Seal with Purpose: I pinch and fold the edges of the dough slightly when rolling to create a better seal. This extra five seconds prevents filling leakage.
- Egg Wash Magic: For special occasions, I brush the tops with beaten egg before baking. This creates a glossy, professional-looking finish that always impresses.
- Filling Distribution: I use a small cookie scoop for the filling, ensuring each crescent gets an equal amount for consistent baking and serving.
- Rest Before Cutting: If serving as appetizers, I let them cool for 5 minutes before slicing in half. This prevents the filling from spilling out too quickly.
Proper Storage
- Refrigeration: I store leftovers in an airtight container for up to 3 days. The texture remains remarkably good, especially compared to other pastry-based dishes.
- Freezing Unbaked: I often prepare extra and freeze them unbaked on a tray before transferring to a freezer bag. This gives me ready-to-bake meals for up to 1 month.
- Freezing Baked: Completely cooled baked crescents can be frozen for up to 2 weeks. I wrap individually in foil before placing in a freezer bag for best results.
- Reheating: I reheat refrigerated rolls in a 350°F oven for 7-10 minutes, which revives the flaky texture better than a microwave ever could.
Variations and Substitutions
Over time, I’ve experimented with countless variations to keep this recipe exciting:
- Buffalo Chicken Version: I add 2 tablespoons of buffalo sauce to the filling and serve with blue cheese dressing for dipping. The spicy kick transforms these into perfect game day treats.
- Mediterranean Twist: I incorporate chopped spinach, feta instead of cheddar, and a pinch of dried oregano. This variation transports the flavor profile to entirely new territory.
- Dairy-Free Option: For lactose-intolerant guests, I substitute the cream cheese with dairy-free cream cheese and use a plant-based shredded cheese alternative. While slightly different, they’re still delicious.
- Gluten-Free Adaptation: When needed, I use gluten-free crescent rolls, which are increasingly available in stores. The filling remains the same, though I find they sometimes need an extra minute of baking time.
- Low-Carb Version: For those watching their carbs, I’ve wrapped the filling in large, blanched cabbage leaves instead of crescents. It’s a completely different experience but satisfies the craving for the filling.
What Goes with This Recipe
I’ve paired these crescents with numerous sides over the years. Here are my favorites:
- Roasted Vegetable Medley: The caramelized sweetness of roasted bell peppers, zucchini, and carrots balances the richness of the crescents perfectly.
- Fresh Garden Salad: A simple green salad with vinaigrette cuts through the richness and adds refreshing contrast to each bite.
- Tomato Soup: On chilly evenings, I serve these alongside a bowl of creamy tomato soup for the ultimate comfort food pairing.
- Steamed Broccoli: The slight bitterness and crisp texture of broccoli complements the creamy, tender crescents in both flavor and mouthfeel.
- Cranberry Sauce: During the holidays, a spoonful of tangy cranberry sauce adds festive flair and bright flavor that elevates these to special occasion status.
FAQ
Can I make these ahead of time? I often prepare the filling up to 2 days ahead and assemble just before baking for the freshest results.
How do I prevent soggy bottoms? I always use parchment paper and let the filled crescents rest for 5 minutes before baking to allow the dough to firm up slightly.
Can I use puff pastry instead of crescent rolls? Absolutely! I’ve done this for fancier occasions, cutting the puff pastry into triangles and proceeding as directed.
Is it possible to make these in an air fryer? Yes! I cook them at 350°F for about 8 minutes, but check early as air fryers vary significantly.
How can I make the filling more flavorful? I sometimes add a tablespoon of ranch seasoning or Italian herbs to the mixture for an extra flavor boost.
- 0 Facebook
- 125 Pinterest
- 5 Email
- Copy Link
- 130 shares
Easy Cheesy Chicken Crescent Rolls
Ingredients
Instructions
Preheat oven to 375°F. Line baking sheet with parchment paper.
Mix chicken, cream cheese, cheddar, garlic powder, onion powder, salt, and pepper in a bowl.
Separate crescent dough into triangles.
Place 2 tablespoons of filling on wide end of each triangle.
Roll from wide end to pointed tip, tucking in sides.
Place on baking sheet, curve ends to form crescent shape.
Bake 11-13 minutes until golden brown.
Let cool 2-3 minutes, sprinkle with parsley, and serve.