- 0 Facebook
- 40 Pinterest
- 0 Email
- Copy Link
- 40 shares
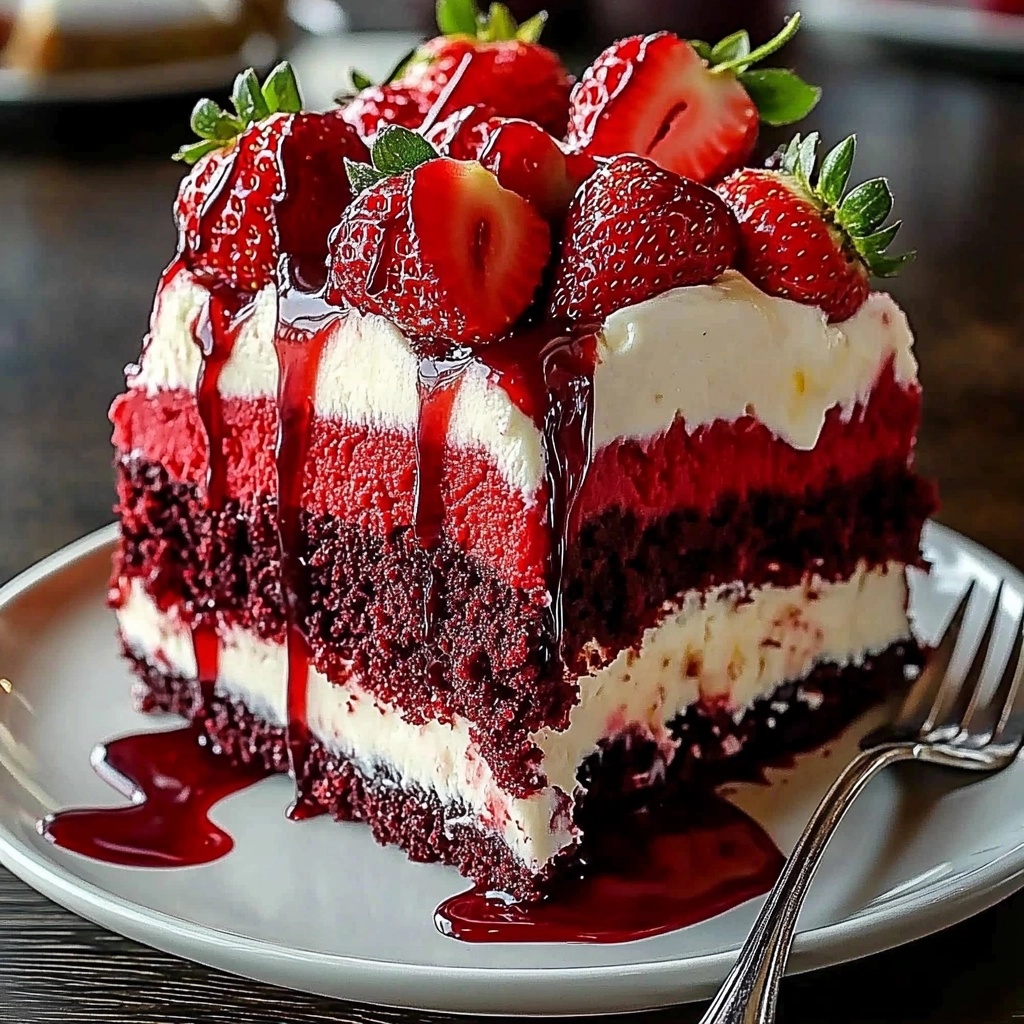
The first time I created this red velvet strawberry cheesecake recipe was for my sister’s birthday five years ago. I remember standing in my kitchen, nervously watching the oven as the cheesecake baked, hoping the layers would set perfectly. When I finally unveiled it at the party, the gasps of delight made all the effort worthwhile. The striking contrast between the deep red crust, creamy white filling, and vibrant pink topping created a dessert that was as beautiful as it was delicious.
What makes this strawberry red velvet cheesecake recipe special is how accessible it is despite its impressive appearance. You don’t need professional baking equipment or hard-to-find ingredients – just some patience and attention to detail. Whether you’re celebrating Valentine’s Day, hosting a holiday gathering, or simply craving something indulgent on a Sunday afternoon, this triple-layer delight promises to make any occasion memorable.
Why You’ll Love This Recipe
I’ve created dozens of cheesecake variations over the years, but this red velvet cheesecake recipe remains one of my absolute favorites for several reasons:
- I love how the tanginess of the cream cheese perfectly balances the subtle cocoa flavor in the red velvet crust, creating a harmony of flavors that isn’t overly sweet.
- I’ve designed this recipe to be made in stages, so you can spread the preparation over two days if needed – perfect for busy schedules.
- I find that the combination of textures – from the slightly crunchy crust to the silky filling and juicy strawberry topping – creates an exciting sensory experience with every bite.
- I appreciate how this dessert looks professionally made but uses simple techniques that even novice bakers can master.
- I’ve tested this recipe countless times to ensure it’s foolproof, with clear indicators for doneness that take the guesswork out of baking.
Ingredients Notes
For the Red Velvet Crust:
Crushed red velvet cake (or red velvet Oreo cookies): I prefer using leftover homemade red velvet cake for its authentic flavor, but red velvet Oreos create a deliciously convenient alternative with that signature cocoa-vanilla balance.
Melted butter: I always use unsalted butter to control the salt content. The butter must be completely melted but not hot when mixed with the crumbs to achieve the perfect binding consistency.
For the Cheesecake Filling:
Cream cheese: I insist on full-fat cream cheese at room temperature for the smoothest texture. Cold cream cheese creates lumps that never fully incorporate, no matter how long you mix.
Granulated sugar: I find that regular granulated sugar dissolves perfectly into the cream cheese, creating a silky texture without the grittiness that can come from alternatives like coconut sugar.
Eggs: I always use large eggs at room temperature, which incorporate more evenly into the batter and create a more consistent texture throughout the cheesecake.
Vanilla extract: I recommend pure vanilla extract rather than imitation for its complex flavor profile that enhances both the cream cheese and the subtle chocolate notes from the crust.
Sour cream: I add this for its tangy flavor and moisture. The slight acidity helps balance the sweetness while contributing to that classic cheesecake texture we all love.
Heavy cream: I incorporate this to create an incredibly silky, mousse-like texture that melts in your mouth. The fat content is crucial for achieving that luxurious mouthfeel.
Cornstarch: I use this as a stabilizer that helps prevent cracks by binding with the eggs and providing structure without making the cheesecake dense or dry.
For the Strawberry Topping:
Fresh strawberries: I select berries that are bright red throughout with no white shoulders for the most intense flavor. In-season strawberries will always create a more flavorful topping.
Sugar: I use just enough to draw out the natural juices from the strawberries without overwhelming their fresh flavor. The amount can be adjusted based on the natural sweetness of your berries.
Lemon juice: I add this for brightness and to enhance the natural strawberry flavor. The acidity also helps activate the cornstarch and creates the perfect consistency.
Cornstarch mixture: I prefer this thickening method over gelatin for its simplicity. The cornstarch creates a glossy finish while allowing the topping to maintain some fluidity rather than setting too firmly.
How to Make This Red Velvet Strawberry Cheesecake Recipe
Preparing the Red Velvet Crust:
- Preheat your oven to 325°F (165°C) and prepare a 9-inch springform pan by lining the bottom with parchment paper and lightly greasing the sides.
- In a medium bowl, combine the crushed red velvet cake or cookies with the melted butter. The mixture should resemble wet sand and hold together when pressed between your fingers. If it seems too dry, add an additional tablespoon of melted butter.
- Press the mixture firmly into the bottom of the prepared pan, creating an even layer with a flat surface. Use the bottom of a measuring cup to compact the crust, paying special attention to the edges where the crust meets the pan.
- Bake the crust for 10 minutes until it’s just set but not browned. Remove from the oven and allow to cool completely while you prepare the filling. The crust will firm up as it cools.
Creating the Cheesecake Filling:
- Reduce the oven temperature to 300°F (150°C). Fill a large baking dish halfway with hot water and place it on the lower rack of your oven . This water bath will create a gentle, humid environment for your cheesecake.
- In a large bowl, beat the softened cream cheese on medium-low speed until completely smooth with no lumps, about 2-3 minutes. Scrape down the sides and bottom of the bowl frequently to ensure even mixing.
- Gradually add the sugar while continuing to beat on medium-low. The mixture should become lighter in both color and texture. Avoid beating on high speed, which incorporates too much air and can cause cracks.
- Add the eggs one at a time, mixing on low speed just until each is incorporated. You should see the batter become glossy and slightly thicker with each addition. Overbeating at this stage can cause the cheesecake to rise too much and then fall.
- Mix in the vanilla extract, then add the sour cream and heavy cream, blending until just combined. The batter should be silky smooth and have a pourable consistency.
- Sift the cornstarch over the batter and fold it in gently with a rubber spatula until no white streaks remain. The batter should now have a slight sheen to it.
- Pour the filling over the cooled crust, smoothing the top with an offset spatula. Tap the pan gently on the counter a few times to release any trapped air bubbles, which can cause cracks during baking.
- Place the cheesecake on the middle rack of your oven , directly above the water bath. Bake for 60-70 minutes, or until the edges are set but the center still has a slight jiggle when the pan is gently shaken.
- Turn off the oven, crack the door open about an inch, and let the cheesecake cool in the oven for 1 hour. This gradual cooling helps prevent the surface from cracking.
- Remove the cheesecake from the oven and run a thin knife around the edge to loosen it from the pan. Let it cool completely at room temperature before refrigerating for at least 4 hours, preferably overnight.
Creating the Strawberry Topping:
- In a medium saucepan, combine the sliced strawberries, sugar, and lemon juice. Let sit for about 15 minutes until the berries release some of their juices.
- Place the saucepan over medium heat and bring to a simmer, stirring occasionally. The strawberries will soften and release more juice, creating a vibrant red mixture with a sweet aroma.
- Once simmering, add the cornstarch mixture while stirring constantly. Continue to cook for 2-3 minutes until the mixture thickens and becomes glossy. You’ll notice it coating the back of a spoon when it’s ready.
- Remove from heat and allow to cool completely to room temperature. The mixture will continue to thicken as it cools, transforming from a thin sauce to a spoonable topping.
- Spread the cooled strawberry topping over the chilled cheesecake, or serve it on the side if you prefer to showcase the pristine white surface of your cheesecake.
- Return the cheesecake to the refrigerator for at least 30 minutes to allow the topping to set before serving. This creates a beautiful layered effect when sliced.
Expert Cooking Tips
- I always wrap the outside of my springform pan with aluminum foil before baking to prevent any water from seeping in if you choose to place the cheesecake directly in a water bath rather than above it.
- I’ve found that leaving cream cheese out for at least 2 hours before baking ensures it’s truly room temperature throughout, which is crucial for a smooth, lump-free batter.
- I never open the oven door during the first 45 minutes of baking, as sudden temperature changes are the primary cause of cracks and sinking in cheesecakes.
- When making the strawberry topping, I reserve a few fresh strawberry slices to arrange on top just before serving for a beautiful contrast in texture and visual appeal.
- I always use a long, thin knife dipped in hot water and wiped clean between cuts for perfect cheesecake slices that showcase all three beautiful layers.
Storage Tips
- Refrigerate the cheesecake covered with plastic wrap or in an airtight container for up to 5 days. The plastic shouldn’t touch the surface to avoid damaging the topping.
- For individual portions, slice the cheesecake first, then freeze the pieces on a baking sheet before transferring to a freezer container with parchment between layers.
- Thaw frozen cheesecake overnight in the refrigerator , never at room temperature, to maintain the creamy texture and prevent condensation from making the crust soggy.
- If making ahead for an event, prepare the cheesecake and topping separately, storing the topping in a jar and adding it just before serving for the freshest appearance.
Variations and Substitutions
- Gluten-Free Version: Replace the red velvet cake/cookies with gluten-free alternatives or a simple almond flour and cocoa powder mixture with a touch of red food coloring.
- White Chocolate Variation: Add 4 ounces of melted white chocolate to the cheesecake batter for an even richer flavor that pairs beautifully with both the red velvet and strawberry components.
- Dairy-Free Option: Substitute plant-based cream cheese, coconut cream instead of heavy cream, and vegan butter for the crust. The texture will be slightly different but still delicious.
- Mixed Berry Twist: Replace half the strawberries with raspberries or blackberries for a more complex flavor profile and deeper color in the topping.
- Mini Cheesecakes: Divide the crust and filling among a muffin tin lined with paper liners for individual servings that are perfect for parties and freeze beautifully.
What to Serve with Red Velvet Strawberry Cheesecake Recipe
- Vanilla Bean Ice Cream: The simple, creamy flavor complements the complex layers of the cheesecake while the temperature contrast creates an exciting sensory experience.
- Fresh Mint Tea: The bright, herbaceous notes cut through the richness of the cheesecake and cleanse the palate between bites.
- Dark Chocolate Sauce: A small drizzle adds another dimension to the dessert, enhancing the subtle cocoa notes in the red velvet crust.
- Champagne or Prosecco: The effervescence and acidity balance the creamy richness, making this pairing perfect for celebrations.
- Strong Coffee: The bitter notes create a perfect counterpoint to the sweet, creamy cheesecake, especially when served after a meal.
FAQ
Can I make this cheesecake without a springform pan? Line a regular cake pan with parchment paper with overhang on all sides to lift out the chilled cheesecake.
Why did my cheesecake crack? Likely causes: overmixing, baking at too high temperature, or cooling too quickly. Use a water bath and cool gradually in the oven.
Can I use frozen strawberries for the topping? Yes, but thaw and drain them first, using only 1 tablespoon of sugar as frozen berries release more liquid.
How do I know when my cheesecake is done? The edges should be set but the center should still jiggle slightly when gently shaken. It will continue setting as it cools.
Can I make this recipe ahead of time? Absolutely! The cheesecake actually improves after 24 hours as the flavors meld. Add the topping just before serving.
- 0 Facebook
- 40 Pinterest
- 0 Email
- Copy Link
- 40 shares
Decadent Red Velvet Strawberry Cheesecake Delight
Ingredients
Instructions
Preheat your oven to 325°F (165°C) and prepare a 9-inch springform pan by lining the bottom with parchment paper and lightly greasing the sides.
In a medium bowl, combine the crushed red velvet cake or cookies with the melted butter. The mixture should resemble wet sand and hold together when pressed between your fingers. If it seems too dry, add an additional tablespoon of melted butter.
Press the mixture firmly into the bottom of the prepared pan, creating an even layer with a flat surface. Use the bottom of a measuring cup to compact the crust, paying special attention to the edges where the crust meets the pan.
Bake the crust for 10 minutes until it’s just set but not browned. Remove from the oven and allow to cool completely while you prepare the filling. The crust will firm up as it cools.
Reduce the oven temperature to 300°F (150°C). Fill a large baking dish halfway with hot water and place it on the lower rack of your oven. This water bath will create a gentle, humid environment for your cheesecake.
In a large bowl, beat the softened cream cheese on medium-low speed until completely smooth with no lumps, about 2-3 minutes. Scrape down the sides and bottom of the bowl frequently to ensure even mixing.
Gradually add the sugar while continuing to beat on medium-low. The mixture should become lighter in both color and texture. Avoid beating on high speed, which incorporates too much air and can cause cracks.
Add the eggs one at a time, mixing on low speed just until each is incorporated. You should see the batter become glossy and slightly thicker with each addition. Overbeating at this stage can cause the cheesecake to rise too much and then fall.
Mix in the vanilla extract, then add the sour cream and heavy cream, blending until just combined. The batter should be silky smooth and have a pourable consistency.
Sift the cornstarch over the batter and fold it in gently with a rubber spatula until no white streaks remain. The batter should now have a slight sheen to it.
Pour the filling over the cooled crust, smoothing the top with an offset spatula. Tap the pan gently on the counter a few times to release any trapped air bubbles, which can cause cracks during baking.
Place the cheesecake on the middle rack of your oven, directly above the water bath. Bake for 60-70 minutes, or until the edges are set but the center still has a slight jiggle when the pan is gently shaken.
Turn off the oven, crack the door open about an inch, and let the cheesecake cool in the oven for 1 hour. This gradual cooling helps prevent the surface from cracking.
Remove the cheesecake from the oven and run a thin knife around the edge to loosen it from the pan. Let it cool completely at room temperature before refrigerating for at least 4 hours, preferably overnight.
In a medium saucepan, combine the sliced strawberries, sugar, and lemon juice. Let sit for about 15 minutes until the berries release some of their juices.
Place the saucepan over medium heat and bring to a simmer, stirring occasionally. The strawberries will soften and release more juice, creating a vibrant red mixture with a sweet aroma.
Once simmering, add the cornstarch mixture while stirring constantly. Continue to cook for 2-3 minutes until the mixture thickens and becomes glossy. You’ll notice it coating the back of a spoon when it’s ready.
Remove from heat and allow to cool completely to room temperature. The mixture will continue to thicken as it cools, transforming from a thin sauce to a spoonable topping.
Spread the cooled strawberry topping over the chilled cheesecake, or serve it on the side if you prefer to showcase the pristine white surface of your cheesecake.
Return the cheesecake to the refrigerator for at least 30 minutes to allow the topping to set before serving. This creates a beautiful layered effect when sliced.