- 0 Facebook
- 0 Pinterest
- 0 Email
- Copy Link
- 0 shares
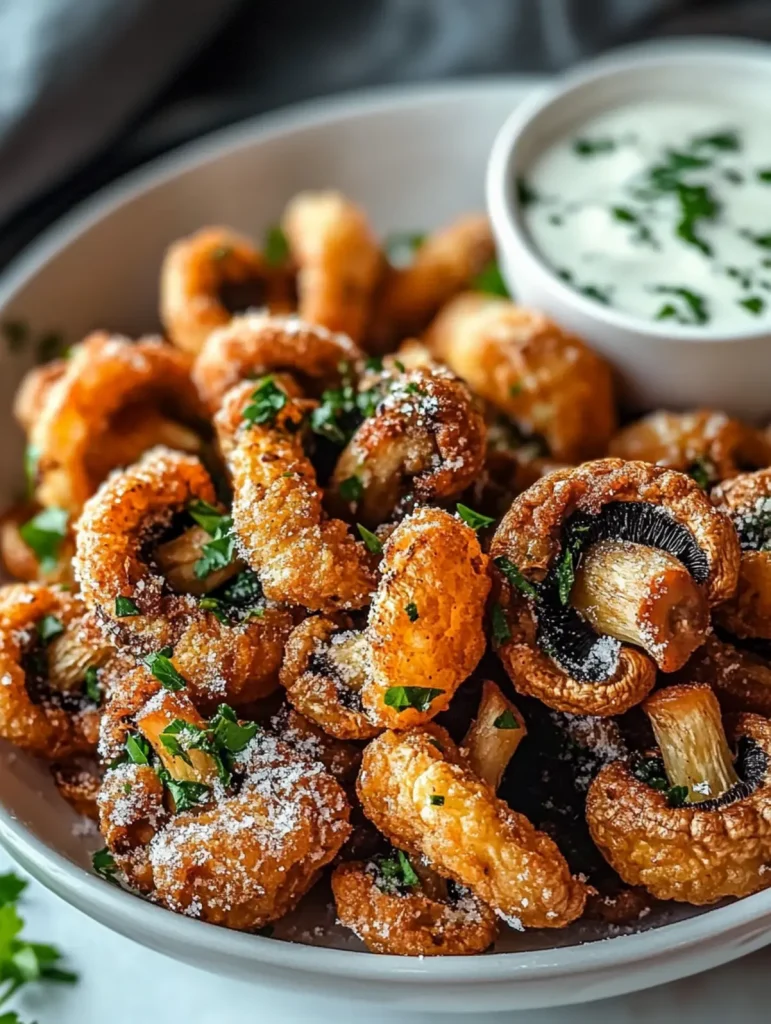
Crispy golden mushrooms that shatter with each bite reveal their tender, earthy goodness within — a textural masterpiece that transforms humble fungi into crave-worthy morsels. These battered and fried mushrooms deliver a perfect balance of savory flavors, with garlic and onion notes complementing the mushrooms’ natural richness. The golden-brown exterior gives way to a juicy center, creating an irresistible appetizer that disappears from plates in minutes. Pair them with the creamy herb dip for a cooling contrast that cuts through the richness with bright, fresh flavors.
Why You’ll Love This Recipe
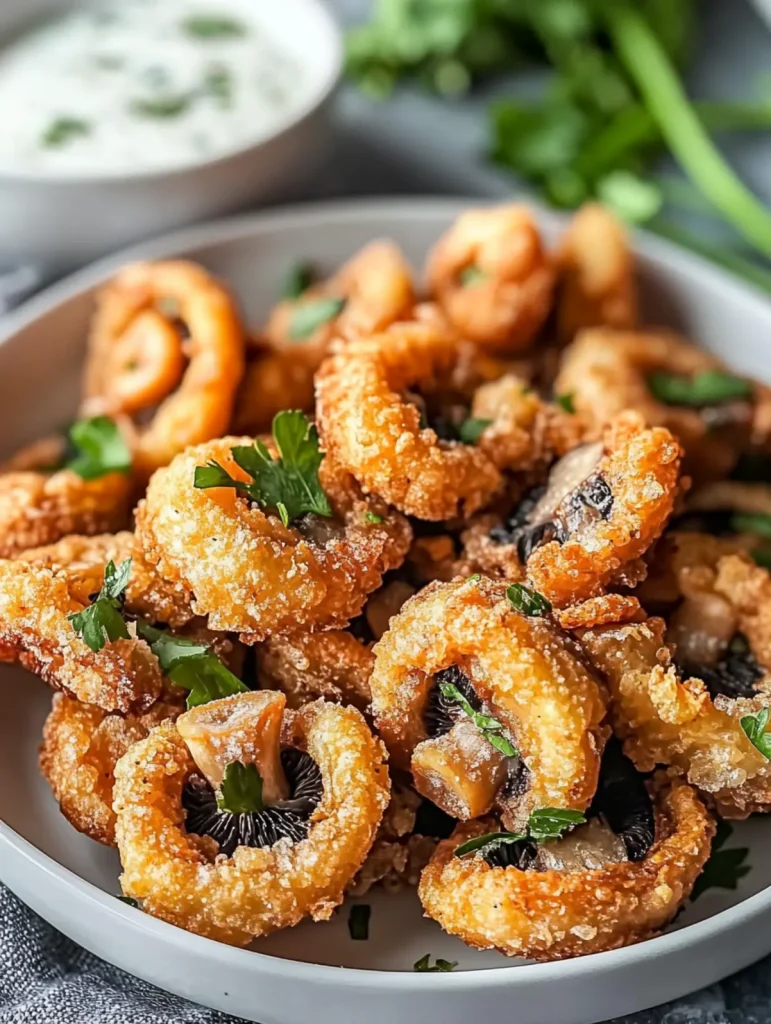
These Ultimate Crispy Fried Mushrooms deliver restaurant-quality results with surprisingly simple home techniques. Each bite offers the perfect contrast between crispy exterior and juicy interior.
- Perfect Texture Contrast : The triple-dredging technique creates a shatteringly crisp shell while preserving the mushrooms’ natural juiciness inside.
- Quick Weeknight Solution : From pantry to plate in under 30 minutes, making these ideal for impromptu gatherings or satisfying sudden snack cravings.
- Customizable Flavor Profile : The seasoned breadcrumb coating adapts beautifully to personal taste preferences—try adding smoked paprika for depth or cayenne for heat.
- Make-Ahead Friendly : Prepare the herb dip up to two days in advance, allowing the flavors to meld and develop while saving precious time before serving.
- Guaranteed Crowd-Pleaser : Even mushroom skeptics convert after trying these crispy bites—the earthy flavor transforms into a savory, umami-rich experience that appeals to all palates.
Ingredient Notes
The perfect Crispy Fried Mushrooms rely on quality ingredients working together to create that irresistible contrast between crispy exterior and juicy interior. Each component plays a crucial role in texture, flavor development, and achieving that golden-brown perfection.
- Fresh mushrooms : Choose firm, unblemished button or cremini mushrooms for their meaty texture and earthy flavor. Wipe clean with a damp paper towel rather than washing, as excess moisture will prevent proper crisping.
- All-purpose flour : Creates the first critical layer of the coating that helps additional ingredients adhere. For a gluten-free option, substitute cup-for-cup gluten-free flour blend with xanthan gum included.
- Eggs : Provide essential binding power and richness to the coating. They create the “glue” that helps breadcrumbs stick while adding protein that creates a substantial crust.
- Milk : Combines with eggs to create a rich, smooth batter with proper consistency. Whole milk works best for richness, though plant-based alternatives like unsweetened almond milk can substitute in a pinch.
- Breadcrumbs : Regular breadcrumbs offer the perfect crispy texture. For extra crunch, use panko Japanese breadcrumbs, which have a lighter, airier structure that creates exceptional crispiness.
- Garlic powder : Offers concentrated savory flavor throughout the coating without the risk of burning that fresh garlic presents during frying. Use fresh, aromatic powder for best results.
- Onion powder : Adds sweet, aromatic depth that complements mushrooms’ natural earthiness. The dehydrated form distributes flavor evenly through the coating.
- Salt : Enhances all other flavors in both mushrooms and coating. Diamond Crystal kosher salt is preferred by chefs for its clean taste and ease of pinching.
- Black pepper : Provides gentle heat and aromatic complexity. Freshly ground delivers significantly more flavor than pre-ground options.
- Oil for frying : Choose a neutral oil with high smoke point like vegetable, canola, or peanut oil. The oil should reach 350-375°F for optimal crispiness without greasiness.
- Mayonnaise : Forms the rich, creamy base for the herb dip. Full-fat versions provide the best flavor and texture, though light mayonnaise works adequately.
- Sour cream : Adds tanginess and silky texture to the dip. Greek yogurt makes a protein-rich alternative with similar consistency.
- Fresh garlic : Provides bright, pungent flavor in the dip that balances the rich dairy components. Mince finely to avoid overwhelming bites of raw garlic.
- Fresh herbs : Parsley offers clean, bright notes while dill contributes distinctive aromatic qualities. Use tender herbs rather than woody ones like rosemary or thyme.
- Lemon juice : Brightens the dip with essential acidity that cuts through fried richness. Always use fresh-squeezed for clean, vibrant flavor without preservative aftertaste.
How to Make Ultimate Crispy Fried Mushrooms with Herbed Dip
- Clean the mushrooms by gently wiping them with a damp paper towel, then slice any larger ones into bite-sized pieces. Pat them completely dry—this is crucial for achieving that perfect crispy coating.
- Set up your dredging station with three shallow bowls: add the flour, salt, pepper, garlic powder, and onion powder to the first bowl; whisk eggs and milk together in the second bowl; and place breadcrumbs in the third bowl.
- Dredge each mushroom piece first in the seasoned flour, shaking off excess, then dip into the egg mixture, and finally coat thoroughly with breadcrumbs. I like to use one hand for dry ingredients and one for wet to avoid creating a mess on my fingers.
- Heat about 1 inch of oil in a deep skillet to 350-375°F. You’ll know it’s ready when a breadcrumb sizzles immediately when dropped in, but doesn’t instantly burn.
- Carefully add the coated mushrooms to the hot oil in small batches, frying for about 2-3 minutes until they turn a beautiful golden brown. Don’t crowd the pan—this is the secret to maintaining proper oil temperature and achieving maximum crispiness.
- Transfer the fried mushrooms to a paper towel-lined plate using a slotted spoon. Season immediately with a light sprinkle of salt while they’re still hot.
- For the herb dip, simply mix together mayonnaise, sour cream, minced garlic, chopped fresh herbs, and lemon juice in a small bowl. The dip actually tastes even better after sitting for about 15 minutes, allowing the flavors to marry.
- Serve the mushrooms while still hot and crispy alongside the cool, creamy herb dip for the perfect temperature and flavor contrast that makes this appetizer absolutely irresistible.
Serving Suggestions
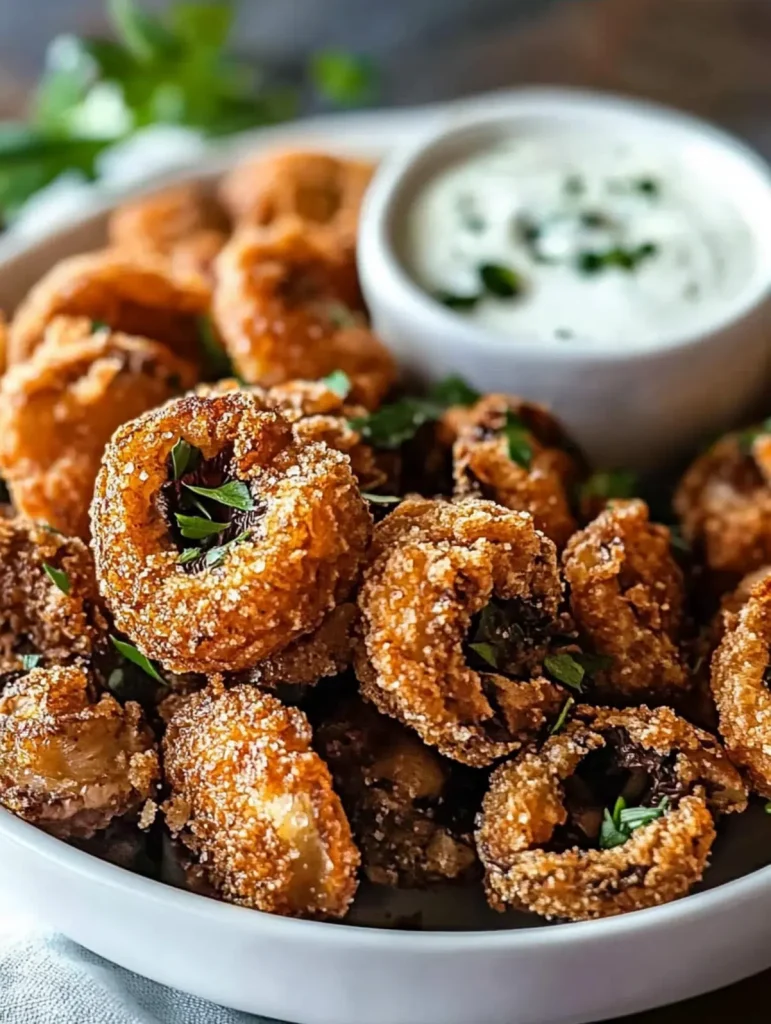
These Crispy Fried Mushrooms are versatile enough to shine in multiple settings, from casual snacking to elegant entertaining. The contrast between their crunchy exterior and tender interior deserves to be showcased properly!
For a classic appetizer presentation, arrange the hot mushrooms on a serving platter lined with a paper doily or fresh herb sprigs, with the herb dip in a small bowl alongside. I like to garnish the platter with lemon wedges and additional fresh herbs that match what’s in the dip – the bright colors make the golden-brown mushrooms look even more appetizing.
These crispy bites pair beautifully with a variety of drinks. For casual gatherings, they’re perfect with cold craft beer or a crisp hard cider. For more elegant occasions, try serving them with a glass of unoaked Chardonnay or Pinot Grigio, whose acidity helps cut through the richness of the fried coating.
Turn this appetizer into part of a more substantial meal by serving alongside other finger foods like garlic bread, a fresh green salad with vinaigrette, or as part of a DIY appetizer board. They also make an excellent side dish for grilled steaks or roasted chicken, adding textural contrast to the meal.
For a fun twist, try using these crispy mushrooms as a topping for burgers or tucked into sandwiches – they add an incredible texture that elevates an ordinary sandwich to something special!
Storage & Freezing
These Crispy Fried Mushrooms are best enjoyed fresh from the fryer, but if you find yourself with leftovers, proper storage is key to maintaining as much of that delicious texture as possible.
Store any leftover fried mushrooms in an airtight container lined with paper towels in the refrigerator for up to 2 days. The paper towels help absorb excess moisture that would otherwise make the coating soggy. I’ve found that separating layers with additional paper towels helps preserve crispiness even better.
For reheating, avoid the microwave which will turn your crispy mushrooms soggy. Instead, place them on a baking sheet in a preheated 375°F oven for 5-7 minutes until heated through and re-crisped. The herb dip can be stored separately in the refrigerator for up to 4 days, and actually improves in flavor after the first day as the garlic and herbs fully infuse the creamy base.
Unfortunately, these Crispy Fried Mushrooms don’t freeze well, as the breading becomes soggy when thawed. However, you can prepare the herb dip ahead of time and freeze it for up to one month in an airtight container. Just whisk it well after thawing to recombine any separated ingredients.
Make Ahead Options
These Ultimate Crispy Fried Mushrooms are perfect for meal prep enthusiasts who want to save time on busy weeknights! You can prepare the herbed dip up to 3 days in advance and refrigerate it in an airtight container (the flavors actually improve with time). The mushrooms can be cleaned, sliced, and stored in the refrigerator for up to 24 hours before coating and frying. For ultimate convenience, set up your complete dredging station with seasoned flour, egg mixture, and breadcrumbs up to 2 hours ahead, covering each bowl with plastic wrap. When ready to serve, simply coat the mushrooms and fry as directed—you’ll have restaurant-quality Crispy Fried Mushrooms with minimal last-minute effort.
Variations & Substitutions
Don’t be afraid to make this recipe your own! These crispy fried mushrooms are incredibly versatile and can be adapted to suit your taste preferences, dietary needs, or whatever you happen to have in your pantry.
- Mushroom varieties : While button or cremini mushrooms work perfectly, try using oyster mushrooms or torn king oyster mushrooms for a meatier texture and more dramatic presentation. I’ve found shiitakes create an intensely savory result that mushroom lovers go wild for.
- Gluten-free coating : Easily adapt this recipe by substituting the all-purpose flour with a cup-for-cup gluten-free blend and using gluten-free panko or crushed rice cereal for the breadcrumbs. The results are just as crispy and delicious!
- Spice it up : Add 1/2 teaspoon of smoked paprika and a pinch of cayenne to the flour mixture for a spicy kick. For an Asian-inspired twist, mix 1 teaspoon of Chinese five-spice powder into your breadcrumbs.
- Herb infusion : Mix 1-2 tablespoons of finely chopped fresh herbs like thyme, rosemary or sage into your breadcrumb mixture for an aromatic coating that complements the earthiness of the mushrooms beautifully.
- Dairy-free dip : Create a dairy-free version of the herb dip by substituting vegan mayonnaise and dairy-free yogurt for the mayo and sour cream. A splash of lemon juice keeps that essential tanginess.
- Air fryer option : When I’m craving these mushrooms but want a lighter version, I spray the breaded mushrooms with cooking oil and air fry at 380°F for 8-10 minutes, shaking halfway through. They’re slightly less decadent but still wonderfully crispy!
Expert Tips
Here are my hard-earned secrets for creating truly restaurant-worthy crispy fried mushrooms:
- Moisture is the enemy : Pat mushrooms completely dry with paper towels before coating. Any excess moisture will create steam during frying, resulting in soggy rather than crispy mushrooms.
- Oil temperature matters : I keep my oil between 350-375°F using a thermometer. Too cool and your mushrooms absorb oil; too hot and they’ll burn before cooking through.
- Double-dredge for extra crunch : For the ultimate crispy fried mushrooms, try double-coating them. After the first breadcrumb layer, dip back in the egg mixture and breadcrumbs again for an extra-thick, super-crunchy crust.
- Timing is everything : Make the herb dip first and refrigerate it while preparing the mushrooms. The flavors in the dip develop beautifully during that time, especially the raw garlic and fresh herbs.
- Season hot : Always sprinkle that final pinch of salt immediately after removing mushrooms from oil. It adheres better to the hot surface and enhances all the flavors in your coating.
Recipe FAQs
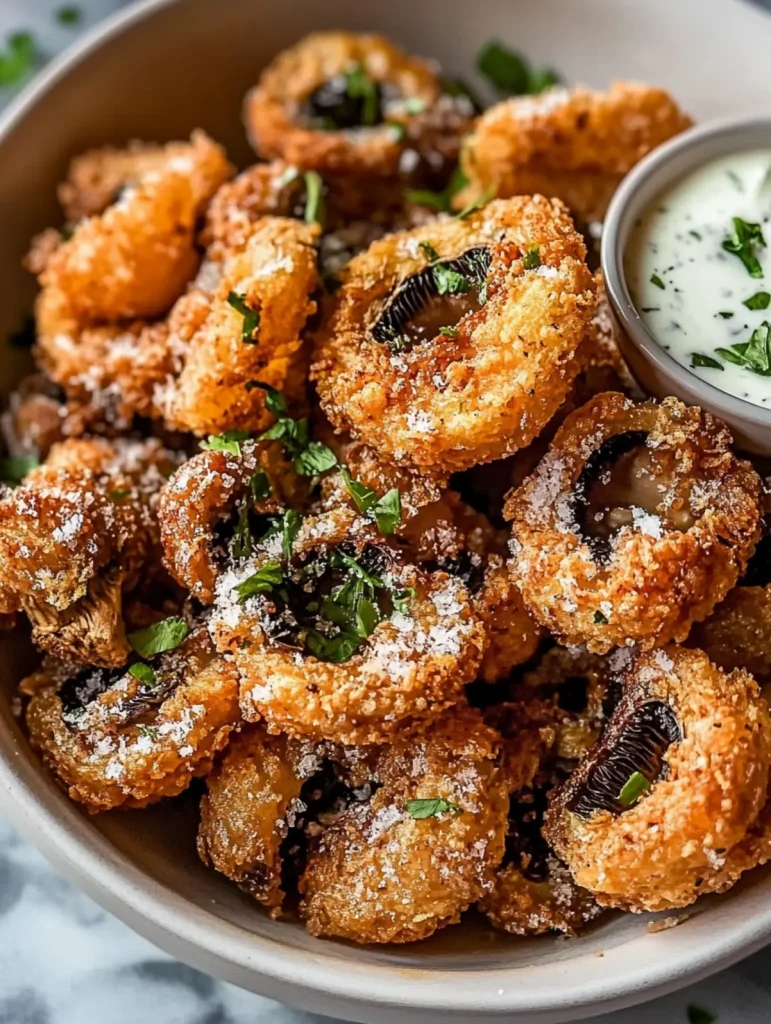
What type of mushrooms work best for this recipe? Button or cremini mushrooms are ideal.
Why do I need to pat the mushrooms dry? Moisture prevents proper crisping.
Can I make the herb dip ahead of time? Yes! Flavors improve after 15 minutes.
What’s the best oil for frying these mushrooms? Any neutral oil with high smoke point.
How do I know when the oil is ready? Breadcrumb sizzles but doesn’t burn instantly.
Can I use an air fryer instead? Yes, spray with oil and cook at 380°F.
- 0 Facebook
- 0 Pinterest
- 0 Email
- Copy Link
- 0 shares
Ultimate Crispy Fried Mushrooms with Herbed Dip
Ingredients
Instructions
Clean the mushrooms by gently wiping them with a damp paper towel, then slice any larger ones into bite-sized pieces. Pat them completely dry—this is crucial for achieving that perfect crispy coating.
Set up your dredging station with three shallow bowls: add the flour, salt, pepper, garlic powder, and onion powder to the first bowl; whisk eggs and milk together in the second bowl; and place breadcrumbs in the third bowl.
Dredge each mushroom piece first in the seasoned flour, shaking off excess, then dip into the egg mixture, and finally coat thoroughly with breadcrumbs. I like to use one hand for dry ingredients and one for wet to avoid creating a mess on my fingers.
Heat about 1 inch of oil in a deep skillet to 350-375°F. You’ll know it’s ready when a breadcrumb sizzles immediately when dropped in, but doesn’t instantly burn.
Carefully add the coated mushrooms to the hot oil in small batches, frying for about 2-3 minutes until they turn a beautiful golden brown. Don’t crowd the pan—this is the secret to maintaining proper oil temperature and achieving maximum crispiness.
Transfer the fried mushrooms to a paper towel-lined plate using a slotted spoon. Season immediately with a light sprinkle of salt while they’re still hot.
For the herb dip, simply mix together mayonnaise, sour cream, minced garlic, chopped fresh herbs, and lemon juice in a small bowl. The dip actually tastes even better after sitting for about 15 minutes, allowing the flavors to marry.
Serve the mushrooms while still hot and crispy alongside the cool, creamy herb dip for the perfect temperature and flavor contrast that makes this appetizer absolutely irresistible.
Notes
Moisture is the enemy : Pat mushrooms completely dry with paper towels before coating. Any excess moisture will create steam during frying, resulting in soggy rather than crispy mushrooms.
Oil temperature matters : I keep my oil between 350-375°F using a thermometer. Too cool and your mushrooms absorb oil; too hot and they’ll burn before cooking through.
Double-dredge for extra crunch : For the ultimate crispy fried mushrooms, try double-coating them. After the first breadcrumb layer, dip back in the egg mixture and breadcrumbs again for an extra-thick, super-crunchy crust.
Timing is everything : Make the herb dip first and refrigerate it while preparing the mushrooms. The flavors in the dip develop beautifully during that time, especially the raw garlic and fresh herbs.
Season hot : Always sprinkle that final pinch of salt immediately after removing mushrooms from oil. It adheres better to the hot surface and enhances all the flavors in your coating.
Nutrition
| Serving Size | 1 serving |
|---|---|
| Calories | 250 calories |
| Sugar Content | 2 grams |
| Sodium Content | 450 milligrams |
| Fat Content | 15 grams |
| Saturated Fat Content | 3 grams |
| Unsaturated Fat Content | 10 grams |
| Trans Fat Content | 0 grams |
| Carbohydrate Content | 25 grams |
| Fiber Content | 2 grams |
| Protein Content | 6 grams |
| Cholesterol Content | 120 milligrams |