- 0 Facebook
- 11 Pinterest
- 0 Email
- Copy Link
- 11 shares
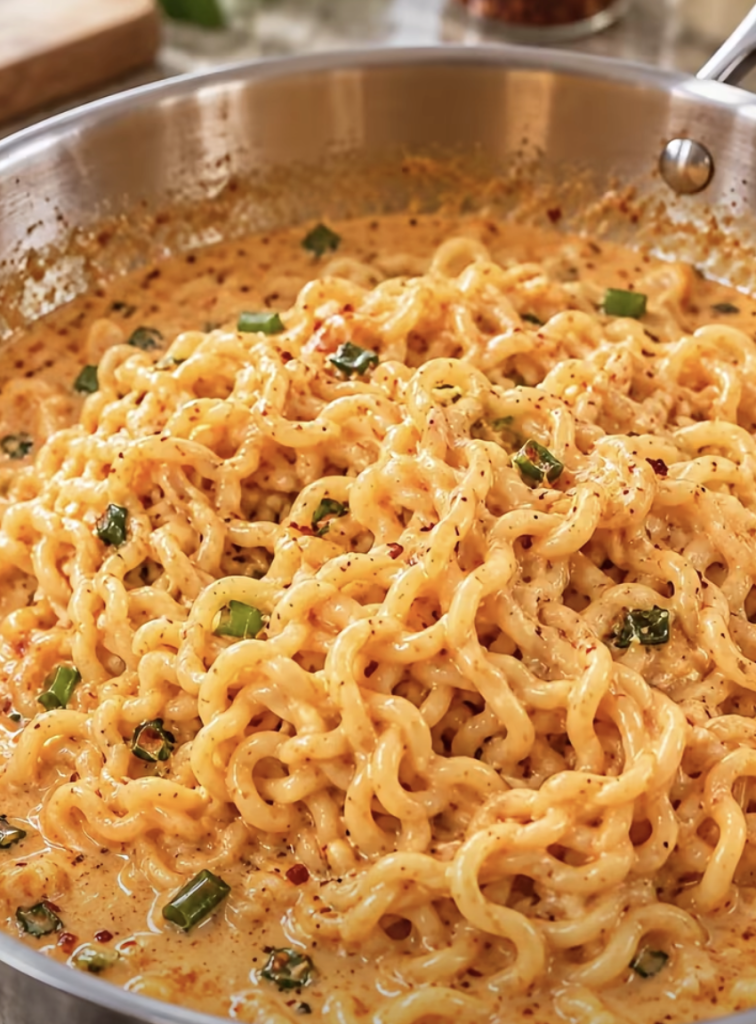
Velvety, garlicky, and just spicy enough to wake up your taste buds, this ramen turns humble instant noodles into something that tastes straight out of a restaurant kitchen. Garlic sizzles in butter with chili flakes and tomato paste, then cream, milk, and two cheeses melt into a glossy sauce that clings to every noodle, all on the stovetop in about 20 minutes. Pile on sliced green onions and serve with a crisp cucumber salad to cut through the richness.
Why Love Creamy Garlic Chili Cheese Ramen?
This is the kind of bowl that turns a pantry staple into real comfort food in about 20 minutes, with one pot for the noodles and one skillet for the sauce. Skipping the seasoning packets lets garlic, butter, and chili flakes carry the flavor, while a spoonful of tomato paste adds a subtle depth and sweetness that balances the heat. Freshly shredded cheddar melts far more smoothly than the pre-bagged kind, and the mozzarella adds a gentle stretch. If the sauce tightens up, a splash of the starchy reserved noodle water loosens it into a glossy coating that clings to every strand. It’s also easy to adjust: use less chili for milder palates, or add more for a bolder kick. Leftovers keep in the fridge for up to 3 days, though the creamy sauce is at its best fresh from the pan, topped with crisp green onions.
The Ingredients That Make It Work
A short ingredient list means every item has to pull its weight, and in this Creamy Garlic Chili Cheese Ramen, each one does. Here’s what every ingredient brings to the bowl and how to get the best results from it.
Quick note: Shred your cheese and measure everything before the skillet heats up. Once the garlic hits the butter, the sauce comes together fast.
Noodles & Cooking Water
- Instant ramen noodles (2 packages, 3 oz each): These give the bowl its springy, slurpable base. Discard the seasoning packets, which are heavy on sodium and would overpower the garlic and cheese. Drain the noodles about 1 minute before the package time, since they finish cooking in the sauce. Thin spaghetti or any quick-cooking wheat noodle works in a pinch.
- Reserved noodle cooking water (½ cup, as needed): The starch in this water helps the sauce turn glossy and cling to the noodles. Scoop it out before draining, then add it a tablespoon at a time until the sauce loosens. It’s already lightly salty, so taste before adding extra salt.
Aromatics & Spice
- Butter (1 tablespoon): Butter adds richness and carries the garlic and chili flavors through the sauce. Unsalted gives you more control, but salted works if you go easy on the salt later. Keep the heat at medium so it melts without browning too quickly.
- Garlic (4 cloves, minced): Fresh garlic gives the sauce its sharp aroma and deep flavor. Sauté it for just 30 to 60 seconds, until fragrant. Browned garlic turns bitter. Jarred garlic works in a pinch, but the flavor is milder.
- Chili flakes (1 teaspoon, or to taste): Toasting the flakes briefly in the butter blooms their flavor and tints the sauce a warm orange. Start with ½ teaspoon for a milder bowl and build from there. Gochugaru gives a fruitier, gentler heat, and a pinch of cayenne gives a sharper one.
- Tomato paste (1 tablespoon): This adds subtle sweetness, savory depth, and color without making the dish taste tomato-forward. Cook it in the butter for about a minute to remove its raw, tinny edge. Freeze leftover paste in tablespoon portions so none goes to waste.
Creamy Base
- Heavy cream (½ cup): Heavy cream makes the sauce silky and full-bodied, and its higher fat content makes it less likely to curdle. Half-and-half works as a lighter substitute, though the sauce will be a bit thinner. Keep the heat at a gentle simmer rather than a hard boil.
- Whole milk (½ cup): Milk lightens the sauce so it stays creamy without feeling heavy. Two percent works if that’s what’s on hand, but skip skim, which can leave the sauce watery.
Cheeses
- Cheddar cheese (¾ cup, freshly shredded): Cheddar brings the sharp, tangy backbone of the dish. Shredding it from a block matters because pre-bagged cheese contains anti-caking starches that can make the sauce grainy. Lower the heat and add it in handfuls, stirring until each addition melts.
- Mozzarella cheese (¼ cup, shredded): Mozzarella adds a gentle stretch and a mild, milky creaminess that balances the cheddar. Low-moisture mozzarella melts most smoothly. Monterey Jack or provolone make good substitutes.
Seasoning & Finish
- Black pepper (¼ teaspoon): A little freshly ground pepper adds a warm, aromatic bite that rounds out the chili heat. Grind it just before using for the best flavor.
- Salt (to taste): Season at the end. The noodles, cooking water, and cheeses all contribute salt, so tasting the finished sauce prevents over-seasoning.
- Green onions (2, sliced): These add fresh crunch, a mild oniony bite, and a pop of color against the rich sauce. Slice them thinly and sprinkle them on just before serving so they stay crisp.
Step-by-Step Instructions
- Bring a medium pot of water to a boil and cook the ramen noodles for about 1 minute less than the package directions, so they stay springy. Scoop out ½ cup of the starchy cooking water, then drain the noodles and set both aside.
- Melt the butter in a large, deep skillet over medium heat, then add the minced garlic and sauté for 30 to 60 seconds, until fragrant and pale golden. I like to pull the pan off the heat for a moment if the garlic darkens too fast, since browned garlic turns bitter.
- Stir in the chili flakes and tomato paste, and cook for about 1 minute, stirring constantly. The paste should darken slightly and turn the butter a warm orange-red.
- Pour in the heavy cream and whole milk, whisking to dissolve the tomato paste. Simmer gently for 2 to 3 minutes, until the sauce lightly coats the back of a spoon. Avoid a hard boil, which can cause the cream to separate.
- Reduce the heat to low and add the cheddar a handful at a time, stirring until each addition melts before adding the next. Then stir in the mozzarella and black pepper until the sauce is smooth and velvety, about 2 minutes. It’s normal if the sauce looks a little thin at this stage, because it thickens as the noodles absorb it.
- Add the drained noodles to the skillet and toss with tongs for about 1 minute, until every strand is coated. If the sauce tightens, loosen it with the reserved noodle water, 1 tablespoon at a time, until it turns glossy and flows easily.
- Taste and season with salt only if needed, since the cheese and noodle water already add plenty. I like to divide the ramen among 4 bowls right away and top each with sliced green onions for a fresh, crisp finish.
Tip: Keep the skillet on low heat once the cheese goes in. High heat can make the sauce grainy or oily, while gentle heat keeps it smooth.
Remember: this sauce is at its creamiest straight from the pan, so serve it right away. Store leftovers in an airtight container in the fridge for up to 3 days, and reheat gently with a splash of milk to bring back the silky texture.
Make Ahead Options
Creamy Garlic Chili Cheese Ramen is a great fit for busy weeknights, because you can prep in advance and have dinner on the table in about 10 minutes. Shred the cheddar and mozzarella, mince the garlic, and slice the green onions up to 24 hours ahead , then refrigerate each in its own airtight container (this keeps the garlic from turning harsh and the onions crisp). You can also stir together the cream and milk up to 2 days early. Before serving, cook the noodles, warm the sauce gently over low heat, and toss everything together with a splash of reserved noodle water. Dinner will taste just as velvety and delicious.
Variations & Substitutions
This ramen is forgiving, so feel free to adjust it to your pantry, your spice tolerance, or your dietary needs. These swaps have all worked well in the skillet .
- Add a protein : Top with a jammy soft-boiled egg, shredded rotisserie chicken, or quick-seared shrimp for a heartier bowl that works as a full dinner.
- Gluten-free noodles : Brown rice ramen or thin rice noodles work well. Follow their package timing, since it differs from wheat ramen, and still save the starchy cooking water.
- Lighter cream sauce : Replace the cream and milk with 1 cup of evaporated milk for a lighter sauce that resists curdling and still coats the noodles nicely.
- Gochujang twist : Use 1 tablespoon of gochujang instead of tomato paste for a sweeter, fermented heat. Cut the chili flakes to ½ teaspoon and taste before adding salt.
- Cheese swaps : I sometimes trade the mozzarella for pepper jack when I want extra kick, or replace half the cheddar with Gruyère for a nuttier flavor.
- Veggie boost : I like stirring in baby spinach at the end or steamed broccoli florets with the noodles. Broccoli holds up better when reheating leftovers.
Expert Tips
A few small habits help this Creamy Garlic Chili Cheese Ramen turn out silky and restaurant-worthy every time.
- Shred cheese from blocks : Freshly grated sharp cheddar melts silky, while bagged shreds contain anti-caking starch that can turn the sauce grainy.
- Pull noodles early : Draining the ramen a minute before the package time keeps it springy, since the noodles keep softening as they soak up the sauce.
- Bloom the tomato paste : I stir it constantly until it darkens to a brick red, which cooks off the tinny taste and deepens the sauce.
- Rescue an oily sauce : If it looks greasy, pull the skillet off the heat and whisk in a tablespoon of warm milk until smooth.
- Build the spice gradually : Chili flakes keep building heat as they sit in the cream, so start with ½ teaspoon and pass extra flakes at the table.
- Warm your bowls : I rinse the bowls with hot tap water first, because the sauce tightens fast on cold ceramic and loses its glossy cling.
Storage & Freezing
- Refrigerate: Cool leftover Creamy Garlic Chili Cheese Ramen within 2 hours of cooking, then store it in a shallow airtight container for up to 3 days. The noodles keep absorbing the sauce as they sit, so the dish will look thicker and drier the next day. Leave the sliced green onions off until serving so they stay crisp.
- Freeze (with caveats): Freeze portions in freezer-safe containers for up to 2 months, though the texture is best within the first month. Cream and cheese sauces can separate, and the noodles soften a bit after thawing. I pull the noodles a full minute early, as in the recipe, and leave a little extra sauce in each container to make up for what they absorb. Thaw overnight in the fridge, never on the counter.
- Reheat gently: Warm the ramen in a skillet over low heat with a splash of milk (1 to 2 tablespoons per portion), tossing with tongs until it turns glossy again. High heat can make the cheddar sauce grainy or oily, which is the same reason the recipe keeps the heat low once the cheese goes in. If a frozen portion looks split, I whisk in a spoonful of warm milk off the heat to bring it back together.
- Microwave option: Use 50% power in 30-second bursts, stirring between each, and add a splash of milk before the first round. Reheat until steaming hot throughout (165°F) and top with fresh green onions before serving.
Serving Suggestions
- Plate it right away: Serve the ramen in warmed, shallow bowls straight from the skillet. Use tongs to twirl each portion into a loose nest, then spoon any sauce left in the pan over the top. Finish with the sliced green onions and a few extra chili flakes. I like to add a last pinch of shredded cheddar just before it hits the table, so it softens into the sauce without clumping.
- Cut the richness with something bright: This cream-and-cheese sauce is hearty, so a sharp, acidic side keeps each bite lively. A quick cucumber salad tossed with rice vinegar, a little sugar, and sesame seeds is ideal. Quick-pickled red onions or a simple arugula salad with lemon juice also work well. For drinks, a crisp lager or an off-dry Riesling balances the chili heat. For something non-alcoholic, try iced green tea or sparkling water with lime.
- Turn it into a full meal: Add a protein or vegetable and the ramen becomes a complete dinner. A jammy soft-boiled egg, crispy bacon, pan-seared shrimp, or shredded rotisserie chicken all suit the garlicky sauce. For greens, steamed broccoli or sautéed spinach stirred in during the last 30 seconds of tossing adds color and freshness. Because the dish is rich, 4 generous bowls make a satisfying main, while the same batch stretches to 6 small servings as a starter.
- Match the setting: For a weeknight dinner, one skillet and a simple salad is all you need. For movie night or a casual get-together, set out a toppings bar with extra chili flakes, crumbled bacon, sliced jalapeños, toasted sesame seeds, and chili crisp so everyone can customize their bowl. Serve the ramen last, while the sauce is at its silkiest.
Common Questions About Creamy Garlic Chili Cheese Ramen Better Than Takeout
- Can I use pre-shredded cheese? Block-shredded melts smoother; bagged starch makes sauce grainy.
- How do I make it less spicy? Start with ½ teaspoon chili flakes instead.
- What if my sauce gets too thick? Stir in reserved noodle water, one tablespoon at a time.
- How long do leftovers keep, and how do I reheat? Three days refrigerated; I reheat low with milk.
- 0 Facebook
- 11 Pinterest
- 0 Email
- Copy Link
- 11 shares
Creamy Garlic Chili Cheese Ramen Better Than Takeout
Ingredients
Instructions
Bring a medium pot of water to a boil and cook the ramen noodles for about 1 minute less than the package directions so they stay springy. Scoop out ½ cup of the starchy cooking water, then drain the noodles and set both aside.
Melt the butter in a large, deep skillet over medium heat, then add the minced garlic and sauté for 30 to 60 seconds, until fragrant and pale golden. Pull the pan off the heat briefly if the garlic darkens too fast to avoid bitterness.
Stir in the chili flakes and tomato paste and cook for about 1 minute, stirring constantly, until the paste darkens slightly and the butter turns a warm orange-red.
Pour in the heavy cream and whole milk, whisking to dissolve the tomato paste. Simmer gently for 2 to 3 minutes until the sauce lightly coats the back of a spoon, avoiding a hard boil.
Reduce heat to low and add the cheddar a handful at a time, stirring until each addition melts before adding the next. Then stir in the mozzarella and black pepper until the sauce is smooth and velvety, about 2 minutes.
Add the drained noodles to the skillet and toss with tongs for about 1 minute until every strand is coated. If the sauce tightens, loosen it with the reserved noodle water, 1 tablespoon at a time, until glossy and flowing.
Taste and season with salt only if needed. Divide the ramen among 4 bowls and top each with sliced green onions. Serve immediately while the sauce is at its creamiest.
- Tip
Keep the skillet on low heat once the cheese goes in; high heat can make the sauce grainy or oily, while gentle heat keeps it smooth.
Notes
Shred cheese from blocks : Freshly grated sharp cheddar melts more smoothly than pre-shredded varieties, which often contain starches that can make the sauce grainy.
Pull noodles early : Drain the noodles a minute before the package time so they stay springy as they soak up the sauce.
Bloom the tomato paste : Stir it until it darkens to a brick red to cook off tinny flavors and deepen the sauce.
Rescue an oily sauce : If the sauce looks greasy, pull the pan off the heat and whisk in a tablespoon of warm milk until smooth.
Build the spice gradually : Chili flakes continue to build heat in the cream—start with ½ teaspoon and pass extra at the table.
Warm your bowls : Rinsing bowls with hot tap water helps the sauce cling and stay glossy.
Storage: Cool leftovers within 2 hours, store in an airtight container in the fridge for up to 3 days. To reheat, warm gently in a skillet over low heat with 1–2 tablespoons milk per portion, tossing until glossy. Freeze up to 2 months (best within 1 month); thaw overnight in the fridge and reheat gently. Use 50% power in 30-second bursts if reheating in the microwave, stirring between rounds and adding a splash of milk before the first round.
Nutrition
| Serving Size | 1 bowl (about 1/4 recipe) |
|---|---|
| Calories | 440 kcal |
| Sugar Content | 4 g |
| Sodium Content | 800 mg |
| Fat Content | 31 g |
| Saturated Fat Content | 17 g |
| Unsaturated Fat Content | 13 g |
| Trans Fat Content | 0.5 g |
| Carbohydrate Content | 30 g |
| Fiber Content | 1 g |
| Protein Content | 18 g |
| Cholesterol Content | 110 mg |