- 0 Facebook
- 198 Pinterest
- 12 Email
- Copy Link
- 210 shares
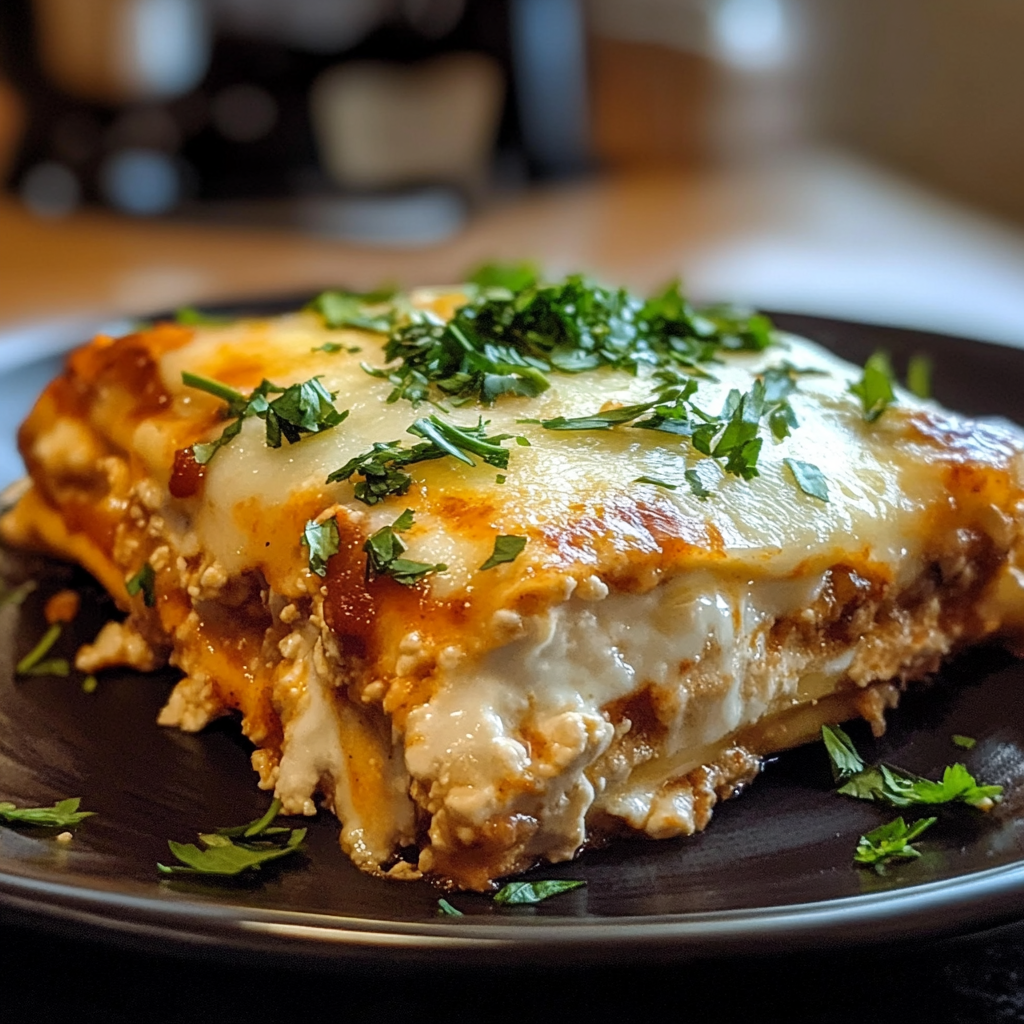
I still remember the first time I made these Cottage Cheese Chicken Enchiladas—it was during a chaotic weeknight when I needed something delicious but didn’t have hours to spend in the kitchen. That was three years ago, and honestly, I wish I’d discovered this recipe sooner! The creamy cottage cheese creates this luxurious texture that transforms ordinary enchiladas into something special, while still being ridiculously simple to prepare. What I love most is how versatile they are—sometimes I’ll add black beans for extra protein, or throw in some corn for sweetness. Whether you’re serving them for a casual family dinner or bringing them to a potluck, these enchiladas never fail to impress. I get excited just thinking about all the different ways you can make them your own!
Why You’ll Love This Recipe
I’ve become somewhat of an enchilada enthusiast over the years, and these cottage cheese chicken enchiladas stand out for several delicious reasons:
- Incredible Time-Saver: I can have these prepped and in the oven in under 20 minutes—perfect for those nights when cooking feels like too much effort.
- Protein-Packed Goodness: The combination of shredded chicken and cottage cheese creates a filling that’s both satisfying and nutritious, keeping me full for hours.
- Creamy Without Heavy Cream: I discovered that cottage cheese offers that luxurious creaminess we all crave, but with added protein and less fat than traditional sour cream.
- Meal Prep Champion: When I’m organized, I make a double batch—one for dinner and one for the freezer. Future me is always grateful!
- Crowd-Pleaser Status: I’ve yet to meet someone who doesn’t love these enchiladas, from picky eaters to food enthusiasts alike.
Ingredients for This Recipe
- Shredded Chicken: The foundation of our enchiladas. I prefer rotisserie chicken for its convenience and flavor depth, but any cooked chicken works beautifully.
- Cottage Cheese: My secret weapon that adds incredible creaminess and protein. I opt for 4% milkfat for the most luxurious texture and flavor.
- Shredded Cheese: The melty magic that brings everything together. I alternate between sharp cheddar and Monterey Jack depending on my mood—both create that perfect cheese pull.
- Enchilada Sauce: The soul of this dish. I look for authentic varieties with a balance of chile peppers, tomatoes and spices for that traditional flavor.
- Corn Tortillas: I always use corn rather than flour for authentic flavor and texture. I quickly warm them before rolling to prevent cracking.
- Chopped Onions: The aromatic base that adds depth. I finely dice them to distribute their flavor evenly throughout each bite.
- Green Peppers: These add freshness and a slight crunch. I love the subtle sweetness they contribute to balance the savory elements.
- Chili Powder: The warm, earthy flavor that defines Tex-Mex cooking. I adjust the amount depending on my audience’s spice tolerance.
- Salt and Pepper: Never underestimate these basics. I season gradually throughout cooking, tasting as I go for the perfect balance.
How to Make This Recipe
1. Prepare Your Filling: In a large bowl, I combine the shredded chicken, cottage cheese, half the shredded cheese, chopped onions, and green peppers. The mixture should be moist and well-integrated, with the cottage cheese binding everything together.
2. Season the Mixture: I sprinkle in the chili powder, salt, and pepper, mixing thoroughly. I always taste test here—the filling should be slightly more seasoned than you think necessary, as the tortillas will mellow the flavors.
3. Prepare Your Baking Dish : I pour a thin layer of enchilada sauce to coat the bottom of a 9×13 baking dish . This prevents sticking and adds flavor to the tortilla bottoms—a trick my grandmother taught me.
4. Warm the Tortillas: I briefly heat the corn tortillas in a dry skillet or microwave between damp paper towels until pliable. This crucial step prevents cracking during rolling and allows them to absorb more flavor.
5. Fill and Roll: I place about ⅓ cup of filling along the center of each tortilla, then roll it tightly and place seam-side down in the baking dish . The enchiladas should fit snugly together in a single layer.
6. Add the Sauce: I pour the remaining enchilada sauce over the rolled tortillas, ensuring they’re completely covered. This keeps them moist during baking and creates that authentic enchilada texture.
7. Top with Cheese: I sprinkle the remaining shredded cheese evenly over the top. For photo-worthy enchiladas, I make sure every inch is covered with that soon-to-be golden cheese.
8. Bake to Perfection: I bake at 375°F for 20-25 minutes until the cheese is bubbly and beginning to brown at the edges. The sauce should be simmering around the sides—that’s how I know the enchiladas are heated through.
9. Rest Before Serving: I allow the enchiladas to rest for 5-10 minutes before serving. This sets the filling and makes them easier to portion without falling apart—patience rewards with prettier plates!
Expert Cooking Tips
- Toast Your Spices: I briefly heat the chili powder in a dry pan before adding it to the filling. This awakens the essential oils and creates a more complex, aromatic flavor profile.
- Cottage Cheese Trick: I pulse the cottage cheese in a food processor for a few seconds if anyone in my family is texture-sensitive. This creates a smoother consistency while keeping all the benefits.
- Don’t Oversauce: I’ve learned that while enchiladas need to be well-covered with sauce, too much can make them soggy. I aim for a generous coating that doesn’t pool excessively in the pan.
- Watch The Edges: I cover just the edges with foil if they start to brown too quickly during baking. This ensures even cooking without burnt tortilla edges—a small detail that makes a big difference.
- Rest Period Matters: I never skip the 5-10 minute rest after baking. Just like with meat, this resting time allows the fillings to set and the flavors to meld perfectly.
Proper Storage
- Refrigeration: I store leftover enchiladas covered tightly with foil or in an airtight container for up to 3 days. The flavors actually intensify beautifully overnight!
- Freezing Unbaked: For meal prep, I assemble the enchiladas completely, cover tightly with plastic wrap and foil, and freeze for up to 2 months before the first baking.
- Freezing Baked: I portion cooled, baked enchiladas in individual containers for quick lunches. They maintain quality for about 1 month when properly sealed.
- Reheating: I reheat refrigerated enchiladas at 350°F for 15-20 minutes. From frozen, I bake covered for 30 minutes, then uncovered until heated through and bubbly.
Variations and Substitutions
- Protein Swaps: I’ve successfully substituted ground turkey, beef, or black beans for the chicken. Each brings a different character to the dish while maintaining that satisfying heartiness.
- Dairy Alternatives: For lactose-sensitive friends, I’ve used dairy-free cottage cheese alternatives and plant-based shredded cheese. The texture differs slightly, but the comfort food essence remains intact.
- Greener Version: Sometimes I add a handful of chopped spinach or kale to the filling for extra nutrients. The mild flavor blends seamlessly, and I love the color it adds to each bite.
- Heat Adjustments: When cooking for my spice-loving friends, I add a diced jalapeño to the filling and use a hot enchilada sauce. For milder palates, I stick with mild sauce and add a touch of smoked paprika for depth without heat.
- White Enchiladas: I occasionally switch to a creamy verde sauce instead of traditional red enchilada sauce. Paired with Monterey Jack cheese, this creates a completely different but equally delicious experience.
What Goes with This Recipe
- Cilantro Lime Rice: The bright, citrusy notes cut through the richness of the enchiladas, creating a refreshing contrast that cleanses the palate between bites.
- Simple Green Salad: I toss together mixed greens, avocado, and a light vinaigrette. The fresh crispness balances the warm, cheese-filled enchiladas perfectly.
- Roasted Street Corn: Sweet corn kernels charred with chili, lime, and cotija cheese echo the Mexican flavor profile while adding textural variety to the meal.
- Refried Beans: The smooth, velvety texture complements the more structured enchiladas. I often add a sprinkle of cheese on top for an extra indulgent side.
- Quick Guacamole: The cool creaminess of fresh guacamole spooned over a corner of the hot enchiladas creates a temperature and texture contrast I find irresistible.
FAQ
Can I make these ahead of time? Absolutely! Assemble up to 24 hours ahead and refrigerate unbaked. Add 5-10 minutes to baking time when cooking from cold.
How do I prevent soggy enchiladas? Briefly fry tortillas in hot oil before filling. This creates a barrier that resists sogginess while adding flavor.
Can I use flour tortillas instead? Yes, though corn provides more authentic flavor. Flour tortillas create a different texture but work in a pinch.
Is cottage cheese necessary? It provides unique creaminess and protein. Ricotta or sour cream can substitute but will alter the final texture and flavor.
How do I know when they’re done? Look for bubbling sauce and golden cheese. A knife inserted should feel hot when touched to your lip.
- 0 Facebook
- 198 Pinterest
- 12 Email
- Copy Link
- 210 shares
Cottage Cheese Chicken Enchiladas
Ingredients
Instructions
1. Prepare Your Filling: In a large bowl, I combine the shredded chicken, cottage cheese, half the shredded cheese, chopped onions, and green peppers. The mixture should be moist and well-integrated, with the cottage cheese binding everything together.
2. Season the Mixture: I sprinkle in the chili powder, salt, and pepper, mixing thoroughly. I always taste test here—the filling should be slightly more seasoned than you think necessary, as the tortillas will mellow the flavors.
3. Prepare Your Baking Dish : I pour a thin layer of enchilada sauce to coat the bottom of a 9×13 baking dish . This prevents sticking and adds flavor to the tortilla bottoms—a trick my grandmother taught me.
4. Warm the Tortillas: I briefly heat the corn tortillas in a dry skillet or microwave between damp paper towels until pliable. This crucial step prevents cracking during rolling and allows them to absorb more flavor.
5. Fill and Roll: I place about ⅓ cup of filling along the center of each tortilla, then roll it tightly and place seam-side down in the baking dish . The enchiladas should fit snugly together in a single layer.
6. Add the Sauce: I pour the remaining enchilada sauce over the rolled tortillas, ensuring they’re completely covered. This keeps them moist during baking and creates that authentic enchilada texture.
7. Top with Cheese: I sprinkle the remaining shredded cheese evenly over the top. For photo-worthy enchiladas, I make sure every inch is covered with that soon-to-be golden cheese.
8. Bake to Perfection: I bake at 375°F for 20-25 minutes until the cheese is bubbly and beginning to brown at the edges. The sauce should be simmering around the sides—that’s how I know the enchiladas are heated through.
9. Rest Before Serving: I allow the enchiladas to rest for 5-10 minutes before serving. This sets the filling and makes them easier to portion without falling apart—patience rewards with prettier plates!