- 0 Facebook
- 8 Pinterest
- 0 Email
- Copy Link
- 8 shares
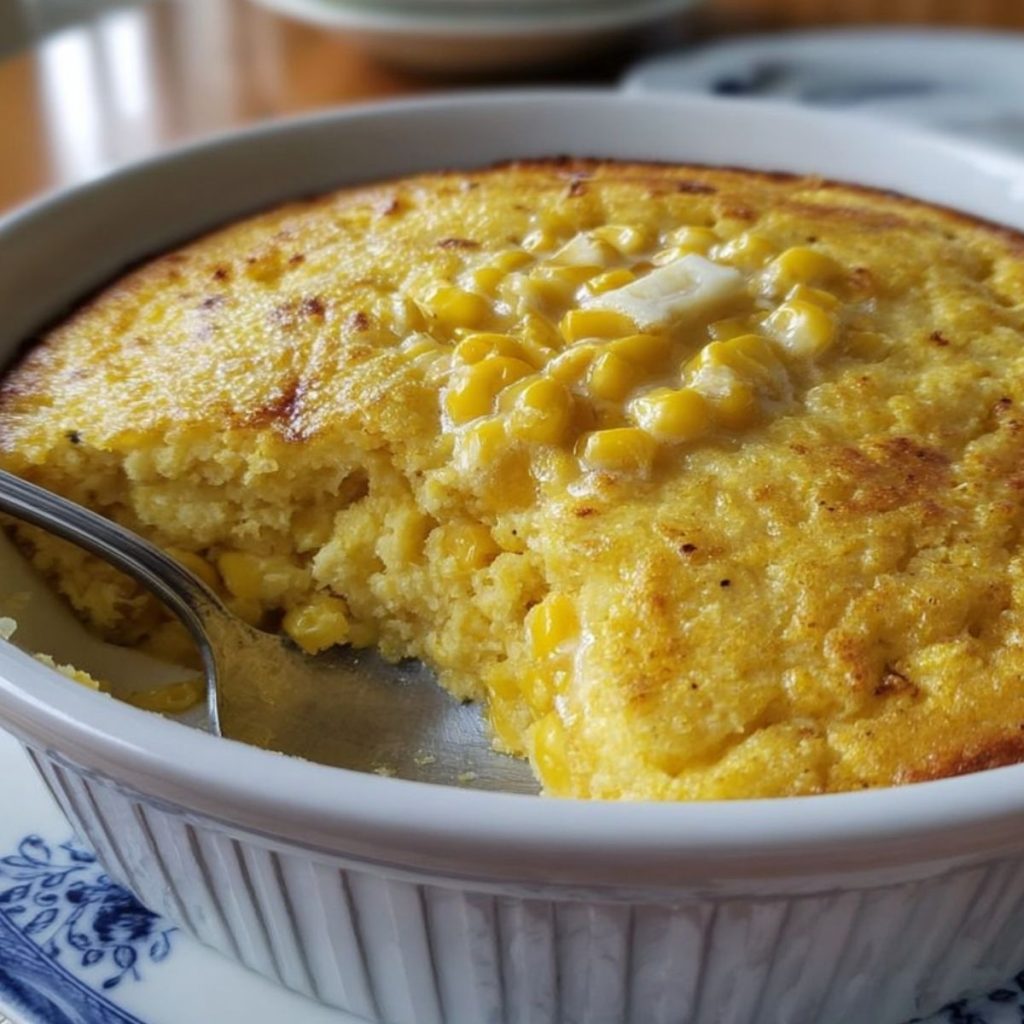
This golden corn casserole combines the sweetness of fresh corn with the comforting richness of melted butter and sour cream — creating pure comfort food magic in every spoonful. The fluffy, moist interior strikes the perfect balance between cornbread and pudding, while the slightly crisp top adds delightful textural contrast. Made with simple pantry ingredients and requiring just minutes of prep time, this creamy side dish transforms ordinary meals into memorable experiences. Serve it alongside your favorite grilled meats for a homestyle dinner that feels like a warm hug on a plate.
Why You’ll Love This Recipe
This Ultimate Creamy Corn Casserole brings together simple ingredients that transform into something truly magical when baked to golden perfection. Each spoonful delivers the comfort food experience you’re craving with minimal effort.
- Double Corn Goodness : The combination of cream corn and whole kernel corn creates perfect texture balance – creamy base with sweet pops of corn in every bite.
- Foolproof Results : Even kitchen novices can master this recipe with its simple mix-and-bake approach that delivers consistent, impressive results every time.
- Make-Ahead Marvel : Prepare the batter up to 24 hours ahead and refrigerate until baking time, making holiday meal planning significantly less stressful.
- Texture Perfection : The sour cream creates that coveted fluffy interior while allowing the top to develop a beautiful golden crust during baking.
- Versatile Crowd-Pleaser : This casserole has been tested across generations at countless gatherings – consistently earning rave reviews from both kids and adults alike.
Ingredient Breakdown with Tips
The magic of this Corn Casserole lies in how simple ingredients work together to create incredible flavor and texture. Each component plays a crucial role in developing that perfect balance between sweet, savory, and comforting.
- Jiffy cornbread mix : This pantry staple provides structure while adding that distinctive sweet cornbread flavor. For best results, use the original version rather than honey-flavored varieties which can make the casserole overly sweet.
- Cream corn : Adds essential moisture and creates that signature creamy texture throughout the casserole. Choose a quality brand with visible corn kernels suspended in the creamy base for better texture contrast.
- Whole kernel corn, drained : Provides delightful pops of sweet corn flavor and pleasant texture variation. Thoroughly drain the can to prevent excess moisture that could make your casserole soggy.
- Eggs : Act as the binding agent that helps the casserole set properly during baking. Bring them to room temperature before mixing for more even incorporation into the batter.
- Butter, melted : Delivers rich flavor and contributes to the casserole’s moist interior and slightly crisp top. Allow melted butter to cool slightly before adding to prevent it from cooking the eggs on contact.
- Sour cream : The secret ingredient that makes this corn casserole exceptionally creamy and tender. Full-fat sour cream produces the best results, though reduced-fat versions can work in a pinch (avoid fat-free options which lack the necessary richness).
Step-by-Step Instructions
- Preheat your oven to 350°F (175°C) and generously grease a 9×13-inch baking dish with butter or cooking spray.
- Combine the Jiffy cornbread mix, cream corn, and drained whole kernel corn in a large mixing bowl. The contrasting textures create that perfect balance between creamy and hearty.
- Crack the eggs into the bowl and add the melted butter, then stir until just incorporated. I find it’s best not to overmix at this stage—a few lumps are perfectly fine!
- Fold in the sour cream gently until the mixture is mostly uniform. The batter should be thick but pourable, with a slightly speckled appearance from the corn kernels.
- Pour the batter into your prepared baking dish , using a spatula to spread it evenly to the corners. The top should look slightly textured but relatively level.
- Bake for 45-50 minutes, or until the top turns golden brown and the center is set. You’ll know it’s done when a toothpick inserted in the center comes out mostly clean with just a few moist crumbs.
- Allow the casserole to rest for about 10 minutes before serving. This resting time is crucial as it allows the casserole to set up properly—trust me, your patience will be rewarded with perfect texture!
Make It Your Way
Don’t be afraid to put your own spin on this already-amazing corn casserole! The classic recipe is delicious as written, but sometimes ingredients or dietary needs call for adjustments.
- Add some heat : Fold in 1-2 finely diced jalapeños (seeds removed if you prefer milder heat) or a 4-ounce can of diced green chiles for a Southwestern kick that balances beautifully with the corn’s natural sweetness.
- Cheese please : I often stir in 1 cup of shredded cheddar, Monterey Jack, or Colby cheese just before baking for an even more indulgent casserole. For an extra treat, sprinkle another ½ cup on top during the last 10 minutes of baking.
- Make it gluten-free : Substitute the Jiffy mix with ⅔ cup gluten-free cornmeal plus ⅓ cup gluten-free flour blend, 1½ tablespoons sugar, and 1 teaspoon baking powder (just verify your other ingredients are gluten-free as well).
- Lighter option : Replace the sour cream with Greek yogurt and use reduced-fat butter (not margarine) to maintain the creamy texture while cutting some calories and fat. The tanginess of the yogurt actually enhances the corn’s natural sweetness!
- Herb enhancement : Fresh herbs bring brightness to this rich dish. Try adding 2 tablespoons of chopped fresh chives, 1 tablespoon chopped fresh thyme, or even a handful of chopped fresh basil folded into the batter for garden-fresh flavor.
- Special occasion upgrade : For holiday tables, fold in ½ cup cooked, crumbled bacon and ¼ cup finely diced red bell pepper for festive color and savory depth that turns this side into a showstopper.
Expert Tips
Here’s how to elevate your corn casserole from good to absolutely unforgettable:
- Room temperature ingredients : Allow eggs and sour cream to come to room temperature before mixing – they’ll blend more smoothly with the Jiffy cornbread mix for a more uniform batter.
- Drain thoroughly : Make sure to drain the whole kernel corn completely – I even pat it dry with paper towels sometimes. Excess moisture can make your corn casserole soggy rather than perfectly creamy.
- Watch the bake time : Every oven runs differently. I’ve found the perfect corn casserole has a golden top but remains moist inside – start checking at 40 minutes with a toothpick.
- Rest before serving : Those 10 minutes of resting aren’t optional! The casserole continues cooking from residual heat and sets up to the perfect consistency, making it easier to portion and serve.
- Make it your own : The classic recipe is perfect as-is, but I sometimes fold in 1 cup of shredded cheddar or add a diced jalapeño for a spicy-sweet variation that transforms this comfort food classic.
Serving Suggestions
This Corn Casserole is comfort food at its finest – versatile enough to complement almost any meal yet special enough to earn a place at your holiday table.
I love serving this golden, creamy side dish alongside smoky barbecued meats where the sweet corn flavor creates the perfect counterpoint to savory, charred proteins. For Sunday dinners, try pairing it with roasted chicken and a simple green salad dressed with vinaigrette – the acidity cuts through the richness of the casserole beautifully.
For holiday meals, this casserole fits right in with traditional favorites. The buttery, slightly sweet flavor profile makes it an excellent partner to turkey, ham, or prime rib. I particularly enjoy how it soaks up gravy without losing its distinct texture and taste.
For a complete comfort food experience, serve each portion with a pat of butter melting on top and a sprinkle of freshly ground black pepper. The contrast between the crisp golden top and the soft, creamy interior truly shines when served hot from the oven after that crucial 10-minute rest.
Storage & Freezing
This Creamy Corn Casserole keeps beautifully, making it perfect for meal prep or holiday planning. Proper storage ensures you’ll enjoy that same comforting texture and flavor even days after baking.
Refrigeration is simple – once your corn casserole has completely cooled, transfer leftovers to an airtight container and refrigerate for up to 4 days. The dairy components (sour cream and butter) may cause the casserole to firm up slightly when chilled, but this won’t affect the flavor. I actually find the flavors meld and develop even more complexity after a day in the fridge!
For longer storage, this corn casserole freezes surprisingly well despite its creamy ingredients. Cut cooled leftovers into individual portions and wrap tightly in plastic wrap, then foil, before placing in freezer bags. Label with the date and freeze for up to 3 months. When reheating, thaw overnight in the refrigerator , then warm in a 325°F oven until heated through (about 20 minutes), covering with foil to prevent over-browning. For best results, add a light sprinkle of water before reheating to restore moisture that may have been lost during freezing.
Make Ahead Options
This Corn Casserole is a meal prep champion that saves precious time on busy weeknights! You can prepare the entire batter up to 24 hours in advance and refrigerate it covered in the baking dish (the flavors actually improve overnight). The dry and wet ingredients can also be prepped separately up to 3 days ahead—store the cornbread mix combination in an airtight container and keep the wet ingredients mixed in the refrigerator . When ready to bake, simply combine everything if prepped separately, or remove from the fridge and let sit at room temperature for 15 minutes before baking. You’ll get the same golden, creamy results with half the effort!
Recipe FAQs
Can I use frozen corn instead of canned? Yes, just thaw and drain completely first.
How do I know when the casserole is done? Golden top with mostly clean toothpick test.
Can I make this ahead of time? Mix a day ahead, refrigerate, then bake.
What if I don’t have Jiffy mix? Substitute 1 cup cornmeal plus 2 tbsp sugar.
Can I freeze leftover corn casserole? Yes, freezes well for up to 3 months.
Is this gluten-free? No, but gluten-free cornbread mix works perfectly.
- 0 Facebook
- 8 Pinterest
- 0 Email
- Copy Link
- 8 shares
The Ultimate Creamy Corn Casserole: Comfort In Every Bite
Ingredients
Instructions
Preheat your oven to 350°F (175°C) and generously grease a 9×13-inch baking dish with butter or cooking spray.
Combine the Jiffy cornbread mix, cream corn, and drained whole kernel corn in a large mixing bowl. The contrasting textures create that perfect balance between creamy and hearty.
Crack the eggs into the bowl and add the melted butter, then stir until just incorporated. I find it’s best not to overmix at this stage—a few lumps are perfectly fine!
Fold in the sour cream gently until the mixture is mostly uniform. The batter should be thick but pourable, with a slightly speckled appearance from the corn kernels.
Pour the batter into your prepared baking dish, using a spatula to spread it evenly to the corners. The top should look slightly textured but relatively level.
Bake for 45-50 minutes, or until the top turns golden brown and the center is set. You’ll know it’s done when a toothpick inserted in the center comes out mostly clean with just a few moist crumbs.
Allow the casserole to rest for about 10 minutes before serving. This resting time is crucial as it allows the casserole to set up properly—trust me, your patience will be rewarded with perfect texture!
Notes
Room temperature ingredients: Allow eggs and sour cream to come to room temperature before mixing.
Drain thoroughly: Make sure to drain the whole kernel corn completely to avoid sogginess.
Watch the bake time: Start checking at 40 minutes with a toothpick.
Rest before serving: Those 10 minutes of resting aren’t optional!
Make it your own: Consider folding in 1 cup of shredded cheddar or a diced jalapeño for variation.
Nutrition
| Serving Size | 1 slice |
|---|---|
| Calories | 300 calories |
| Sugar Content | 5g |
| Sodium Content | 600mg |
| Fat Content | 15g |
| Saturated Fat Content | 8g |
| Unsaturated Fat Content | 7g |
| Trans Fat Content | 0g |
| Carbohydrate Content | 35g |
| Fiber Content | 2g |
| Protein Content | 6g |
| Cholesterol Content | 100mg |