- 0 Facebook
- 41 Pinterest
- 3 Email
- Copy Link
- 44 shares
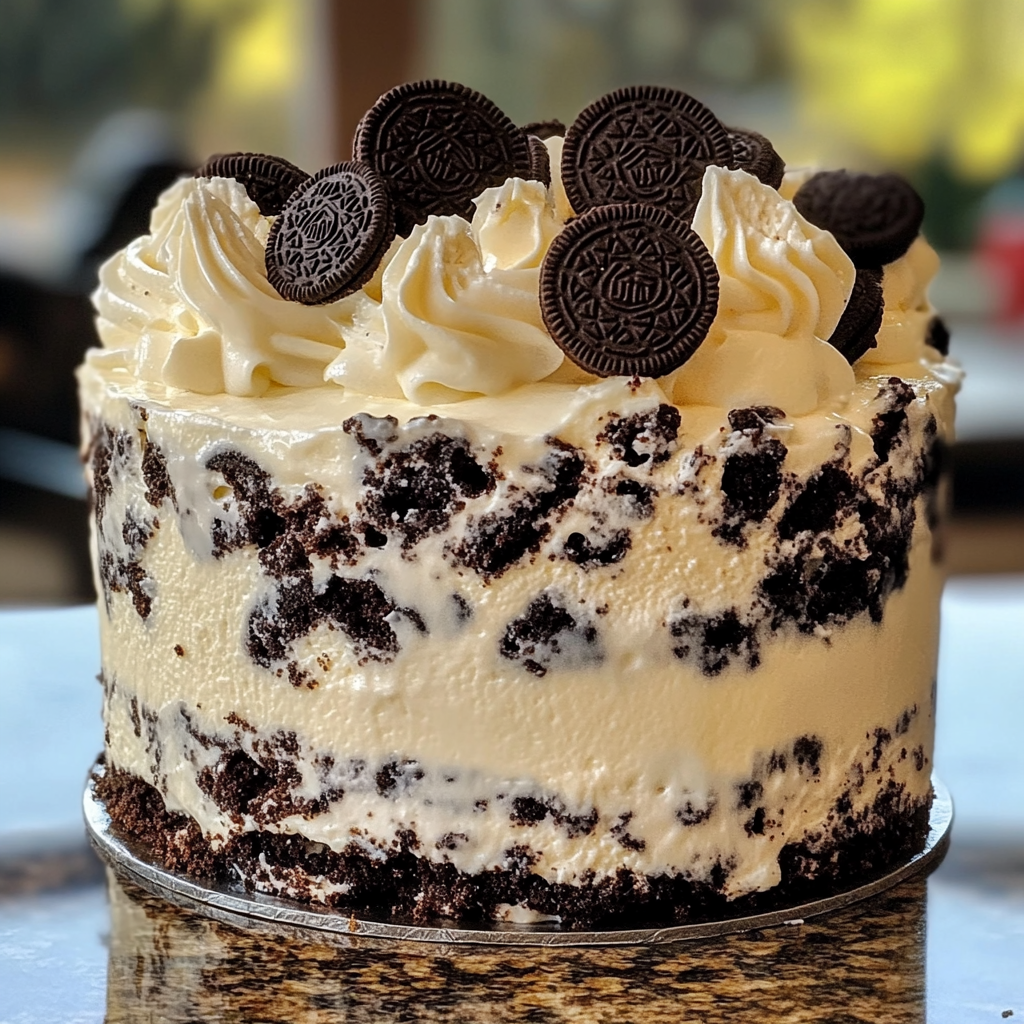
I’ll never forget the first time I made this Cookies and Cream Oreo Cake—it was for my niece’s birthday, and the look on her face when she saw those classic black-and-white cookies adorning a towering, creamy masterpiece was priceless! There’s something almost magical about transforming humble Oreos into a dessert that’s both nostalgic and sophisticated. Don’t you sometimes crave those childhood flavors but in a grown-up presentation? This cake delivers exactly that—the familiar comfort of Oreos elevated into something truly special that’s worthy of celebrations but simple enough for a “just because” weekend treat.
Why You’ll Love This Recipe
I believe this Cookies and Cream Oreo Cake stands out from other desserts for so many reasons:
- Perfect Texture Balance: The moist vanilla cake contrasts beautifully with crunchy Oreo pieces, creating an exciting mouthfeel with every bite.
- Foolproof Formula: I’ve tested this recipe countless times, ensuring it delivers consistent results whether you’re a novice baker or experienced pastry enthusiast.
- Visual Impact: The striking black-and-white contrast creates a showstopping dessert that looks professionally made with minimal decorating skills.
- Customizable Canvas: The basic formula works beautifully while allowing for personal touches—more Oreos, less sweetness, or even different cookie varieties.
- Make-Ahead Friendly: The cake actually improves with a day of rest, allowing flavors to meld and making it perfect for busy schedules.
Ingredients for This Recipe
For the Cake:
- Vanilla Cake Mix: The foundation that provides consistent structure. I find that a quality brand produces the best texture, though homemade works beautifully for more control.
- Sour Cream: My secret weapon for incredible moisture and tenderness. The slight tang balances the sweetness for a more sophisticated flavor profile.
- Eggs: These bind everything together and provide structure. I always use room temperature eggs for better incorporation and more even baking.
- Vegetable Oil: Creates a more tender, moist crumb than butter. The neutral flavor allows the vanilla and Oreo notes to shine through.
- Vanilla Extract: Enhances the creamy flavor profile. I always splurge on pure vanilla for its complex, authentic flavor notes.
- Milk: Adds necessary moisture while maintaining a tender crumb. Whole milk provides the best richness, but any variety works.
- Crushed Oreo Cookies: The star ingredient that creates those beloved cookies-and-cream specks throughout. Crushing them unevenly adds textural interest.
- Granulated Sugar: Provides additional sweetness and helps create a slightly caramelized exterior. The coarse crystals also aid in creating air pockets for a lighter texture.
For the Oreo Frosting:
- Heavy Cream: Whips up to create a cloud-like texture. The high fat content ensures stable peaks and luxurious mouthfeel.
- Cream Cheese: Adds tangy depth and stabilizes the whipped cream. I always use full-fat for the creamiest results.
- Powdered Sugar: Sweetens while dissolving completely for a silky-smooth texture. The cornstarch component helps stabilize the frosting.
- Vanilla Extract: Complements the creamy components with warm, aromatic notes. A good quality extract makes a noticeable difference.
- Crushed Oreo Cookies: Creates those signature black specks throughout the frosting. I prefer a fine crush here for smoother spreading.
- White Chocolate Chips: Optional but adds an elegant finish and subtle flavor contrast. The slight hardening when cooled creates a beautiful drip effect.
For Decoration:
- Whole Oreo Cookies: Create an instantly recognizable presentation. Standing them upright around the edge makes for a particularly striking display.
- Extra Crushed Oreos: The final touch that signals exactly what awaits inside. A coarser crush here provides textural contrast.
How to Make This Recipe
Prepare the Cake Batter:
- Preheat and Prep: Start by preheating your oven to 350°F (175°C). I like to grease and line two 9-inch round cake pans with parchment paper for easy removal later.
- Mix the Base: In a large mixing bowl, combine the vanilla cake mix, sour cream, eggs, vegetable oil, vanilla extract, and milk. I find that beating on medium speed for about 2 minutes creates the perfect consistency—smooth and well-incorporated but not overmixed.
- Incorporate Oreos: Gently fold in the crushed Oreo cookies and granulated sugar. The cookie pieces should be distributed evenly throughout the batter without overmixing, which would deflate the air we’ve incorporated.
- Bake to Perfection: Divide the batter evenly between your prepared cake pans. The surface should be relatively smooth with visible Oreo specks. Bake for 25-30 minutes, or until a toothpick inserted in the center comes out with a few moist crumbs but no wet batter.
- Cool Completely: Allow the cakes to cool in their pans for about 10 minutes—this prevents them from breaking when removed. Then transfer to a wire rack to cool completely before frosting. The cakes should feel room temperature to the touch with no warmth in the center.
Create the Oreo Frosting:
- Whip the Cream: In a large, chilled bowl, beat the heavy cream until soft peaks form. The cream should hold its shape but still have a slight droop at the peak. Transfer to another bowl and set aside.
- Beat the Base: In the original bowl, beat the softened cream cheese until smooth and fluffy. Add the powdered sugar and vanilla extract, continuing to beat until well combined with no lumps. The mixture should be light and airy.
- Combine Components: Gently fold the whipped cream back into the cream cheese mixture until just combined. The texture should be light and cloud-like, with no streaks of cream cheese visible.
- Add Oreo Magic: Fold in the crushed Oreo cookies, being careful not to deflate the frosting. You want visible Oreo specks distributed evenly throughout.
Assemble and Decorate:
- Layer Construction: Place one cake layer on your serving plate. Spread a generous amount of the Oreo frosting—about 1 inch thick—over the top, creating an even layer that extends slightly beyond the edges.
- Complete the Stack: Carefully place the second cake layer on top, gently pressing down to secure. The frosting should squish slightly but not ooze out completely.
- Frost Exterior: Cover the top and sides of the cake with the remaining frosting. I prefer a rustic finish with swoops and swirls, which forgives any imperfections while looking intentionally artistic.
- Optional Drizzle: If using, melt the white chocolate chips and drizzle over the top of the cake, allowing some to cascade down the sides. This creates an elegant effect that contrasts beautifully with the Oreo specks.
- Final Decoration: Press whole Oreo cookies around the edge of the cake and sprinkle the extra crushed Oreos over the top. I find that standing the cookies upright creates a particularly impressive presentation.
- Chill to Set: Refrigerate the cake for at least 1 hour before serving to allow the frosting to set and the flavors to meld together. This creates a more cohesive texture and flavor profile.
Expert Cooking Tips
- Texture Control: I always pulse Oreos to varying degrees—some fine, some chunky—for more interesting texture throughout. Perfect uniformity is actually less appealing than rustic variation.
- Temperature Matters: Room temperature ingredients (especially eggs and cream cheese) incorporate more evenly. I set mine out an hour before starting for truly remarkable texture.
- Crumb Coat Secret: For a professional finish, I apply a thin “crumb coat” of frosting first, chill for 20 minutes, then add the final layer. This traps crumbs and creates cleaner final results.
- Frosting Stability: The cream cheese-whipped cream blend can soften in warm rooms. I keep my mixing bowl and beaters in the freezer for 15 minutes before whipping for maximum stability.
- Cookie Selection: While classic Oreos are traditional, I’ve had amazing results using seasonal varieties like mint or birthday cake flavors for themed events.
Proper Storage
- Room Temperature: Enjoy same-day servings at room temperature for about 2 hours maximum. The texture is creamiest when the chill is just slightly taken off.
- Refrigeration: Store leftovers covered in the refrigerator for up to 4 days. The plastic wrap should touch the cut surfaces to prevent drying.
- Freezing Option: Freeze unfrosted cake layers wrapped tightly in plastic and foil for up to 3 months. Thaw overnight in the refrigerator before frosting.
- Whole Cake Preservation: For storing a fully decorated cake, chill until firm, then wrap in plastic without touching the surface. Refrigerate up to 3 days.
- Serving From Cold: For best flavor and texture, I let refrigerated cake slices stand at room temperature for 20-30 minutes before serving.
Variations and Substitutions
Dietary Adaptations:
- Gluten-Free Version: Swap in your favorite gluten-free vanilla cake mix and use gluten-free chocolate sandwich cookies. The texture remains nearly identical with these simple substitutions.
- Reduced Sugar Option: Cut powdered sugar to ¼ cup in the frosting and use reduced-sugar Oreos. The cream cheese provides enough body that the structure won’t suffer.
- Dairy Alternatives: Non-dairy cream cheese and coconut whipped cream create a surprisingly authentic version. Just ensure your coconut cream is thoroughly chilled for proper whipping.
Creative Flavor Twists:
- Mint Chocolate: Use mint Oreos and add ¼ teaspoon mint extract to the frosting for a refreshing variation that’s perfect for holiday gatherings.
- Peanut Butter Dream: Substitute peanut butter Oreos and add 2 tablespoons of creamy peanut butter to the frosting for a nutty twist that’s absolutely irresistible.
- Berry Beautiful: Add 2 tablespoons of freeze-dried strawberry powder to the frosting and use golden Oreos for a fruity, visually stunning pink-and-white version.
- Coffee Infusion: Dissolve 1 tablespoon of instant espresso in the milk before adding to the batter. This enhances the chocolate notes in the Oreos without overwhelming them.
What Goes with This Recipe
- Fresh Berries: I serve strawberries or raspberries alongside for bright acidity that cuts through the richness. Their vibrant color also creates beautiful plate presentation.
- Warm Chocolate Sauce: A small pitcher of slightly warm chocolate sauce allows guests to add extra decadence. The contrast between cold cake and warm sauce is heavenly.
- Coffee or Milk: A strong cup of coffee balances the sweetness perfectly, while a cold glass of milk creates that nostalgic cookies-and-milk experience in elevated form.
- Vanilla Bean Ice Cream: A small scoop alongside (rather than on top) provides temperature contrast without melting into the cake’s carefully crafted texture.
- Caramel Drizzle: A light drizzle of salted caramel sauce adds complexity and brings out the vanilla notes in both the cake and cookies.
FAQ
Can I make this cake in advance? Absolutely! I actually prefer making it a day ahead as the flavors meld beautifully overnight.
Why did my frosting become runny? Likely the cream was overwhipped or ingredients were too warm. Chill everything beforehand for stability.
Can I use double-stuffed Oreos instead? Yes! They’ll provide extra creaminess in the cake texture and more pronounced vanilla flavor.
How do I prevent my cake layers from cracking? Cool them completely in the pans for 10 minutes before removing to prevent thermal shock.
Can I turn this into cupcakes? Definitely! Fill liners 2/3 full and reduce baking time to 18-22 minutes for perfect miniature versions.
- 0 Facebook
- 41 Pinterest
- 3 Email
- Copy Link
- 44 shares
Cookies and Cream Oreo Cake Recipe
Ingredients
Instructions
Preheat oven to 350°F. Grease two 9-inch cake pans.
Mix cake mix, sour cream, eggs, oil, vanilla, and milk until smooth.
Fold in crushed Oreos and sugar.
Divide between pans; bake 25-30 minutes until done.
Cool completely.
Whip cream to soft peaks; set aside.
Beat cream cheese, powdered sugar, and vanilla until fluffy.
Fold in whipped cream, then crushed Oreos.
Layer cakes with frosting between and covering outside.
Optional: Drizzle with melted white chocolate.
Decorate with whole and crushed Oreos.
Refrigerate 1 hour before serving.