Introduction
There’s something undeniably comforting and nostalgic about a classic thumbprint cookie. That tender, buttery base with a sweet, jammy center just speaks to the soul. But what if we told you we’ve taken that beloved classic and elevated it to a whole new level of decadence? Prepare to meet your new favorite indulgence: Chocolate Hazelnut Thumbprints. These aren’t your grandma’s thumbprints (unless your grandma was a culinary genius with a penchant for sophisticated flavor pairings!). We’re talking about a rich, chewy chocolate cookie base cradling a luscious, creamy hazelnut filling that will transport your taste buds straight to dessert heaven.
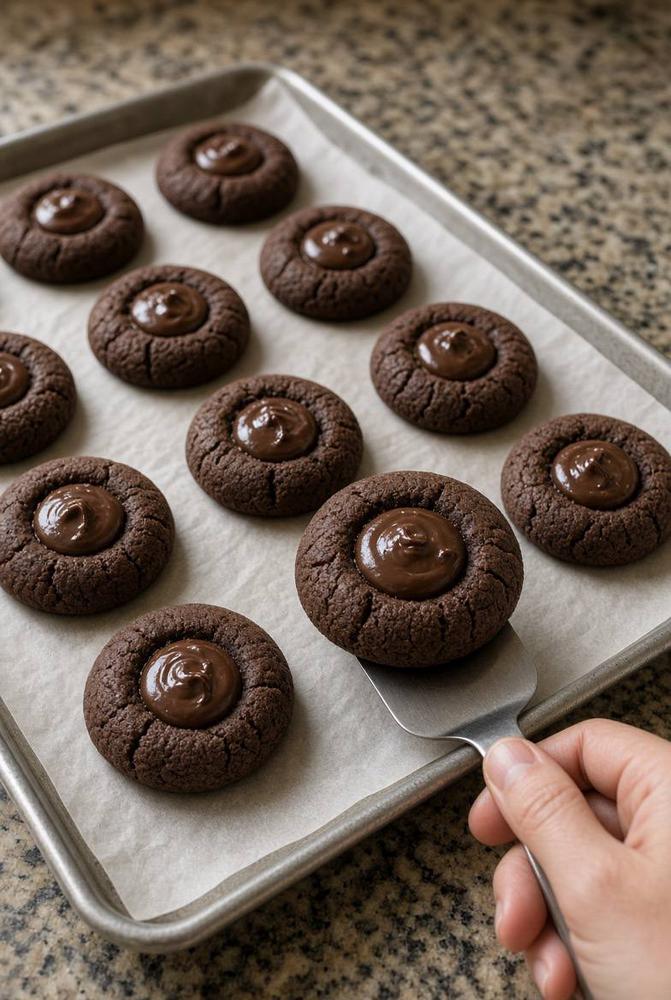
This recipe combines the deep, slightly bitter notes of premium cocoa with the sweet, nutty allure of toasted hazelnuts, creating a symphony of flavors that is both familiar and exciting. Imagine biting into a soft, dark chocolate cookie, its edges just slightly cracked from baking, revealing a warm, glossy center of pure hazelnut bliss. It’s the kind of cookie that makes you close your eyes and savor every single crumb. Perfect for holiday cookie platters, a thoughtful homemade gift, or simply as a special treat to brighten any ordinary day, these Chocolate Hazelnut Thumbprints are guaranteed to impress. They’re sophisticated enough for a dinner party, yet comforting enough for a cozy night in.
Whether you’re a seasoned baker or just starting your culinary journey, this recipe is designed to guide you to success. We’ve fine-tuned every step to ensure your cookies turn out perfectly chewy, intensely flavorful, and utterly irresistible. So, grab your apron, preheat your oven, and get ready to transform simple ingredients into a truly extraordinary dessert that celebrates the magical pairing of chocolate and hazelnut.
Nutritional Information
Per serving (approximate values):
- Calories: 210
- Protein: 3g
- Carbohydrates: 25g
- Fat: 12g
- Fiber: 2g
- Sodium: 90mg
Ingredients
- 1 cup (2 sticks) unsalted butter, softened
- 3/4 cup granulated sugar
- 1 large egg
- 1 teaspoon vanilla extract
- 1 3/4 cups all-purpose flour
- 1/2 cup unsweetened cocoa powder
- 1/2 teaspoon baking soda
- 1/4 teaspoon salt
- 1 cup hazelnut spread (like Nutella)
- 1/4 cup finely chopped toasted hazelnuts (optional, for garnish)
Instructions
- Preheat your oven to 350°F (175°C). Line two baking sheets with parchment paper.
- In a large bowl, using an electric mixer, cream together the softened butter and granulated sugar until light and fluffy, about 2-3 minutes.
- Beat in the egg and vanilla extract until well combined, scraping down the sides of the bowl as needed.
- In a separate medium bowl, whisk together the all-purpose flour, unsweetened cocoa powder, baking soda, and salt.
- Gradually add the dry ingredients to the wet ingredients, mixing on low speed until just combined and a soft dough forms. Be careful not to overmix.
- Roll the dough into 1-inch balls. Place them about 2 inches apart on the prepared baking sheets.
- Using your thumb or the back of a rounded measuring spoon (like a 1/2 teaspoon), gently press an indentation into the center of each dough ball. If the edges crack too much, gently smooth them back together.
- Bake for 9-11 minutes, or until the edges are set and the cookies are slightly puffed. The centers may still look a bit soft.
- Immediately upon removing the cookies from the oven, use your thumb or the back of the measuring spoon to gently re-indent the centers if they have puffed up during baking.
- Allow the cookies to cool on the baking sheets for about 5 minutes before carefully transferring them to a wire rack to cool completely.
- Once the cookies are completely cool, spoon or pipe about 1 teaspoon of hazelnut spread into each indentation. If the hazelnut spread is too firm, you can warm it slightly in the microwave for 10-15 seconds to make it more spreadable.
- If desired, sprinkle the finely chopped toasted hazelnuts over the hazelnut spread for added texture and flavor.
- Allow the hazelnut spread to set slightly before serving, or enjoy immediately.
Cooking Tips and Variations
Achieving the perfect Chocolate Hazelnut Thumbprint cookie is all about a few key techniques and knowing how to make them your own. For starters, always ensure your butter is truly softened, not melted, when creaming it with sugar. This creates the essential airy texture that makes these cookies so tender. Overmixing the dough once the flour is added is a common pitfall; mix only until just combined to prevent tough cookies. Chilling the dough for 15-30 minutes before rolling can also help prevent spreading, especially if your kitchen is warm, resulting in perfectly shaped cookies. When forming the indentations, using the back of a rounded 1/2 teaspoon measuring spoon can create a more uniform and neat well than a thumb, though a thumb works just fine for a more rustic look. If the cookies puff up significantly during baking, gently re-indent them immediately after they come out of the oven while they are still warm and pliable. This ensures a nice, deep well for your hazelnut filling.
The timing of the hazelnut filling is crucial for that glossy, creamy finish. While some thumbprint recipes add the filling before baking, for these chocolate hazelnut delights, we recommend adding the hazelnut spread after the cookies have cooled. This prevents the spread from drying out, cracking, or becoming too firm during baking, preserving its luscious texture. If your hazelnut spread is a bit stiff, microwave it for 10-15 seconds or stir it vigorously to make it more pliable and easier to spoon or pipe into the wells. For an extra boost of hazelnut flavor, consider toasting whole hazelnuts, then grinding a portion of them into a fine meal to incorporate into the cookie dough itself, replacing a tablespoon or two of flour. This adds a subtle, earthy depth to the chocolate base. A tiny pinch of sea salt sprinkled over the top of the filled cookies can also enhance both the chocolate and hazelnut flavors, creating a gourmet touch.
Beyond the classic chocolate hazelnut pairing, these thumbprints are incredibly versatile. You could experiment with different fillings once you master the base cookie. Imagine a salted caramel thumbprint, a raspberry jam-filled one, or even a white chocolate ganache center for a striking contrast. For a different cookie base, you could reduce the cocoa powder and add a bit of instant espresso powder to intensify the chocolate, or even omit the cocoa for a classic vanilla shortbread thumbprint. You can also play with toppings; instead of chopped hazelnuts, consider a sprinkle of flaky sea salt, a dusting of cocoa powder, or even a drizzle of melted dark chocolate over the hazelnut filling for an extra layer of decadence. These cookies are also excellent for gifting; arrange them in a pretty box with parchment paper between layers, and they’re sure to be a hit. Don’t be afraid to get creative and make this recipe truly your own!
Storage and Reheating
Proper storage is key to keeping your Chocolate Hazelnut Thumbprints fresh and delicious for as long as possible. Once the hazelnut spread has set, store the cookies in an airtight container at room temperature. They will remain fresh and delightfully chewy for up to 3-4 days. To prevent the cookies from sticking together or the hazelnut filling from smudging, you can place a piece of parchment paper or wax paper between layers if stacking them in the container. Avoid storing them in the refrigerator, as the cold air can dry out the cookies and make the chocolate base firm and less tender. The hazelnut spread also tends to stiffen in the cold, affecting its creamy texture.
If you’ve made a large batch and wish to keep some for longer, these cookies freeze beautifully. To freeze, arrange the cooled, filled cookies in a single layer on a baking sheet and place them in the freezer for about 1-2 hours, or until solid. This “flash freezing” step prevents them from sticking together. Once frozen, transfer the cookies to a freezer-safe airtight container or a heavy-duty freezer bag. They can be stored in the freezer for up to 2-3 months. When you’re ready to enjoy them, simply remove the desired number of cookies from the freezer and let them thaw at room temperature for about 30-60 minutes. There’s no need to reheat them; they are best enjoyed at room temperature, allowing the cookie to soften and the hazelnut spread to return to its creamy consistency. Reheating in a microwave or oven could cause the hazelnut spread to become oily or dry out the cookie. Enjoying them thawed at room temperature ensures they maintain their delightful texture and flavor profile.
Frequently Asked Questions
What kind of cocoa powder should I use for these cookies?
For these Chocolate Hazelnut Thumbprints, we recommend using unsweetened natural cocoa powder. This provides a deep, rich chocolate flavor that complements the sweetness of the hazelnut spread beautifully. Dutch-processed cocoa powder can also be used, but it will result in a slightly darker cookie with a milder, less acidic chocolate flavor. Both options work well, so choose based on your personal preference for chocolate intensity.
My cookie dough is too sticky to roll. What should I do?
If your cookie dough feels too sticky to handle and roll into balls, it’s likely a bit too warm. The best solution is to chill the dough in the refrigerator for 15-30 minutes. This will firm up the butter, making the dough much easier to work with. If after chilling it’s still too sticky, you can add a tablespoon or two more of flour, mixing it in gently, until the dough reaches a manageable consistency.
Can I make these cookies ahead of time?
Absolutely! These cookies are great for making ahead. You can prepare the cookie dough, wrap it tightly in plastic wrap, and refrigerate it for up to 2-3 days before baking. When ready to bake, let the dough sit at room temperature for about 15-20 minutes to soften slightly before rolling and baking. Alternatively, you can bake the cookies, let them cool completely, and then store them unfilled in an airtight container at room temperature for up to 2 days. Fill them with the hazelnut spread just before serving for the freshest taste and best texture.
My thumbprints flattened during baking. How can I prevent this?
There are a few reasons why thumbprints might flatten. Ensure your butter isn’t too soft or melted when you start creaming. Chilling the dough before rolling and baking can significantly help maintain their shape. Also, if your oven runs hot, the cookies might spread more quickly, so double-check your oven temperature. If they still flatten slightly, gently re-indent them with your thumb or a measuring spoon immediately after taking them out of the oven while they are still warm and pliable.
Chocolate Hazelnut Thumbprints
Ingredients
Instructions
Preheat your oven to 350°F (175°C). Line two baking sheets with parchment paper.
In a large bowl, using an electric mixer, cream together the softened butter and granulated sugar until light and fluffy, about 2-3 minutes.
Beat in the egg and vanilla extract until well combined, scraping down the sides of the bowl as needed.
In a separate medium bowl, whisk together the all-purpose flour, unsweetened cocoa powder, baking soda, and salt.
Gradually add the dry ingredients to the wet ingredients, mixing on low speed until just combined and a soft dough forms. Be careful not to overmix.
Roll the dough into 1-inch balls. Place them about 2 inches apart on the prepared baking sheets.
Using your thumb or the back of a rounded measuring spoon (like a 1/2 teaspoon), gently press an indentation into the center of each dough ball. If the edges crack too much, gently smooth them back together.
Bake for 9-11 minutes, or until the edges are set and the cookies are slightly puffed. The centers may still look a bit soft.
Immediately upon removing the cookies from the oven, use your thumb or the back of the measuring spoon to gently re-indent the centers if they have puffed up during baking.
Allow the cookies to cool on the baking sheets for about 5 minutes before carefully transferring them to a wire rack to cool completely.
Once the cookies are completely cool, spoon or pipe about 1 teaspoon of hazelnut spread into each indentation. If the hazelnut spread is too firm, you can warm it slightly in the microwave for 10-15 seconds to make it more spreadable.
If desired, sprinkle the finely chopped toasted hazelnuts over the hazelnut spread for added texture and flavor.
Allow the hazelnut spread to set slightly before serving, or enjoy immediately.