- 0 Facebook
- 30 Pinterest
- 1 Email
- Copy Link
- 31 shares
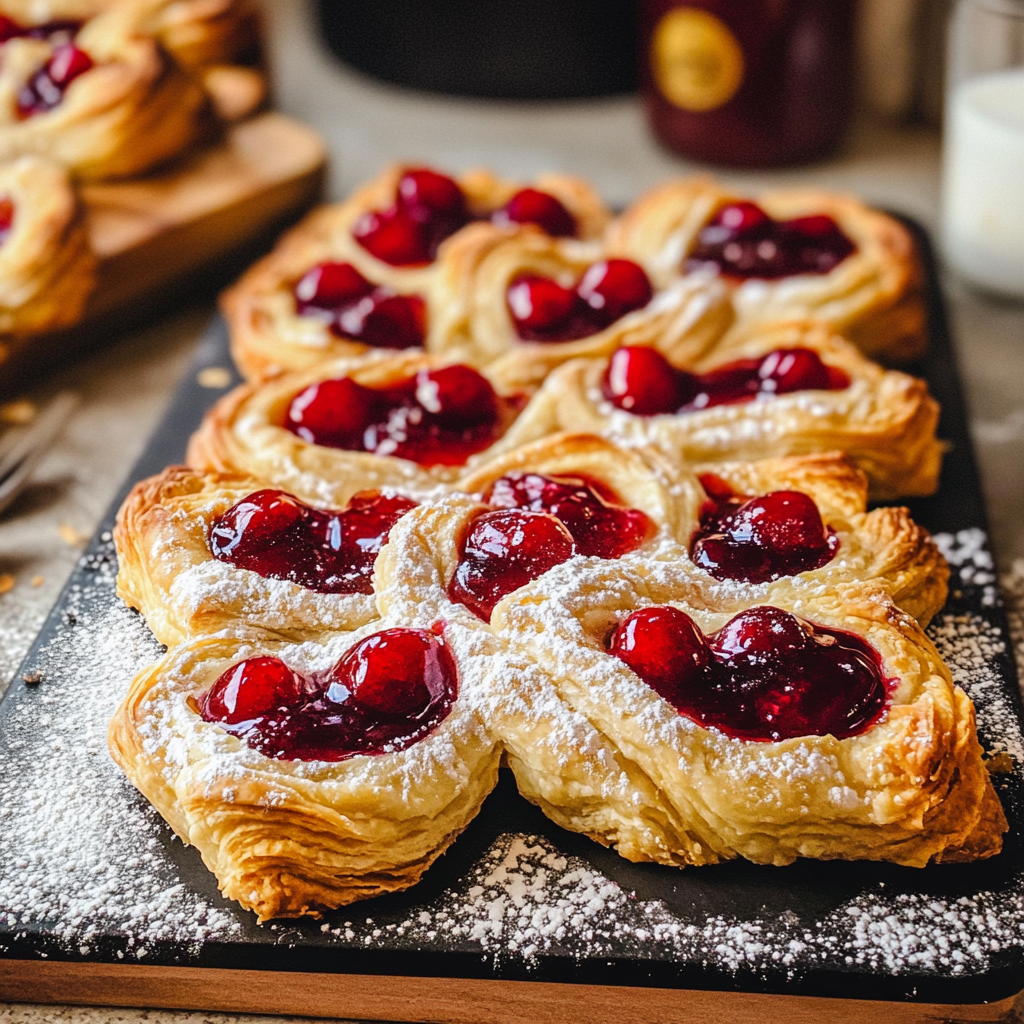
I still remember the first time I created these Cherry Cheese Danishes for a Sunday brunch with friends. I was rushing to prepare something impressive yet manageable, and stumbled upon my grandmother’s old recipe box. Her danish recipe caught my eye, but I decided to add my own twist with cream cheese and cherries. The moment I pulled them from the oven , the sweet aroma of buttery pastry and warm cherries filled my kitchen, and I knew I’d found something special. These danishes have since become my signature contribution to family gatherings – they’re remarkably simple to prepare yet look absolutely stunning, like something from a high-end bakery.
Why You’ll Love This Cherry Cheese Danish
• The magic of Cherry Cheese Danishes lies in their perfect balance of textures and flavors • Flaky, buttery layers of puff pastry create the ideal canvas • Creamy, slightly tangy cream cheese filling adds richness • Sweet-tart cherry topping provides vibrant color and fruity punch • Elegant results with minimal effort • Delivers a café-quality experience from your own kitchen
Ingredients for This Recipe
- Frozen Puff Pastry: I always keep a box in my freezer for last-minute baking emergencies. Its pre-laminated layers create that incredible flakiness without the hours of folding and chilling homemade pastry would require.
- Cream Cheese: The creamy backbone that transforms this from simple danish to decadent treat. I recommend using full-fat for the richest flavor and smoothest texture when baked.
- Sugar: I’ve found just the right amount to sweeten the filling without overpowering the natural tanginess of the cream cheese. It creates the perfect balance against the tart cherries.
- Vanilla Extract or Bourbon: This aromatic element elevates the entire pastry. I prefer bourbon when serving adults – it adds complex caramel notes that perfectly complement the cherries.
- Cherry Pie Filling: The star of the show! The vibrant color and sweet-tart flavor create that perfect “wow” moment. I sometimes make my own during cherry season, but quality store-bought delivers consistent results.
- Powdered Sugar: The final touch that adds a professional bakery look. I dust it on just before serving for that picture-perfect finish that makes everyone reach for their phones before taking a bite.
How to Make Cherry Cheese Danish
1. Prepare the Pastry: I always start by thawing the frozen puff pastry according to package directions – usually about 40 minutes at room temperature. The pastry should be cold but pliable enough to unfold without cracking.
2. Create the Cream Cheese Filling: While the pastry thaws, I beat the cream cheese until smooth and creamy, then blend in the sugar and vanilla (or bourbon). The texture should be light and fluffy – this ensures it bakes up with that perfect cheesecake-like consistency.
3. Prepare the Pastry Sheets: On a lightly floured surface, I gently roll each sheet into a 10×10-inch square, then cut each into four equal squares. This creates the perfect size for individual danishes without stretching the dough too thin.
4. Form the Danishes: I place the squares on parchment-lined baking sheets, then use my fingers to create a slight indent in the center of each square, leaving about a 1-inch border. The border will puff dramatically around our filling.
5. Add the Fillings: With a spoon, I place about 1 tablespoon of the cream cheese mixture in the center of each square, spreading it slightly but keeping it within the border. Then I top each with about 2 tablespoons of cherry filling – the contrast of white cream cheese and ruby cherries creates a stunning visual.
6. Bake to Golden Perfection: Into a preheated 375°F oven they go for 15-18 minutes, until the pastry has puffed dramatically and turned a deep golden brown. I watch them carefully during the last few minutes – the difference between perfectly caramelized and slightly burned happens quickly!
7. Finish with Flair: After cooling for about 10 minutes, I dust the danishes with powdered sugar just before serving. The warm pastries with their cool filling and sweet-tart cherry topping create an absolutely irresistible combination.
Expert Cooking Tips
- Keep Everything Cold: I always ensure my cream cheese is cold and my pastry stays chilled until the moment it hits the oven . This creates those magnificent layers that make puff pastry so special.
- Create a Containment Border: Fold in the corners of each square slightly – I’ve learned this creates a natural barrier that keeps the fillings from spilling out during baking.
- For the Best Texture: Don’t overwork the pastry dough. I handle it minimally to keep those beautiful layers intact, which results in that bakery-worthy height and flakiness.
- Even Filling Distribution: I use a small cookie scoop for perfectly portioned cream cheese dollops. This ensures every danish gets the same delicious amount of filling.
- Watch the Bake Carefully: The transformation from “almost done” to “perfectly golden” happens quickly! I start checking at 14 minutes and never walk away during those final moments.
Proper Storage
- Fresh Enjoyment: These danishes are at their absolute peak when eaten within 24 hours. I store them loosely covered at room temperature for the crispiest pastry.
- Refrigerator Storage: For longer keeping, I refrigerate in an airtight container for up to 3 days. The pastry softens slightly but the flavors continue to develop beautifully.
- Freezer Option: I’ve found these freeze surprisingly well! I wrap each cooled danish individually, then freeze for up to a month. Perfect for unexpected guests!
- Reheating for Freshness: To revive refrigerated or frozen danishes, I pop them in a 300°F oven for 5-10 minutes. The pastry recrisps beautifully, like it was just baked.
Variations and Substitutions
- Different Fruit Fillings: I love experimenting with seasonal options! Blueberry preserves in summer, apple compote in fall, or even lemon curd for a bright winter treat – the cream cheese base pairs beautifully with almost any fruit.
- Flavor Enhancements: Sometimes I add a teaspoon of almond extract to the cream cheese mixture when using cherries – it’s a classic flavor pairing that elevates the entire pastry. Lemon zest adds wonderful brightness when paired with blueberry or raspberry fillings.
- Dairy-Free Version: I’ve successfully made these using dairy-free cream cheese alternative and a light brushing of plant-based milk instead of egg wash. The pastry still puffs beautifully and the filling maintains that creamy texture.
- Make-Ahead Option: When I’m really pressed for time, I assemble these the night before and refrigerate the filled but unbaked pastries. In the morning, I simply pop them into the oven for fresh-baked danishes with minimal effort.
What Goes with Cherry Cheese Danish
- Fresh Fruit Platter: I love serving these danishes alongside sliced fresh fruits – the natural sweetness and acidity create a perfect balance against the rich pastry.
- Coffee or Tea: A bold cup of coffee or Earl Grey tea cuts through the sweetness, creating that perfect café experience right at home.
- Breakfast Meats: For a more substantial brunch, I pair with crispy bacon or breakfast sausage. The savory saltiness complements the sweet danish beautifully.
- Yogurt Parfaits: For a lighter option, I serve alongside yogurt parfaits with granola. The tangy yogurt echoes the cream cheese filling in a delightful way.
FAQ
Can I make these ahead of time? I often prepare and freeze unbaked danishes, then bake from frozen, adding 5-7 minutes to the bake time.
How do I prevent soggy bottoms? Always bake on parchment paper and allow the baking sheet to preheat with the oven .
Can I use homemade cherry filling? Absolutely! I pit and cook down 4 cups of fresh cherries with ¼ cup sugar and 1 tablespoon cornstarch.
What if my pastry tears? No worries! I simply press the edges together or patch with a small piece of dough from another area.
Can I halve this recipe? Yes! Use just one sheet of puff pastry and half the filling ingredients.
- 0 Facebook
- 30 Pinterest
- 1 Email
- Copy Link
- 31 shares
Cherry Cheese Danish Recipe
Ingredients
Instructions
Thaw puff pastry according to package directions (about 40 minutes at room temperature).
Preheat oven to 375°F. Line baking sheets with parchment paper.
In a medium bowl, beat cream cheese until smooth. Add sugar and vanilla (or bourbon) and mix until well combined.
On a lightly floured surface, roll each pastry sheet into a 10×10-inch square. Cut each sheet into 4 equal squares.
Place squares on prepared baking sheets. Create a shallow depression in the center of each square, leaving a 1-inch border.
Spoon about 1 tablespoon of cream cheese mixture into the center of each square.
Top each with about 2 tablespoons of cherry pie filling.
Bake for 15-18 minutes until pastry is puffed and golden brown.
Cool for 10 minutes, then dust with powdered sugar before serving.