- 0 Facebook
- 629 Pinterest
- 50 Email
- Copy Link
- 679 shares
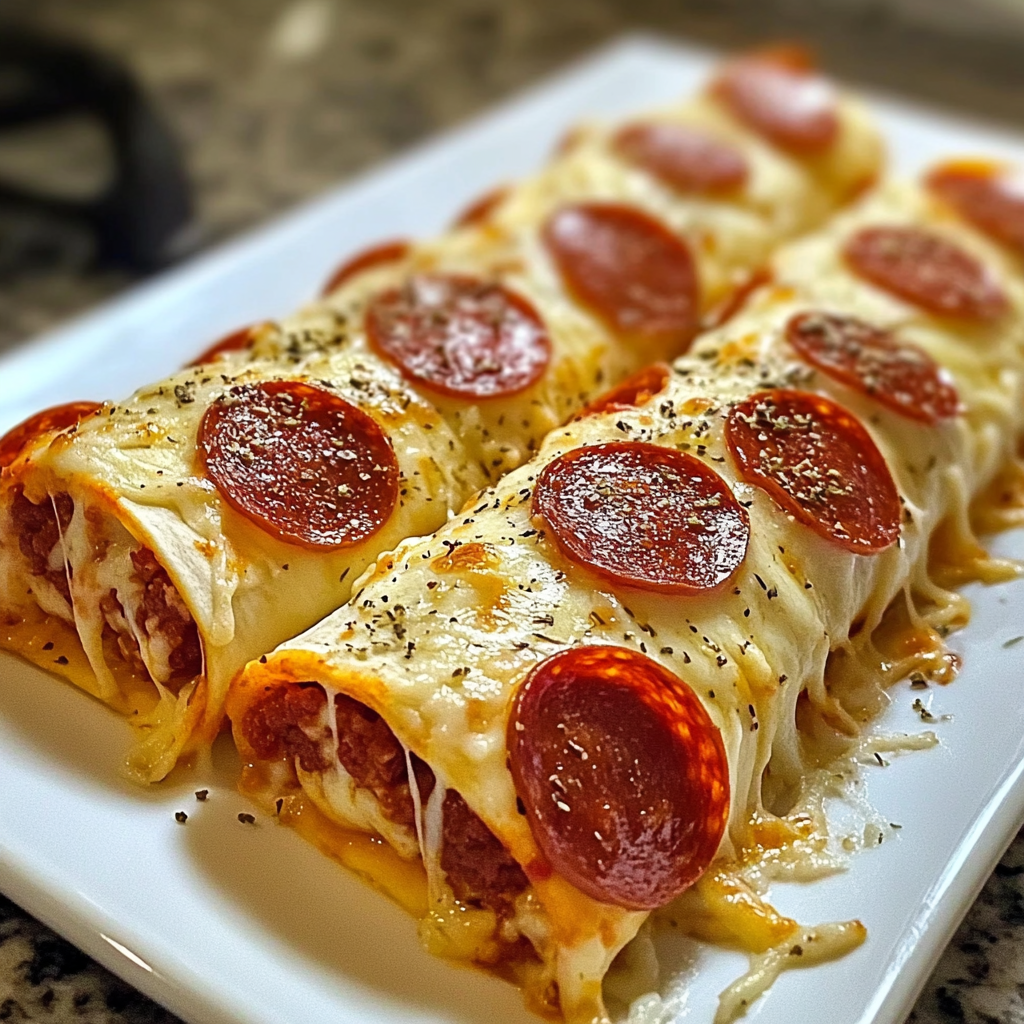
I stumbled upon these Cheesy Pepperoni Pizza Roll-Ups during a chaotic Friday night when my kids were clamoring for pizza but I was desperately trying to avoid another takeout meal. What started as a kitchen experiment has become our family’s go-to quick dinner solution. I’ve been making these roll-ups for over two years now, and honestly, I wish I had discovered them sooner!
The magic of these roll-ups lies in their simplicity – just a few ingredients rolled together and baked to golden perfection. In less than 20 minutes, you’ll have pizza-flavored heaven that’s portable and fun to eat. My children love dipping them in extra pizza sauce, while my husband prefers his with a side of ranch dressing. I’ve even served these at neighborhood gatherings where they disappear faster than I can put them on the plate!
Why You’ll Love This Recipe
I’ve found so many reasons to keep making these Cheesy Pepperoni Pizza Roll-Ups week after week:
- Quick and Simple: I can have these ready in under 20 minutes, making them perfect for hectic weeknights when time is scarce but hungry mouths are plenty.
- Budget-Friendly: I love that these use basic ingredients that don’t break the bank, especially when feeding a crowd.
- Kid-Approved: Every child I’ve served these to has devoured them with smiles. The familiar pizza flavors in a fun new format are irresistible!
- Versatile: I’ve made these for after-school snacks, party appetizers, and even packed them cold in lunchboxes. They work beautifully in so many situations.
- Customizable: The basic recipe is just the starting point. I’ve experimented with countless variations depending on what’s in my fridge.
Ingredients for This Recipe
I’ve carefully selected each ingredient in this recipe to create the perfect balance of flavors and textures:
- Low-Carb Tortillas: I use these as the base that holds everything together. Their flexibility makes rolling easy, and they crisp up beautifully in the oven while keeping the recipe lighter.
- Shredded Mozzarella Cheese: The creamy backbone that melts perfectly, creating that stretchy cheese pull we all crave. I prefer low-moisture, whole milk mozzarella for the richest flavor.
- Pepperoni Slices: These thin discs of savory, slightly spicy goodness add the classic pizza flavor we love. I typically use regular-sized pepperoni, but mini works well too.
- Pizza Sauce: The tangy, herby foundation that brings authentic pizza flavor. I look for sauces with minimal added sugar and real tomato as the first ingredient.
- Italian Seasoning: My secret flavor booster that elevates the whole dish with aromatic herbs. This blend typically includes oregano, basil, thyme, and rosemary for authentic Italian flavor.
- Olive Oil Spray (optional): A light misting helps achieve that golden, crispy exterior. I find extra virgin olive oil adds a subtle richness that complements the Italian flavors.
How to Make This Recipe
I’ve perfected these steps over countless family pizza nights:
1. Prepare Your Workspace: Start by preheating your oven to 375°F (190°C). Line a baking sheet with parchment paper for easy cleanup.
2. Assemble Your Ingredients: Lay out the tortillas on a flat surface. I find working with one tortilla at a time prevents the sauce from making things soggy.
3. Spread the Sauce: Apply a thin layer of pizza sauce on each tortilla, leaving about half an inch around the edges bare. Too much sauce will make rolling difficult and create a soggy result.
4. Season with Care: Sprinkle a pinch of Italian seasoning evenly over the sauce. I’ve found this small touch makes a significant difference in the final flavor.
5. Add the Cheese: Distribute ¼ cup of shredded mozzarella over each tortilla, ensuring even coverage. The cheese acts as the glue that will hold everything together once melted.
6. Place the Pepperoni: Arrange 4 pepperoni slices in a single layer across each tortilla. I like to slightly overlap them in a line about 2 inches from one edge to create a pepperoni-concentrated area.
7. Roll with Care: Starting from the edge closest to the pepperoni, tightly roll each tortilla into a log shape. The initial roll should capture the pepperoni, with the rest following smoothly.
8. Secure the Rolls: Place each roll seam-side down on the prepared baking sheet. This prevents them from unwrapping during baking.
9. Optional Enhancement: Lightly mist the tops with olive oil spray for a golden finish and sprinkle with a touch more Italian seasoning for visual appeal.
10. Bake to Perfection: Place in the preheated oven and bake for 8-10 minutes, until the edges turn golden brown and the cheese is fully melted. The tortillas should develop a slight crispness.
11. Rest and Slice: Allow the rolls to cool for 2-3 minutes before using a sharp knife to slice each roll into 4-5 pieces. This brief rest prevents the melted cheese from oozing out completely.
12. Serve Immediately: Arrange on a plate with extra pizza sauce for dipping. The contrast between the crisp exterior and gooey interior is best enjoyed while warm.
Expert Cooking Tips
I’ve learned a few tricks along the way that make these pizza roll-ups truly exceptional:
- Cheese Barrier: I always place a thin layer of cheese down first, before the sauce. This creates a barrier that prevents the tortilla from becoming soggy.
- Temperature Matters: Room temperature tortillas roll more easily without cracking. I take mine out of the refrigerator about 10 minutes before starting.
- Seam Side Strategy: Placing the rolls seam-side down is crucial! I learned this the hard way after watching my first batch unravel in the oven .
- Cut with Precision: I use a serrated knife with a gentle sawing motion to slice the rolls without squishing them flat.
- For Extra Crispiness: I sometimes brush the outside with a touch of olive oil and sprinkle with grated parmesan before baking for an irresistible texture.
Proper Storage
- Refrigeration: Store completely cooled roll-ups in an airtight container lined with paper towels to absorb moisture. Enjoy within 3 days for best flavor and texture.
- Freezer Method: Flash-freeze slices on a baking sheet before transferring to a freezer bag. This prevents them from sticking together and allows for individual portions.
- Reheating Success: For that fresh-baked taste, reheat in a 350°F oven for 5-7 minutes. Microwaving works in a pinch but sacrifices the crispy texture.
- Make-Ahead Option: Prepare rolls without baking, wrap individually in plastic, then foil. Refrigerate up to 24 hours before baking, adding 2-3 minutes to baking time.
Variations and Substitutions
Over the years, I’ve experimented with numerous twists on this basic recipe:
- Vegetarian Delight: I swap pepperoni for thinly sliced bell peppers, olives, and mushrooms. The veggies add a wonderful freshness and crunch.
- Breakfast Version: Adding scrambled eggs and breakfast sausage creates a morning variation that my kids request on weekends. I serve these with maple syrup for dipping.
- Gluten-Free Option: Corn tortillas work surprisingly well, though they’re a bit more delicate when rolling. I add an extra minute or two of baking time for the right texture.
- Buffalo Chicken: Replacing pepperoni with shredded rotisserie chicken tossed in buffalo sauce creates a spicy variation that’s perfect for game day. Blue cheese dressing makes the ideal dipping companion.
- Dessert Twist: For a sweet treat, I spread Nutella, sprinkle mini chocolate chips, and add sliced strawberries. These dessert roll-ups drizzled with a touch of honey are absolutely dreamy!
What Goes with This Recipe
- Classic Marinara: A warm bowl of extra marinara sauce elevates dipping to an art form. I love how the tangy tomato flavor complements the cheesy goodness.
- Garden Salad: A crisp green salad with a light vinaigrette balances the richness of the roll-ups. The cool, fresh vegetables create the perfect textural contrast.
- Roasted Broccoli: Caramelized edges add wonderful depth alongside these roll-ups. I toss mine with garlic and a squeeze of lemon for brightness.
- Sweet Potato Fries: The subtle sweetness pairs surprisingly well with the savory roll-ups. I dust mine with paprika for a smoky complement.
- Italian Wedding Soup: On chillier evenings, this combo transforms snack time into a complete meal. The brothy soup provides a wonderful counterpoint to the crispy roll-ups.
FAQ
Can I make these ahead of time? Yes! Prepare, refrigerate overnight, and add 2-3 minutes to baking time. The flavors meld beautifully overnight.
How do I prevent soggy roll-ups? Use a thin layer of sauce and place seam-side down while baking. A cheese barrier helps too!
Can I use flour tortillas instead? Absolutely! They roll easily and crisp nicely, though they contain more carbs than the low-carb version.
Are these freezer-friendly? Yes! Freeze sliced roll-ups individually, then reheat from frozen at 350°F for 8-10 minutes.
Can I make these in an air fryer? Definitely! Cook at 370°F for about 6 minutes for perfectly crispy results.
- 0 Facebook
- 629 Pinterest
- 50 Email
- Copy Link
- 679 shares
Cheesy Pepperoni Pizza Roll-Ups
Ingredients
Instructions
Preheat oven to 375°F. Line baking sheet with parchment paper.
Spread each tortilla with pizza sauce, leaving ½-inch border.
Sprinkle with Italian seasoning and ¼ cup cheese per tortilla.
Arrange 4 pepperoni slices across each tortilla.
Roll up tightly, place seam-side down on baking sheet.
Optional: Spray with olive oil and sprinkle with additional seasoning.
Bake 8-10 minutes until golden and crispy.
Cool slightly, slice into pieces, and serve with extra sauce.