- 0 Facebook
- 4 Pinterest
- 0 Email
- Copy Link
- 4 shares
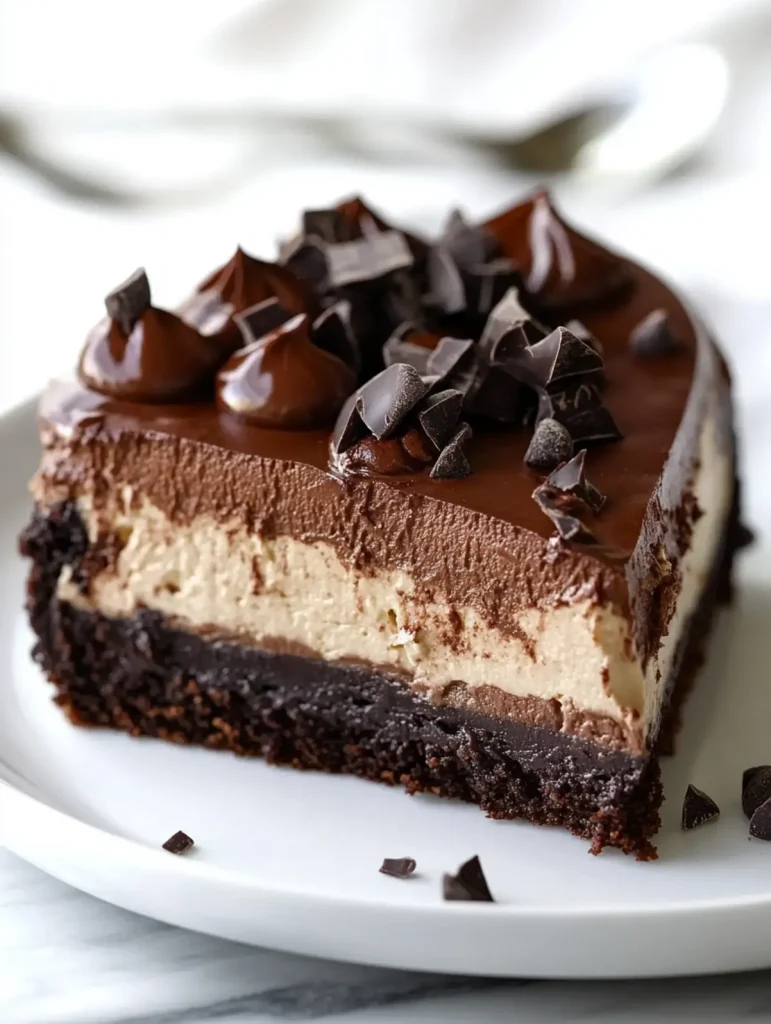
This brownie bottom chocolate cheesecake transforms two beloved desserts into one show-stopping treat that’s worth every calorie. A fudgy, cocoa-rich brownie layer creates the perfect foundation for the silky chocolate cheesecake that melts on your tongue with each heavenly bite. The contrasting textures — dense, fudgy brownie against creamy, velvety cheesecake — create a dessert experience that’s both familiar and extraordinary. Serve with a dollop of fresh whipped cream for an indulgent finale to any special meal.
Why You’ll Love This Recipe
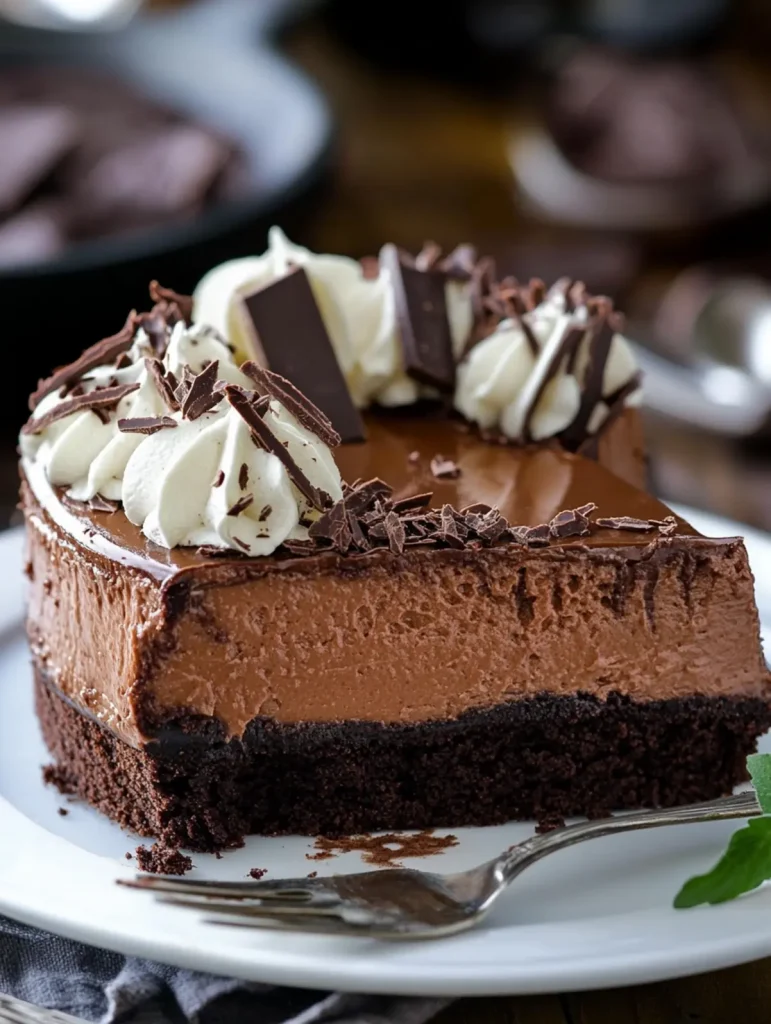
This Brownie Bottom Chocolate Cheesecake combines two beloved desserts into one irresistible showstopper that’s surprisingly doable for home bakers. Here’s why this recipe deserves a permanent spot in your dessert rotation:
- Double Dessert Delight : The fudgy brownie base provides the perfect textural contrast to the silky-smooth chocolate cheesecake layer, delivering two distinct dessert experiences in each bite.
- Make-Ahead Marvel : This cheesecake actually benefits from overnight chilling, making it the perfect stress-free dessert for entertaining since it can be prepared a day in advance.
- Chocolate Perfection : The combination of Dutch-processed cocoa and melted milk chocolate chips creates depth of flavor that store-bought desserts simply can’t match.
- Foolproof Formula : The partially-baked brownie technique ensures the perfect texture balance—never soggy, never dry—while providing a sturdy foundation for the creamy cheesecake layer.
- Crowd-Pleasing Classic : This dessert consistently earns rave reviews even from the pickiest eaters, making it ideal for holidays, celebrations, or anytime you need a guaranteed dessert win.
Ingredient Notes
Every element in this Brownie Bottom Chocolate Cheesecake plays a crucial role in creating its signature decadence. Understanding these ingredients ensures perfect texture and flavor in every luxurious bite.
Brownie Crust:
- All-purpose flour : Provides structure to the brownie base. For a lighter texture, sift before measuring for more accurate results.
- Dutch-processed cocoa powder : Creates a richer, deeper chocolate flavor than natural cocoa. Its alkalized process delivers that classic deep brown color and intense taste.
- Baking powder : Gives the brownie base a slight rise without making it cakey. Be sure it’s fresh for proper leavening.
- Kosher salt : Enhances the chocolate flavor by balancing sweetness. Diamond Crystal brand is preferred by pastry chefs for its clean taste.
- Eggs (room temperature) : Acts as a binder and adds moisture. Room temperature eggs incorporate more evenly, creating a smoother batter.
- Granulated sugar : Provides sweetness and helps create that crackly brownie top. Avoid substituting with liquid sweeteners which will alter texture.
- Unsalted butter : Adds richness and moisture. Using unsalted allows precise control over the salt content in your dessert.
- Vanilla : Enhances chocolate flavor with aromatic depth. Pure vanilla extract produces superior results to imitation varieties.
Filling:
- Heavy cream (room temperature) : Creates a silky ganache with chocolate chips. Room temperature prevents the chocolate from seizing when combined.
- Milk chocolate chips : Provides a creamy sweetness. High-quality chips with cocoa butter (not palm oil) melt more smoothly.
- Cream cheese (room temperature) : The foundation of cheesecake’s texture. Philadelphia brand is preferred by professionals for its consistent quality and minimal grit.
- Granulated sugar : Sweetens while helping stabilize the filling. Fine granulated dissolves more readily than coarser varieties.
- Unsweetened cocoa powder : Intensifies the chocolate flavor without extra sweetness. Sift before measuring to avoid lumps in the filling.
- Eggs (room temperature) : Provides structure and creaminess. Adding them one at a time allows proper emulsification for a silky texture.
- Vanilla extract : Rounds out the chocolate flavors. Use pure extract rather than imitation for authentic flavor.
Topping:
- Whipped topping : Lightens each bite with airy contrast. Make fresh whipped cream with a touch of powdered sugar for superior flavor and presentation.
How to Make Decadent Brownie Bottom Chocolate Cheesecake Magic
- Preheat and prepare your oven to 350°F and get your springform pan ready by spraying it lightly with cooking spray and lining the bottom with parchment paper. This double protection ensures your masterpiece will release perfectly after baking.
- Create the brownie base by whisking together the flour, Dutch-processed cocoa, baking powder, and salt in a bowl. In your stand mixer, beat the eggs, sugar, butter, and vanilla until fluffy and lighter in color—I find this usually takes about 3 minutes at medium speed for that perfect consistency.
- Combine the wet and dry ingredients by adding the flour mixture to your butter mixture and mixing on low speed just until combined. Pour this fudgy batter into your prepared pan and bake for exactly 12 minutes. The brownies will look slightly underdone—this is exactly what you want!
- Prepare the chocolate cheesecake filling while the brownie base bakes. Melt the chocolate chips with heavy cream in 20-second microwave intervals, stirring between each until silky smooth. In your mixer, beat the cream cheese until completely smooth, then add sugar and cocoa powder and mix until no lumps remain.
- Finish the filling by adding eggs one at a time, ensuring each is fully incorporated before adding the next. Scrape down the bowl frequently—those sneaky streaks of unmixed ingredients can ruin the smooth texture! Fold in the melted chocolate mixture and vanilla until evenly combined.
- Assemble and bake by pouring the cheesecake batter over your partially baked brownie crust. Bake for 65-70 minutes, or until the edges are set but the center still has a slight jiggle. The center will continue cooking from residual heat and set up perfectly while cooling.
- Cool properly by allowing the cheesecake to reach room temperature before refrigerating. This prevents condensation from forming on top of your beautiful creation. After cooling completely, refrigerate for at least 4 hours—though overnight is best for that perfect texture that slices like a dream.
Remember, patience is the secret ingredient here! Rushing the cooling process can result in cracks or a less-than-perfect texture, so give your cheesecake the time it deserves to reach its full potential.
Variations & Substitutions
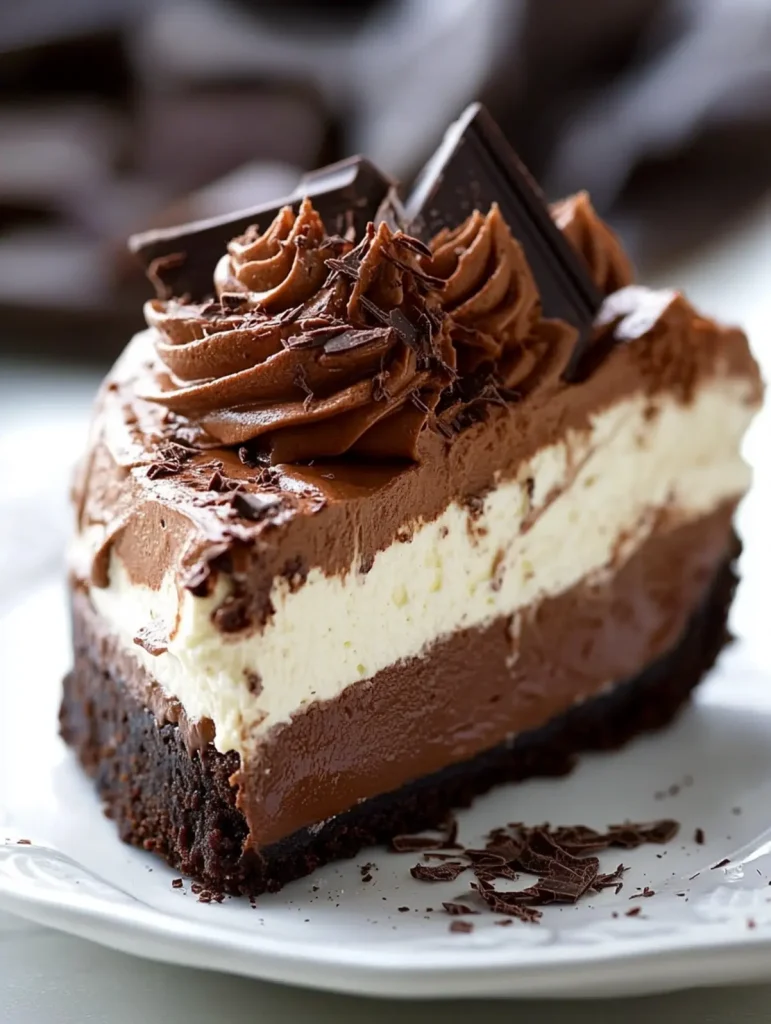
Don’t be afraid to put your own spin on this Brownie Bottom Chocolate Cheesecake! The recipe is wonderfully adaptable to what you have on hand or your personal flavor preferences.
- Gluten-free option : Substitute the all-purpose flour with a 1:1 gluten-free baking blend in the brownie base. I’ve tested this with both Bob’s Red Mill and King Arthur gluten-free flours with excellent results – guests couldn’t even tell the difference!
- Dairy alternatives : Replace the cream cheese with dairy-free cream cheese (such as Tofutti or Kite Hill) and substitute the heavy cream with full-fat coconut cream for a dairy-free version that maintains the luxurious texture.
- Flavor twists : Add 1-2 tablespoons of espresso powder to either the brownie base or cheesecake filling for a mocha variation that enhances the chocolate depth. The coffee notes bring out the richness without tasting like coffee.
- Topping variations : Instead of simple whipped cream, try a drizzle of salted caramel sauce, fresh raspberries, or crushed Oreo cookies. For chocolate lovers, a thin layer of ganache (equal parts heavy cream and chocolate) spread over the cooled cheesecake creates an extra decadent finish.
- White chocolate lovers : Swap the milk chocolate chips for white chocolate chips in the filling and add 2 tablespoons of extra cocoa powder to maintain the chocolate intensity while getting a different flavor profile.
- Lower sugar option : Reduce the sugar by up to 25% in both the brownie base and filling without significantly affecting texture. Using stevia-sweetened chocolate chips can further reduce the overall sugar content.
Serving Suggestions
This Brownie Bottom Chocolate Cheesecake deserves a presentation as spectacular as its taste. The rich combination of fudgy brownie and velvety chocolate cheesecake creates endless serving possibilities.
For an elegant dessert service, place each slice on a chilled dessert plate with a dollop of fresh whipped cream and a light dusting of cocoa powder. I love adding a few fresh raspberries or strawberries on the side—their bright acidity beautifully cuts through the richness of the chocolate layers and adds a pop of color to your presentation.
Transform this showstopper into a dessert bar experience by creating a toppings station with warm chocolate ganache, caramel sauce, crushed toasted nuts, and fresh berries. For coffee lovers, pair with a shot of espresso or cappuccino—the bitter notes complement the sweet chocolate perfectly and create a café-worthy dessert experience.
For special occasions, try serving with a scoop of vanilla bean ice cream on the side. The contrast between the cold, creamy ice cream and the dense, room-temperature Brownie Bottom Chocolate Cheesecake creates a delightful temperature and texture play that elevates this already decadent dessert to new heights.
Make-Ahead Tips for Brownie Bottom Chocolate Cheesecake
This Brownie Bottom Chocolate Cheesecake is actually a meal prep dream that tastes even better when made in advance! You can prepare the entire dessert up to 3 days ahead of serving, allowing the flavors to meld beautifully while the texture becomes perfectly set. Simply follow the recipe through the complete cooling and initial chilling process, then wrap the springform pan tightly with plastic wrap to prevent any refrigerator odors from affecting your masterpiece. The cheesecake will maintain its creamy texture and rich flavor throughout the storage period. When ready to serve, remove from the refrigerator 15-20 minutes before slicing to achieve those perfect, clean cuts, and add fresh whipped cream just before presenting for the most elegant finish.
Tips for the Best Brownie Bottom Chocolate Cheesecake
These insider tips will help elevate your Brownie Bottom Chocolate Cheesecake from merely delicious to absolutely unforgettable:
- Room temperature matters : Allow cream cheese, eggs, and heavy cream to sit out for at least 1 hour before starting. Cold ingredients create lumps that never fully incorporate, while room temperature components blend into silky perfection.
- Water bath alternative : I’ve found that placing a large baking dish filled with hot water on the oven rack below the cheesecake provides enough humidity to prevent cracks without the risk of water leaking into your springform pan.
- Perfect chocolate ganache : When melting chocolate chips with heavy cream, stir continuously even during microwave breaks. This prevents the chocolate from overheating and ensures that velvety, glossy texture we all crave.
- Master the jiggle test : Your cheesecake is done when the outer 2-3 inches are set but the center still has a slight wobble—like firm Jell-O. This slight underbaking prevents the dry, cracked texture that comes from overbaking.
- Clean-cut slices : Dip your knife in hot water and wipe clean between each slice for those picture-perfect servings that make everyone say “wow” when you present your Brownie Bottom Chocolate Cheesecake masterpiece.
Storage & Freezing
This Brownie Bottom Chocolate Cheesecake stores beautifully, allowing you to enjoy its decadence for days after baking. With proper storage, you can preserve both the fudgy texture of the brownie base and the silky smoothness of the chocolate cheesecake layer.
For short-term storage, refrigerate the cheesecake covered in the springform pan or transfer to an airtight container. The cheesecake will keep well in the refrigerator for up to 5 days, though the texture is absolutely prime during the first 3 days. I’ve found that covering with plastic wrap directly touching the surface (rather than stretched across the container) prevents condensation from forming on top of your beautiful creation.
This dessert freezes exceptionally well for up to 2 months. For best results, chill the cheesecake thoroughly first, then remove the sides of the springform pan and wrap the cheesecake (still on its base) in a double layer of plastic wrap followed by aluminum foil. To thaw, transfer from freezer to refrigerator for 24 hours before serving. Individual slices can also be frozen – simply place unwrapped slices on a baking sheet until frozen solid, then wrap tightly and store in a freezer container for grab-and-go indulgence.
For the freshest taste when serving previously refrigerated or frozen cheesecake, allow it to sit at room temperature for 20-30 minutes before serving. This brief warming period softens the dense chocolate filling just enough to revive its velvety mouthfeel and allows the full depth of the chocolate flavors to emerge.
Recipe FAQs
Can I use natural cocoa powder instead of Dutch-processed? No, Dutch-processed creates the proper rich flavor.
Why is my cheesecake cracking on top? Likely overbaked or cooled too quickly.
Can I make this without a springform pan? No, it’s essential for proper release.
How do I know when the cheesecake is done baking? Edges set but center still slightly jiggly.
Can I freeze this cheesecake? Yes! Wrap well and freeze up to 2 months.
Must the cream cheese be room temperature? Absolutely – cold cream cheese creates lumps.
- 0 Facebook
- 4 Pinterest
- 0 Email
- Copy Link
- 4 shares
Decadent Brownie Bottom Chocolate Cheesecake Magic
Ingredients
Instructions
- Preheat and prepare
your oven to 350°F and get your springform pan ready by spraying it lightly with cooking spray and lining the bottom with parchment paper.
- Create the brownie base
by whisking together the flour, Dutch-processed cocoa, baking powder, and salt in a bowl. In your stand mixer, beat the eggs, sugar, butter, and vanilla until fluffy and lighter in color.
- Combine the wet and dry ingredients
by adding the flour mixture to your butter mixture and mixing on low speed just until combined. Pour this fudgy batter into your prepared pan and bake for exactly 12 minutes.
- Prepare the chocolate cheesecake filling
while the brownie base bakes. Melt the chocolate chips with heavy cream in 20-second microwave intervals, stirring between each until silky smooth.
- Finish the filling
by adding eggs one at a time, ensuring each is fully incorporated before adding the next. Fold in the melted chocolate mixture and vanilla until evenly combined.
- Assemble and bake
by pouring the cheesecake batter over your partially baked brownie crust. Bake for 65-70 minutes.
- Cool properly
by allowing the cheesecake to reach room temperature before refrigerating. After cooling completely, refrigerate for at least 4 hours.
Notes
Room temperature matters : Allow cream cheese, eggs, and heavy cream to sit out for at least 1 hour before starting.
Water bath alternative : Placing a large baking dish filled with hot water on the oven rack below the cheesecake provides enough humidity to prevent cracks.
Perfect chocolate ganache : Stir continuously when melting chocolate chips with heavy cream to prevent overheating.
Master the jiggle test : Your cheesecake is done when the outer 2-3 inches are set but the center still has a slight wobble.
Clean-cut slices : Dip your knife in hot water and wipe clean between each slice for picture-perfect servings.
Nutrition
| Serving Size | 1 slice |
|---|