- 0 Facebook
- 1 Pinterest
- 0 Email
- Copy Link
- 1 share
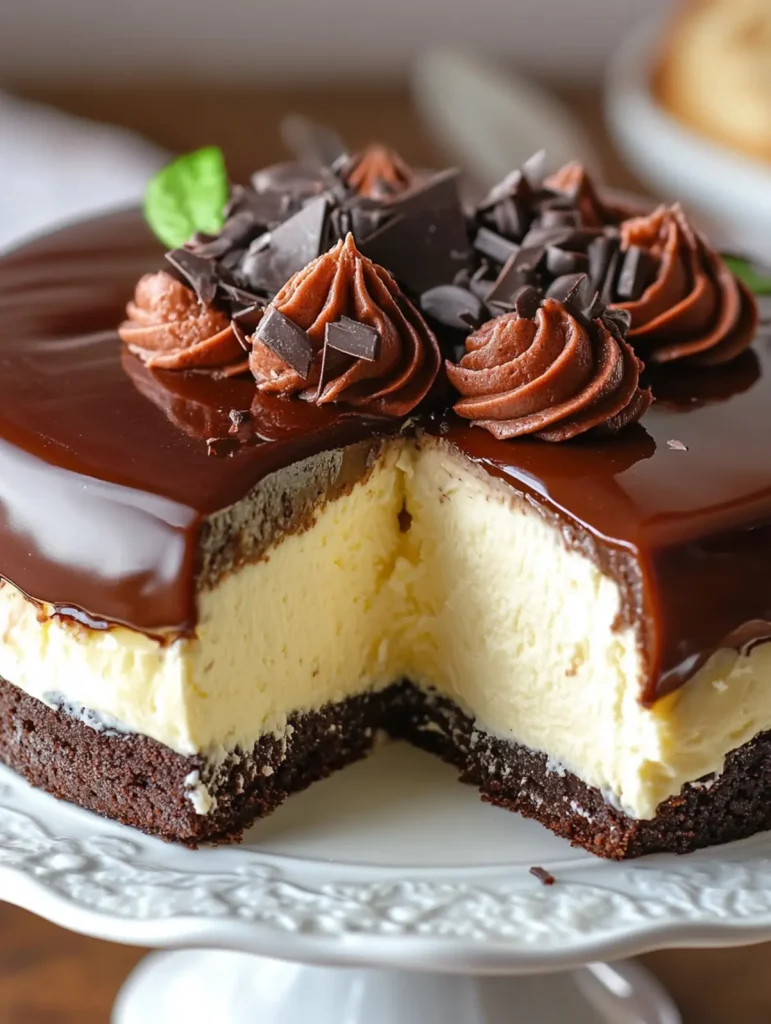
This Boston Cream Pie Cheesecake transforms two beloved classics into one show-stopping triple-layer masterpiece. Golden vanilla cake serves as the foundation for a velvety cream cheese center, while a silky pastry cream and rich chocolate glaze crown this decadent creation. Each forkful delivers the perfect harmony of textures—fluffy, creamy, and smooth—in one gloriously indulgent bite. Serve this sophisticated dessert chilled with fresh berries scattered across the plate for a presentation that’s as remarkable as its flavor.
Why It Belongs in Your Recipe Box
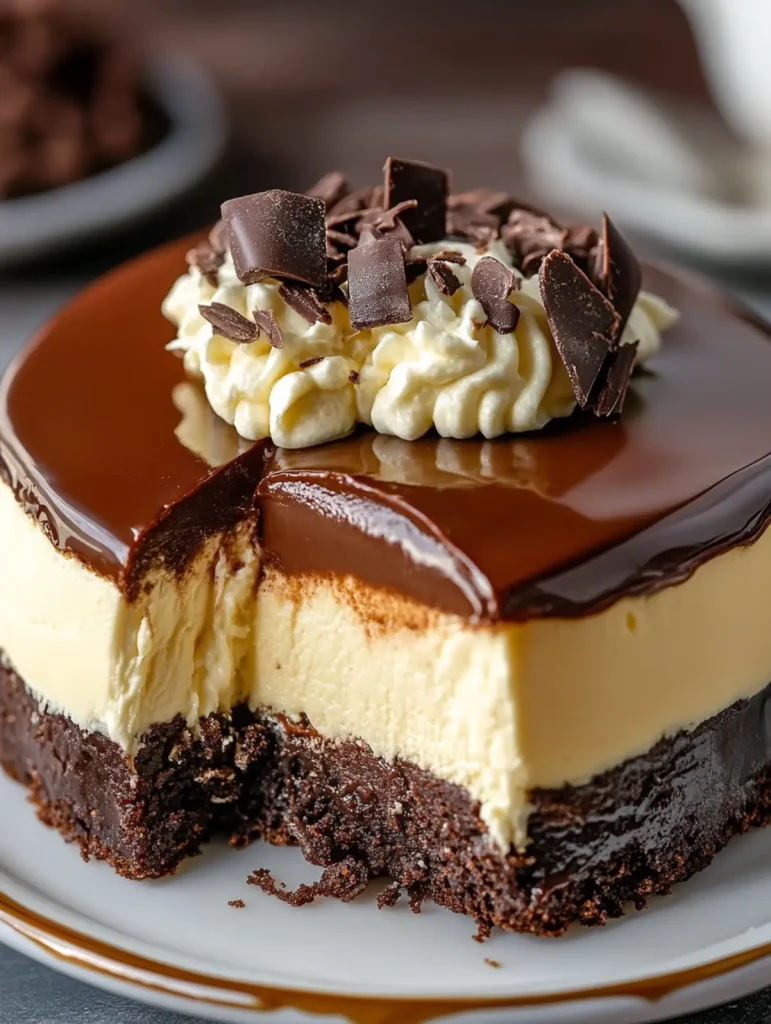
This Boston Cream Pie Cheesecake combines the best elements of three classic desserts into one extraordinary creation that’s worth every minute spent making it.
- Triple-Layer Magic : Each element—vanilla cake, creamy cheesecake, and chocolate glaze—creates a perfect symphony of complementary textures and flavors that simply can’t be achieved with simpler desserts.
- Make-Ahead Friendly : The cheesecake actually improves after 24 hours in the refrigerator , allowing flavors to meld perfectly and making it ideal for entertaining without day-of stress.
- Impressive Presentation : Few desserts create the same dramatic effect when sliced, revealing distinct, beautiful layers that showcase your baking prowess without requiring decorating skills.
- Crowd Converter : Even guests who typically choose either cheesecake or Boston cream pie find themselves won over by this hybrid dessert that delivers the best qualities of both classics.
- Freezer Tested : Individual slices freeze beautifully for up to two months—simply thaw in the refrigerator overnight for an instant gourmet dessert whenever cravings strike.
- Adaptable Base : The technique of layering cake with cheesecake creates a versatile foundation for seasonal variations, like adding strawberry glaze in summer or pumpkin spice in fall.
Ingredient Notes
The perfect Boston Cream Pie Cheesecake relies on quality ingredients working harmoniously across all three layers. Each component plays a crucial role in achieving the ideal texture, flavor, and structural integrity of this showstopping dessert.
Cake Layer:
- Sifted cake flour : Creates a lighter, more tender cake layer than all-purpose flour. Pre-sift before measuring for accuracy and optimal texture.
- Baking powder : Provides the necessary lift for a fluffy cake base. Check that it’s fresh (less than 6 months old) for proper rising.
- Salt : Enhances the vanilla flavor while balancing sweetness. Even this tiny amount is essential for depth of flavor.
- Egg separations : The separated eggs allow for proper aeration. Ensure no yolk contaminates your whites for maximum volume.
- Sugar (in two measurements) : The divided sugar portions serve different purposes—one sweetens yolks while the other stabilizes egg whites. Don’t combine them prematurely.
- Vanilla extract : Use pure vanilla extract rather than imitation for a more complex, authentic flavor profile.
- Melted butter : Adds richness and moisture to the cake. Allow it to cool slightly before incorporating to prevent cooking the eggs.
- Cream of tartar : Stabilizes the whipped egg whites, helping maintain their volume. In a pinch, substitute with a few drops of lemon juice.
Cheesecake Layer:
- Cream cheese : Full-fat cream cheese delivers the richest flavor and creamiest texture. Bring to room temperature before mixing to prevent lumps.
- Sugar : Provides sweetness while helping create the proper density. Don’t reduce the amount as it affects both texture and structure.
- Cornstarch : Acts as a stabilizer that prevents cracking and creates a silky-smooth texture. It’s the secret to a perfectly set cheesecake.
- Vanilla extract : Enhances the cream cheese flavor while adding warmth and complexity to the filling.
- Eggs : Provide structure and richness. Add them last and mix gently to avoid incorporating excess air that can cause cracks.
- Heavy whipping cream : Creates incredible richness and velvety texture. The high fat content is essential for proper consistency.
Pastry Cream:
- Heavy cream : The foundation for a luxurious pastry cream layer. Use only heavy cream (36-40% fat) for proper thickening.
- Instant vanilla pudding : Offers convenience without sacrificing flavor. French vanilla variant adds extra richness if available.
- Milk : Helps control the thickness of the pastry cream. Use whole milk for best results and proper setting.
Chocolate Glaze:
- Semisweet chocolate : Provides the perfect balance of sweetness and chocolate intensity. High-quality chocolate (60-70% cacao) melts more smoothly.
- Light corn syrup : Creates a glossy, professional-looking finish and prevents the chocolate from setting too hard for easy cutting.
- Butter : Adds shine and richness to the glaze while ensuring a silky texture. Use unsalted butter to control the overall flavor balance of your Boston Cream Pie Cheesecake.
Step-by-Step Instructions
- Prepare the cake layer by preheating your oven to 350°F and greasing a 9-inch springform pan. In a medium bowl, sift together cake flour, baking powder, and salt, then set aside.
- Beat the egg yolks in a large mixing bowl with an electric mixer until they begin to thicken. Gradually add ⅓ cup sugar and continue beating until the mixture is pale yellow and forms ribbons when the beaters are lifted. Mix in the vanilla extract, then gently fold in the melted butter.
- Whip the egg whites in a separate clean bowl with cream of tartar until soft peaks form. I always make sure my bowl is absolutely grease-free for maximum volume! Gradually add the remaining 2 tablespoons sugar and beat until stiff peaks form.
- Create the cake batter by gently folding the egg white mixture into the yolk mixture in thirds. Then fold in the dry ingredients until just incorporated – overworking will deflate your beautiful air bubbles. Spread the batter evenly in the prepared springform pan and bake 15-18 minutes until golden and springy to the touch.
- Make the cheesecake filling while the cake cools. Reduce oven temperature to 325°F. Beat cream cheese and sugar with an electric mixer until smooth, then beat in cornstarch and vanilla. Add eggs one at a time, mixing gently after each addition, then slowly stir in the cream until just blended.
- Assemble and bake by pouring the cheesecake mixture over the cooled cake layer. Wrap the outside of the springform pan with aluminum foil and place in a water bath. Bake for 60-70 minutes until the center is almost set but still slightly jiggly.
- Create the pastry cream by whisking together heavy cream, instant vanilla pudding, and milk until thickened. Spread this evenly over the cooled cheesecake layer and refrigerate for at least 2 hours to set completely.
- Finish with chocolate glaze by melting chocolate, corn syrup and butter in a double boiler or microwave at 50% power. Pour over the set pastry cream layer, tilting the pan to create an even coating. Refrigerate overnight before serving for the best flavor and texture integration.
This multi-layer masterpiece requires patience, but the complex flavors that develop overnight make it absolutely worth the wait!
Serving Suggestions
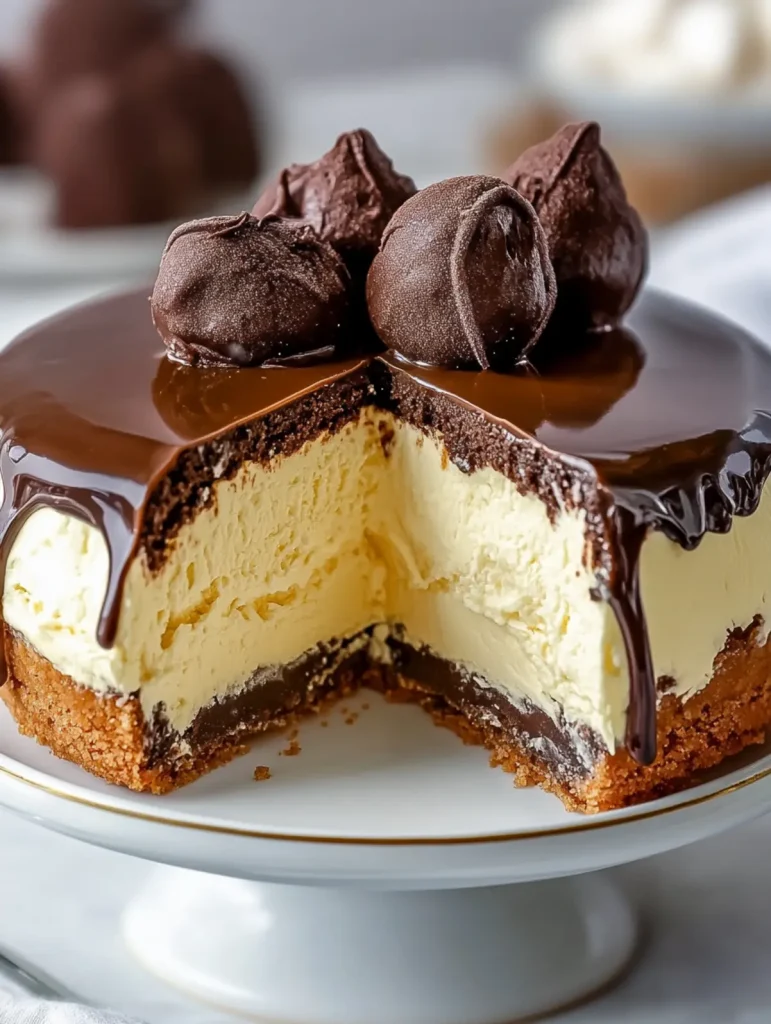
This Boston Cream Pie Cheesecake deserves a presentation as impressive as its triple-layered construction. A dessert this special calls for just the right serving style to highlight its decadent nature.
For an elegant presentation, serve slices on chilled dessert plates with a light dusting of cocoa powder around the edges. I like to add a small dollop of lightly sweetened whipped cream on the side—the airy texture provides a wonderful contrast to the rich, dense layers of the cheesecake. Fresh berries, particularly raspberries or strawberries, not only add a pop of vibrant color but their slight tartness cuts through the richness of the cream cheese and pastry cream layers.
For beverage pairings, this dessert shines alongside a cup of good quality coffee—the bitterness complements the sweet vanilla and chocolate elements beautifully. If serving for a special celebration, consider pairing with a glass of dessert wine like a late harvest Riesling or a creamy liqueur such as Baileys Irish Cream over ice.
When entertaining, I sometimes create a dessert board centered around smaller slices of this Boston Cream Pie Cheesecake, surrounded by chocolate-dipped strawberries and additional semisweet chocolate pieces to echo the glaze. This approach turns an already spectacular dessert into an interactive experience that guests never forget.
Storage & Freezing
This layered Boston Cream Pie Cheesecake requires proper storage for optimal texture and flavor. Store leftovers in the refrigerator , tightly covered with plastic wrap or in an airtight container, for up to 5 days. The flavors actually continue to develop and meld beautifully after the first 24 hours.
For longer storage, this triple-layer dessert freezes remarkably well for up to 2 months. I recommend cutting individual slices, wrapping each tightly in plastic wrap and then aluminum foil before freezing. This method prevents texture changes and makes it easy to enjoy just one piece at a time. When ready to enjoy, thaw overnight in the refrigerator rather than at room temperature to maintain the distinct layers.
The chocolate glaze may lose some of its shine after freezing, but this is purely cosmetic. If serving previously frozen slices for a special occasion, consider adding a fresh garnish like whipped cream or berries to restore that “wow” factor. Be aware that the pastry cream layer may become slightly softer after thawing, but the flavor will remain deliciously intact.
Expert Tips
Master this decadent Boston Cream Pie Cheesecake with these professional insights:
- Room temperature cream cheese matters : Take your cream cheese packages out at least 1 hour before mixing to ensure a perfectly smooth, lump-free cheesecake layer without overbeating.
- Perfect your water bath : Double-wrap your springform pan with heavy-duty foil extending well up the sides to prevent any water seepage that would ruin your cake layer and cheesecake texture.
- Cool in stages : I’ve found that allowing the cheesecake to cool gradually in the turned-off oven with the door cracked prevents the dramatic temperature change that causes cracks.
- Chill thoroughly between layers : Give each layer proper time to set (especially the pastry cream) before adding the next component—patience results in cleaner, more distinct layers.
- Chocolate glaze temperature trick : Let your chocolate, corn syrup and butter mixture cool to just warm (not hot) before pouring over the pastry cream to prevent melting it while still flowing smoothly.
- Slice with confidence : Dip a sharp knife in hot water and wipe dry between cuts for photo-worthy slices that showcase all three magnificent layers of your Boston Cream Pie Cheesecake.
Variations & Substitutions
Don’t be afraid to put your own spin on this decadent dessert! The classic version is spectacular, but there’s always room for personalization based on your preferences or pantry.
- Chocolate cake base : Substitute 2 tablespoons of the cake flour with unsweetened cocoa powder for a chocolate cake layer that creates a stunning contrast with the vanilla cheesecake. I’ve tried this variation for chocolate lovers in my family, and it’s always a hit!
- Flavor infusions : Add 1-2 teaspoons of almond extract, orange zest, or coffee extract to any layer to create subtle flavor variations that complement the classic profile without overwhelming it.
- Dairy alternatives : Replace the heavy cream in the cheesecake layer with full-fat sour cream for a slightly tangier flavor, or substitute plant-based cream cheese and coconut cream for those avoiding dairy (though the texture will be somewhat different).
- Gluten-free option : Swap the cake flour for a high-quality cup-for-cup gluten-free flour blend and add 1/4 teaspoon of xanthan gum to maintain the proper cake structure.
- Pudding variations : Try using white chocolate or cheesecake-flavored instant pudding instead of vanilla for a slightly different twist on the pastry cream layer.
- Topping twist : For a more traditional Boston cream pie appearance, cover only half the top with chocolate glaze and sprinkle the exposed pastry cream with chocolate shavings or a light dusting of cocoa powder.
Make Ahead Options
This Boston Cream Pie Cheesecake is a meal planner’s dream, actually improving in flavor when prepared in advance! You can assemble the entire dessert up to 3 days ahead—the layers meld beautifully while refrigerated, creating an even more decadent taste. For maximum convenience, prepare each component separately: bake the cake layer up to 2 days early (wrap tightly to prevent drying), and make the cheesecake filling 24 hours ahead (cover surface with plastic wrap to prevent a skin from forming). When ready to serve, simply add the pastry cream and chocolate glaze layers as directed. The finished Boston Cream Pie Cheesecake actually tastes better after resting overnight, making it perfect for stress-free entertaining with restaurant-quality results.
Recipe FAQs
Can I make this cheesecake without a springform pan? No, the springform is essential for proper removal.
Why wrap the pan with foil? Prevents water from seeping into cheesecake during baking.
Can I use regular flour instead of cake flour? Yes, but mix with cornstarch for similar lightness.
How do I prevent cheesecake from cracking? The water bath is your secret weapon.
Is instant pudding necessary for pastry cream? I always use it for foolproof results.
Can I make this dessert ahead of time? Absolutely! It improves with overnight refrigeration.
- 0 Facebook
- 1 Pinterest
- 0 Email
- Copy Link
- 1 share
Ultimate Boston Cream Pie Cheesecake: Decadent Triple-Layer Bliss
Ingredients
Instructions
Prepare the cake layer by preheating your oven to 350°F and greasing a 9-inch springform pan. In a medium bowl, sift together cake flour, baking powder, and salt, then set aside.
Beat the egg yolks in a large mixing bowl with an electric mixer until they begin to thicken. Gradually add ⅓ cup sugar and continue beating until the mixture is pale yellow and forms ribbons when the beaters are lifted. Mix in the vanilla extract, then gently fold in the melted butter.
Whip the egg whites in a separate clean bowl with cream of tartar until soft peaks form. Gradually add the remaining 2 tablespoons sugar and beat until stiff peaks form.
Create the cake batter by gently folding the egg white mixture into the yolk mixture in thirds. Then fold in the dry ingredients until just incorporated. Spread the batter evenly in the prepared springform pan and bake 15-18 minutes until golden and springy to the touch.
Make the cheesecake filling while the cake cools. Reduce oven temperature to 325°F. Beat cream cheese and sugar with an electric mixer until smooth, then beat in cornstarch and vanilla. Add eggs one at a time, mixing gently after each addition, then slowly stir in the cream until just blended.
Assemble and bake by pouring the cheesecake mixture over the cooled cake layer. Wrap the outside of the springform pan with aluminum foil and place in a water bath. Bake for 60-70 minutes until the center is almost set but still slightly jiggly.
Create the pastry cream by whisking together heavy cream, instant vanilla pudding, and milk until thickened. Spread this evenly over the cooled cheesecake layer and refrigerate for at least 2 hours to set completely.
Finish with chocolate glaze by melting chocolate, corn syrup, and butter in a double boiler or microwave at 50% power. Pour over the set pastry cream layer, tilting the pan to create an even coating. Refrigerate overnight before serving for the best flavor and texture integration.
Notes
Room temperature cream cheese matters: Take your cream cheese packages out at least 1 hour before mixing to ensure a perfectly smooth, lump-free cheesecake layer without overbeating.
Perfect your water bath: Double-wrap your springform pan with heavy-duty foil extending well up the sides to prevent any water seepage that would ruin your cake layer and cheesecake texture.
Cool in stages: Allowing the cheesecake to cool gradually in the turned-off oven with the door cracked prevents the dramatic temperature change that causes cracks.
Chill thoroughly between layers: Give each layer proper time to set before adding the next component.
Chocolate glaze temperature trick: Let your chocolate mixture cool to just warm before pouring over the pastry cream.
Slice with confidence: Dip a sharp knife in hot water and wipe dry between cuts for photo-worthy slices.
Nutrition
| Serving Size | 1 slice |
|---|---|
| Calories | 450 calories |
| Sugar Content | 30g |
| Sodium Content | 200mg |
| Fat Content | 30g |
| Saturated Fat Content | 18g |
| Unsaturated Fat Content | 10g |
| Trans Fat Content | 0g |
| Carbohydrate Content | 40g |
| Fiber Content | 1g |
| Protein Content | 6g |
| Cholesterol Content | 120mg |