Introduction
Prepare your taste buds for a truly irresistible treat: the Biscoff Cheesecake! If you’ve ever savored the warm, spiced notes of Lotus Biscoff cookies, then you already know the magic held within that distinct flavor. This cheesecake takes that beloved taste to an entirely new level, transforming it into a luxuriously creamy, utterly decadent dessert that will have everyone asking for the recipe. It’s more than just a cheesecake; it’s a celebration of that unique caramelized biscuit goodness, perfectly balanced with a rich, velvety texture.
What makes this Biscoff Cheesecake so special? It’s a symphony of textures and flavors. We start with a buttery, crunchy crust made from crushed Biscoff biscuits themselves, providing the perfect foundation. This leads into an incredibly smooth, airy filling infused generously with the iconic Biscoff cookie butter spread, delivering that signature caramel and cinnamon spice in every spoonful. The beauty of this recipe is its relative ease and the potential for a glorious no-bake creation, meaning less time in the kitchen and more time enjoying the fruits of your labor. It’s a dessert that looks impressive but is surprisingly simple to master, making it ideal for both seasoned bakers and enthusiastic beginners.
Whether you’re looking for a show-stopping dessert for a dinner party, a comforting treat for a cozy evening, or simply a way to indulge your Biscoff cravings, this cheesecake is the answer. Its appealing golden-brown hue, aromatic spice, and melt-in-your-mouth creaminess make it an instant crowd-pleaser. Get ready to dive into the ultimate Biscoff experience!
Nutritional Information
Per serving (approximate values):
- Calories: 550
- Protein: 8g
- Carbohydrates: 55g
- Fat: 35g
- Fiber: 2g
- Sodium: 300mg
Ingredients
For the Biscoff Crust:
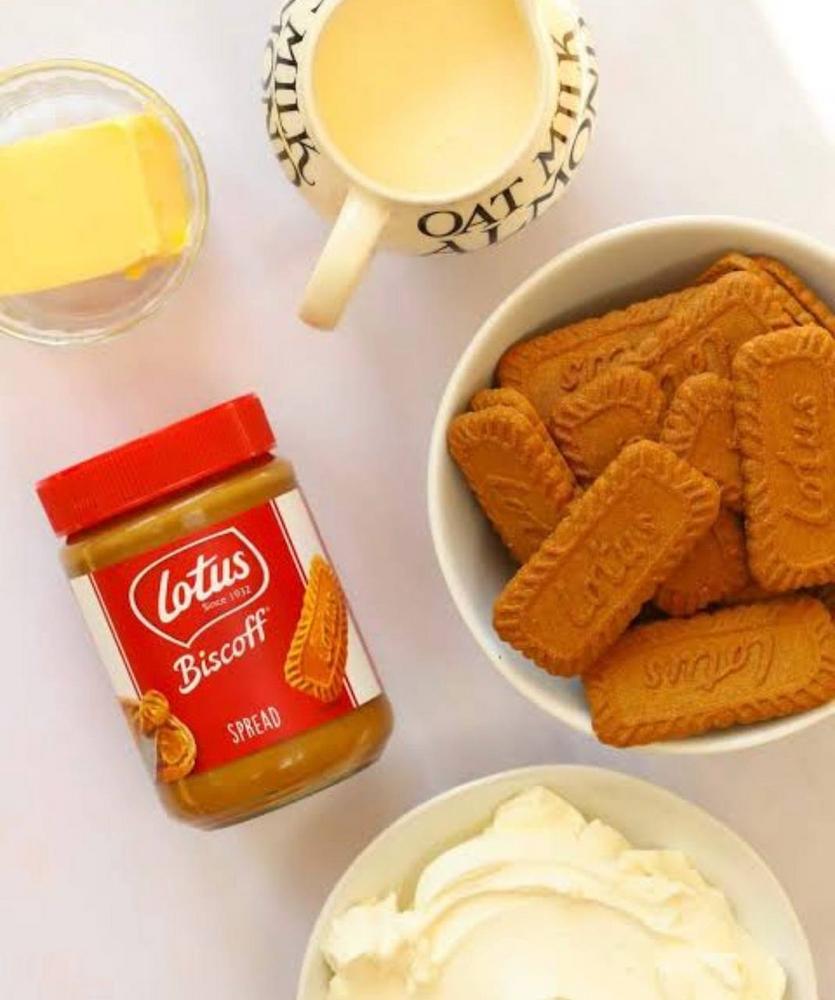
- 250g (about 1 1/2 cups) Lotus Biscoff Biscuits, finely crushed
- 100g (7 tablespoons) unsalted butter, melted
For the Biscoff Cheesecake Filling:
- 680g (3 blocks, 8 oz each) full-fat cream cheese, softened at room temperature
- 200g (approx. 3/4 cup) Lotus Biscoff Spread, melted slightly if very firm
- 150g (1 1/4 cups) powdered sugar (confectioners’ sugar), sifted
- 1 teaspoon vanilla extract
- 1/4 cup oat milk (or full-fat dairy milk, or heavy cream for richer texture)
- 240ml (1 cup) heavy cream (cold)
For the Garnish (Optional):
- 50g (approx. 1/4 cup) Lotus Biscoff Spread, melted for drizzling
- 2-3 Lotus Biscoff Biscuits, crushed, for sprinkling
Instructions
- Prepare the Biscoff Crust: Begin by finely crushing the Lotus Biscoff biscuits. You can do this in a food processor until they resemble fine crumbs, or place them in a zip-top bag and crush them with a rolling pin. Ensure there are no large chunks remaining.
- Melt the unsalted butter in a small saucepan or microwave-safe bowl. Add the melted butter to the crushed Biscoff biscuits and mix thoroughly until all the crumbs are moistened.
- Press the mixture evenly into the bottom of a 9-inch springform pan. Use the back of a spoon or the bottom of a flat glass to compact the crust firmly. Place the pan in the refrigerator while you prepare the filling, allowing the crust to chill and set for at least 15-20 minutes.
- Make the Creamy Biscoff Filling: In a large mixing bowl, using an electric mixer (stand mixer with paddle attachment or hand mixer), beat the softened full-fat cream cheese on medium speed until it is smooth and creamy, about 2-3 minutes. Make sure there are no lumps.
- Add the slightly melted Biscoff spread to the cream cheese and continue to beat until well combined and smooth.
- Gradually add the sifted powdered sugar to the mixture, beating on low speed until fully incorporated. Scrape down the sides of the bowl as needed.
- Stir in the vanilla extract and oat milk (or chosen milk/cream) until just combined.
- In a separate, clean, cold mixing bowl, whip the cold heavy cream on medium-high speed until stiff peaks form. Be careful not to over-whip.
- Gently fold the whipped cream into the Biscoff cream cheese mixture in two additions, using a spatula. Fold until just combined and no streaks of whipped cream remain. Be careful not to deflate the mixture; the goal is a light and airy filling.
- Assemble and Chill: Pour the cheesecake filling over the chilled Biscoff crust in the springform pan. Use an offset spatula or the back of a spoon to smooth the top.
- Cover the springform pan loosely with plastic wrap and refrigerate for a minimum of 6-8 hours, or preferably overnight, to allow the cheesecake to set completely. This chilling time is crucial for a firm, sliceable cheesecake.
- Decorate and Serve (Optional): Once the cheesecake is fully set, carefully remove it from the springform pan. You can run a thin knife around the edge of the pan before releasing the sides if needed.
- For garnish, gently melt the additional Biscoff spread (if using) in the microwave for 15-30 seconds until it’s pourable. Drizzle it decoratively over the top of the cheesecake.
- Crush a few more Biscoff biscuits and sprinkle them around the edge or center of the cheesecake for added texture and visual appeal.
- Slice with a warm, sharp knife (run under hot water and wipe dry between slices) and serve immediately.
Cooking Tips and Variations
Achieving the perfect Biscoff cheesecake is all about attention to detail, especially with a no-bake recipe. Here are some pro tips and exciting variations to elevate your dessert:
- Room Temperature Cream Cheese is Key: This is perhaps the most crucial tip for a smooth, lump-free filling. Ensure your full-fat cream cheese is at true room temperature (soft to the touch) before you start beating it. Cold cream cheese will result in a lumpy filling that’s difficult to incorporate smoothly.
- Don’t Overmix the Cream Cheese: While you want the cream cheese to be smooth, avoid over-beating it once other ingredients are added. Overmixing can incorporate too much air initially, which can then deflate, leading to a less stable and dense filling.
- Whip Heavy Cream Separately: Whipping the heavy cream to stiff peaks in a separate bowl before gently folding it into the cream cheese mixture ensures a light, airy, and stable filling. If you try to whip it all together, you risk over-mixing the cream cheese or not achieving the desired lightness. Ensure your heavy cream is very cold for best whipping results.
- Sift Powdered Sugar: Sifting the powdered sugar prevents lumps in your cheesecake filling, contributing to that silky-smooth texture.
- Adjust Biscoff Flavor: The recipe calls for a generous amount of Biscoff spread, but you can adjust it slightly to your preference. If you like a milder flavor, reduce it by a tablespoon or two. For an extra intense Biscoff kick, you could add another tablespoon.
- Crust Compression: Press the Biscoff crust firmly into the pan. This helps it hold together when slicing. You can use the bottom of a flat glass or a measuring cup to really compact it.
- Chilling Time is Non-Negotiable: Do not rush the chilling process. A minimum of 6-8 hours, or even better, overnight, is essential for the cheesecake to properly set. Rushing it will result in a soft, messy cheesecake.
- Vegan Biscoff Cheesecake: This recipe is highly adaptable for a vegan version! Vegan Cream Cheese: Substitute dairy cream cheese with an equal amount of good quality, firm vegan cream cheese. Ensure it’s at room temperature. Vegan Butter: Use vegan butter sticks for the crust. Vegan Heavy Cream: Replace dairy heavy cream with a full-fat canned coconut cream (chilled, scoop out the thick cream, leaving the liquid behind) or a store-bought vegan whipping cream. Biscoff Spread: Lotus Biscoff Spread is naturally vegan, as are the biscuits!
- Baked Biscoff Cheesecake Variation: If you prefer a baked cheesecake, you would need to add eggs to the filling (typically 2-3 large eggs, added one at a time after the cream cheese and sugar are combined) and bake in a water bath at a lower temperature (around 325°F or 160°C) until the edges are set and the center is slightly jiggly, then cool slowly. This specific recipe is designed as a no-bake, so stick to the no-bake instructions unless you’re comfortable adapting it significantly.
- Individual Mini Cheesecakes: For portion control or a party, press the crust into the bottom of muffin liners in a muffin tin. Fill with the cheesecake mixture and chill. These are adorable and easy to serve.
- Different Crusts: While Biscoff biscuits are perfect, you could experiment with a shortbread crust or even a graham cracker crust if you want a subtle flavor variation.
- Add-ins: Consider folding in some finely chopped Biscoff biscuits into the filling for extra texture, or even a swirl of melted white chocolate for another layer of flavor.
Storage and Reheating
Proper storage is crucial to maintain the freshness, texture, and flavor of your Biscoff Cheesecake. Since this is a no-bake cheesecake, reheating is not applicable, but here’s how to store it effectively:
Storage:
- In the Refrigerator: The Biscoff Cheesecake must be stored in the refrigerator at all times due to its dairy-based ingredients.
- Cover Properly: Once the cheesecake has fully set, cover it loosely but securely with plastic wrap or aluminum foil. If you have a cheesecake carrier, that’s ideal. This prevents it from absorbing odors from other foods in the fridge and keeps it from drying out.
- On a Plate/Cake Stand: If you’ve already removed it from the springform pan, store it on a flat plate or cake stand, covered.
- How Long it Lasts: When stored correctly in the refrigerator, the Biscoff Cheesecake will stay fresh and delicious for 4-5 days.
- Do Not Store at Room Temperature: Never leave the cheesecake out at room temperature for more than 2 hours, as this can lead to bacterial growth and compromise its texture.
Freezing:
- For Longer Storage: Biscoff Cheesecake freezes beautifully, making it an excellent make-ahead dessert.
- Pre-Freeze: Once the cheesecake is fully set and chilled, place it uncovered in the freezer for about 1-2 hours until it’s firm to the touch. This helps prevent the plastic wrap from sticking to the surface.
- Wrap Tightly: After the initial freeze, wrap the cheesecake (either whole or in individual slices) very tightly in several layers of plastic wrap, followed by a layer of aluminum foil. Ensure it’s airtight to prevent freezer burn.
- Storage Duration: Frozen Biscoff Cheesecake can be stored for up to 1-2 months.
- Thawing: To thaw, transfer the wrapped cheesecake (or slices) from the freezer to the refrigerator and let it thaw slowly overnight. Do not thaw at room temperature, as this can affect the texture. Once thawed, unwrap and serve. Consume within 2-3 days of thawing.
Frequently Asked Questions
Why is my Biscoff cheesecake not setting?
There are a few common reasons why a no-bake cheesecake might not set properly. The most likely culprit is not enough chilling time; it truly needs 6-8 hours, or preferably overnight, to become firm. Another reason could be that the heavy cream wasn’t whipped to stiff peaks, or it was over-whipped and then deflated when folded in. Ensure your cream cheese was full-fat and at room temperature for proper emulsification, and don’t reduce the amount of cream cheese or heavy cream in the recipe, as these are crucial for structure.
Can I make this Biscoff cheesecake ahead of time?
Absolutely! This Biscoff Cheesecake is an ideal make-ahead dessert. In fact, making it a day in advance allows it ample time to chill and set perfectly, which often results in a better texture and flavor. You can prepare the entire cheesecake, including the crust and filling, up to 2 days before serving and store it covered in the refrigerator. If you plan to freeze it, you can prepare it even further in advance, as detailed in the storage section.
What is the best way to get clean slices of cheesecake?
For beautifully clean slices, the key is a warm, sharp knife. Before each cut, dip a long, sharp knife into hot water, then wipe it completely dry with a clean kitchen towel. Make a single, decisive cut. Repeat this process for each slice: dip, wipe, slice. This technique ensures that the knife glides smoothly through the creamy filling without dragging or sticking, giving you perfectly presented portions every time.
Biscoff Cheesecake
Ingredients
Instructions
Prepare the Biscoff Crust: Begin by finely crushing the Lotus Biscoff biscuits. You can do this in a food processor until they resemble fine crumbs, or place them in a zip-top bag and crush them with a rolling pin. Ensure there are no large chunks remaining.
Melt the unsalted butter in a small saucepan or microwave-safe bowl. Add the melted butter to the crushed Biscoff biscuits and mix thoroughly until all the crumbs are moistened.
Press the mixture evenly into the bottom of a 9-inch springform pan. Use the back of a spoon or the bottom of a flat glass to compact the crust firmly. Place the pan in the refrigerator while you prepare the filling, allowing the crust to chill and set for at least 15-20 minutes.
Make the Creamy Biscoff Filling: In a large mixing bowl, using an electric mixer (stand mixer with paddle attachment or hand mixer), beat the softened full-fat cream cheese on medium speed until it is smooth and creamy, about 2-3 minutes. Make sure there are no lumps.
Add the slightly melted Biscoff spread to the cream cheese and continue to beat until well combined and smooth.
Gradually add the sifted powdered sugar to the mixture, beating on low speed until fully incorporated. Scrape down the sides of the bowl as needed.
Stir in the vanilla extract and oat milk (or chosen milk/cream) until just combined.
In a separate, clean, cold mixing bowl, whip the cold heavy cream on medium-high speed until stiff peaks form. Be careful not to over-whip.
Gently fold the whipped cream into the Biscoff cream cheese mixture in two additions, using a spatula. Fold until just combined and no streaks of whipped cream remain. Be careful not to deflate the mixture; the goal is a light and airy filling.
Assemble and Chill: Pour the cheesecake filling over the chilled Biscoff crust in the springform pan. Use an offset spatula or the back of a spoon to smooth the top.
Cover the springform pan loosely with plastic wrap and refrigerate for a minimum of 6-8 hours, or preferably overnight, to allow the cheesecake to set completely. This chilling time is crucial for a firm, sliceable cheesecake.
Decorate and Serve (Optional): Once the cheesecake is fully set, carefully remove it from the springform pan. You can run a thin knife around the edge of the pan before releasing the sides if needed.
For garnish, gently melt the additional Biscoff spread (if using) in the microwave for 15-30 seconds until it’s pourable. Drizzle it decoratively over the top of the cheesecake.
Crush a few more Biscoff biscuits and sprinkle them around the edge or center of the cheesecake for added texture and visual appeal.
Slice with a warm, sharp knife (run under hot water and wipe dry between slices) and serve immediately.