- 0 Facebook
- 0 Pinterest
- 2 Email
- Copy Link
- 2 shares
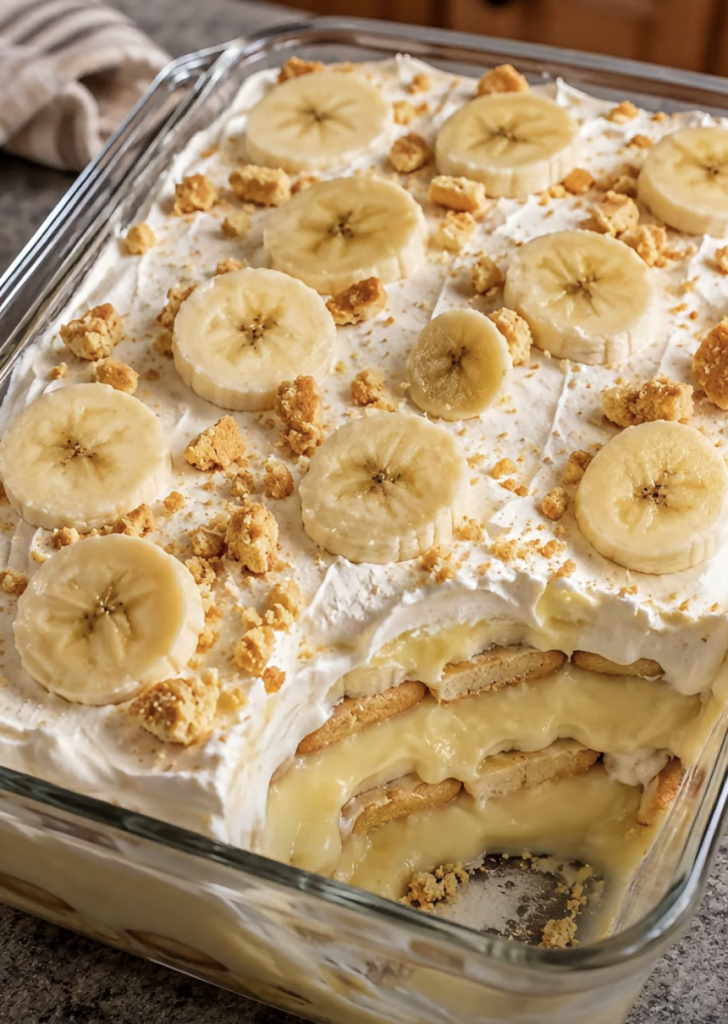
Spoonfuls of cold, velvety vanilla pudding layered with soft banana slices and vanilla wafers that melt into cake-like tenderness: that’s the magic of this banana pudding. Sweetened condensed milk and whipped cream make the base rich and cloud-light at once, and there’s no oven involved, just a bowl, a whisk, and a little patience in the fridge (the wafers need time to soften). Serve it from a big trifle dish at a family dinner, and watch the scoops disappear.
Why Will You Love This Banana Pudding?
This Creamy Banana Pudding That Beats Every Other Dessert earns its spot on the table because it delivers bakery-level comfort with almost no effort. Just 30 minutes of hands-on time gets you a dessert that feeds eight, with no oven and no fuss. Sweetened condensed milk gives the pudding a silky, caramel-kissed richness, and whipped cream folded in keeps it light instead of heavy. A few small habits make a big difference. Use bananas that are ripe but still firm, so they stay sweet without turning mushy. Keep the milk and cream very cold so the pudding sets properly and the cream whips to stable peaks. Then let it rest in the fridge for at least four hours. That’s when the wafers soften into cake-like layers, and it’s why home cooks often say the dessert tastes even better the next day. It’s also a smart make-ahead option for gatherings, and leftovers keep beautifully in the fridge for up to three days.
The Ingredients That Make It Work
Great banana pudding comes down to a short list of ingredients, so each one matters. Here’s what every item does and how to get the best from it.
The Pudding Base
- Instant vanilla pudding mix (2 boxes, 3.4 oz / 96 g each): This gives the base its vanilla flavor and sets it into a spoonable, creamy custard without any cooking. Be sure to buy instant , not cook-and-serve, since only instant sets properly with cold milk. Whisk for a full two minutes so it thickens evenly.
- Cold whole milk (3 cups / 720 ml): Whole milk adds the fat that makes the pudding taste rich and smooth. Keep it fridge-cold so the mix thickens quickly. 2% works if needed, but the texture will be a little less luscious. Skip skim and most plant-based milks, which can leave the pudding loose.
- Sweetened condensed milk (1 can, 14 oz / 396 g): This adds silky body and a gentle caramel sweetness. Make sure the can says sweetened condensed milk, because evaporated milk is not a substitute. Scrape the can well with a spatula so none of it is left behind.
The Layers
- Ripe but firm bananas (4 large): Bananas bring natural sweetness and a soft, creamy bite. Look for yellow peels with just a few brown freckles, which give flavor without turning mushy between layers. Slice them right before assembling and press them into the pudding, which limits browning.
- Vanilla wafer cookies (1 box, 11 oz / 312 g): The wafers soak up moisture as the dessert chills and turn into tender, cake-like layers. Classic vanilla wafers hold their shape best, so don’t crush them. For a variation, shortbread cookies or ladyfingers also work well.
The Whipped Topping
- Cold heavy whipping cream (2 cups / 480 ml): Cream adds the cloud-like lightness that balances the richer pudding. Choose a cream with at least 36% fat and chill both the bowl and the beaters for faster, more stable peaks. Whip until the peaks hold their shape but still look glossy, and stop before it turns grainy.
- Powdered sugar (2 tablespoons): It dissolves instantly into the cream for a smooth sweetness with no grittiness. The small amount of cornstarch in it also helps the whipped cream hold its shape. Sift it first if it looks clumpy.
- Vanilla extract (1 teaspoon): A touch of vanilla rounds out the cream and adds warm, bakery-style aroma. Pure vanilla extract has a deeper, more complex flavor than imitation, and it’s worth using in a dessert this simple. Vanilla bean paste makes an easy 1:1 swap.
Quick tip: Measure everything and chill your dairy before you start. Cold ingredients are the secret to a pudding that sets well and a cream that whips beautifully.
Step-by-Step Instructions
- Whisk the 2 boxes of instant vanilla pudding mix with 3 cups of cold whole milk in a large bowl for a full 2 minutes, until thick and smooth with no dry streaks. Let it stand for 5 minutes so it sets to a soft, spoonable texture.
- Stir in the can of sweetened condensed milk until the pudding looks glossy and fully blended. It will be quite thick, which is exactly what you want.
- Beat the 2 cups of cold heavy whipping cream with the powdered sugar and vanilla extract in a chilled bowl on medium-high speed for 2 to 3 minutes. I stop as soon as the peaks stand up and still look glossy, because overwhipped cream turns grainy.
- Fold about half of the whipped cream into the pudding with a spatula, using slow, gentle strokes until no white streaks remain. Save the other half in the fridge for the topping.
- Slice the 4 bananas about ¼ inch thick right before assembling. Line the bottom of a 3-quart trifle dish with a single layer of vanilla wafers, then cover them with a layer of banana slices.
- Spread one-third of the pudding over the bananas, then repeat with wafers, bananas, and pudding two more times, finishing with pudding on top. I like to stand a few wafers upright against the glass so the layers look pretty from the side.
- Swirl the reserved whipped cream over the top and garnish with a few crushed wafers. Cover loosely and refrigerate for at least 4 hours, or overnight if you can wait, until the wafers are soft and cake-like.
Quick tip: If the pudding seems slightly loose right after mixing, don’t worry. It firms up as it chills, and the wafers absorb extra moisture along the way.
Remember: the fridge time is part of the recipe. Chill for at least 4 hours before serving, and keep leftovers covered in the refrigerator for up to 3 days.
Storage & Freezing
- Refrigerating: Cover the dish tightly with plastic wrap or a lid and refrigerate leftover Banana Pudding for up to 3 days at 40°F (4°C) or below. Dairy-based desserts shouldn’t sit out for more than 2 hours, so return the dish to the fridge soon after serving. The wafers keep softening each day, and the banana slices may darken a little at the edges. They still taste good, and pressing them into the pudding during assembly limits browning. Day two is usually the sweet spot, when the texture is most cake-like.
- Freezing: This dessert doesn’t freeze well, and it’s best to skip it if you can. Instant pudding can turn watery and grainy after thawing, the whipped cream deflates, and bananas turn dark and mushy. If you do have leftovers you can’t finish, scoop them into individual freezer-safe cups, cover tightly, and freeze for up to 1 month. Thaw them overnight in the fridge and expect a softer, looser texture. I sometimes let a frozen cup sit at room temperature for 20 to 30 minutes and eat it semi-frozen, like an ice cream cake, which hides the texture change nicely.
- Reheating: Don’t heat this one, because warmth will melt the cream and split the pudding. Serve it cold, straight from the fridge. To revive a dish that’s a few days old, stir any pooled liquid back in gently and top it with a fresh swirl of whipped cream. Then add a few new wafers and freshly sliced bananas, which bring back both the crunch and the bright flavor.
- Make-ahead tip: For gatherings, assemble the dish up to 24 hours ahead and chill it uncovered for the first 30 minutes, then cover it. Hold back the crushed wafer garnish until just before serving so it stays crisp against the cream.
Make-Ahead Tips for Banana Pudding
This banana pudding is perfect for meal prep, since it actually tastes better after a night in the fridge! You can whisk the pudding base (pudding mix, milk, and condensed milk) and refrigerate it up to 24 hours in advance, covered tightly with plastic wrap pressed onto the surface to prevent a skin. For the best texture, assemble the layers the night before, but slice the bananas just before layering to prevent browning. Keep the whipped cream separate and swirl it on top up to 4 hours before serving , so it stays fluffy and stable. Add crushed wafers right before serving for a little crunch, and you’ll have a stress-free dessert that’s just as delicious.
Serving Suggestions
- Serve it family-style or in individual cups: Bring the 3-quart trifle dish straight to the table so everyone can see the layers. Use a large spoon and dig all the way to the bottom of the dish, so each scoop gets wafers, bananas, and pudding. For a party, spoon the layers into small jars or glasses and chill them for the same 4 hours. Individual cups are easy to carry and need no scooping. Hold back the crushed wafer garnish until the last minute so it stays crunchy against the cream.
- Finish with a little contrast: This Banana Pudding is rich and sweet, so a bright or salty finishing touch keeps each bite interesting. I like to add a few fresh banana slices and a light drizzle of salted caramel right before serving. A pinch of flaky sea salt works well too. Sliced strawberries or a handful of raspberries add a tart note that cuts through the condensed milk and cream.
- Pair it with something hot, bold, or bright: A cup of freshly brewed coffee or espresso balances the sweetness with a little bitterness. Cold whole milk is a nostalgic choice, especially for kids. For an adult dinner, a small pour of tawny port or a nutty cream sherry echoes the caramel notes in the pudding. After a heavy meal, a pot of black tea or a sparkling water with lemon refreshes the palate.
- Match it to the occasion: It’s a natural finish to a Sunday dinner or barbecue, where the cool, creamy layers follow smoky ribs, fried chicken, or pulled pork. Because it must chill for at least 4 hours, it’s also ideal for potlucks and holidays, since you can make it the day before and have one less thing to do. Keep portions modest, about ¾ cup each, because the dessert is filling. One dish comfortably serves 8, with a little left over for the cook.
Variations & Substitutions
This banana pudding is forgiving, so you can adjust it to fit your pantry, your guests, or your mood. Here are a few tested swaps that keep the creamy, cake-like texture intact.
- Swap the cookies : Shortbread cookies hold their shape a bit longer, while ladyfingers soften into a more tender, sponge-like layer. Use the same amount.
- Make it gluten-free : Use gluten-free vanilla wafers in equal amounts, and check the pudding mix label, since formulas vary by brand.
- Lighter milk option : 2% milk works in the pudding with a slightly less rich texture. Skip skim and plant milks, which can leave it loose.
- Pantry whipped topping : Out of heavy cream? A thawed 12-ounce tub of whipped topping works, though it tastes lighter and less rich than fresh.
- Salted caramel twist : I drizzle 2 tablespoons of caramel sauce over each pudding layer and sprinkle a pinch of flaky salt on top for contrast.
- Individual party cups : I layer everything into about twelve 8-ounce jars or glasses for easy serving. Chill them the same 4 hours.
Expert Tips for the Best Banana Pudding
- Chill your bowl: Freeze the mixing bowl and beaters for 15 minutes, then whip the cold heavy cream with powdered sugar until peaks are glossy and stable.
- Time the whisking: Whisk the instant pudding mix and cold whole milk for a full two minutes, then rest five minutes so it sets before adding condensed milk.
- Fold gently: Use a wide spatula and slow strokes to fold half the whipped cream into the pudding, keeping the air that makes it light.
- Slice bananas last: I cut ¼-inch slices right before layering, then spread pudding over them right away so air can’t turn them brown.
- Trust the chill: Don’t panic if the pudding looks loose. Four hours in the fridge firms it up while the vanilla wafers soften like cake.
Recipe FAQs
- How long does leftover Banana Pudding keep in the fridge? Covered, it keeps up to 3 days.
- Why does my pudding look loose after mixing? It firms up during the four-hour chill.
- How do I keep the bananas from browning? Slice them last, then press into pudding.
- When should I stop whipping the cream? I stop when peaks stand up and look glossy.
- 0 Facebook
- 0 Pinterest
- 2 Email
- Copy Link
- 2 shares
Creamy Banana Pudding That Beats Every Other Dessert
Ingredients
Instructions
Whisk the 2 boxes of instant vanilla pudding mix with 3 cups of cold whole milk in a large bowl for a full 2 minutes, until thick and smooth with no dry streaks. Let it stand for 5 minutes so it sets to a soft, spoonable texture.
Stir in the can of sweetened condensed milk until the pudding looks glossy and fully blended. It will be quite thick, which is exactly what you want.
Beat the 2 cups of cold heavy whipping cream with the powdered sugar and vanilla extract in a chilled bowl on medium-high speed for 2 to 3 minutes, stopping when peaks stand up and still look glossy.
Fold about half of the whipped cream into the pudding with a spatula, using slow, gentle strokes until no white streaks remain. Reserve the other half of the whipped cream in the fridge for the topping.
Slice the 4 bananas about 1/4 inch thick right before assembling. Line the bottom of a 3-quart trifle dish with a single layer of vanilla wafers, then cover them with a layer of banana slices.
Spread one-third of the pudding over the bananas, then repeat with wafers, bananas, and pudding two more times, finishing with pudding on top. Stand a few wafers upright against the glass if you like the layered look.
Swirl the reserved whipped cream over the top and garnish with a few crushed wafers. Cover loosely and refrigerate for at least 4 hours, or overnight if you can wait, until the wafers are soft and cake-like.
Quick tip: If the pudding seems slightly loose right after mixing, don’t worry — it firms up as it chills and the wafers absorb extra moisture.
Notes
Chill your bowl: Freeze the mixing bowl and beaters for 15 minutes before whipping cream so peaks are glossy and stable.
Time the whisking: Whisk the instant pudding mix and cold whole milk for a full two minutes, then rest five minutes so it sets before adding condensed milk.
Fold gently: Use a wide spatula and slow strokes to fold half the whipped cream into the pudding, keeping the air that makes it light.
Slice bananas last: Cut 1/4-inch slices right before layering and cover them with pudding immediately to limit browning.
Trust the chill: Four hours in the fridge firms the pudding and softens the wafers into cake-like layers; leftovers often taste better on day two.
Refrigerating: Cover the dish tightly and refrigerate for up to 3 days at 40°F (4°C) or below. Dairy desserts shouldn’t sit out for more than 2 hours.
Freezing: Not recommended — texture changes. If necessary, freeze individual portions for up to 1 month and thaw overnight in the fridge; expect a softer, looser texture.
Reheating: Do not heat. Stir any pooled liquid back in gently and top with fresh whipped cream, wafers, and banana slices to refresh a few-days-old dish.
Make-ahead tip: Assemble up to 24 hours ahead; chill uncovered 30 minutes then cover. Hold back garnish until serving so it stays crisp.
Nutrition
| Serving Size | 1/8 recipe (about 1 cup) |
|---|---|
| Calories | 690 kcal |
| Sugar Content | 58 g |
| Sodium Content | 280 mg |
| Fat Content | 45 g |
| Saturated Fat Content | 27 g |
| Unsaturated Fat Content | 16 g |
| Trans Fat Content | 0.5 g |
| Carbohydrate Content | 78 g |
| Fiber Content | 3 g |
| Protein Content | 8 g |
| Cholesterol Content | 145 mg |