Introduction
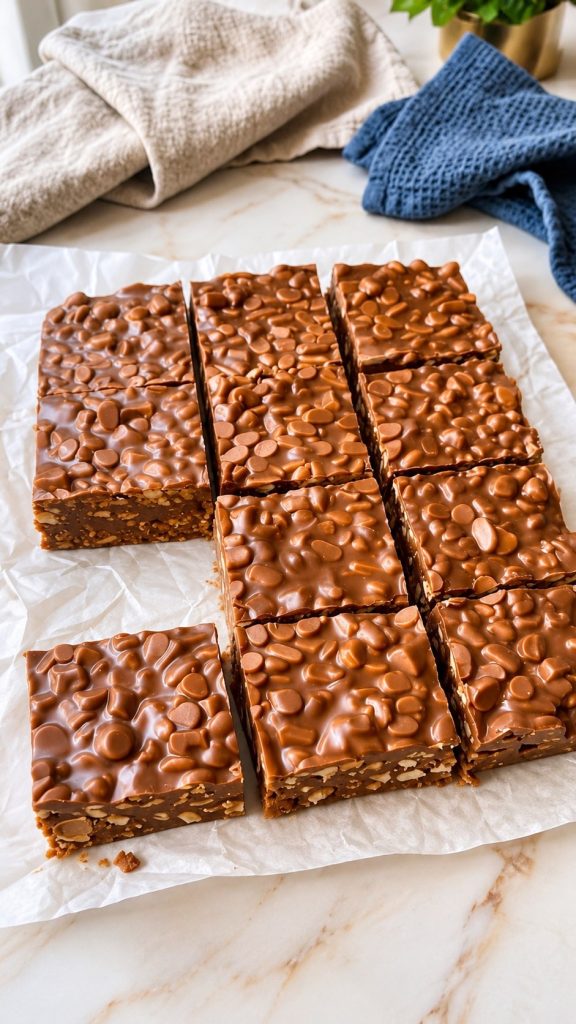
No-Bake Chocolate Peanut Butter Bars are a deliciously rich and creamy treat that combines the perfect balance of chocolate and peanut butter in a convenient, no-bake format. This recipe is ideal for anyone craving a quick and indulgent dessert without the hassle of an oven. With just 15 minutes of prep and no cooking time, these bars are perfect for busy home cooks and dessert enthusiasts alike.
This no-bake dessert bar features a crunchy, buttery base with a smooth and luscious chocolate-peanut butter topping, making it irresistible for peanut butter and chocolate lovers. Whether you’re preparing a sweet snack for family, friends, or a special occasion, these bars are sure to satisfy your sweet tooth with minimal effort.
Why you’ll love this No-Bake Chocolate Peanut Butter Bars recipe
- This recipe requires no baking, saving you time and energy, especially on hot days.
- The combination of creamy peanut butter and smooth milk chocolate creates a rich and satisfying flavor profile.
- It uses simple pantry ingredients, making it easy to prepare with what you likely already have at home.
- The bars have a perfect balance of crunchy graham cracker crumbs and chopped peanuts for delightful texture.
- These bars are versatile and easy to customize with additional toppings or mix-ins to suit your taste.
Ingredients
- 1 cup salted butter, melted
- 1 1/2 cups creamy peanut butter
- 2 cups graham cracker crumbs
- 2 cups powdered sugar
- 1/2 cup chopped roasted peanuts
- 2 cups milk chocolate chips
- 2 tablespoons peanut butter
Servings: 9 to 12 bars Prep Time: 15 minutes Cook Time: 0 minutes
The key ingredients in this recipe include creamy peanut butter, which provides the signature smooth and nutty flavor, and milk chocolate chips that melt into a luscious topping. Salted butter adds richness and helps bind the base together. Graham cracker crumbs give a subtle sweetness and crunchy texture, while powdered sugar sweetens the filling evenly. Chopped roasted peanuts add an extra nutty crunch and enhance the overall texture. When choosing peanut butter, opt for a creamy version to ensure a smooth mixture, and select high-quality milk chocolate chips for the best melt and flavor.
Instructions
- Prepare your pan: Line an 8×8-inch or 9×9-inch baking pan with parchment paper, leaving some overhang to easily lift the bars later.
- Make the base mixture: In a large bowl, combine the melted salted butter, 1 cup of creamy peanut butter, graham cracker crumbs, powdered sugar, and chopped roasted peanuts. Mix thoroughly until the mixture is thick and well combined.
- Press the base: Evenly press the peanut butter mixture firmly into the bottom of the prepared pan, creating a smooth and compact layer.
- Melt the chocolate topping: In a microwave-safe bowl or over a double boiler, melt the milk chocolate chips together with the remaining 2 tablespoons of peanut butter until smooth and glossy.
- Spread the chocolate layer: Pour the melted chocolate and peanut butter mixture over the base layer and spread it evenly with a spatula.
- Add extra crunch (optional): If desired, press a few extra chopped peanuts on top of the chocolate layer for added texture and a decorative finish.
- Chill to set: Place the pan in the refrigerator and chill for 1 to 2 hours until the bars are fully set and firm to the touch.
- Cut and serve: Use the parchment paper overhang to lift the set bars from the pan. Cut into 9 to 12 squares or rectangles and serve.
Tips for the best results
- Use room temperature peanut butter to ensure it mixes smoothly with the other ingredients.
- Press the base mixture firmly into the pan to prevent the bars from crumbling when cut.
- When melting chocolate, heat in short bursts to avoid burning and stir frequently for a glossy finish.
- Chill the bars long enough to fully set; rushing this step may cause the bars to be too soft.
- For easier cutting, chill the bars until very firm and use a sharp knife wiped clean between cuts.
- Store the bars in an airtight container in the refrigerator to maintain their texture and freshness.
Variations and substitutions
- Use natural peanut butter for a less sweet, more earthy flavor, adjusting powdered sugar to taste.
- Swap milk chocolate chips for dark chocolate chips if you prefer a richer chocolate taste.
- Add a sprinkle of sea salt on top before chilling for a sweet and salty contrast.
- Incorporate mini chocolate chips or butterscotch chips into the base mixture for extra bursts of flavor.
- Replace chopped roasted peanuts with chopped almonds or pecans for a different nutty crunch.
Serving suggestions
These No-Bake Chocolate Peanut Butter Bars are perfect served chilled as a snack or dessert. Pair them with a glass of cold milk or a hot cup of coffee or tea for a delightful treat. They also make great additions to dessert platters at parties or potlucks. For a fun twist, serve with a dollop of whipped cream or a drizzle of caramel sauce to elevate their richness.
Storage and reheating
Store the bars in an airtight container in the refrigerator for up to one week to maintain their texture and flavor. If you prefer them softer, allow the bars to sit at room temperature for 10-15 minutes before serving. These bars are best enjoyed chilled and do not require reheating. Avoid freezing, as the texture may change once thawed.
Frequently asked questions
Can I use crunchy peanut butter instead of creamy?
Yes, crunchy peanut butter can be used, but it will add more texture to the base. If you prefer a smoother consistency, stick with creamy peanut butter. The crunchy variant will provide an extra nutty bite in every bar.
Do I have to use graham cracker crumbs?
Graham cracker crumbs give a subtle sweetness and structure to the bars, but you can substitute with crushed digestive biscuits or vanilla wafers if preferred. Just be sure to use finely crushed crumbs for the best texture.
Can I make these bars vegan or dairy-free?
To make a vegan or dairy-free version, use plant-based butter substitutes and dairy-free chocolate chips. Also, ensure the peanut butter is free from animal-derived ingredients. The texture and flavor will be slightly different but still delicious.
How long do these bars last?
Stored in an airtight container in the refrigerator, these bars last up to one week. For best taste and texture, consume them within this timeframe and keep them chilled until serving.
Is it possible to double the recipe?
Yes, you can easily double the ingredients and use a larger pan, such as a 9×13-inch dish. Keep the same layering and chilling instructions, but the bars may require additional chilling time to fully set.
Final thoughts
These No-Bake Chocolate Peanut Butter Bars are a simple yet decadent treat that combines rich chocolate and creamy peanut butter in a delightful no-bake dessert. With minimal prep time and ingredients you probably already have, they’re an excellent choice for busy days or last-minute gatherings. Give this recipe a try and enjoy a homemade indulgence that’s sure to become a favorite!
No-Bake Chocolate Peanut Butter Bars – Rich, Creamy & Irresistible!
Ingredients
Instructions
Prepare your pan: Line an 8×8-inch or 9×9-inch baking pan with parchment paper, leaving some overhang to easily lift the bars later.
Make the base mixture: In a large bowl, combine the melted salted butter, 1 cup of creamy peanut butter, graham cracker crumbs, powdered sugar, and chopped roasted peanuts. Mix thoroughly until the mixture is thick and well combined.
Press the base: Evenly press the peanut butter mixture firmly into the bottom of the prepared pan, creating a smooth and compact layer.
Melt the chocolate topping: In a microwave-safe bowl or over a double boiler, melt the milk chocolate chips together with the remaining 2 tablespoons of peanut butter until smooth and glossy.
Spread the chocolate layer: Pour the melted chocolate and peanut butter mixture over the base layer and spread it evenly with a spatula.
Add extra crunch (optional): If desired, press a few extra chopped peanuts on top of the chocolate layer for added texture and a decorative finish.
Chill to set: Place the pan in the refrigerator and chill for 1 to 2 hours until the bars are fully set and firm to the touch.
Cut and serve: Use the parchment paper overhang to lift the set bars from the pan. Cut into 9 to 12 squares or rectangles and serve.