- 0 Facebook
- 19 Pinterest
- 0 Email
- Copy Link
- 19 shares
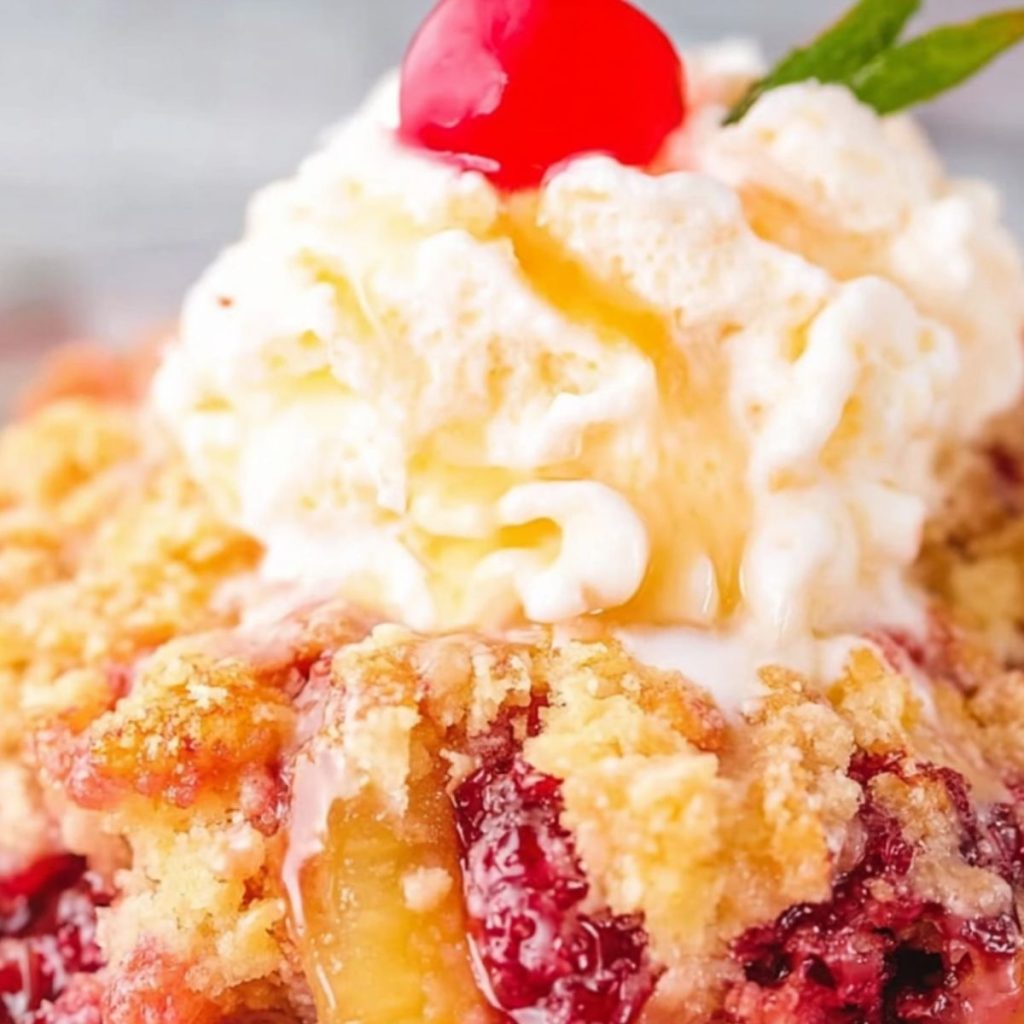
This Cherry Pineapple Dump Cake transforms a handful of simple ingredients into a warm, bubbling masterpiece of fruity delight. The sweet-tart cherries mingle with juicy pineapple beneath a golden, buttery cake layer that crisps beautifully in the oven . Ready in under an hour with just minutes of hands-on prep, this dessert strikes the perfect balance between homemade satisfaction and effortless execution. Each spoonful delivers a comforting blend of bright fruit flavors and rich cake—especially when served warm with a melting scoop of vanilla ice cream on top.
Why You’ll Love This Recipe
This Cherry Pineapple Dump Cake delivers maximum flavor with minimal effort—the perfect solution when you crave a homemade dessert without the fuss.
- Effortlessly Impressive : The combination of bubbling fruit and golden buttery topping creates a dessert that looks like you spent hours in the kitchen.
- No Mixing Required : Simply layer ingredients in the baking dish —no bowls, no beaters, and practically zero cleanup afterward.
- Perfectly Balanced Flavors : The sweet-tart cherries complement the tropical pineapple while the buttery cake adds rich texture that satisfies every dessert craving.
- Incredibly Versatile : Works beautifully as a casual family dessert or dressed up with quality vanilla ice cream for dinner party elegance.
- Make-Ahead Magic : Prepare this cake up to a day before serving—it actually develops more flavor as it sits and reheats beautifully.
- Foolproof Success : Even novice bakers achieve perfect results every time, with a consistently moist interior and crisp, golden topping.
Ingredient Notes
Each component in this Cherry Pineapple Dump Cake plays a crucial role in creating its signature flavor and texture. The quality of these simple ingredients directly impacts the delicious results you’ll achieve with minimal effort.
- Crushed pineapple : Provides natural sweetness and moisture that keeps the cake tender. Drain only partially to retain some juice that will create a luscious sauce when baked.
- Cherry pie filling : Creates the signature sweet-tart flavor that balances the cake’s richness. Premium brands with whole cherries offer better texture and less artificial flavor than budget options.
- Butter cake mix : Forms the golden, crispy top layer without any mixing. Yellow cake mix works equally well, though butter cake delivers a slightly richer flavor profile.
- Salted butter : Transforms the dry cake mix into a crisp, buttery crust. Slice it thinly and distribute evenly to ensure consistent browning and prevent dry patches.
- Almond or vanilla extract : Just a teaspoon amplifies the fruit flavors and adds depth to the dessert. Almond pairs exceptionally well with cherries, while vanilla offers a more traditional profile.
- Optional vanilla ice cream : The cool creaminess creates the perfect temperature and texture contrast against the warm, fruity cake. Premium brands with higher butterfat content melt more elegantly.
- Optional maraschino cherry : Beyond decoration, it signals the cherry flavor within and adds a bright pop of color against the vanilla ice cream.
How to Make Cherry Pineapple Dump Cake
- Preheat your oven to 350°F (175°C) and lightly grease a 9×13-inch baking dish with cooking spray or butter to prevent sticking.
- Spread the can of crushed pineapple evenly across the bottom of the prepared baking dish , including about half of the juice from the can. This creates a moist base layer that will bubble up during baking.
- Spoon the cherry pie filling over the pineapple layer, gently spreading it to create an even distribution of cherries. I like to use the back of a spoon to carefully spread without mixing the layers too much.
- Sprinkle the almond or vanilla extract over the fruit layers—this small addition makes a remarkable difference in deepening the flavor of the finished cake.
- Evenly distribute the dry cake mix over the fruit, creating a complete layer that covers all the cherry and pineapple mixture. Ensure no fruit is peeking through for the best texture contrast.
- Arrange the thinly sliced butter pieces across the entire surface of the cake mix. Make sure to cover as much area as possible—any dry spots won’t brown properly and will remain powdery.
- Bake in the preheated oven for 35-45 minutes, or until the top turns a deep golden brown and the fruit filling bubbles around the edges. The butter should completely melt and transform the cake mix into a crispy, crumbly topping.
- Allow the cake to cool for about 10-15 minutes before serving—the filling is extremely hot straight from the oven and needs time to set slightly.
Remember, while this dessert is delicious on its own, serving it warm with a scoop of vanilla ice cream takes it to another level of indulgence!
Variations & Substitutions
The beauty of dump cakes is their flexibility! Feel free to customize this Cherry Pineapple Dump Cake to match your taste preferences or what you have on hand.
- Fruit swap options : Not a fan of cherries? Substitute with blueberry, strawberry, or peach pie filling while keeping the pineapple base for that perfect moisture and sweetness balance.
- Make it from scratch : Skip the canned pie filling and use 4 cups of fresh or frozen cherries mixed with 1/2 cup sugar and 2 tablespoons cornstarch if you prefer a less processed approach.
- Cake mix alternatives : I sometimes use spice cake mix instead of butter cake for a warm, cozy flavor profile that’s especially delicious during fall and winter months.
- Add some crunch : Sprinkle 1/2 cup chopped pecans, walnuts, or sliced almonds over the butter layer before baking for added texture and nutty flavor that complements the fruits beautifully.
- Dairy-free adaptation : Replace the butter with coconut oil (solid, not melted) sliced into thin pieces for a dairy-free version that still achieves that crispy golden topping.
- Flavor boosters : Add 1 tablespoon of lemon zest to the fruit layer or 1/2 teaspoon of coconut extract to the pineapple for a tropical twist that elevates the flavor profile.
Storage & Freezing
This Cherry Pineapple Dump Cake keeps beautifully in the refrigerator for up to 5 days when stored in an airtight container. The flavors actually continue to meld and develop overnight, making this a perfect make-ahead dessert option for busy hosts.
For longer storage, this dump cake freezes surprisingly well. Portion completely cooled leftovers into freezer-safe containers and freeze for up to 3 months. I recommend cutting it into individual servings before freezing—this makes it easier to thaw just what you need for a quick dessert fix later on.
To reheat refrigerated portions, warm in the microwave for 20-30 seconds or in a 325°F oven for about 10 minutes until heated through. For frozen portions, thaw overnight in the refrigerator before reheating, or use the microwave’s defrost setting followed by gentle heating. The fruit filling may release additional moisture when thawed, but this actually helps keep the cake layer moist and delicious!
Tips for the Best Cherry Pineapple Dump Cake
Here’s how to elevate this simple dessert to bakery-worthy status:
- Layer strategically : When spreading the pineapple layer, include about half the juice – it creates the perfect moisture balance without making the final cake soggy.
- Butter coverage matters : I’ve found that thinner butter slices melt more evenly across the cake mix, preventing those disappointing dry patches in the finished dessert.
- Watch the edges : Your Cherry Pineapple Dump Cake is done when the edges bubble with fruit juices and the top turns golden brown – usually around 40 minutes in my oven .
- Cool slightly before serving : Let the cake rest 10-15 minutes after baking; this allows the molten fruit filling to set up just enough while still remaining deliciously warm.
- Flavor boost option : Try adding ½ teaspoon of cinnamon to the cake mix layer for a subtle warmth that beautifully complements both the cherries and pineapple.
Serving Suggestions
This Cherry Pineapple Dump Cake is a versatile dessert that shines in so many different serving scenarios – from casual family dinners to special celebrations.
I love serving this warm from the oven with a generous scoop of vanilla ice cream that slowly melts into the fruity layers, creating a creamy sauce that complements the buttery cake topping. For an extra special touch, add a light dusting of powdered sugar and a fresh mint leaf alongside that classic maraschino cherry.
For brunch gatherings, try serving smaller portions in pretty dessert bowls with a dollop of freshly whipped cream instead of ice cream – the lighter topping works beautifully for daytime entertaining. If you’re hosting a dinner party, consider individual servings in ramekins with a small pour of warm vanilla sauce for an elegant presentation that still captures the homey essence of this Cherry Pineapple Dump Cake.
Coffee or tea lovers will appreciate how well this dessert pairs with a robust cup of coffee or Earl Grey tea, as the bright fruit flavors balance the bitter notes in these beverages perfectly. For a truly indulgent experience, serve with a small glass of amaretto or cherry liqueur to echo and enhance the almond and cherry notes in the cake.
Make-Ahead Tips for Cherry Pineapple Dump Cake
This Cherry Pineapple Dump Cake is a meal prep dream for busy home cooks who want homemade dessert without last-minute stress! You can assemble the entire cake up to 24 hours in advance—simply layer the pineapple, cherry filling, extract, and cake mix in your baking dish , then cover tightly with plastic wrap and refrigerate. The butter should be added just before baking to prevent the cake mix from becoming soggy. When ready to serve, let the assembled cake sit at room temperature for 15-20 minutes, add the sliced butter on top, then bake as directed (you may need an extra 5 minutes since it’s starting cold). The flavors actually meld beautifully overnight, creating an even more delicious result with zero morning prep work!
Recipe FAQs
Can I use fresh fruit instead of canned? Not recommended – canned provides needed juices.
How do I know when it’s done baking? Top is golden and edges are bubbling.
Can I use other cake mix flavors? Absolutely! White or spice cake work beautifully.
Is this dump cake freezer-friendly? Yes, freeze for up to 3 months.
Can I make this without butter? I use coconut oil sometimes – equally delicious!
What if I don’t have a 9×13 pan? Two 8×8 pans work – reduce baking time.
- 0 Facebook
- 19 Pinterest
- 0 Email
- Copy Link
- 19 shares
Irresistible Cherry Pineapple Dump Cake for Effortless Entertaining
Ingredients
Instructions
Preheat your oven to 350°F (175°C) and lightly grease a 9×13-inch baking dish with cooking spray or butter to prevent sticking.
Spread the can of crushed pineapple evenly across the bottom of the prepared baking dish, including about half of the juice from the can.
Spoon the cherry pie filling over the pineapple layer, gently spreading it to create an even distribution of cherries.
Sprinkle the almond or vanilla extract over the fruit layers.
Evenly distribute the dry cake mix over the fruit, ensuring no fruit is peeking through.
Arrange the thinly sliced butter pieces across the surface of the cake mix.
Bake in the preheated oven for 35-45 minutes, or until the top turns a deep golden brown and the fruit filling bubbles around the edges.
Allow the cake to cool for about 10-15 minutes before serving.
Notes
Layer strategically by including about half the juice from the pineapple.
Ensure thinner butter slices melt evenly across the cake mix.
Watch the edges for bubbling fruit juices and golden brown color.
Cool slightly before serving to allow the filling to set.
Try adding ½ teaspoon of cinnamon for extra flavor.
Nutrition
| Serving Size | 1 slice |
|---|---|
| Calories | 250 calories |
| Sugar Content | 20g |
| Sodium Content | 250mg |
| Fat Content | 10g |
| Saturated Fat Content | 5g |
| Unsaturated Fat Content | 3g |
| Trans Fat Content | 0g |
| Carbohydrate Content | 35g |
| Fiber Content | 1g |
| Protein Content | 3g |
| Cholesterol Content | 25mg |