- 0 Facebook
- 202 Pinterest
- 6 Email
- Copy Link
- 208 shares
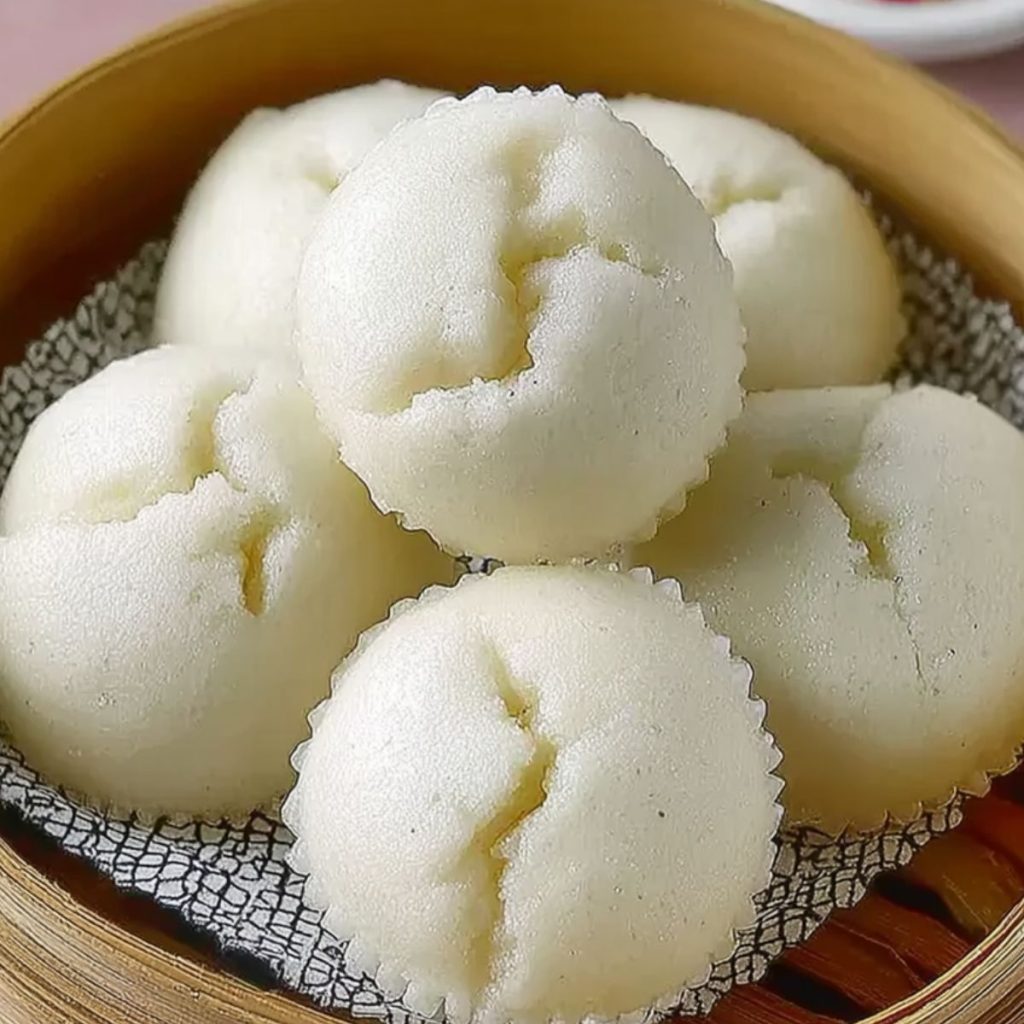
The first time I discovered puto bigas was during a weekend visit to my Filipino neighbor, Mrs. Santos. The sweet aroma of coconut and rice flour wafted through her kitchen window, drawing me in like a moth to a flame. She was carefully ladling batter into small silicone molds, her weathered hands moving with practiced precision. “These are puto bigas,” she explained with a warm smile, “rice cakes that taste like childhood memories.”
That afternoon, as I bit into my first warm, pillowy cake topped with a sprinkle of cheese, I knew I had to master this recipe. What started as curiosity became an obsession, and after countless batches (and a few failures), I’ve perfected a version that captures that same magic Mrs. Santos shared with me. This recipe transforms simple pantry ingredients into something extraordinary – tender, slightly sweet rice cakes that practically melt in your mouth.
Why You’ll Love This Recipe
I’ve spent years perfecting this puto bigas recipe, and what makes it truly special is how the coconut milk creates an incredibly moist, tender crumb while the combination of baking powder and yeast gives these cakes their signature fluffy texture. The gentle sweetness from the sugar balances beautifully with the subtle nuttiness of rice flour, creating a dessert that’s comforting without being overwhelming.
The beauty of this recipe lies in its simplicity – you’re essentially creating a delicate, steamed cake that’s forgiving for beginners yet sophisticated enough to impress seasoned bakers. These cakes are versatile enough to serve warm for breakfast with coffee or chilled as an afternoon treat, and the steaming method ensures they stay incredibly moist for days.
- Foolproof method that works every time, even for first-time puto makers
- Naturally gluten-free thanks to rice flour base
- Perfect texture – fluffy, tender, and never dense
- Make-ahead friendly for busy schedules
- Customizable with various toppings and flavors
Ingredients Notes
- Rice Flour: I always use fine rice flour for the smoothest texture. It creates that distinctive tender crumb that’s neither too dense nor too airy, giving puto bigas its characteristic melt-in-your-mouth quality.
- Salt: Just a pinch enhances all the other flavors without making the cakes taste salty. It’s essential for balancing the sweetness and bringing out the coconut milk’s natural richness.
- White Sugar: Creates the perfect level of sweetness while helping achieve that light, fluffy texture. I prefer granulated sugar as it dissolves completely, ensuring no grittiness in the final product.
- Baking Powder: Works alongside yeast to create lift and lightness. Fresh baking powder is crucial – I always check the expiration date because old baking powder won’t give you those perfectly risen cakes.
- Instant Yeast: Adds that extra lift and creates tiny air pockets for fluffiness. Unlike active dry yeast, instant yeast can be mixed directly into dry ingredients, making this recipe incredibly convenient.
- Coconut Milk: The star ingredient that makes these cakes incredibly moist and adds that subtle tropical flavor. I use full-fat coconut milk for the richest taste and best texture.
- Warm Water: Helps activate the yeast and creates the perfect batter consistency. The temperature should be just warm to touch – too hot will kill the yeast, too cold won’t activate it properly.
- Oil: Keeps the cakes tender and prevents them from drying out during steaming. I use neutral oil like vegetable or canola so it doesn’t compete with the coconut flavor.
How to Make Fluffy Steamed Rice Cakes (Puto Bigas)
Step 1: In a large mixing bowl, whisk together rice flour, salt, sugar, baking powder, and instant yeast until well combined. Make sure there are no lumps – this dry mixture should be smooth and evenly distributed for consistent results.
Step 2: Create a well in the center of the dry ingredients. Pour in the coconut milk, warm water, and oil. Using a whisk, gradually incorporate the wet ingredients into the dry mixture, starting from the center and working outward to prevent lumps.
Step 3: Whisk the batter until completely smooth and slightly thick, about 2-3 minutes. The consistency should be similar to pancake batter – pourable but not too thin. Some small bubbles are fine — avoid overmixing, which can deflate the batter. Let the batter rest for 10 minutes to allow the yeast to activate and the rice flour to fully hydrate.
Step 4: Meanwhile, prepare your steamer and lightly grease small molds or silicone cups. I prefer using individual molds about 2 inches wide for the perfect portion size. Fill each mold about 2/3 full with batter – they’ll rise during steaming.
Step 5: Steam the puto bigas over rapidly boiling water for 15-20 minutes, or until a toothpick inserted in the center comes out clean. The tops should spring back when lightly touched, and the cakes should have a beautiful, slightly golden color.
Tip: Wrap the lid of your steamer with a clean kitchen towel to prevent condensation from dripping onto the cakes and affecting texture.
Step 6: Remove from steamer and let cool in molds for 5 minutes before carefully unmolding. Serve warm or at room temperature, optionally topped with grated cheese (add during the last 2–3 minutes of steaming), salted egg, or coconut flakes.
Expert Cooking Tips
- Test your yeast first: I always proof a small amount in warm water to ensure it’s active before mixing the batter for guaranteed rise.
- Don’t overmix: Once the batter is smooth, stop whisking. Overmixing can make the cakes tough and dense instead of fluffy.
- Maintain consistent steam: Keep the water at a rolling boil throughout steaming and avoid lifting the lid, which releases precious steam.
- Use room temperature ingredients: This helps everything blend smoothly and ensures even cooking throughout each cake.
- Check doneness properly: Insert a toothpick in the center – it should come out clean or with just a few moist crumbs attached.
Storage Tips
- Refrigerator storage: Keep covered in airtight container for up to 5 days. The coconut milk keeps them moist and delicious.
- Freezer storage: Wrap individually in plastic wrap, then place in freezer bags for up to 3 months without losing texture.
- Reheating method: Steam for 2-3 minutes or microwave for 15-20 seconds to restore that fresh-from-steamer warmth and softness.
- Room temperature: Store covered for up to 2 days, though they’re best enjoyed within the first day for optimal freshness.
Variations and Substitutions
- Ube puto bigas: Add 2 tablespoons ube extract for beautiful purple color and subtle vanilla flavor that’s absolutely stunning.
- Coconut milk substitute: Use equal parts whole milk and heavy cream if coconut milk isn’t available, though you’ll lose the tropical flavor.
- Pandan version: Add 1 tablespoon pandan extract for that distinctive Asian flavor and lovely green color that’s Instagram-worthy.
- Dairy-free option: This recipe is naturally dairy-free, but ensure your toppings like cheese alternatives match your dietary needs.
- Sugar alternatives: Replace with equal amount of coconut sugar for deeper flavor, or reduce to 1/2 cup for less sweetness.
What to Serve with Puto Bigas
- Grated cheese: Sharp cheddar or Edam creates a delightful sweet-savory contrast that’s traditional and absolutely delicious.
- Fresh fruit: Sliced mangoes or berries add brightness and acidity that balances the rich, creamy coconut flavors perfectly.
- Latik (coconut caramel): Drizzle this traditional Filipino coconut sauce over warm puto for an authentic, indulgent experience.
- Salted egg: Grated salted duck egg adds umami depth and creates an interesting textural contrast with the soft cakes.
- Coconut flakes: Toasted coconut enhances the tropical flavor while adding delightful crunch to each bite.
FAQ
Q: Why are my puto bigas dense instead of fluffy? A: Check yeast freshness and don’t overmix the batter. Old yeast or too much mixing creates dense cakes.
Q: Can I make these without a steamer? A: Yes, use a large pot with a steaming rack or improvise with a metal colander over boiling water.
Q: How do I prevent the cakes from sticking to molds? A: Lightly grease molds with oil or use silicone molds for easy release every time.
Q: Can I double this recipe? A: Absolutely! Just maintain the same ingredient ratios and steam in batches if your steamer isn’t large enough.
Q: Can I use glutinous rice flour instead of regular rice flour? A: No – glutinous rice flour will make the cakes sticky and chewy instead of light and fluffy.
Q: Why is my batter too thick or thin? A: Adjust with small amounts of warm water if too thick, or rice flour if too thin.
- 0 Facebook
- 202 Pinterest
- 6 Email
- Copy Link
- 208 shares
Fluffy Steamed Rice Cakes Puto Bigas
Ingredients
Instructions
- Step 1
In a large mixing bowl, whisk together rice flour, salt, sugar, baking powder, and instant yeast until well combined. Make sure there are no lumps – this dry mixture should be smooth and evenly distributed for consistent results.
- Step 2
Create a well in the center of the dry ingredients. Pour in the coconut milk, warm water, and oil. Using a whisk, gradually incorporate the wet ingredients into the dry mixture, starting from the center and working outward to prevent lumps.
- Step 3
Whisk the batter until completely smooth and slightly thick, about 2-3 minutes. The consistency should be similar to pancake batter – pourable but not too thin. Some small bubbles are fine — avoid overmixing, which can deflate the batter. Let the batter rest for 10 minutes to allow the yeast to activate and the rice flour to fully hydrate.
- Step 4
Meanwhile, prepare your steamer and lightly grease small molds or silicone cups. I prefer using individual molds about 2 inches wide for the perfect portion size. Fill each mold about 2/3 full with batter – they’ll rise during steaming.
- Step 5
Steam the puto bigas over rapidly boiling water for 15-20 minutes, or until a toothpick inserted in the center comes out clean. The tops should spring back when lightly touched, and the cakes should have a beautiful, slightly golden color.
- Tip
Wrap the lid of your steamer with a clean kitchen towel to prevent condensation from dripping onto the cakes and affecting texture.
- Step 6
Remove from steamer and let cool in molds for 5 minutes before carefully unmolding. Serve warm or at room temperature, optionally topped with grated cheese (add during the last 2–3 minutes of steaming), salted egg, or coconut flakes.