- 0 Facebook
- 6 Pinterest
- 0 Email
- Copy Link
- 6 shares
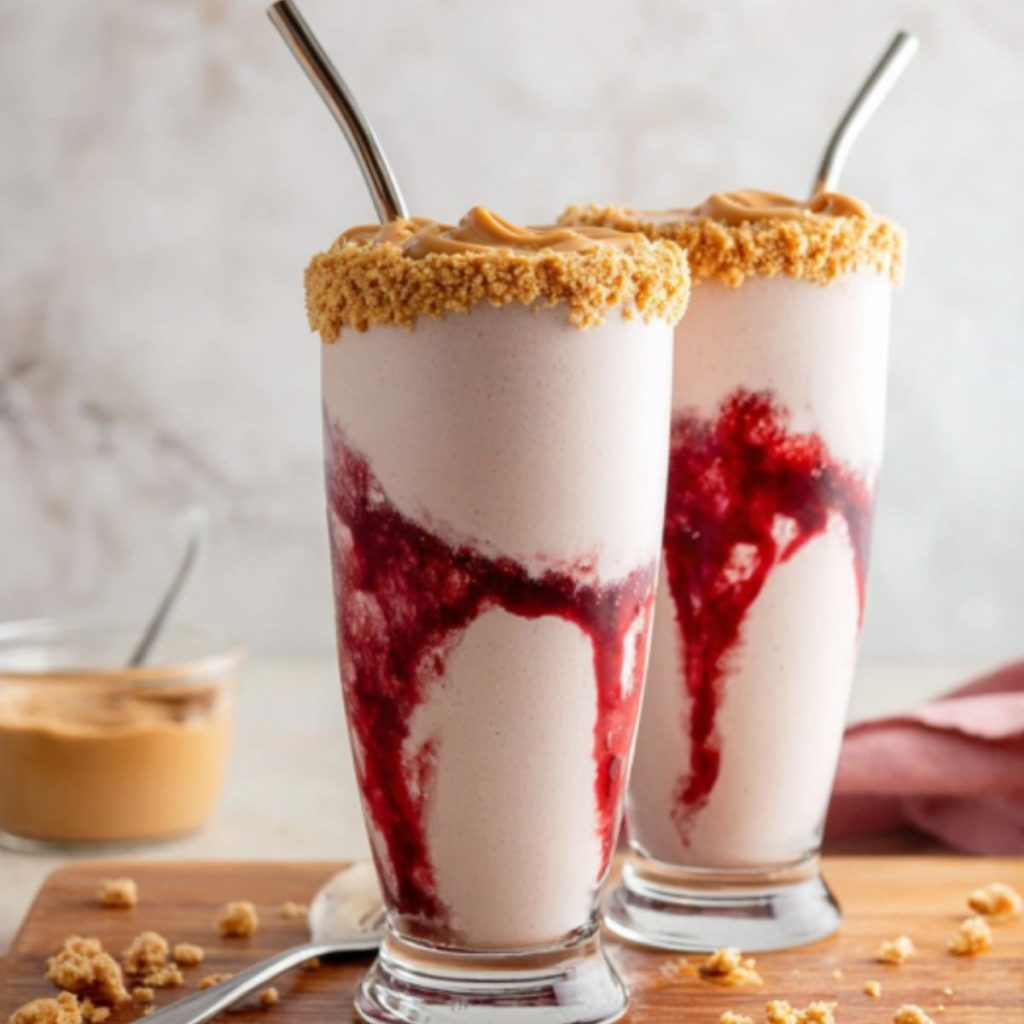
There’s something magical about the first warm days of summer that takes me straight back to my grandmother’s kitchen. I remember being seven years old, sticky fingers from making PB&J sandwiches, when Grandma surprised me with what she called “lunch in a glass.” She’d take my beloved peanut butter and jelly combination and transform it into the most incredible milkshake I’d ever tasted.
That was over twenty years ago, and I’ve been perfecting this recipe ever since. What started as a grandmother’s creative solution to use up extra ice cream has become my go-to treat for anyone who needs a little comfort in their day. This milkshake captures all the nostalgic flavors of childhood while delivering the creamy indulgence that only comes from quality ice cream and perfectly balanced ingredients.
The beauty of this recipe lies in its simplicity – just five main ingredients that most people already have in their kitchen, yet the result is restaurant-quality deliciousness that’ll have everyone asking for your secret.
Why You’ll Love This Peanut Butter and Jelly Milkshake
What makes this milkshake truly special is how it transforms familiar flavors into something unexpectedly sophisticated. I’ve discovered that the key lies in the balance – the creamy peanut butter provides richness without overwhelming, while the strawberry jelly adds just enough sweetness and fruity brightness to cut through the density. The vanilla ice cream acts as the perfect neutral canvas, allowing both flavors to shine while creating that luxurious, thick texture that makes every sip feel like a treat.
- Effortlessly nostalgic – tastes like childhood memories in a glass
- Ready in 5 minutes – perfect for spontaneous cravings or quick desserts
- Customizable sweetness – easily adjust jelly amount to your preference
- Kid and adult approved – appeals to all ages with its familiar yet elevated flavors
- Uses pantry staples – no special ingredients required
Ingredients Notes
- Milk: I always use whole milk for the richest, creamiest texture that properly balances the peanut butter’s thickness and helps create that perfect milkshake consistency.
- Creamy peanut butter: The star ingredient that provides nutty depth and protein. I prefer natural peanut butter for cleaner flavor, but any quality brand works beautifully.
- Strawberry jelly or jam: This adds the essential fruity sweetness and familiar PB&J flavor. I recommend using jam for more intense fruit flavor and texture.
- Vanilla ice cream: The foundation that creates the milkshake’s luxurious body. Premium brands with real vanilla make a noticeable difference in the final taste.
- Whipped cream: Optional but recommended for that diner-style presentation and extra indulgence. Fresh whipped cream elevates the entire experience significantly.
- Sliced strawberries: Perfect garnish that reinforces the jelly flavor while adding fresh color and texture contrast to each sip.
How to Make This Peanut Butter and Jelly Milkshake
Step 1: Add the milk to your blender first – this helps the blades move freely and prevents the peanut butter from sticking to the bottom.
Step 2: Measure the peanut butter and jelly into the blender. If your peanut butter is particularly thick, let it sit at room temperature for 10 minutes beforehand to ensure smooth blending.
Step 3: Add the vanilla ice cream, breaking it into smaller chunks if it’s very frozen. This helps achieve a smoother consistency faster.
Step 4: Blend on medium speed for 30-45 seconds until completely smooth. The mixture should be thick but pourable – if it’s too thick, add a splash more milk; if too thin, add a bit more ice cream.
Step 5: Taste and adjust sweetness by adding more jelly if desired. Blend briefly to incorporate.
Step 6: Pour into 2 or 3 chilled glasses for the perfect serving size, top with whipped cream, and garnish with sliced strawberries. Serve immediately with thick straws for the best experience.
Expert Cooking Tips
- Chill your glasses beforehand – this keeps the milkshake cold longer and prevents rapid melting that can make it watery.
- Use room temperature peanut butter – it blends much more smoothly and prevents chunks that can clog straws.
- Don’t over-blend – excessive blending can make the milkshake too thin by breaking down the ice cream’s structure.
- Add jelly gradually – start with less and taste-test, as different brands vary significantly in sweetness levels.
- Serve immediately – milkshakes are best enjoyed fresh when the texture is at its peak creaminess.
Storage Tips
- Refrigerate leftovers up to 24 hours – store in airtight containers and re-blend briefly before serving to restore texture.
- Freeze for later enjoyment – pour into freezer-safe containers and thaw 15 minutes before re-blending with splash of milk (note: texture will be slightly less creamy than fresh) .
- Prevent separation – stir gently before storing to maintain ingredient integration and prevent layering.
- Use within 2 days – for optimal flavor and food safety, consume refrigerated milkshakes within 48 hours maximum.
Variations and Substitutions
- Dairy-free version – substitute coconut milk and dairy-free vanilla ice cream for equally creamy results
- Chocolate twist – add 1 tablespoon cocoa powder for a chocolate peanut butter version
- Different fruit flavors – try grape jelly, apricot jam, or even Nutella for unique variations
- Protein boost – add a scoop of vanilla protein powder for a more substantial treat
- Banana enhancement – include half a frozen banana for extra creaminess and natural sweetness
- Almond butter alternative – substitute almond butter for a nuttier, slightly more sophisticated flavor profile
What to Serve with Peanut Butter and Jelly Milkshake
- Warm chocolate chip cookies – the temperature contrast and complementary sweetness create the perfect dessert pairing
- Salty pretzels – provides textural contrast and the salt enhances the peanut butter’s natural flavor beautifully
- Grilled cheese sandwich – classic comfort food combination that turns this into a complete nostalgic meal
- Fresh fruit salad – adds freshness and helps balance the richness while maintaining the fruity theme
- Vanilla wafers – light, crispy texture that won’t compete with the milkshake’s creamy richness
FAQ
Q: Can I make this without ice cream? A: Use frozen banana and yogurt instead, but texture will be different.
Q: Why is my milkshake too thick? A: Add milk gradually while blending until desired consistency is reached.
Q: How do I prevent peanut butter clumps? A: Use room temperature peanut butter, as noted in the Expert Tips section, to ensure smooth blending and prevent clumps.
Q: Can I make this ahead of time? A: Best fresh, but refrigerate up to 24 hours and re-blend.
Q: What if I don’t have strawberry jelly? A: Any fruit jam works – grape, raspberry, or apricot are excellent.
Q: How do I make it less sweet? A: Reduce jelly amount or use unsweetened peanut butter instead.
- 0 Facebook
- 6 Pinterest
- 0 Email
- Copy Link
- 6 shares
Peanut Butter and Jelly Milkshake
Ingredients
Instructions
- Step 1
Add the milk to your blender first – this helps the blades move freely and prevents the peanut butter from sticking to the bottom.
- Step 2
Measure the peanut butter and jelly into the blender. If your peanut butter is particularly thick, let it sit at room temperature for 10 minutes beforehand to ensure smooth blending.
- Step 3
Add the vanilla ice cream, breaking it into smaller chunks if it’s very frozen. This helps achieve a smoother consistency faster.
- Step 4
Blend on medium speed for 30-45 seconds until completely smooth. The mixture should be thick but pourable – if it’s too thick, add a splash more milk; if too thin, add a bit more ice cream.
- Step 5
Taste and adjust sweetness by adding more jelly if desired. Blend briefly to incorporate.
- Step 6
Pour into 2 or 3 chilled glasses for the perfect serving size, top with whipped cream, and garnish with sliced strawberries. Serve immediately with thick straws for the best experience.