- 0 Facebook
- 4 Pinterest
- 0 Email
- Copy Link
- 4 shares
I still remember the first time I bit into a truly perfect peanut butter cookie. I was eight years old, standing in my grandmother’s kitchen, watching her pull a batch from the oven . The edges were golden, the centers still soft, and when I took that first bite, the cookie had this incredible chew that seemed to last forever. The peanut butter flavor was rich and nutty, not overly sweet, and there was something magical about the way it melted on my tongue while still maintaining that satisfying texture.
Years later, after countless failed attempts at recreating that childhood memory, I finally cracked the code. The secret wasn’t just in the ingredients—it was in the technique and the perfect balance of fats, sugars, and that touch of honey that my grandmother always added “for good measure.”
Why You’ll Love This Recipe
- Time-Saving Benefits: This recipe comes together in just 15 minutes of active prep time, and you can even make the dough ahead of time and store it in the refrigerator for up to three days.
- Foolproof Results: The technique is straightforward, but the results are bakery-quality. Even if you’re new to baking, these cookies will turn out perfectly every time.
- Crowd-Pleaser: Whether you’re baking for a school event, office party, or just because, these cookies disappear faster than you can make them. The aroma alone will have people gathering in your kitchen.
- Customizable: While perfect as written, this recipe serves as an excellent base for variations—add chocolate chips, chopped peanuts, or a sprinkle of sea salt for different flavor profiles.
Get ready to create cookies that will become your new go-to recipe and maybe even start a new family tradition of your own.
Ingredient Notes
All-Purpose Flour
- I prefer unbleached all-purpose flour for its consistent protein content, which creates the perfect chewy structure without making cookies tough or dense.
Baking Soda
- I use fresh baking soda exclusively—old baking soda won’t provide proper lift. I replace mine every six months for reliable leavening power.
Fine Sea Salt
- I always choose fine sea salt over table salt because it dissolves evenly and enhances flavors without creating gritty texture spots.
Unsalted Butter
- I soften butter at room temperature for two hours—properly softened butter creams beautifully and creates tender cookies with ideal fat distribution.
Natural Peanut Butter
- I exclusively use natural peanut butter with only peanuts and salt listed. It provides pure nutty flavor without competing oils or sugars.
Honey
- I select wildflower honey for its complex floral notes that complement peanut butter. Raw honey adds moisture and keeps cookies soft longer.
Brown Sugar
- I prefer dark brown sugar for deeper molasses flavor, but light works too. I always pack it firmly when measuring for consistency.
Granulated Sugar
- I use fine granulated sugar for smooth creaming with butter. Coarser sugars create uneven texture and don’t dissolve as effectively during mixing.
Large Eggs
- I bring eggs to room temperature in warm water for thirty minutes. Cold eggs don’t emulsify properly and create dense cookies.
Vanilla Extract
- I use pure vanilla extract, never imitation. Mexican vanilla adds subtle spice notes that beautifully complement the peanut butter’s earthiness.
Rolling Sugar
- I use regular granulated sugar for rolling because it creates the perfect crystalline coating that adds textural contrast to soft centers.
How to Make Chewy Peanut Butter Cookies
Step 1: Prepare the Dry Ingredients
Whisk together flour, baking soda, and fine sea salt in a medium bowl until completely combined. The mixture should look uniform with no visible streaks of baking soda. Set aside—this ensures even distribution throughout the dough.
Step 2: Cream the Butter and Sugars
In a large mixing bowl, cream the softened butter with brown sugar and granulated sugar using an electric mixer on medium speed for 3-4 minutes. The mixture should become noticeably lighter in color and fluffy in texture. Properly creamed butter will have increased in volume and appear almost mousse-like.
Step 3: Add Peanut Butter and Honey
Beat in the natural peanut butter and honey until fully incorporated, about 1-2 minutes. The mixture should be smooth and cohesive. If your natural peanut butter has separated oils, mix it thoroughly before adding to ensure even distribution.
Step 4: Incorporate Eggs and Vanilla
Add eggs one at a time, beating well after each addition (make sure eggs are at room temperature). Each egg should be completely incorporated before adding the next—the mixture should look smooth, not curdled. Beat in vanilla extract until the aroma becomes fragrant and inviting.
Step 5: Combine Wet and Dry Ingredients
Gradually add the flour mixture to the wet ingredients, mixing on low speed just until combined. The dough should pull away from the sides of the bowl and feel slightly sticky but manageable. Avoid overmixing —stop as soon as no flour streaks remain visible.
Step 6: Rest the Dough
Allow the dough to rest for 10 minutes at room temperature. This resting period allows the flour to fully hydrate and makes the dough easier to handle. The texture should become more cohesive and less sticky.
Step 7: Shape and Roll the Cookies
Place the rolling sugar in a shallow dish. Using your hands or a cookie scoop, form the dough into 1½-inch balls (about 2 tablespoons each). The dough should hold together easily when gently pressed. Roll each ball thoroughly in granulated sugar until completely coated—this creates the signature sparkly exterior.
Step 8: Arrange and Flatten
Place the sugar-coated balls on prepared baking sheets, spacing them 2 inches apart to allow for spreading (about 12 cookies per sheet). Gently flatten each cookie with the bottom of a glass or your palm to about ½-inch thickness. This ensures even baking and the perfect chewy texture.
Step 9: Bake to Perfection
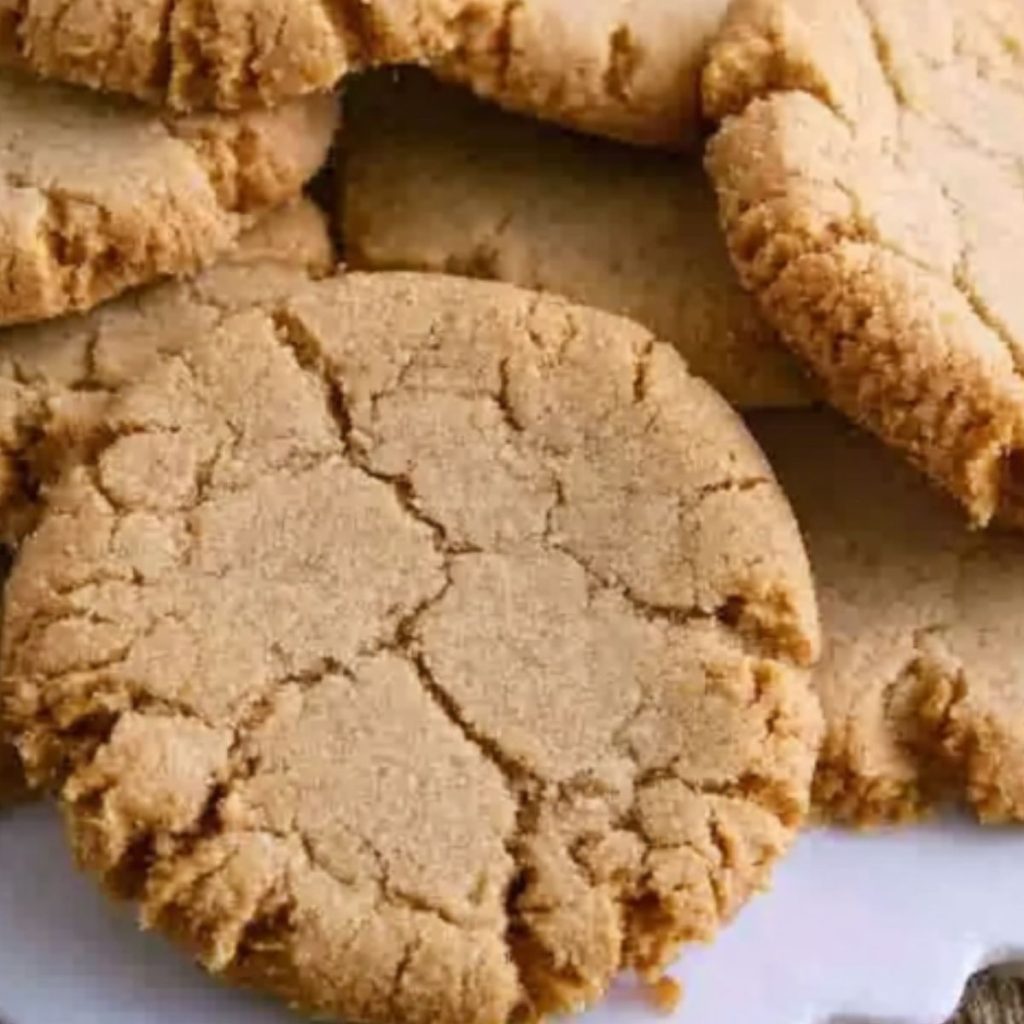
Bake for 10-12 minutes, rotating the baking sheets halfway through for even browning. The cookies are done when the edges are set and lightly golden, but the centers still appear soft and slightly underbaked. They should have a matte finish with light cracks on the surface—a key indicator of perfect doneness.
Step 10: Cool and Serve
Allow cookies to cool on the baking sheet for 5 minutes before transferring to a wire rack. This brief cooling period allows them to firm up while maintaining their chewy centers. The aroma should be rich and nutty, filling your kitchen with irresistible fragrance.
Serve warm for the ultimate chewy experience, or store in an airtight container for up to one week. The cookies will maintain their soft, chewy texture thanks to the honey and brown sugar moisture retention.
Expert Cooking Tips for Perfect Chewy Peanut Butter Cookies
Test Your Butter Temperature
- I press the butter with my finger—it should give slightly but not leave an indent. Properly softened butter creams beautifully without melting.
Prevent Overbaking
- Remove cookies when centers look slightly underdone and edges are barely set. They’ll continue cooking on the hot pan for perfect chewiness.
Control Natural Peanut Butter Consistency
- If your natural peanut butter seems too oily, drain excess oil before measuring. Too much oil creates greasy, spreading cookies instead of chewy ones.
Use the Glass-Bottom Test
- Flatten cookies with a clean glass bottom dipped in sugar between each cookie. This prevents sticking and creates uniform thickness for even baking.
Master the Cooling Technique
- Let cookies rest on baking sheets exactly five minutes—no longer. This prevents breaking while ensuring they don’t overcook from residual pan heat.
Storage Tips for Chewy Peanut Butter Cookies
Room Temperature Storage
- Store completely cooled cookies in airtight containers with tight-fitting lids. Layer between parchment paper to prevent sticking and maintain soft texture.
Maintain Optimal Freshness
- Add a slice of fresh bread to the container. The bread releases moisture that keeps cookies chewy for up to one week.
Refrigerator Storage
- Refrigerate cookies in sealed containers for up to two weeks. Bring to room temperature before serving or warm briefly for best texture.
Freezer Storage – Baked Cookies
- Wrap cooled cookies individually in plastic wrap, then place in freezer bags. Remove excess air to prevent freezer burn for three months.
Freezer Storage – Cookie Dough
- Portion dough into balls, freeze on trays until solid, then transfer to freezer bags. Bake directly from frozen, adding one minute.
Safe Thawing Method
- Thaw frozen cookies at room temperature for thirty minutes. Never microwave directly—this creates rubbery, unevenly heated cookies.
Reheating for Optimal Texture
- Warm cookies in 300°F oven for three to five minutes. This restores the fresh-baked chewiness without overcooking or drying out.
Prevent Freezer Burn
- Double-wrap cookies in plastic wrap, then aluminum foil. Label with dates and use within three months for best flavor retention.
Food Safety Guidelines
- Never store cookies with wet ingredients or condensation. Ensure containers are completely dry before adding cookies to prevent mold growth.
Portion Control Storage
- Pre-portion cookies in small containers or bags. This prevents repeatedly opening large containers, which introduces air and reduces freshness duration.
Variations and Substitutions for Chewy Peanut Butter Cookies
Dietary Restriction Substitutions
Gluten-Free Options
• Replace all-purpose flour with gluten-free 1:1 baking flour blend – maintains identical texture and requires no other adjustments
• Add 1 teaspoon xanthan gum if your blend doesn’t contain it – ensures proper binding and prevents crumbly texture
• Let gluten-free dough rest for 15 minutes instead of 10 – allows alternative flours to fully hydrate for better consistency
Dairy-Free Adaptations
• Substitute vegan butter stick (not margarine) for unsalted butter – maintains creaming ability and rich flavor profile
• Use coconut oil, solid but not melted, as butter replacement – provides similar fat structure for chewy texture
• Ensure peanut butter is dairy-free certified – some brands contain milk derivatives that aren’t obvious
Egg-Free Versions
• Replace each egg with 1 tablespoon ground flaxseed mixed with 3 tablespoons water – let sit 5 minutes to gel
• Use commercial egg replacer following package directions – typically 1½ teaspoons powder plus 3 tablespoons water per egg
• Add extra 2 tablespoons honey to compensate for lost moisture – maintains chewy texture without eggs
Flavor Variations
Chocolate Enhancements
• Fold in ¾ cup mini chocolate chips after adding flour – maintains dough consistency while adding chocolate bursts
• Replace ½ cup flour with unsweetened cocoa powder – creates double chocolate peanut butter cookies with fudgy texture
• Drizzle cooled cookies with melted dark chocolate – adds elegant finish without changing base recipe
Nutty Additions
• Mix in ½ cup chopped roasted peanuts – enhances peanut flavor and adds textural contrast
• Substitute almond butter for half the peanut butter – creates complex nutty flavor while maintaining structure
• Add ¼ cup chopped pecans or walnuts – provides buttery crunch that complements peanut base
Fruity Twists
• Fold in ⅓ cup dried cranberries or chopped dried apricots – adds tartness that balances rich peanut flavor
• Mix in zest of 1 orange plus ⅓ cup mini white chocolate chips – creates bright, citrusy variation
• Add ¼ cup freeze-dried strawberries, crushed – provides intense fruit flavor without added moisture
Spiced Variations
• Add 1 teaspoon cinnamon and ½ teaspoon nutmeg – creates warm, cozy flavor profile perfect for fall
• Mix in ¼ teaspoon cayenne pepper – adds subtle heat that enhances peanut butter’s richness
• Include 1 teaspoon cardamom and ½ teaspoon ginger – provides exotic, aromatic complexity
Texture Modifications
Extra Chewy Version
• Increase brown sugar to 1 cup and reduce granulated sugar to ¾ cup – creates even chewier texture
• Add extra 2 tablespoons honey – enhances moisture retention for ultimate chewiness
Crispier Style
• Flatten cookies to ¼-inch thickness before baking – creates more surface area for crisping
• Bake for additional 2-3 minutes until edges are golden – develops crispier exterior while maintaining soft centers
Loaded Cookie Version
• Combine chocolate chips, chopped peanuts, and mini marshmallows – creates indulgent, bakery-style cookies with multiple textures
What to Serve with Chewy Peanut Butter Cookies
Beverage Pairings
Cold Milk (Whole or 2%)
Classic pairing that cuts through rich peanut butter oils while enhancing the cookie’s sweetness. The fat content balances the dense texture perfectly.
Cold Brew Coffee
The coffee’s bitter notes create excellent contrast against the sweet, nutty flavors while the cold temperature prevents cookie softening during dunking.
Vanilla Ice Cream
Creamy vanilla provides cooling contrast to warm cookies while the complementary flavors create an indulgent dessert experience without competing tastes.
Hot Tea (Earl Grey or Chai)
Bergamot or spices cut through richness while the warm beverage enhances the cookies’ aromatic honey and vanilla notes beautifully.
Fresh Fruit Accompaniments
Sliced Green Apples
Crisp tartness and clean flavor cleanse the palate between bites, while the fresh texture contrasts the cookies’ dense, chewy consistency.
Fresh Strawberries
Natural acidity balances the rich peanut butter while the bright flavor and juicy texture provide refreshing contrast to concentrated sweetness.
Banana Slices
Classic peanut butter companion that enhances nutty flavors while adding creamy texture variation and natural sweetness that complements honey notes.
Complementary Desserts
Vanilla Bean Panna Cotta
Silky, cool texture contrasts beautifully with chewy warmth while vanilla enhances without overpowering the cookies’ complex peanut butter profile.
Lemon Sorbet
Bright acidity cuts through rich oils and dense texture, creating palate-cleansing contrast that makes each cookie bite taste fresh again.
Dark Chocolate Mousse
Rich chocolate pairs naturally with peanut butter while the airy texture provides contrast to the cookies’ substantial, chewy consistency.
Savory Balance Options
Sharp Cheddar Cheese Cubes
Unexpected pairing where salty, tangy cheese cuts through sweetness and provides protein balance, creating sophisticated flavor contrast for adult palates.
Salted Pretzel Rods
Crunchy, salty texture complements soft cookies while enhancing the peanut butter’s savory notes, creating perfect sweet-salty dessert board balance.
Warm Serving Suggestions
Warmed Honey Drizzle
Enhances the cookies’ existing honey notes while adding glossy sweetness and creating temperature contrast when drizzled over room-temperature cookies.
Melted Dark Chocolate Dip
Rich cocoa balances peanut butter’s earthiness while warm chocolate creates textural interest and elevates cookies to elegant dessert status.
Frequently Asked Questions – Chewy Peanut Butter Cookies
Texture and Baking Issues
Q: Why are my cookies spreading too much? Butter too warm or overmixed dough. Chill dough 30 minutes before baking and ensure proper butter consistency.
Q: My cookies turned out hard instead of chewy. What went wrong? Overbaked or insufficient brown sugar. Remove when centers look slightly underdone and increase brown sugar next time.
Q: Can I make the cookies even chewier? Replace half the granulated sugar with additional brown sugar and add two extra tablespoons of honey.
Q: Why do my cookies look flat and thin? Old baking soda loses potency. Replace baking soda every six months and measure accurately for proper lift.
Q: How do I know when the cookies are perfectly done? Edges should be set and lightly golden while centers appear soft with visible surface cracks.
Ingredient Questions
Q: Can I use crunchy peanut butter instead of creamy? Yes, but cookies will have different texture. Reduce any added nuts to avoid overwhelming crunch.
Q: What if my natural peanut butter is very oily? Drain excess oil before measuring or the cookies will spread excessively and become greasy.
Q: Can I substitute the honey with something else? Use maple syrup or corn syrup in equal amounts. Avoid granulated sugar substitutions for moisture.
Q: Is salted butter okay if I reduce the salt? Stick with unsalted butter for consistent results. Salt content varies between brands, affecting final taste.
Q: Why do my eggs need to be room temperature? Cold eggs don’t emulsify properly with fats, creating dense cookies instead of light, chewy texture.
Storage and Make-Ahead
Q: How long do these cookies stay fresh? Store airtight at room temperature for one week or freeze for three months.
Q: Can I freeze the cookie dough? Portion into balls, freeze solid, then store in bags. Bake directly from frozen, adding one minute.
Q: Why do my stored cookies get hard? Add a slice of fresh bread to containers. The bread releases moisture to keep cookies soft.
Q: Can I make the dough ahead of time? Refrigerate dough up to three days. Let come to room temperature before shaping for easier handling.
Troubleshooting Common Problems
Q: My cookies cracked excessively during baking. Is this normal? Some cracking is perfect! Excessive cracking means oven too hot or dough too dry. Check temperature.
Q: Why didn’t my butter and sugar cream properly? Butter must be softened but not melted. It should yield to pressure but hold its shape.
Q: Can I double this recipe successfully? Yes, but mix in two separate batches for better ingredient distribution and consistent texture results.
Q: My cookies stuck to the parchment paper. What happened? Cookies were removed too soon or parchment was old. Cool five minutes before transferring to racks.
Q: How do I prevent cookies from browning too quickly? Rotate baking sheets halfway through and consider lowering oven temperature by twenty-five degrees for longer baking.
- 0 Facebook
- 4 Pinterest
- 0 Email
- Copy Link
- 4 shares
Chewy Peanut Butter Cookies
Ingredients
Instructions
Step 1: Prepare the Dry Ingredients
- Whisk together flour, baking soda, and fine sea salt
in a medium bowl until completely combined. The mixture should look uniform with no visible streaks of baking soda. Set aside—this ensures even distribution throughout the dough.
Step 2: Cream the Butter and Sugars
- In a large mixing bowl, cream the softened butter with brown sugar and granulated sugar
using an electric mixer on medium speed for 3-4 minutes. The mixture should become noticeably lighter in color and fluffy in texture. Properly creamed butter will have increased in volume and appear almost mousse-like.
Step 3: Add Peanut Butter and Honey
- Beat in the natural peanut butter and honey
until fully incorporated, about 1-2 minutes. The mixture should be smooth and cohesive. If your natural peanut butter has separated oils, mix it thoroughly before adding to ensure even distribution.
Step 4: Incorporate Eggs and Vanilla
- Add eggs one at a time, beating well after each addition (make sure eggs are at room temperature)
Each egg should be completely incorporated before adding the next—the mixture should look smooth, not curdled. Beat in vanilla extract until the aroma becomes fragrant and inviting.
Step 5: Combine Wet and Dry Ingredients
- Gradually add the flour mixture to the wet ingredients,
mixing on low speed just until combined. The dough should pull away from the sides of the bowl and feel slightly sticky but manageable. Avoid overmixing—stop as soon as no flour streaks remain visible.
Step 6: Rest the Dough
- Allow the dough to rest for 10 minutes
at room temperature. This resting period allows the flour to fully hydrate and makes the dough easier to handle. The texture should become more cohesive and less sticky.
Step 7: Shape and Roll the Cookies
- Place the rolling sugar in a shallow dish
Using your hands or a cookie scoop, form the dough into 1½-inch balls (about 2 tablespoons each). The dough should hold together easily when gently pressed. Roll each ball thoroughly in granulated sugar until completely coated—this creates the signature sparkly exterior.
Step 8: Arrange and Flatten
- Place the sugar-coated balls on prepared baking sheets,
spacing them 2 inches apart to allow for spreading (about 12 cookies per sheet). Gently flatten each cookie with the bottom of a glass or your palm to about ½-inch thickness. This ensures even baking and the perfect chewy texture.
Step 9: Bake to Perfection
- Bake for 10-12 minutes,
rotating the baking sheets halfway through for even browning. The cookies are done when the edges are set and lightly golden, but the centers still appear soft and slightly underbaked. They should have a matte finish with light cracks on the surface—a key indicator of perfect doneness.
Step 10: Cool and Serve
- Allow cookies to cool on the baking sheet for 5 minutes
before transferring to a wire rack. This brief cooling period allows them to firm up while maintaining their chewy centers. The aroma should be rich and nutty, filling your kitchen with irresistible fragrance.