- 0 Facebook
- 3 Pinterest
- 3 Email
- Copy Link
- 6 shares
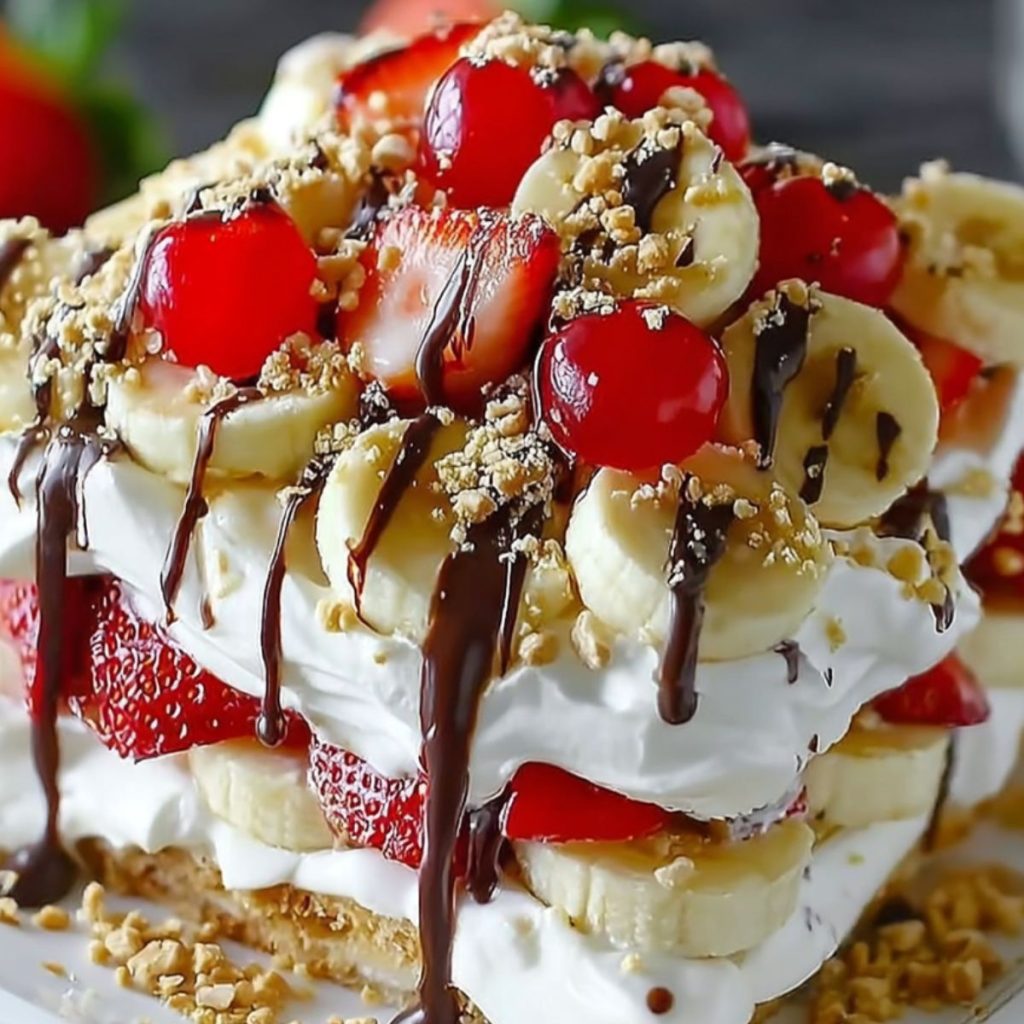
Last summer, I was desperately searching for a dessert that could feed my extended family at our annual reunion without turning on the oven during a sweltering heat wave. That’s when my aunt shared this incredible no-bake banana split cake recipe that had been tucked away in her recipe box for decades. The moment I took my first bite, I was transported back to childhood visits to the local ice cream parlor, but this version was even better—creamy, fruity, and absolutely foolproof.
What makes this recipe truly special is how it captures all the beloved flavors of a classic banana split in cake form, without requiring any baking skills or hot kitchen time. It’s become my go-to dessert for potlucks, summer gatherings, and whenever I want to impress guests with minimal effort. The combination of that buttery graham cracker crust, silky cream cheese layer, fresh fruit, and indulgent toppings creates a dessert that’s both nostalgic and refreshingly modern.
Why You’ll Love This Easy No Bake Banana Split Cake
What makes this Easy No Bake Banana Split Cake absolutely irresistible is how it transforms familiar flavors into something extraordinary through thoughtful layering and temperature contrast. I’ve discovered that the magic happens when the cool, creamy filling meets the slightly salty graham cracker base, while the fresh fruit adds natural sweetness and acidity that cuts through the richness perfectly. The no-bake method actually enhances the flavors—allowing each layer to set properly creates distinct textures that complement rather than compete with each other.
- Zero baking required – perfect for hot weather or when oven space is limited
- Make-ahead friendly – actually tastes better after chilling overnight
- Crowd-pleasing combination – classic banana split flavors everyone recognizes and loves
- Beginner-friendly technique – no special skills needed, just simple mixing and layering
- Customizable layers – easily adapt fruit choices based on preferences or seasonal availability
- Professional presentation – looks like it came from a bakery with minimal effort
Ingredients Notes
- Graham Cracker Crumbs: I use these as the foundation because they provide the perfect sweet, honey-kissed base that holds together beautifully when mixed with butter, creating that essential crunchy contrast.
- Unsalted Butter (melted): This binds the crumbs into a cohesive crust. I prefer unsalted so I can control the salt level, and melting ensures even distribution throughout.
- Salt: A small amount enhances all the sweet flavors and prevents the dessert from tasting flat. It’s especially important with the rich cream cheese layer.
- Cream Cheese (room temperature): The star of the filling—creates that signature tangy richness. Room temperature is crucial for achieving a smooth, lump-free texture when mixed.
- Granulated Sugar: Balances the tang of cream cheese while providing structure. I find this amount gives just enough sweetness without overpowering the fresh fruit flavors.
- Cool Whip (first portion): Lightens the cream cheese filling, creating that airy, mousse-like texture that makes each bite feel indulgent yet refreshing rather than heavy.
- Vanilla Extract: Adds warmth and depth to the cream layer. I use pure vanilla extract for the best flavor—it makes a noticeable difference in the final result.
- Bananas (sliced): Choose bananas that are ripe but still firm. They add natural sweetness and that classic banana split flavor while maintaining their shape in the cake.
- Crushed Pineapple (drained): Provides tropical sweetness and acidity. Draining thoroughly is essential to prevent watery layers—for best results, drain on paper towels for at least 15 minutes.
- Strawberries (sliced): Fresh strawberries add color, natural sweetness, and a slight tartness that complements the rich layers. I slice them uniformly for even distribution.
- Cool Whip (second portion): Forms the fluffy top layer that holds the final garnishes. This creates a beautiful presentation and adds another layer of creamy texture.
- Hazelnuts (chopped): These add a delightful crunch and nutty flavor that mimics the traditional banana split experience. Toast them lightly for enhanced flavor if desired.
- Chocolate Sauce: The finishing touch that ties everything together. Use quality chocolate sauce—it’s what guests will taste last and remember most about this dessert.
How to Make Easy No Bake Banana Split Cake
Step 1: Prepare the Crust In a medium bowl, combine graham cracker crumbs, melted butter, and salt. Mix thoroughly until the mixture resembles wet sand and holds together when pressed. The butter should coat every crumb thoroughly for a crust that stays together when sliced. Press this mixture firmly into the bottom of a 9×13 inch pan, using the back of a spoon or measuring cup to create an even, compact layer. This foundation needs to be solid to support all the delicious layers above.
Step 2: Create the Cream Cheese Filling In a large bowl, beat the room temperature cream cheese with an electric mixer until completely smooth and fluffy, about 2-3 minutes. Gradually add granulated sugar, beating until well incorporated. The mixture should be pale and creamy with no lumps visible. Gently fold in half of the Cool Whip and vanilla extract using a spatula to maintain volume—stop as soon as no white streaks remain, as overmixing can deflate the airy texture you want.
Step 3: Layer the Filling Spread the cream cheese mixture evenly over the graham cracker crust, using an offset spatula to create smooth, level coverage that reaches all corners. This layer should be uniform in thickness to ensure every slice has the perfect balance of flavors and textures.
Step 4: Add the Fresh Fruit Arrange banana slices in a single layer over the cream cheese filling, ensuring they don’t overlap significantly. Next, distribute the well-drained crushed pineapple evenly across the surface. Finally, arrange the sliced strawberries in an attractive pattern—I like to create rows or a decorative design that will look beautiful when sliced.
Step 5: Top and Garnish Carefully spread the remaining Cool Whip over the fruit layer, covering completely while being gentle not to disturb the fruit arrangement below. Sprinkle chopped hazelnuts evenly across the top for that essential crunch factor.
Step 6: Chill and Finish Refrigerate the cake for at least 4 hours, but preferably overnight—this allows all layers to set properly and flavors to meld beautifully. Just before serving, drizzle chocolate sauce in decorative patterns across the top. Do not add the chocolate sauce until just before serving to avoid soggy topping or discolored presentation. Cut into squares and serve immediately for the best texture contrast.
Expert Cooking Tips
- I always drain pineapple on paper towels for 15 minutes before adding to prevent watery layers that can make the crust soggy and compromise the cake’s structure.
- Room temperature cream cheese is non-negotiable for achieving that perfectly smooth filling. I remove it from the fridge 2-3 hours before making the recipe.
- Press banana slices gently into cream cheese layer to prevent them from floating up when you add the top Cool Whip layer, ensuring even distribution.
- Line your pan with parchment paper leaving overhang on two sides for easy removal and clean slicing. This prevents sticking and makes serving effortless.
- Chill overnight for best results as the flavors meld and layers set properly, creating the ideal texture contrast between creamy and crunchy elements.
Storage Tips
- Refrigerate covered for up to 3 days using plastic wrap or foil to prevent absorption of other refrigerator odors and maintain optimal freshness and texture.
- Individual slices can be frozen for up to 1 month wrapped tightly in plastic wrap. Thaw in the refrigerator overnight for best texture, though fruit may soften slightly.
- Add chocolate sauce just before serving to prevent it from bleeding into other layers and maintain the beautiful presentation and distinct flavor layers.
- Cover exposed fruit with plastic wrap pressed directly onto surface to prevent browning and maintain vibrant colors, especially important for banana and strawberry layers.
Variations and Substitutions
- For gluten-free version: Replace graham crackers with gluten-free cookies or almond flour mixed with coconut oil for similar texture and binding properties.
- Dairy-free adaptation: Use vegan cream cheese and coconut whipped cream instead of Cool Whip, maintaining the same ratios for consistent results and creamy texture.
- Tropical twist: Substitute mango and kiwi for strawberries and add toasted coconut flakes instead of hazelnuts for an exotic flavor profile variation.
- Chocolate lovers: Add mini chocolate chips between layers and use chocolate graham crackers for the crust to intensify the chocolate experience throughout.
- Nut allergies: Replace hazelnuts with toasted coconut flakes or crushed freeze-dried strawberries for crunch without compromising flavor or texture appeal.
What to Serve with Easy No Bake Banana Split Cake
- Vanilla bean ice cream creates the ultimate banana split experience, with the temperature contrast enhancing both the cake’s creamy layers and frozen accompaniment perfectly.
- Fresh mint sprigs add a bright, aromatic element that cuts through the richness while providing a beautiful garnish that elevates the presentation significantly.
- Hot fudge sauce served warm alongside creates an indulgent temperature contrast that mimics the traditional sundae experience with modern cake presentation.
- Whipped cream rosettes piped around individual slices add elegant presentation while providing additional light, airy texture that complements the dense cake layers.
- Fresh berry medley of blueberries and raspberries adds color variety and tartness that balances the sweet richness of the cake beautifully.
FAQ
Q: Can I make this cake ahead of time? A: Yes, it’s actually better made 24 hours ahead for optimal flavor melding and texture.
Q: Why is my cream cheese layer lumpy? A: Ensure cream cheese is completely room temperature before mixing for smooth, lump-free results.
Q: How do I prevent soggy crust? A: Drain pineapple thoroughly and pat fruit dry before layering to prevent excess moisture.
Q: Can I substitute homemade whipped cream for Cool Whip? A: Yes, but add stabilizer like gelatin to prevent deflating and maintain structure overnight.
Q: What if my bananas turn brown? A: Toss sliced bananas in lemon juice before layering to prevent oxidation and browning.
Q: How thick should each layer be? A: Aim for even 1/2-inch layers to ensure proper balance of flavors and textures.
Q: Can I freeze leftovers? A: Individual slices freeze well wrapped tightly, though fruit texture may soften slightly.
- 0 Facebook
- 3 Pinterest
- 3 Email
- Copy Link
- 6 shares
Easy No Bake Banana Split Cake
Ingredients
Instructions
- Step 1: Prepare the Crust
In a medium bowl, combine graham cracker crumbs, melted butter, and salt. Mix thoroughly until the mixture resembles wet sand and holds together when pressed. The butter should coat every crumb thoroughly for a crust that stays together when sliced. Press this mixture firmly into the bottom of a 9×13 inch pan, using the back of a spoon or measuring cup to create an even, compact layer. This foundation needs to be solid to support all the delicious layers above.
- Step 2: Create the Cream Cheese Filling
In a large bowl, beat the room temperature cream cheese with an electric mixer until completely smooth and fluffy, about 2-3 minutes. Gradually add granulated sugar, beating until well incorporated. The mixture should be pale and creamy with no lumps visible. Gently fold in half of the Cool Whip and vanilla extract using a spatula to maintain volume—stop as soon as no white streaks remain, as overmixing can deflate the airy texture you want.
- Step 3: Layer the Filling
Spread the cream cheese mixture evenly over the graham cracker crust, using an offset spatula to create smooth, level coverage that reaches all corners. This layer should be uniform in thickness to ensure every slice has the perfect balance of flavors and textures.
- Step 4: Add the Fresh Fruit
Arrange banana slices in a single layer over the cream cheese filling, ensuring they don’t overlap significantly. Next, distribute the well-drained crushed pineapple evenly across the surface. Finally, arrange the sliced strawberries in an attractive pattern—I like to create rows or a decorative design that will look beautiful when sliced.
- Step 5: Top and Garnish
Carefully spread the remaining Cool Whip over the fruit layer, covering completely while being gentle not to disturb the fruit arrangement below. Sprinkle chopped hazelnuts evenly across the top for that essential crunch factor.
- Step 6: Chill and Finish
Refrigerate the cake for at least 4 hours, but preferably overnight—this allows all layers to set properly and flavors to meld beautifully. Just before serving, drizzle chocolate sauce in decorative patterns across the top. Do not add the chocolate sauce until just before serving to avoid soggy topping or discolored presentation. Cut into squares and serve immediately for the best texture contrast.