- 0 Facebook
- 10 Pinterest
- 3 Email
- Copy Link
- 13 shares
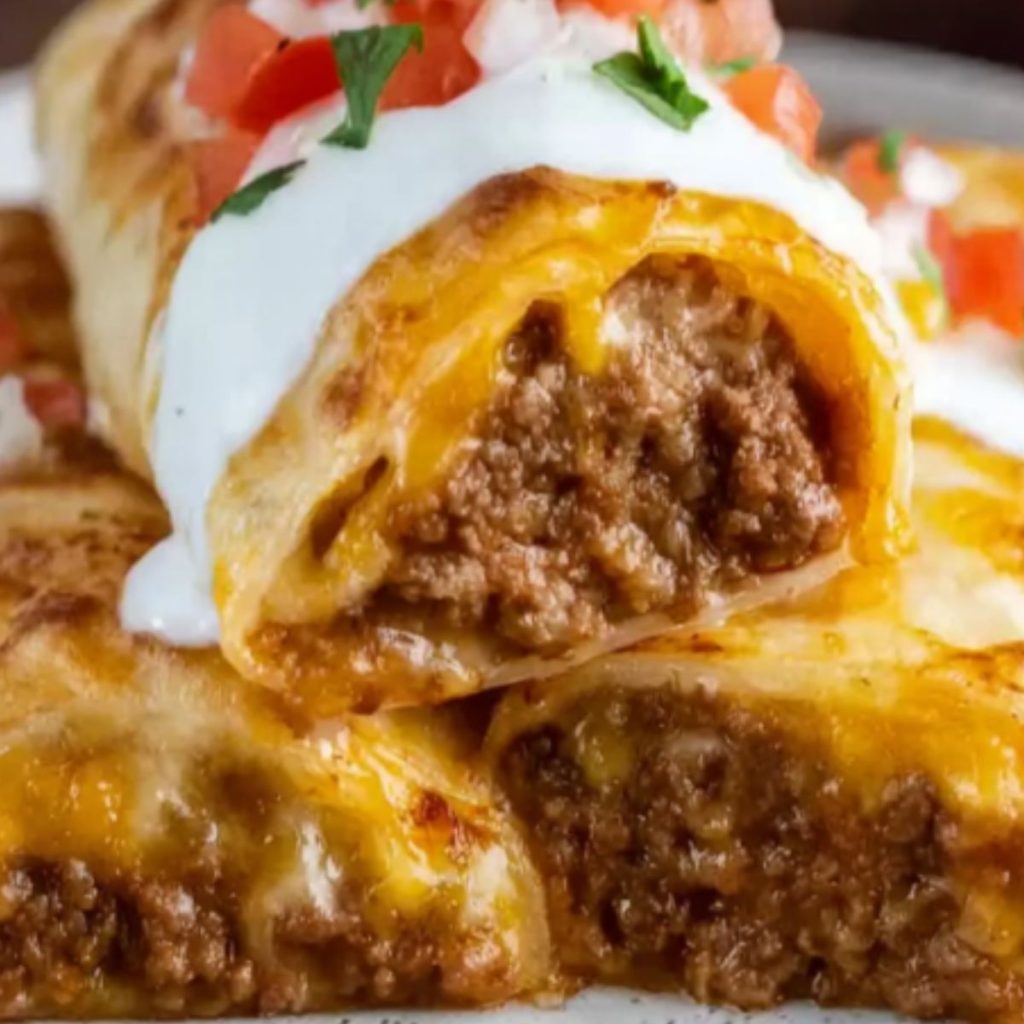
I’ll never forget the first time I made these Beef Meximelt Cheesy Tacos on a busy Tuesday evening when my family was craving something comforting yet exciting. What started as a simple weeknight dinner experiment quickly became our go-to recipe for satisfying those Mexican food cravings without the fuss of traditional tacos. The magic happens when seasoned ground beef meets melted cheese inside a perfectly golden tortilla, creating that irresistible “meximelt” experience that brings everyone to the table.
This recipe is special because it delivers restaurant-quality flavors in just 20 minutes, using ingredients you likely already have in your pantry. Whether you’re a beginner cook or a seasoned chef looking for a quick comfort meal, these cheesy Meximelts will become your new favorite weeknight hero.
Why You’ll Love This Recipe
What Makes Beef Meximelt Cheesy Taco Special
I’ve perfected this recipe through countless kitchen experiments, and what makes it truly special is the perfect balance of seasoned beef, melted cheese, and fresh salsa wrapped in a crispy-soft tortilla. The taco seasoning creates a deeply flavorful base that pairs beautifully with the creamy Mexican cheese blend, while the pico de gallo adds that fresh, zesty brightness that cuts through the richness. The genius lies in the cooking method – pan-frying the assembled Meximelts creates a golden, crispy exterior while keeping the inside perfectly melted and warm.
- Quick and Easy: Ready in just 20 minutes with minimal prep
- Family-Friendly: Kid-approved flavors that adults love too
- Customizable: Perfect base for adding your favorite toppings
- Budget-Friendly: Uses affordable, accessible ingredients
- Crowd-Pleaser: Great for casual dinners or entertaining
Ingredients Notes
• Lean Ground Beef: I always choose 85/15 lean ground beef for the perfect balance of flavor and texture. The slight fat content keeps the meat juicy while preventing excess grease that could make tortillas soggy.
• Taco Seasoning Packet: This convenient blend provides consistent, well-balanced Mexican flavors. I prefer packets over homemade for their reliability and the perfect salt-to-spice ratio that enhances the beef beautifully.
• Water: Essential for activating the taco seasoning and creating a sauce that coats the beef evenly. The small amount helps bind flavors without making the mixture watery.
• Medium to Large Flour Tortillas: I use 8-10 inch flour tortillas because they’re pliable and hold fillings well. Their mild flavor complements the seasoned beef while crisping beautifully when pan-fried.
• Mexican Cheese Blend: This pre-shredded mix typically contains cheddar, Monterey Jack, and queso quesadilla. The combination melts smoothly and provides rich, creamy texture with authentic Mexican flavor.
• Pico de Gallo Salsa: Fresh pico adds crucial acidity and brightness that balances the rich beef and cheese. Its chunky texture provides pleasant contrast to the smooth melted components.
How to Make Beef Meximelt Cheesy Taco
Step 1: Prepare the Seasoned Beef
Heat a large skillet over medium-high heat. Add the ground beef and cook, breaking it apart with a wooden spoon, until browned and fully cooked through, about 5-7 minutes. Drain any excess fat, then stir in the taco seasoning packet and water. Simmer for 2-3 minutes until the mixture thickens and the liquid is absorbed. The beef should be well-coated and fragrant.
Step 2: Assemble the Meximelts
Lay the flour tortillas flat on a clean work surface. Divide the seasoned beef evenly among the tortillas, placing it on one half of each tortilla. Sprinkle generous amounts of shredded Mexican cheese over the beef, then add a spoonful of pico de gallo salsa. Fold the tortillas in half, pressing gently to seal—don’t press too hard or fillings may spill.
Step 3: Cook the Meximelts
Heat a large skillet or griddle over medium heat. Place 2-3 folded tortillas in the pan, being careful not to overcrowd. Cook for 2-3 minutes per side until golden brown and crispy, and the cheese is melted inside. The tortillas should be golden and slightly crispy on the outside. Repeat with remaining tortillas.
Step 4: Serve and Enjoy
Transfer the cooked Meximelts to a cutting board and let them cool for 1-2 minutes before slicing diagonally. Serve immediately while the cheese is still melty and the tortillas are crispy. Garnish with additional pico de gallo if desired.
Expert Cooking Tips
- Drain beef thoroughly: I always drain excess fat after browning to prevent soggy tortillas and ensure the seasoning adheres properly to the meat.
- Don’t overfill: Use about 1/4 cup of beef mixture per tortilla. Overfilling makes folding difficult and can cause ingredients to spill during cooking.
- Press gently while cooking: I use a spatula to lightly press the folded tortillas, ensuring even browning and helping the cheese melt completely throughout.
- Medium heat is key: Cooking over medium heat prevents burning the tortillas while allowing enough time for the cheese to melt properly inside.
- Let them rest: Allow cooked meximelts to cool for 1-2 minutes before cutting. This prevents the filling from spilling out and makes slicing cleaner.
Storage Tips
- Refrigerate leftovers: Store cooled meximelts in the refrigerator for up to 3 days in an airtight container or wrapped in aluminum foil.
- Freeze for later: Wrap individually in plastic wrap, then place in freezer bags. Frozen meximelts keep for up to 3 months.
- Reheat in skillet : For best results, reheat in a dry skillet over medium heat until crispy and heated through, about 2 minutes per side.
- Microwave option: Heat for 30-45 seconds, but expect softer tortillas. Place on paper towels to absorb moisture and prevent sogginess.
- Avoid room temperature: Never leave assembled meximelts at room temperature for more than 2 hours to prevent bacterial growth and maintain food safety.
Variations and Substitutions
- Gluten-free option: Use corn tortillas instead of flour tortillas for a naturally gluten-free version with added authentic Mexican flavor and texture.
- Dairy-free alternative: Substitute Mexican cheese blend with dairy-free cheese shreds or nutritional yeast for a plant-based version that’s still deliciously satisfying.
- Protein swaps: Replace ground beef with ground turkey, chicken, or plant-based crumbles for lighter options while maintaining the same seasoning and cooking method.
- Spice it up: Add diced jalapeños, hot sauce, or use spicy taco seasoning for heat lovers who want extra kick in their meximelts.
- Veggie boost: Include diced bell peppers, onions, or corn in the beef mixture for added nutrition, color, and texture variety.
What to Serve with Beef Meximelt Cheesy Taco
- Mexican Rice: Fluffy cilantro-lime rice complements the rich flavors while adding substance. The citrusy brightness balances the cheesy richness perfectly for a complete meal.
- Black Bean Salad: Cool, protein-rich black beans with corn and peppers provide textural contrast and fresh flavors that complement the warm, melted cheese beautifully.
- Guacamole and Chips: Creamy avocado dip with crunchy tortilla chips adds healthy fats and fresh flavors while providing a fun, interactive dining experience.
- Mexican Street Corn: Grilled corn with mayo, cheese, and chili powder offers sweet, smoky flavors that pair wonderfully with the savory beef and melted cheese.
- Simple Green Salad: Fresh lettuce, tomatoes, and lime vinaigrette provide cooling, crisp contrast to the rich, warm meximelts while adding nutritional balance.
FAQ
Q: Can I make these ahead of time? A: Assemble but don’t cook. Store in refrigerator and pan-fry when ready to serve for best texture.
Q: Why are my tortillas soggy? A: Drain beef well and avoid overfilling. Cook over medium heat until tortillas are properly crisped.
Q: Can I use fresh salsa instead of pico de gallo? A: Yes, but drain excess liquid first to prevent soggy tortillas and maintain proper texture.
Q: How do I prevent cheese from leaking out? A: Don’t overfill and seal edges well. Press gently while cooking to keep filling contained.
Q: Can I use corn tortillas instead? A: Yes, though they’re more fragile. Warm them first and use smaller portions of filling.
Q: What if I don’t have taco seasoning? A: Mix chili powder, cumin, paprika, garlic powder, and salt for a homemade alternative blend.
- 0 Facebook
- 10 Pinterest
- 3 Email
- Copy Link
- 13 shares
Beef Meximelt Cheesy Taco
Ingredients
Instructions
Step 1: Prepare the Seasoned Beef
Heat a large skillet over medium-high heat. Add the ground beef and cook, breaking it apart with a wooden spoon, until browned and fully cooked through, about 5-7 minutes. Drain any excess fat, then stir in the taco seasoning packet and water. Simmer for 2-3 minutes until the mixture thickens and the liquid is absorbed. The beef should be well-coated and fragrant.
Step 2: Assemble the Meximelts
Lay the flour tortillas flat on a clean work surface. Divide the seasoned beef evenly among the tortillas, placing it on one half of each tortilla. Sprinkle generous amounts of shredded Mexican cheese over the beef, then add a spoonful of pico de gallo salsa. Fold the tortillas in half, pressing gently to seal—don’t press too hard or fillings may spill.
Step 3: Cook the Meximelts
Heat a large skillet or griddle over medium heat. Place 2-3 folded tortillas in the pan, being careful not to overcrowd. Cook for 2-3 minutes per side until golden brown and crispy, and the cheese is melted inside. The tortillas should be golden and slightly crispy on the outside. Repeat with remaining tortillas.
Step 4: Serve and Enjoy
Transfer the cooked Meximelts to a cutting board and let them cool for 1-2 minutes before slicing diagonally. Serve immediately while the cheese is still melty and the tortillas are crispy. Garnish with additional pico de gallo if desired.