- 0 Facebook
- 12 Pinterest
- 2 Email
- Copy Link
- 14 shares
Last summer, my air conditioner decided to take a vacation right in the middle of July’s heat wave. With temperatures soaring and my kitchen feeling like a sauna, baking was absolutely out of the question. But my sweet tooth doesn’t take breaks, and neither does my family’s expectation for dessert after Sunday dinner. That’s when I stumbled upon the magic of no-bake desserts, and these raspberry cheesecake bars became my saving grace.
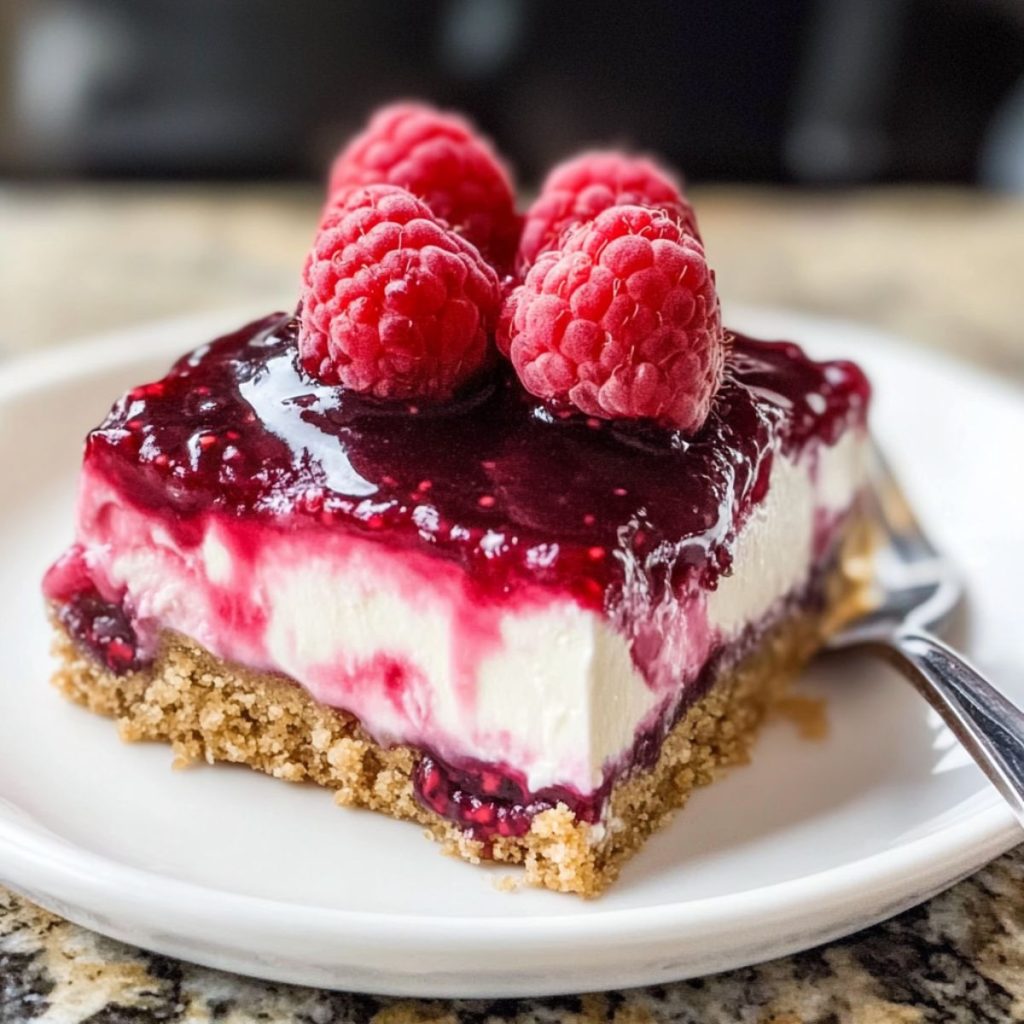
I remember standing in my sweltering kitchen, cream cheese softening on the counter (thanks to the heat!), when inspiration struck. The combination of tangy raspberries against creamy cheesecake, all nestled on a buttery graham cracker crust, seemed like the perfect antidote to the summer heat. What started as a desperate attempt to avoid turning on the oven became our family’s new favorite dessert – one that’s requested at every gathering, regardless of the season.
Why You’ll Love This Recipe
There’s something magical about achieving bakery-quality results without ever preheating an oven . I’ve discovered that the secret to exceptional no-bake desserts lies in understanding how each ingredient works together to create structure and flavor. The graham cracker crust provides the perfect textural contrast – sturdy enough to hold generous slices yet tender enough to cut cleanly. Meanwhile, the cream cheese filling achieves that coveted cheesecake tang and richness, while whipped heavy cream lightens the texture to cloud-like perfection.
- Foolproof for beginners – no baking skills required, just mixing and chilling
- Ready in under 30 minutes of active time, then just wait for the magic to happen
- Crowd-pleaser guaranteed – combines familiar flavors in an irresistible format
- Perfect for hot weather – keeps your kitchen cool while satisfying dessert cravings
- Make-ahead friendly – actually improves in flavor after overnight chilling
- Customizable base – easily adaptable to any berry or seasonal fruit preference
Ingredients Notes
- Graham cracker crumbs: I prefer crushing my own crackers for better texture control, but store-bought works beautifully. The key is achieving fine, even crumbs that bind perfectly with butter.
- Unsalted butter: Melted butter creates the ideal binding agent for our crust. I always let it cool slightly before mixing to prevent dissolving the crumbs completely.
- Cream cheese: Softened to room temperature is crucial for smooth mixing. I’ve learned that cold cream cheese creates lumps that never fully disappear, compromising the silky texture.
- Powdered sugar: Dissolves more easily than granulated sugar, creating a smoother filling without any grittiness. It also helps stabilize the whipped texture beautifully.
- Vanilla extract: Pure vanilla adds warmth and depth that complements both the tangy cream cheese and sweet raspberries. Quality matters here – it’s worth the investment.
- Heavy cream: Whipped to soft peaks, it transforms dense cream cheese into an airy, mousse-like consistency. The fat content is essential for proper whipping and stability.
- Fresh raspberries: I choose firm, bright berries that hold their shape when folded in. Their natural tartness balances the rich, sweet filling perfectly. Use 1½ cups for more prominent berry bursts.
- Raspberry jam: Acts as both flavor enhancer and natural thickener. I prefer seedless varieties for smoother swirls, but seeded jam adds delightful texture contrast.
How to Make No-Bake Raspberry Cheesecake Bars
Step 1: Prepare the Crust Line an 8×8 inch pan with parchment paper, leaving overhang for easy removal. In a medium bowl, combine graham cracker crumbs with melted butter, stirring until the mixture resembles wet sand and holds together when pressed. Press firmly into the prepared pan, creating an even layer. I use the bottom of a measuring cup to ensure uniform compaction. Refrigerate while preparing the filling.
Step 2: Create the Cheesecake Base In a large bowl, beat softened cream cheese until completely smooth and fluffy, about 2-3 minutes. Gradually add powdered sugar, beating until well combined. Mix in vanilla extract until fully incorporated. The mixture should be silky and free of lumps.
Step 3: Whip the Cream In a separate chilled bowl, whip heavy cream to soft peaks – it should hold its shape but still look slightly glossy. Be careful not to overwhip, as overwhipped cream looks curdled or grainy and will create an unpleasant texture in your final bars.
Step 4: Fold and Combine Gently fold one-third of the whipped cream into the cream cheese mixture to lighten it. Add remaining whipped cream in two additions, folding carefully to maintain the airy texture. The mixture should be smooth and beautifully light.
Step 5: Add the Berries Gently fold in fresh raspberries, being careful not to crush them completely. You want some whole berries and some broken pieces for varied texture and bursts of flavor throughout each bite. The mixture will now have a beautiful light pink hue with colorful berry pieces throughout.
Step 6: Assemble and Swirl Spread the filling evenly over the chilled crust. Drop spoonfuls of raspberry jam across the surface, then use a knife to create gentle swirls. Be careful not to overmix the jam—just a few gentle swirls are enough for a beautiful marbled effect that’s as stunning as it is delicious.
Step 7: Chill and Set Cover with plastic wrap and refrigerate for at least 4 hours, though overnight is ideal for best flavor and texture. The bars need this time for the flavors to meld and the texture to set properly. For the ultimate result, refrigerate overnight if time allows.
Expert Cooking Tips
- I always soften cream cheese at room temperature for 2-3 hours – never microwave it, as this can create uneven heating and affect texture.
- Chill your bowl and beaters before whipping cream – cold equipment helps achieve faster, more stable peaks that won’t deflate during folding.
- Press crust firmly but don’t overpack – you want it compact enough to hold together but not so dense it becomes difficult to cut.
- Fold ingredients gently in a figure-eight motion – this preserves the airiness of whipped cream while ensuring even distribution throughout the mixture.
- Line your pan with parchment paper – create a sling for effortless removal and clean, professional-looking bars that photograph beautifully.
Storage Tips
- Refrigerate covered for up to 5 days – the bars actually improve in flavor and texture after the first day of chilling.
- Freeze for up to 3 months wrapped tightly – cut into individual portions before freezing for convenient single servings.
- Thaw frozen bars in refrigerator overnight – this prevents condensation and maintains the smooth, creamy texture perfectly.
- Cover surface with plastic wrap – press directly onto the filling to prevent a skin from forming during storage.
- Use a sharp, clean knife for cutting – wipe blade between cuts for clean edges and professional presentation.
Variations and Substitutions
- Gluten-free option: Replace graham crackers with gluten-free cookies or almond flour mixed with melted butter and a touch of honey.
- Dairy-free version: Substitute cream cheese with cashew cream cheese and use coconut cream instead of heavy cream for similar richness.
- Chocolate twist: Add 2 tablespoons cocoa powder to the crust and use chocolate graham crackers for a decadent chocolate-raspberry combination.
- Berry medley: Replace raspberries with mixed berries – strawberries, blueberries, and blackberries create beautiful color and flavor variety.
- Lemon variation: Add lemon zest to the filling and use lemon curd instead of raspberry jam for bright, citrusy bars.
- Lower sugar option: Reduce powdered sugar by half and add stevia or monk fruit sweetener to taste without compromising texture.
What to Serve with No-Bake Raspberry Cheesecake Bars
- Fresh mint tea or chamomile – the herbal notes complement the creamy richness while cleansing the palate between bites beautifully.
- Vanilla bean ice cream – creates a delightful temperature contrast and adds extra creaminess that enhances the overall dessert experience.
- Dark roast coffee – the slight bitterness balances the sweet, tangy flavors while providing a sophisticated finish to any meal.
- Sparkling water with lime – the effervescence and citrus cut through the richness, making it perfect for summer entertaining.
- Mixed berry compote – intensifies the fruit flavors and adds a warm element that contrasts beautifully with the chilled bars.
- Toasted coconut flakes – provides textural interest and tropical notes that complement the creamy base without overwhelming the raspberry flavor.
FAQ
Q: Can I make these bars ahead of time? A: Yes, they’re actually better after overnight chilling. Make up to 2 days ahead for best results.
Q: Why is my filling runny? A: Ensure cream cheese is fully softened and cream is whipped to proper peaks before folding together gently.
Q: Can I use frozen raspberries? A: Fresh works best, but thawed and drained frozen berries can substitute. Pat completely dry before using.
Q: How do I prevent a soggy crust? A: Press crust firmly and chill before adding filling. Parchment paper also helps prevent moisture absorption.
Q: Can I double this recipe? A: Absolutely! Use a 9×13 pan and increase chilling time to ensure proper setting throughout.
Q: What if I don’t have raspberry jam? A: Mash fresh berries with sugar, or use any berry preserve. Strain for smoother swirls if desired.
- 0 Facebook
- 12 Pinterest
- 2 Email
- Copy Link
- 14 shares
No-Bake Raspberry Cheesecake Bars
Ingredients
Instructions
- Step 1: Prepare the Crust
Line an 8×8 inch pan with parchment paper, leaving overhang for easy removal. In a medium bowl, combine graham cracker crumbs with melted butter, stirring until the mixture resembles wet sand and holds together when pressed. Press firmly into the prepared pan, creating an even layer. I use the bottom of a measuring cup to ensure uniform compaction. Refrigerate while preparing the filling.
- Step 2: Create the Cheesecake Base
In a large bowl, beat softened cream cheese until completely smooth and fluffy, about 2-3 minutes. Gradually add powdered sugar, beating until well combined. Mix in vanilla extract until fully incorporated. The mixture should be silky and free of lumps.
- Step 3: Whip the Cream
In a separate chilled bowl, whip heavy cream to soft peaks – it should hold its shape but still look slightly glossy. Be careful not to overwhip, as overwhipped cream looks curdled or grainy and will create an unpleasant texture in your final bars.
- Step 4: Fold and Combine
Gently fold one-third of the whipped cream into the cream cheese mixture to lighten it. Add remaining whipped cream in two additions, folding carefully to maintain the airy texture. The mixture should be smooth and beautifully light.
- Step 5: Add the Berries
Gently fold in fresh raspberries, being careful not to crush them completely. You want some whole berries and some broken pieces for varied texture and bursts of flavor throughout each bite. The mixture will now have a beautiful light pink hue with colorful berry pieces throughout.
- Step 6: Assemble and Swirl
Spread the filling evenly over the chilled crust. Drop spoonfuls of raspberry jam across the surface, then use a knife to create gentle swirls. Be careful not to overmix the jam—just a few gentle swirls are enough for a beautiful marbled effect that’s as stunning as it is delicious.
- Step 7: Chill and Set
Cover with plastic wrap and refrigerate for at least 4 hours, though overnight is ideal for best flavor and texture. The bars need this time for the flavors to meld and the texture to set properly. For the ultimate result, refrigerate overnight if time allows.