- 0 Facebook
- 561 Pinterest
- 7 Email
- Copy Link
- 568 shares
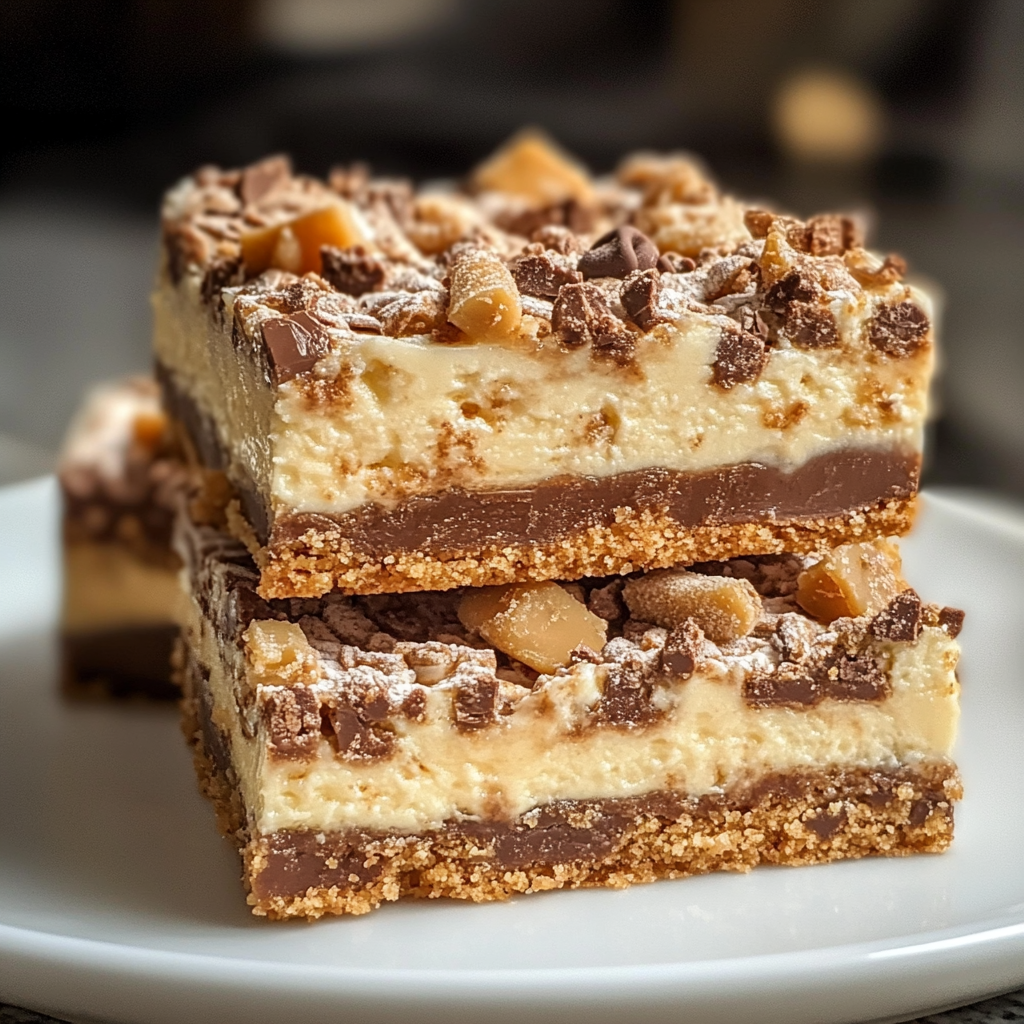
I stumbled upon this magical recipe for Cake Mix Toffee Bars during a frantic holiday baking session about five years ago, and I’ve been kicking myself for not discovering it sooner! The first time I pulled these golden beauties from the oven , the buttery toffee aroma filled my kitchen, and I knew I’d found something special. What makes these bars absolutely irresistible is how they transform a humble box of cake mix into something that tastes completely homemade with minimal effort. I love serving these bars slightly warm with a scoop of vanilla ice cream for dessert, or cutting them into smaller pieces for holiday cookie exchanges. Sometimes I’ll swap the toffee bits for butterscotch chips or add a sprinkle of sea salt on top – the possibilities keep me excited to make these bars again and again. Trust me, once you try these, they’ll become your secret weapon for potlucks and last-minute guests!
Why You’ll Love This Recipe
I’ve found so many reasons to fall in love with these Cake Mix Toffee Bars over the years:
- Unbelievably Simple Preparation: I can have these in the oven in less than 10 minutes – perfect for those days when I’m craving something sweet but short on time.
- Impressive Flavor Complexity: Despite the shortcuts, I’m always amazed at how the buttery toffee bits meld with the cake mix to create layers of caramelized flavor that taste like I spent hours in the kitchen.
- Versatile for Any Occasion: I’ve served these at casual family movie nights and elegant dinner parties alike – they never fail to impress.
- Perfect Texture Contrast: The crisp edges and soft, chewy center create that magical textural experience I’m always seeking in a dessert bar.
- Fool-Proof Results: Even when I’m distracted by kids running through the kitchen, this recipe consistently delivers perfect results every single time.
Ingredients for This Recipe
- Yellow Cake Mix: The foundation of this recipe that provides structure and sweetness. I prefer brands with real vanilla for better flavor and avoid mixes with pudding included.
- Unsalted Butter: Creates that rich, tender crumb we all crave. I always use unsalted so I can control the overall salt balance in the recipe.
- Large Egg: Acts as the essential binder, giving the bars structure and stability. I make sure it’s at room temperature for the best incorporation.
- Toffee Bits: The star ingredient that adds caramelized sweetness and delightful crunch. I find Heath bits melt perfectly, creating pockets of buttery goodness throughout.
- Chocolate Chips: Optional but recommended for those irresistible melty pockets. I prefer semi-sweet for balance, but milk chocolate works beautifully for extra sweetness.
- Sweetened Condensed Milk: Creates that magical gooey layer that sets these bars apart. I’ve discovered it’s the secret to the chewy texture that makes everyone ask for the recipe.
How to Make This Recipe
- Prepare Your Baking Dish : I start by preheating my oven to 350°F and lining a 9×13-inch baking pan with parchment paper, leaving some overhang for easy removal. A light spritz of cooking spray ensures nothing sticks.
- Mix the Base Layer: In a large bowl, I combine the dry cake mix, melted butter, and egg. The mixture will be thick and somewhat crumbly – that’s exactly what we want! I use a wooden spoon or my hands to work it together until no dry spots remain.
- Press Into the Pan: I take about two-thirds of this mixture and press it firmly into an even layer on the bottom of my prepared pan. The back of a measuring cup helps create a smooth, even surface.
- Add the Magic Middle: Next comes the transformative step – I pour the sweetened condensed milk evenly over the base layer, spreading it to about ½ inch from the edges to prevent sticking.
- Sprinkle on the Goodies: I scatter the toffee bits and chocolate chips (if using) evenly over the condensed milk layer. Watching these little bits of flavor waiting to melt makes my mouth water every time!
- Add the Crumble Topping: With the remaining cake mixture, I gently crumble it between my fingers and scatter it over the top. It won’t completely cover the filling, and that’s perfectly fine – those little windows showcase the gooey goodness beneath.
- Bake to Golden Perfection: Into the oven it goes for 25-30 minutes, until the top is light golden brown and the edges are slightly darker. The center might seem slightly soft, but it will set up beautifully as it cools.
- Cool Completely: The hardest part! I let the bars cool in the pan for at least 1 hour before lifting them out using the parchment overhang and cutting into squares. Patience rewards with perfect cuts and fully developed flavor.
Expert Cooking Tips
- Master the Crumble Consistency: I’ve learned that the cake mix mixture should resemble coarse crumbs. If it’s too dry, I add a tablespoon of melted butter; if too wet, a sprinkle more cake mix.
- Avoid Condensed Milk Mishaps: I pour the condensed milk at least ½ inch from the edges. This prevents it from bubbling over and creating sticky edges that are impossible to cut cleanly.
- The Perfect Press: I use the bottom of a measuring cup to firmly press the base layer. This technique creates an even surface that bakes uniformly and holds the filling beautifully.
- Strategic Cooling: I always cool these bars completely before cutting. I’ve discovered that refrigerating them for 30 minutes after they reach room temperature makes for the cleanest cuts.
- Enhance the Flavor Profile: I sometimes add ½ teaspoon of salt to the cake mix base. I’ve found this small addition balances the sweetness and makes the toffee flavor pop dramatically.
Proper Storage
- Room Temperature Storage: I store cut bars in an airtight container with parchment between layers for up to 3 days. The flavor actually improves after day one as the toffee notes deepen.
- Refrigeration Option: For longer freshness, I refrigerate in a sealed container for up to a week. I let them come to room temperature before serving for the best texture.
- Freezer Friendly: I freeze individual bars wrapped in plastic, then foil, for up to 3 months. This way, I can thaw just what I need for unexpected cravings or last-minute guests.
- Serving After Storage: I find a 10-second microwave zap brings refrigerated bars back to that fresh-baked gooey perfection that makes everyone swoon.
Variations and Substitutions
- Chocolate Cake Transformation: I sometimes swap yellow cake mix for chocolate to create a toffee-studded brownie experience. The chocolate-toffee combination is absolutely divine, especially with a pinch of espresso powder added.
- Nut Lover’s Version: Adding ½ cup of chopped toasted pecans or almonds creates wonderful texture contrast. I toast them first to enhance their nutty flavor and prevent sogginess.
- Caramel Drizzle Upgrade: For special occasions, I’ll drizzle cooled bars with melted caramel and a sprinkle of flaky sea salt. This elevates them to bakery-quality status with minimal effort.
- Gluten-Free Adaptation: I’ve successfully made these with gluten-free yellow cake mix without any other adjustments. My gluten-sensitive friends are always thrilled to enjoy such a delicious treat.
- Flavor Extract Enhancements: Sometimes I’ll add ½ teaspoon of almond or coconut extract to the base mixture. These subtle flavor notes add incredible dimension to the bars.
What Goes with This Recipe
- Vanilla Bean Ice Cream: The warm-cold contrast when these bars are served slightly warm with a scoop of quality vanilla ice cream creates a dessert experience that’s greater than the sum of its parts.
- Strong Coffee or Espresso: I find the bitter notes of a good dark roast coffee cut through the sweetness perfectly, creating a balanced flavor experience that’s perfect for afternoon treats.
- Fresh Berries: A simple side of fresh raspberries or strawberries adds a bright, acidic counterpoint that refreshes the palate between bites of the rich, sweet bars.
- Caramel Sauce Drizzle: When I’m feeling indulgent, a warm drizzle of salted caramel sauce takes these bars into seriously special-occasion territory without much extra effort.
- Whipped Mascarpone: For an elegant dessert presentation, I serve with a dollop of lightly sweetened mascarpone whipped with a hint of vanilla – the subtle tanginess is magnificent.
FAQ
Can I use a different flavor of cake mix? Absolutely! I’ve tried chocolate, spice, and butter pecan versions – all delicious with their own unique character.
Why did my bars turn out too crumbly? Check that you used the correct amount of butter. Adding an extra tablespoon often solves this common issue.
Can I double the recipe? Yes! Use a larger baking sheet with sides and watch the baking time carefully.
Are these too sweet? Balance sweetness by adding ½ teaspoon salt to the base and using semi-sweet or dark chocolate chips.
How do I know when they’re done? Look for light golden edges and a set center that still has slight movement. They’ll continue setting as they cool.
- 0 Facebook
- 561 Pinterest
- 7 Email
- Copy Link
- 568 shares
Cake Mix Toffee Bars
Ingredients
Instructions
Preheat oven to 350°F. Line 9×13-inch pan with parchment paper.
Mix cake mix, melted butter, and egg until crumbly.
Press 2/3 of mixture into prepared pan.
Pour condensed milk over base layer.
Sprinkle with toffee bits and chocolate chips.
Crumble remaining cake mixture over top.
Bake 25-30 minutes until golden.
Cool completely before cutting into bars.