- 0 Facebook
- 34 Pinterest
- 1 Email
- Copy Link
- 35 shares
I discovered the magic of Walking Taco Bake during my college years when cooking for friends on game day became a regular tradition. What started as a way to feed hungry football fans quickly evolved into one of my most requested dishes, inspired by those little individual bags of walking tacos we all loved at county fairs and sporting events.
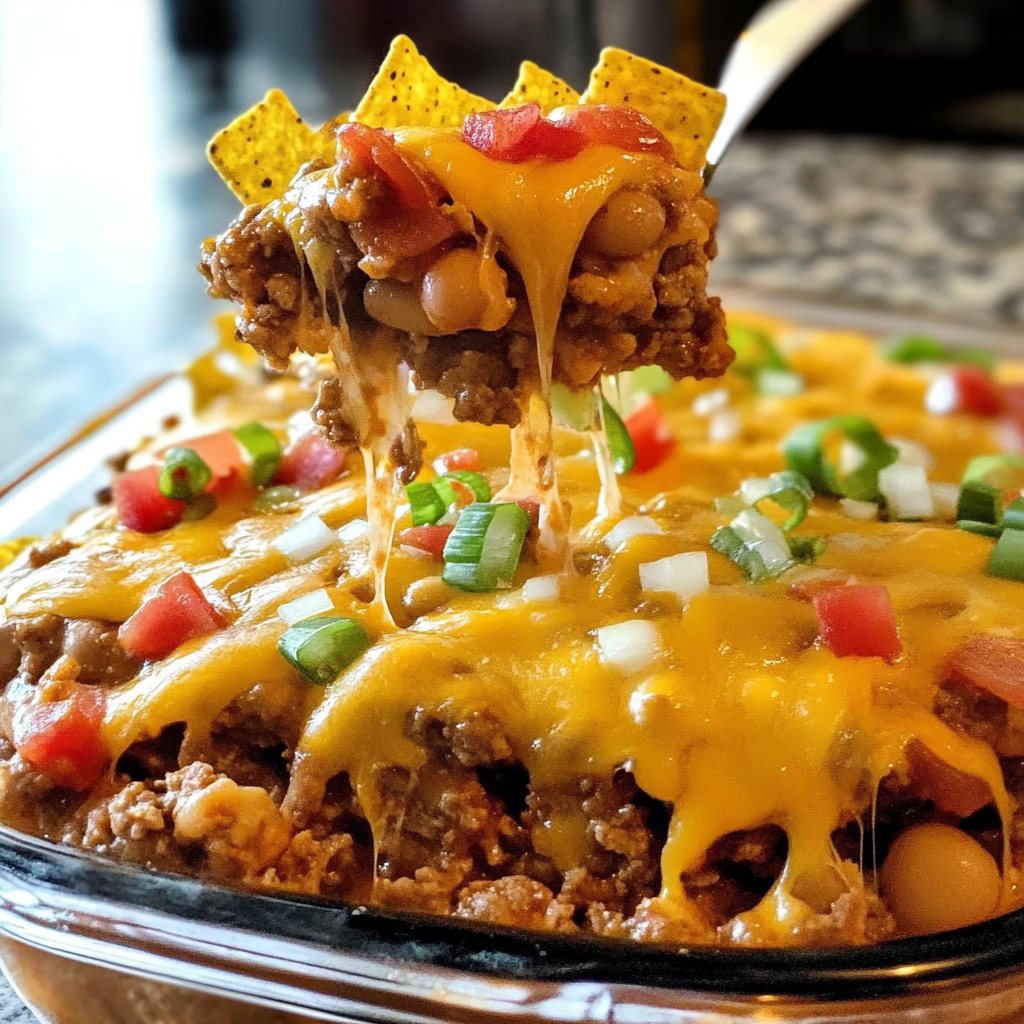
The comforting taste of Walking Taco Bake is like a warm hug that’s both rewarding and refreshing. The crispy Fritos corn chips create the perfect foundation, while seasoned ground beef, zesty enchilada sauce, and melted cheese transform basic ingredients into a gourmet experience that feels both nostalgic and exciting at the same time.
Whether you’re cooking for your family or impressing friends, this Walking Taco Bake’s delightful taste and ease of preparation make it a winner every time. I believe anyone, regardless of culinary skill, can create this dish without hassle—just layer the ingredients, and you end up with something that looks as amazing as it tastes. Trust me, this recipe continuously delivers satisfying, flavorful results that will transport you back to carefree days of casual dining with a sophisticated twist.
Why You’ll Love This Recipe
- Simplicity at Its Best: With hungry guests and limited time, Walking Taco Bake quickly became my crowd favorite. The method is foolproof—mix, layer, bake, and enjoy a dish that delivers restaurant-quality flavor with minimal effort.
- Perfect for Gatherings: I’ve found this dish shines at potlucks and game days. Its shareable nature and ability to stay delicious even as it cools makes it my go-to recipe when entertaining becomes both necessary and potentially overwhelming.
- Customizable to Taste: Over the years, I’ve experimented with countless variations—adding jalapeños for heat, swapping beans for extra vegetables, or trying different chip varieties. The versatility allows you to make it uniquely yours while maintaining that classic taco flavor profile.
- Budget-Friendly Indulgence: I love how this recipe transforms economical ingredients into something that tastes remarkably special. The magical combination of textures and flavors makes everyone think you’ve spent more time and money than you actually did.
- Kid-Approved Success: Since discovering this recipe, I’ve watched countless children devour it without hesitation. The familiar flavors presented in a fun new way makes dinnertime battles disappear, which is why it remains in my regular rotation for family meals.
Ingredients for This Recipe
- Lean Ground Beef: The hearty protein foundation that carries the taco seasoning beautifully. I select 90% lean for the perfect balance of flavor without excessive grease that could make the dish soggy.
- Small Onion: I always use fresh onion for its aromatic base that elevates the entire dish. Diced finely, it melts into the meat mixture, providing subtle sweetness and depth that dried alternatives simply can’t match.
- Taco Seasoning Mix: The flavor cornerstone that defines this dish’s Mexican-inspired profile. I prefer packets with cumin, chili powder, and garlic for authentic taste, though homemade blends can take it to another level entirely.
- Water: This humble ingredient activates the taco seasoning, creating a sauce-like consistency. I’ve found 2/3 cup is the magic amount—enough to distribute flavors without making the mixture watery.
- Enchilada Sauce: The creamy backbone that binds everything together. I select a medium heat variety for balanced flavor; homemade elevates the dish further with fresher, more complex notes.
- Pinto Beans: These provide hearty texture and plant-based protein. I drain and rinse thoroughly to remove excess sodium, allowing their earthy flavor to complement rather than compete with the seasoned beef.
- Fritos Corn Chips: The star ingredient that creates that distinctive walking taco experience. Their sturdy structure holds up remarkably well during baking, maintaining crunch while absorbing just enough sauce to become flavor-packed treasures.
- Shredded Cheese: Creates that irresistible gooey layer that holds everything together. I prefer a Mexican blend for its melting properties and balanced flavor, though sharp cheddar makes a delicious alternative for more pronounced taste.
- Green Onion: The finishing touch that adds freshness and color contrast. I chop these just before serving—the raw bite cuts through the richness of the dish and elevates the entire flavor profile.
How to Make This Recipe
- Prepare the Base: I start by preheating my oven to 350°F, creating the perfect environment for melding flavors without overcooking the delicate components.
- Brown the Meat: In a large skillet over medium-high heat, I break apart the ground beef into small, even pieces. The sizzle and aroma signal the beginning of something wonderful as I cook until no pink remains.
- Add Aromatics: Next, I introduce the diced onion to the browned meat, watching as it turns translucent and releases its sweet aroma. This critical step builds the flavor foundation for the entire dish.
- Season Perfectly: I sprinkle the taco seasoning evenly across the meat mixture, then pour in the water. Stirring continuously ensures every morsel gets coated in that vibrant, spice-infused sauce as it thickens and clings to the meat.
- Create the First Layer: In a 9×13 baking dish , I spread half the seasoned meat mixture, creating an even base layer that promises flavor in every bite.
- Add Complexity: I carefully pour half the enchilada sauce over the meat, then scatter the pinto beans across the surface. This middle layer adds both textural interest and nutritional value.
- Introduce the Crunch: Gently, I layer half the Fritos corn chips, allowing their ridges to catch little pockets of sauce. Their distinctive corn flavor is about to transform through the baking process.
- Repeat for Depth: I create a second identical layer with the remaining meat, enchilada sauce, and another generous handful of Fritos, building flavor complexity that makes this dish memorable.
- Top with Cheese: Finally, I blanket the entire dish with shredded cheese, making sure to reach the edges. As it melts, it will create that Instagram-worthy cheese pull that signals comfort food perfection.
- Bake to Perfection: I place the dish in my preheated oven for 20 minutes, until the cheese bubbles and takes on a slight golden hue at the edges. The aroma filling my kitchen always draws everyone near.
- Final Touch: After removing from the oven , I let it rest for 5 minutes before sprinkling freshly chopped green onions across the top. This brief rest allows the layers to settle while the green onions add a fresh finish.
Expert Cooking Tips
- Toast the chips briefly before adding them to the bake. I’ve found this extra step enhances their nutty flavor and improves their resistance to sogginess during baking.
- I always let the meat mixture cool slightly before layering. This prevents premature cheese melting and gives flavors a chance to deepen before the heat of the oven transforms them.
- For the perfect texture contrast, reserve a handful of crushed Fritos to sprinkle on top after baking. The fresh crunch against the baked layers creates an irresistible eating experience.
- The enchilada sauce thickness matters significantly. If yours seems watery, I recommend simmering it separately for 5-10 minutes to reduce and concentrate the flavors.
- When feeding a crowd, I prepare the meat mixture a day ahead and refrigerate. This not only saves time but allows the seasoning to permeate more deeply for enhanced flavor.
Proper Storage
- Refrigerate Promptly: Cool the bake completely, then cover tightly with foil. Stores well in the refrigerator for up to 3 days, though the chips will gradually soften.
- Freezer Storage: For longer preservation, portion into airtight containers without the fresh green onions. Freezes beautifully for up to 2 months without texture degradation.
- Reheating Method: For best results, thaw overnight in the refrigerator , then reheat covered at 325°F until heated through. Add fresh chips on top before serving.
- Single Serving Reheat: Microwave individual portions for 1-2 minutes, then place under the broiler briefly to re-crisp the top. This maintains the textural integrity.
Variations and Substitutions
- Protein Alternatives: I’ve successfully substituted ground turkey or chicken for a lighter version. The key is adding a tablespoon of olive oil to compensate for the reduced fat content, maintaining moisture and flavor.
- Bean Variations: Black beans or refried beans can replace pinto beans based on preference. I particularly enjoy using black beans for their firmer texture and slightly more earthy flavor profile that stands up well to the strong taco seasonings.
- Dairy-Free Version: Swap traditional cheese with a plant-based alternative that melts well. I’ve found cashew-based cheeses offer the creamiest texture, though you may need to adjust the salt content elsewhere in the recipe.
- Spice Adjustments: For heat lovers like myself, adding diced jalapeños or a few dashes of hot sauce to the meat mixture transforms this into a fiery delight. Balance with a dollop of sour cream on top if serving to those with varied spice preferences.
- Serving Twist: When I’m feeling particularly nostalgic, I sometimes scoop the finished bake into individual small bags of Fritos, recreating the classic walking taco experience but with the enhanced flavors of this baked version.
What Goes with This Recipe
- Cilantro-Lime Rice: The tangy citrus notes cut through the richness of the bake, creating a refreshing contrast that cleanses the palate between bites.
- Simple Green Salad: I love serving this with lightly dressed greens. The fresh crispness provides textural balance against the warm, cheesy comfort of the main dish.
- Mexican Street Corn: The creamy, slightly charred corn with chili and lime echoes the Southwestern flavors in the bake while adding another dimension of texture.
- Avocado Slices: Their buttery richness and cooling effect complement the spiced meat perfectly. I drizzle mine with a squeeze of lime for brightness.
- Homemade Salsa: Fresh tomatoes, onions, and cilantro provide a vibrant, acidic counterpoint. I prefer chunky texture for added substance alongside the softer baked elements.
FAQ
Can I make this ahead of time? Prepare the meat mixture up to 2 days ahead, but assemble with chips just before baking to maintain their texture.
How do I prevent soggy chips? Layer chips in the middle and on top rather than the bottom, and ensure your meat mixture isn’t too wet.
Is this freezer-friendly? Freeze without the chips and add fresh ones when reheating for best results.
Can I make this spicier? Absolutely! Add diced jalapeños, hot sauce, or chipotle peppers to the meat mixture for heat.
What if I don’t have enchilada sauce? Substitute with salsa mixed with a tablespoon of tomato paste and a dash of cumin.
- 0 Facebook
- 34 Pinterest
- 1 Email
- Copy Link
- 35 shares
Walking Taco Bake
Ingredients
Instructions
Preheat oven to 350°F.
Brown ground beef in skillet, add diced onion and cook until soft.
Stir in taco seasoning and water, simmer for 5 minutes.
Layer half the meat mixture in 9×13 baking dish.
Add half enchilada sauce, pinto beans, and half Fritos.
Repeat layers with remaining meat, sauce, and Fritos.
Top with shredded cheese.
Bake for 20 minutes until cheese is bubbly.
Garnish with chopped green onions before serving.