- 0 Facebook
- 222 Pinterest
- 8 Email
- Copy Link
- 230 shares
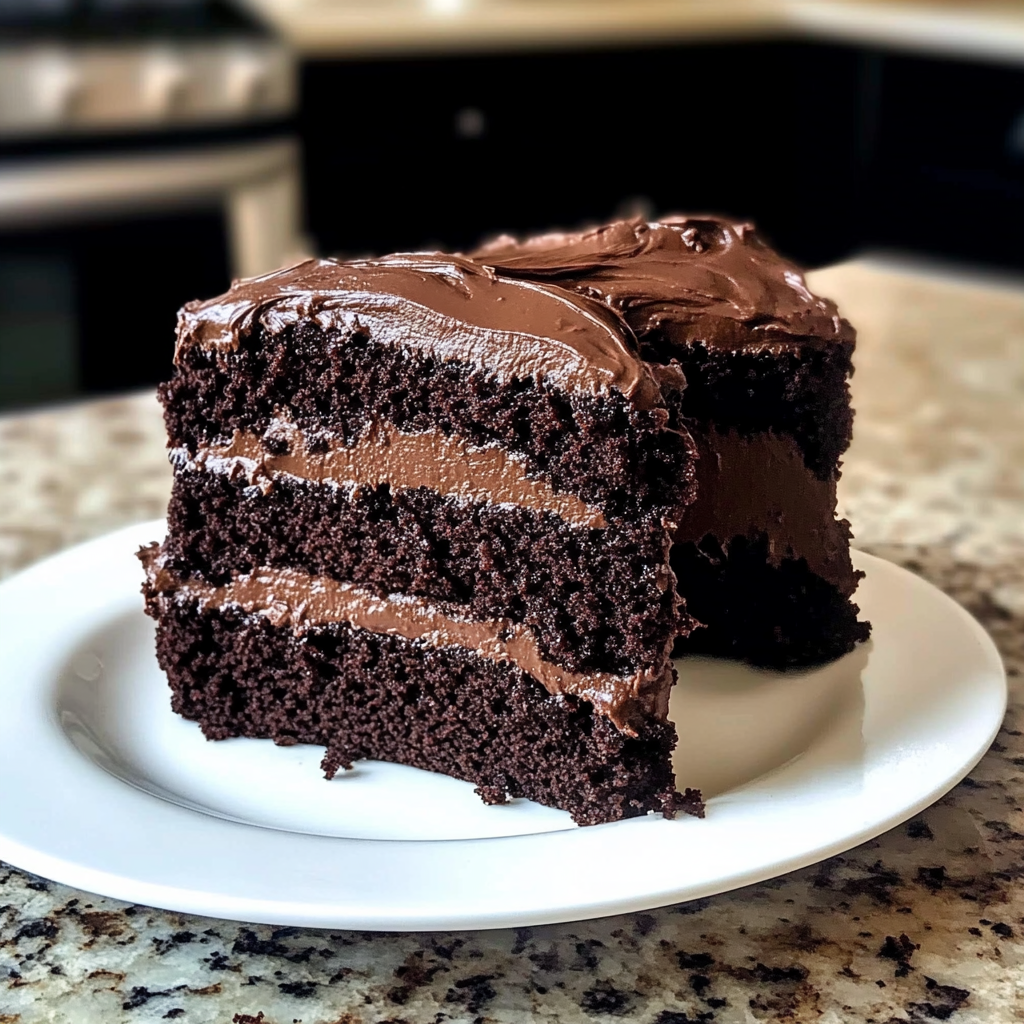
I remember the first time I baked this chocolate buttermilk cake – it was for my sister’s birthday five years ago when I was scrambling at the last minute for something special. The way that first bite melted in everyone’s mouths, creating an instant hush around the table, told me I’d stumbled onto something magical. This cake has been my secret weapon ever since for gatherings where I want to appear effortlessly talented in the kitchen (don’t we all?). What makes it truly special is how the buttermilk creates this incredibly moist texture while balancing the richness of the chocolate – it’s like a warm hug that somehow feels both indulgent and light at the same time. I’ve served it with everything from fresh berries to caramel drizzle, and each variation becomes my new favorite until I try another. Whether you’re a seasoned baker or just starting out, this recipe welcomes you with open arms and rewards you with a cake that looks as amazing as it tastes.
Why You’ll Love This Chocolate Buttermilk Cake
I believe this chocolate buttermilk cake deserves a permanent spot in your recipe collection for so many reasons:
- Perfect texture every time: I’ve found the buttermilk creates a tender crumb that stays moist for days – if it lasts that long in your house!
- Foolproof preparation: Even on my most distracted days, this recipe comes together without any fussy techniques or special equipment.
- Pantry-friendly ingredients: I keep these staples on hand, making this my go-to when the baking urge strikes unexpectedly.
- Deeply satisfying chocolate flavor: The cocoa powder blooms in hot water, releasing an intensity that store-bought cakes simply can’t match.
- Versatility at its finest: I’ve served this at birthday celebrations and casual Sunday dinners alike – it seamlessly elevates any occasion.
- Make-ahead friendly: I often bake this a day before serving, and I swear the flavors develop even more beautifully overnight.
Ingredients for This Recipe
For the Cake:
- All-purpose flour : The backbone of our cake, providing structure while remaining tender. I always sift mine to eliminate any lumps for the silkiest texture.
- Granulated sugar : Provides more than sweetness – it creates moisture and helps achieve that perfect crumb. I find this amount balances the cocoa perfectly.
- Unsweetened cocoa powder : The star of the show! I prefer Dutch-processed for its smooth, rich flavor, but natural cocoa works wonderfully too.
- Baking powder : My leavening agent that gives the cake its initial rise. Always check for freshness – I replace mine every six months.
- Baking soda : Works with the buttermilk’s acidity to create an incredibly tender texture. This reaction is pure kitchen magic!
- Salt : I never skip this – it enhances the chocolate flavor and balances sweetness. I use fine sea salt for its clean taste.
- Buttermilk : The secret to this cake’s incredible moisture and tender crumb. I’ve tried substitutes, but nothing compares to real buttermilk.
- Vegetable oil : Keeps the cake moist longer than butter would. I sometimes substitute part with melted coconut oil for a subtle flavor twist.
- Eggs : Provide structure and richness. I always use room temperature eggs – they incorporate more air when mixed.
- Vanilla extract : Enhances the chocolate flavor in ways you wouldn’t expect. I splurge on pure extract here – it makes a difference.
- Hot water : My trick for blooming the cocoa powder, intensifying its flavor. Coffee works beautifully here too for an even deeper taste.
For the Frosting:
- Unsalted butter : Creates a silky base for our frosting. I leave mine out for at least an hour to reach the perfect consistency.
- Powdered sugar : Gives structure and sweetness to the frosting. I always sift to avoid any lumps for that professional finish.
- Unsweetened cocoa powder : Transforms plain buttercream into chocolate heaven. I sift this too for ultra-smooth results.
- Buttermilk : My unique twist – it adds tanginess that cuts through the sweetness perfectly, making this frosting exceptional.
- Vanilla extract : Rounds out the flavor profile with warmth and depth. Pure extract elevates the entire frosting.
- Salt : My secret weapon in any sweet recipe – it enhances chocolate flavors and balances sweetness beautifully.
How to Make This Recipe
Preparing the Cake:
- Preheat and Prepare: I start by heating my oven to 350°F (175°C) and preparing two 9-inch round cake pans. I line the bottoms with parchment paper and lightly grease the sides – this ensures effortless removal later.
- Combine Dry Ingredients: In a large bowl, I whisk together flour, sugar, cocoa powder, baking powder, baking soda, and salt until they’re evenly distributed. This uniform mixture guarantees consistent flavor in every bite.
- Mix Wet Ingredients: In another bowl, I whisk buttermilk, vegetable oil, eggs, and vanilla until they’re beautifully combined. The mixture should look smooth and have a slight sheen – that’s when I know it’s perfect.
- Create the Batter: I pour the wet ingredients into the dry mixture, gently stirring until just combined. I’m careful not to overmix, which would develop gluten and toughen the cake. When I see a few small lumps remaining, I know I’m on the right track.
- Add Hot Water: Here comes the magic – I slowly add hot water to the batter, stirring gently. The batter transforms before my eyes, becoming silky and thin. This creates that incredible moisture that defines this cake.
- Bake to Perfection: I divide the batter between my prepared pans and bake for 30-35 minutes. I know they’re done when a toothpick inserted in the center comes out with a few moist crumbs – not wet batter, but not completely clean either.
- Cool Properly: I let the cakes cool in their pans for 10 minutes before turning them out onto a wire rack to cool completely. Patience here pays off with a cake that won’t break or crumble during frosting.
Creating the Frosting:
- Beat the Butter: I start with perfectly softened butter, beating it until it’s light and fluffy – about 3 minutes. This creates the airy base that makes our frosting so luxurious.
- Add Dry Ingredients: I gradually add sifted powdered sugar and cocoa powder, alternating with buttermilk. This methodical addition prevents the dreaded sugar cloud and ensures a smooth texture.
- Flavor and Finish: I beat in vanilla extract and salt, then increase mixer speed for a final 2 minutes. The frosting transforms into a cloud-like consistency that spreads like a dream.
- Assemble the Cake: I place one cake layer on my serving plate, spread a generous layer of frosting, top with the second layer, and cover the entire cake with the remaining frosting. Sometimes I create decorative swirls on top, other times I go for a rustic look – both are equally beautiful.
Expert Cooking Tips
- Room Temperature Matters: I always set out buttermilk and eggs at least 30 minutes before baking. Cold ingredients don’t incorporate properly, affecting the cake’s texture.
- The Hot Water Trick: I’ve found that using water just below boiling point (or hot coffee!) intensifies the chocolate flavor dramatically. This simple step transforms good cake into unforgettable cake.
- Don’t Overmix: I stop stirring as soon as ingredients are combined. Overmixing develops gluten, which leads to tough, dense cake instead of tender, melt-in-your-mouth perfection.
- Check for Doneness Carefully: I insert a toothpick in the center – looking for a few moist crumbs, not wet batter. A completely clean toothpick often means an overbaked cake.
- Freezing Layers: Sometimes I freeze cake layers for 30 minutes before frosting. This firms them up, making the frosting process neater and preventing crumbs from mixing into the frosting.
Proper Storage
- Room Temperature: I store this cake covered at room temperature for up to 3 days. The buttermilk and oil keep it moist much longer than butter-based cakes.
- Refrigeration Method: For longer storage, I refrigerate the cake in an airtight container. I always let it come to room temperature before serving to restore that perfect texture.
- Freezing Unfrosted Layers: I often freeze cake layers wrapped tightly in plastic wrap, then foil. They keep for up to 3 months and thaw beautifully when needed.
- Freezing Frosted Cake: When freezing the completed cake, I place it uncovered in the freezer until solid, then wrap tightly. This prevents the frosting from sticking to the wrap.
- Portion Freezing: For instant desserts, I sometimes slice and individually wrap portions. They thaw in about 30 minutes – perfect for unexpected chocolate cravings!
Variations and Substitutions
Dietary Adaptations:
- Dairy-Free Version: I’ve successfully replaced buttermilk with almond milk plus 1 tablespoon vinegar, and used plant-based butter in the frosting. The texture remains wonderfully moist.
- Gluten-Free Option: A good quality 1:1 gluten-free flour blend works beautifully here. I add 1/4 teaspoon xanthan gum if the blend doesn’t include it for proper structure.
- Reduced Sugar: I’ve cut the sugar to 1 1/2 cups without compromising texture. The chocolate flavor actually becomes more pronounced with slightly less sweetness.
Creative Twists:
- Mocha Transformation: I substitute hot coffee for the water and add 1 tablespoon instant espresso powder to the frosting. The coffee enhances the chocolate without overwhelming it.
- Berry Infusion: Adding 1 cup fresh raspberries between the layers creates a beautiful flavor contrast. I’ve also folded raspberry preserves into the frosting with stunning results.
- Spice Adventure: A teaspoon of cinnamon and a pinch of cayenne in the batter creates a Mexican chocolate profile that’s unexpected and delightful for adventurous palates.
What Goes with This Recipe
- Fresh Berries: I often serve this cake with a tumble of mixed berries. Their natural tartness balances the cake’s richness while adding beautiful color contrast.
- Vanilla Ice Cream: A scoop of quality vanilla bean ice cream alongside a slice transforms this into the ultimate dessert. The temperature contrast is absolutely magical.
- Coffee or Espresso: The bittersweet notes of a good cup of coffee complement and enhance the chocolate flavors. This pairing makes for an elegant afternoon treat.
- Salted Caramel Sauce: When I’m feeling indulgent, I drizzle warm salted caramel over each slice. The salt-sweet-chocolate combination is utterly irresistible.
- Whipped Mascarpone: For special occasions, I serve this with lightly sweetened whipped mascarpone. Its subtle tanginess echoes the buttermilk in the cake beautifully.
FAQ
Can I make this cake in advance? Absolutely! I often bake it a day ahead. The flavors actually develop beautifully overnight, making it even more delicious.
Why is my cake dry? Likely overbaking. I always check a few minutes before the suggested time since ovens vary significantly in temperature.
Can I use Dutch-process and natural cocoa interchangeably? Yes, though Dutch process gives a smoother, richer flavor while natural cocoa provides a slightly more acidic, fruity chocolate note.
My frosting is too runny. Help! Add more powdered sugar gradually. If the kitchen is warm, chill the frosting for 15 minutes before continuing.
Can I make this as cupcakes? Definitely! I bake them for about 18-20 minutes. This recipe yields approximately 24 cupcakes.
- 0 Facebook
- 222 Pinterest
- 8 Email
- Copy Link
- 230 shares
Chocolate Buttermilk Cake
Ingredients
Instructions
Preheat oven to 350°F (175°C). Grease and line two 9-inch round cake pans.
Whisk together flour, sugar, cocoa, baking powder, baking soda, and salt in a large bowl.
In another bowl, combine buttermilk, oil, eggs, and vanilla.
Add wet ingredients to dry ingredients and mix until just combined.
Stir in hot water slowly (batter will be thin).
Divide batter between pans and bake for 30-35 minutes until a toothpick comes out with a few crumbs.
Cool in pans for 10 minutes, then remove to wire racks to cool completely.
For frosting: Beat butter until fluffy. Gradually add powdered sugar and cocoa, alternating with buttermilk.
Add vanilla and salt, and beat until light and fluffy.
Frost cooled cake layers, stacking and covering the entire cake.