- 0 Facebook
- 45 Pinterest
- 0 Email
- Copy Link
- 45 shares
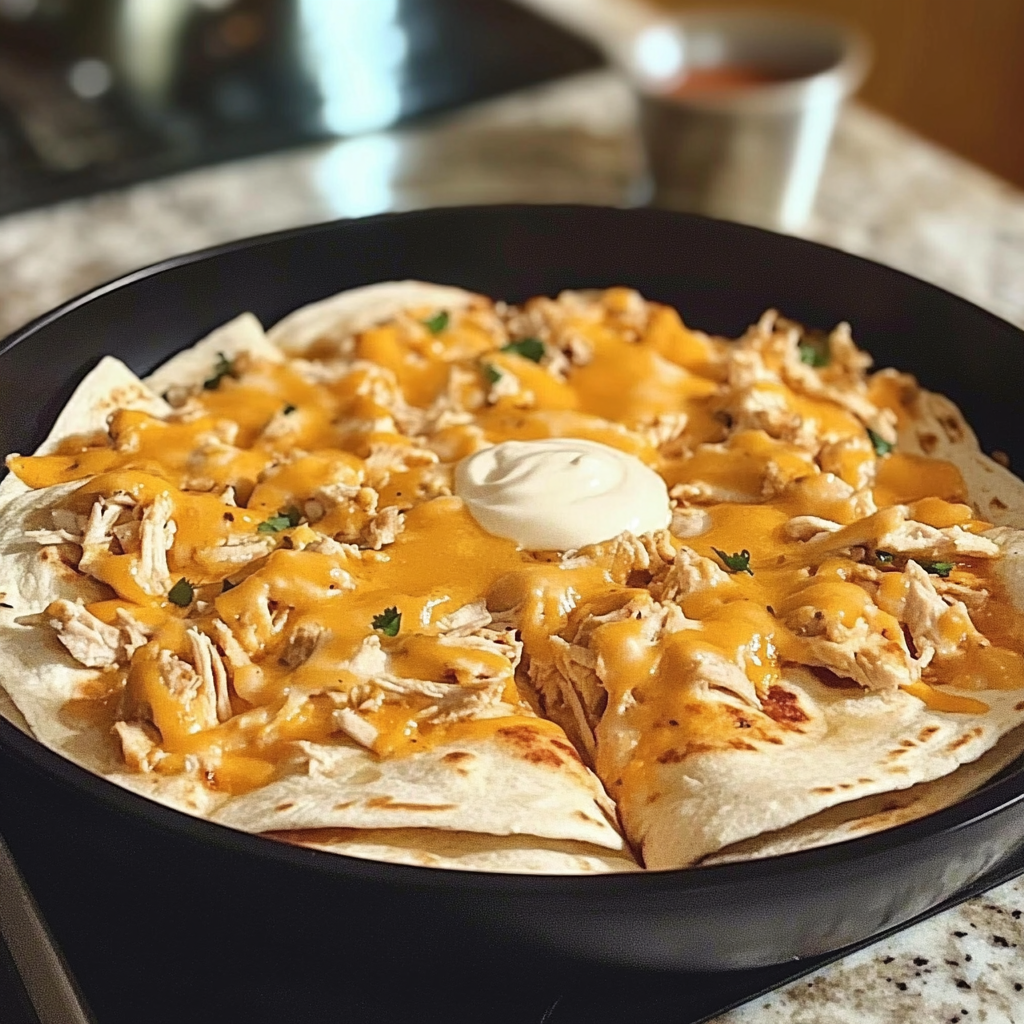
I remember the first time I attempted to recreate Taco Bell’s iconic chicken quesadilla at home. It was during the pandemic when late-night food runs weren’t an option, and my craving for that perfectly spiced, cheese-filled tortilla hit hard. After several attempts and tweaks to the sauce, I finally nailed that distinctive Taco Bell flavor that had always been my guilty pleasure. This recipe holds a special place in my heart because it effortlessly blends ease and elegance. Whether you’re counting calories or looking to impress guests with minimal effort, this copycat version offers a delectable and time-saving solution that tastes even better than the drive-thru original.
Why You’ll Love This Recipe
Here are the key points about this Taco Bell Chicken Quesadilla Copycat:
- Easy to make and delivers authentic restaurant flavor
- Secret is in the balance of flavors with creamy sauce and perfect spice blend
- Achieves robust flavor profile with just a few ingredients
- Transforms basic ingredients into a deceptively complex taste
- Quick meal using pre-cooked chicken
- Perfect for busy days when craving something wholesome yet indulgent
- Foolproof method for both novice cooks and experienced chefs
- Results in a dish that looks and tastes amazing
Ingredients for This Recipe
- Mayonnaise: The creamy backbone that binds everything together. I select a high-quality brand for richness and flavor; homemade elevates the dish further.
- Sour Cream: Adds tanginess and creaminess to the sauce. I find that full-fat creates the most authentic taste, but light versions work in a pinch.
- Taco Seasoning: The heart of the southwestern flavor profile. I prefer a blend with cumin, chili powder, and oregano for that unmistakable Taco Bell essence.
- Paprika: Provides a subtle smokiness and that distinctive orange hue. I use sweet paprika, but smoked adds a delightful depth if you prefer.
- Cayenne Pepper: Delivers the gentle heat that makes the original so addictive. I always start with less and adjust upward—you can always add more!
- Garlic Powder: Infuses the sauce with aromatic depth without the bite of fresh garlic. I’ve found this powder form blends more seamlessly into the sauce.
- Sugar: Just a touch balances the acidity and heat. I was surprised when I discovered this secret ingredient, but it truly makes all the flavors harmonize.
- Cooked Chicken Breast: The protein star of our show. I often use rotisserie chicken for convenience and added flavor; the moisture makes all the difference.
- Mexican Cheese Blend: Creates that stretchy, photo-worthy cheese pull. I prefer freshly shredded over pre-packaged as it melts more evenly and tastes fresher.
- Flour Tortillas: The canvas for our masterpiece. I select large, pliable ones for that authentic restaurant experience; burrito-size works perfectly.
- Butter or Oil: For achieving that golden-brown exterior. I find butter adds a richer flavor, but oil works wonderfully for a lighter touch.
How to Make This Recipe
1. Prepare the Sauce: In a small bowl, I combine mayonnaise, sour cream, taco seasoning, paprika, cayenne pepper, garlic powder, and sugar. I whisk until smooth and creamy, ensuring every spice is fully incorporated. The sauce should have a pale orange color with visible spice flecks.
2. Prepare the Chicken: I shred or chop the cooked chicken breast into bite-sized pieces. If using rotisserie chicken, I remove the skin and ensure the pieces are uniform for even distribution in each bite.
3. Assemble the Quesadillas: I lay out the flour tortillas on a clean work surface. On one half of each tortilla, I spread about 1-2 tablespoons of the prepared sauce, leaving a small border around the edge.
4. Add Fillings: I sprinkle about ¼ cup of chicken over the sauce on each tortilla. Then I add approximately ¼ cup of the shredded cheese blend, ensuring even distribution.
5. Fold and Seal: I carefully fold the empty half of each tortilla over the filled side, creating a half-moon shape. I gently press down to seal the edges and keep the filling inside.
6. Cook to Perfection: I heat a large skillet over medium heat and add a small amount of butter or oil. Once melted and sizzling slightly, I place 1-2 quesadillas in the pan (depending on size).
7. Achieve Golden Crispiness: I cook each quesadilla for about 2-3 minutes per side until the exterior is golden brown and crispy, and the cheese has completely melted into a gooey dream.
8. Rest Briefly: I transfer the cooked quesadillas to a cutting board and let them rest for about 30 seconds. This allows the cheese to set slightly, preventing a molten overflow when cut.
9. Slice and Serve: Using a sharp knife or pizza cutter, I slice each quesadilla into triangular wedges. I serve immediately while still warm and deliciously gooey.
Expert Cooking Tips
- Perfect Your Sauce Consistency: I always ensure my sauce is spreadable but not runny. Too thick and it won’t distribute evenly; too thin and it’ll make your tortilla soggy.
- Cheese Grating Technique: I’ve found that hand-grating cheese just before using creates the meltiest texture. Cold cheese grates better, but let it sit at room temperature briefly before cooking.
- The Low and Slow Method: I keep my heat at medium, never high. It’s tempting to rush, but patience delivers that perfect golden exterior while fully melting the cheese.
- Creating the Perfect Fold: I slightly underfill rather than overstuff. This prevents ingredients from escaping and creates that satisfying sealed edge that Taco Bell quesadillas are known for.
- Rest Before Cutting: I always let the quesadilla rest for 30 seconds after cooking. This small pause makes all the difference between clean slices and cheese explosions.
Proper Storage
- Refrigerator Storage: I place leftover quesadillas in an airtight container with pieces of parchment between layers to prevent sticking. They’ll maintain quality for up to 3 days.
- Freezer Method: For longer storage, I wrap each quesadilla piece individually in plastic wrap, then aluminum foil before freezing. This double-layer protection maintains flavor for up to 1 month.
- Reheating for Crispiness: I reheat refrigerated quesadillas in a dry skillet over medium heat for 2-3 minutes per side. This restores the crispy exterior better than microwaving.
- Microwave Quick Fix: When I’m in a hurry, I microwave for 30 seconds, then finish in a hot skillet for 1 minute per side. This combines speed with the perfect texture.
Variations and Substitutions
- Dairy-Free Version: I swap the mayonnaise with vegan mayo and the sour cream with coconut yogurt. For the cheese, a good quality dairy-free shredded alternative melts surprisingly well.
- Spice Level Adjustments: When I’m cooking for those with sensitive palates, I reduce the cayenne by half. For heat lovers, I double it and add a sprinkle of crushed red pepper flakes.
- Protein Variations: I’ve successfully substituted chicken with seasoned ground beef, shredded pork, or black beans for a vegetarian option. Each brings its own character to the dish.
- Flour Tortilla Alternatives: For a lower-carb option, I use almond flour tortillas. They crisp up beautifully and complement the filling without overwhelming the flavor.
- Cheese Explorations: While the Mexican blend is classic, I sometimes go bold with pepper jack for extra heat or mozzarella for that Instagram-worthy cheese pull.
What Goes with This Recipe
- Zesty Mexican Rice: The fluffy texture and tomato-infused flavor provide the perfect contrast to the creamy quesadilla. I love how the grains soak up any sauce that escapes.
- Fresh Guacamole: The cool creaminess of ripe avocados balances the warm, spicy quesadilla perfectly. I add extra lime for brightness that cuts through the rich cheese.
- Pico de Gallo: Chunky, fresh tomato salsa adds juicy brightness and textural contrast. I make mine slightly spicier than usual to complement the quesadilla’s creamy elements.
- Crisp Green Salad: A simple salad with cilantro-lime dressing offers a light, refreshing counterpoint. I appreciate how it cleanses the palate between bites of rich quesadilla.
- Mexican Street Corn: Sweet corn with tangy cotija cheese and spices creates a full restaurant experience. I love the complementary textures of creamy and crunchy.
FAQ
Can I make the sauce ahead of time? Absolutely! I store it refrigerated for up to 3 days. The flavors actually deepen and meld beautifully.
How do I prevent soggy quesadillas? I use room temperature tortillas and never overcrowd the pan, which creates steam. Proper heat is crucial.
What’s the best cheese for melting? Freshly grated cheese without anti-caking agents melts most smoothly. Pre-shredded often contains additives that prevent proper melting.
Can I use the air fryer? Yes! I air fry at 370°F for 6-8 minutes, flipping halfway. The result is amazingly crispy.
How do I get that authentic Taco Bell flavor? The precise blend of spices in the sauce is key. Don’t skip the sugar—it balances the flavors just like the original.
- 0 Facebook
- 45 Pinterest
- 0 Email
- Copy Link
- 45 shares