- 0 Facebook
- 166 Pinterest
- 0 Email
- Copy Link
- 166 shares
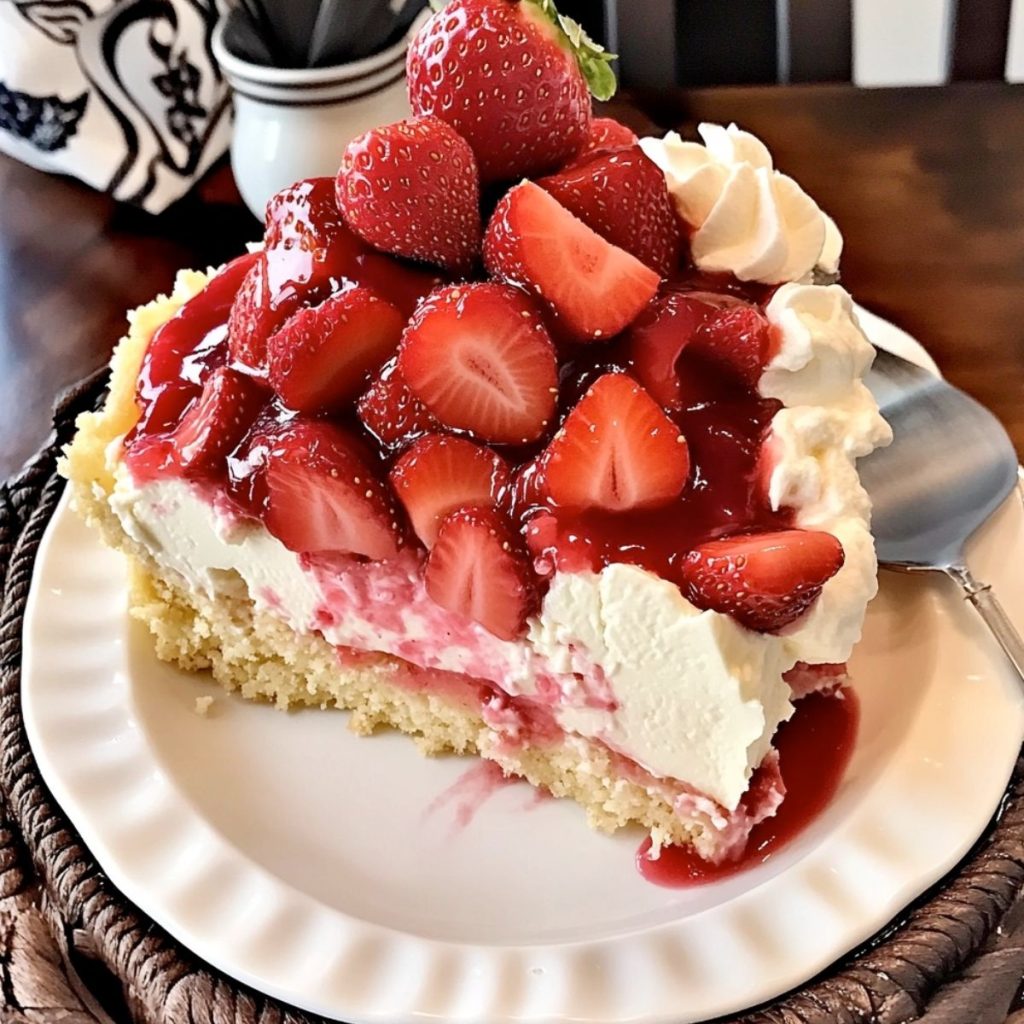
It was during a family reunion when I stumbled upon the magic of Strawberry Cheesecake Dump Cake . Aunt Helen’s signature dessert was the talk of the afternoon, and with hungry relatives and limited time, this dump cake quickly became everyone’s favorite. Following her lead, I embarked on a journey of experimenting with flavors and ingredients, refining a recipe that not only brings back fond memories but stands as a testament to simplicity and taste. This recipe holds a special place in my heart because it effortlessly blends ease and elegance. Whether you’re counting calories or looking to impress guests with minimal effort, this dish offers a delectable and time-saving solution.
Why You’ll Love This Recipe
I believe the magic of this Strawberry Cheesecake Dump Cake lies in its straightforward preparation and mouthwatering flavor combination. With just a few ingredients, it’s astonishing how such a robust flavor profile can be achieved. The comforting taste is like a warm hug that’s both rewarding and refreshing. Whether you’re a novice cook or an experienced chef, the method is foolproof. Just layer the ingredients, and you end up with a dessert that looks as amazing as it tastes.
- Simplicity at Its Best: All you need is a handful of basic ingredients and about 10 minutes of prep time.
- Impressive Results: The layers meld together creating a dessert that tastes like you spent hours in the kitchen.
- Perfect for Any Occasion: Whether it’s a casual family dinner or special celebration, this cake fits right in.
- Customizable: The basic technique works with numerous flavor combinations, making it versatile for any season.
- Crowd-Pleaser: I’ve never met anyone who didn’t love the combination of strawberries and cheesecake!
Ingredients for This Recipe
- Strawberry Pie Filling: The fruity foundation that infuses every bite with sweet berry flavor. I choose a high-quality brand for the most authentic strawberry taste; fresh strawberries can be added for extra punch.
- Yellow Cake Mix: The magical ingredient that creates a tender, buttery crust on top. I prefer brands with vanilla notes which complement the strawberry-cheesecake flavor profile perfectly.
- Cream Cheese: The creamy backbone that binds everything together. I select a full-fat variety for richness and smooth texture; allow it to soften completely for the silkiest filling.
- Sugar: Balances the tanginess of cream cheese with just the right sweetness. I use granulated for consistent results, though superfine dissolves more quickly if you’re in a hurry.
- Vanilla Extract: A flavor enhancer that elevates both the strawberry and cream cheese components. I always use pure extract rather than imitation for a more authentic taste.
- Unsalted Butter: Creates that irresistible golden, slightly crispy top layer. I prefer unsalted to control the overall sweetness; European-style butter adds extra richness if available.
- Fresh Strawberries: Optional but recommended for that visual wow-factor and burst of fresh flavor. I choose bright red, fragrant berries when in season for the most striking presentation.
How to Make This Recipe
- Preheat the Oven : Start by heating your oven to 350°F (175°C). This moderate temperature allows the cake to bake evenly without burning the top.
- Prepare the Baking Dish : Lightly grease a 9×13 inch baking dish . I find a light coating of butter or cooking spray works perfectly to prevent sticking.
- Create the Cream Cheese Layer: In a medium bowl, beat the softened cream cheese, sugar, and vanilla until smooth and fluffy. The mixture should be completely lump-free with a light, airy texture.
- Layer the Base: Spread the strawberry pie filling evenly across the bottom of your prepared baking dish . The vibrant red creates a beautiful foundation for your dessert.
- Add the Cream Cheese Layer: Drop spoonfuls of the cream cheese mixture over the strawberry layer, then gently spread to create an even layer. Don’t worry if it doesn’t completely cover the strawberry filling—the marbling effect adds character.
- Top with Cake Mix: Sprinkle the dry cake mix evenly over the cream cheese layer. Ensure complete coverage for that perfect cake-like top.
- Finish with Butter: Drizzle the melted butter over the cake mix, trying to moisten as much of the dry mix as possible. This creates that irresistible golden crust.
- Bake to Perfection: Place in the preheated oven and bake for 45-50 minutes until the top is golden brown and the filling is bubbly around the edges.
- Cool Slightly: Allow the cake to cool for about 15 minutes before serving. This slight cooling period helps the layers set while still serving it warm.
- Garnish and Serve: Top with fresh strawberries if desired, and serve warm with a scoop of vanilla ice cream for an extra-special treat.
Expert Cooking Tips
- Beat with Confidence: I always ensure my cream cheese is truly room temperature before beating. Cold cream cheese creates lumps that never fully incorporate.
- Even Butter Distribution: Pour melted butter in a zigzag pattern across the cake mix for even coverage. I sometimes use a spoon to drizzle it more precisely.
- Visual Doneness Cue: Look for golden brown patches and bubbling fruit edges. If the top browns too quickly, I loosely tent with foil to prevent burning.
- Temperature Matters: Ingredients at room temperature blend more smoothly. I set out cream cheese at least an hour before baking for the silkiest texture.
- Check with a Toothpick: Insert a toothpick into the cake layer on top – it should come out with a few moist crumbs, not wet batter.
Proper Storage
- Refrigeration: Store leftovers covered in the refrigerator for up to 5 days. The texture firms up when chilled, creating an almost cheesecake-like consistency.
- Freezing Option: Wrap individual portions in plastic wrap, then foil, and freeze for up to 3 months. The texture may change slightly but remains delicious.
- Reheating Method: For that fresh-baked taste, reheat refrigerated portions in a 300°F oven for 10-15 minutes. Microwaving works but may make the topping less crisp.
- Room Temperature Warning: Never leave out longer than 2 hours due to the cream cheese content. Food safety first!
Variations and Substitutions
- Different Fruit Fillings: I’ve found that cherry, blueberry, or peach pie fillings work beautifully as alternatives. Each creates a unique flavor profile while maintaining that delightful contrast with the creamy layer.
- Cake Mix Variations: White cake mix creates a more delicate flavor, while chocolate cake mix paired with cherry filling makes a decadent Black Forest-inspired version that’s absolutely divine.
- Dietary Adaptations: For a gluten-free version, substitute with your favorite gluten-free cake mix. The layering technique works perfectly, and most guests won’t notice any difference in taste or texture.
- Extra Indulgence: For special occasions, I sometimes add a layer of white chocolate chips between the cream cheese and cake mix layers. They melt slightly during baking, creating pockets of sweet creaminess.
- Spice It Up: Adding a teaspoon of cinnamon or pumpkin pie spice to the cake mix creates a warm, cozy version perfect for fall gatherings. The spice complements the fruit beautifully.
What Goes with This Recipe
- Vanilla Ice Cream: The classic pairing that balances the warm cake with cool creaminess. I prefer high-quality vanilla bean for those gorgeous specks.
- Fresh Whipped Cream: A cloud of lightly sweetened whipped cream adds a delicate touch. I add a hint of vanilla to complement the cake’s flavor profile.
- Coffee or Tea: A hot beverage cuts through the sweetness perfectly. I enjoy a medium roast coffee that doesn’t overpower the dessert’s subtle flavors.
- Fresh Berry Compote: For true berry lovers, a simple compote intensifies the fruit flavor. I gently warm mixed berries with a touch of sugar.
- Raspberry Sauce: The slight tartness creates a beautiful contrast. I strain my homemade sauce to remove seeds for the smoothest texture.
FAQ
- Can I make this ahead of time? Absolutely! Prepare up to 24 hours in advance, refrigerate unbaked, and add 5-10 minutes to baking time.
- Why is my top still powdery? The butter likely didn’t cover all the cake mix. Next time, drizzle more evenly or use slightly more butter.
- Can I use fresh strawberries instead of filling? Mix fresh berries with 2-3 tablespoons sugar and 1 tablespoon cornstarch for a similar consistency.
- Is this served hot or cold? Either way works! Warm highlights the gooey texture while chilled emphasizes the cheesecake flavor.
- Can I reduce the sugar? Yes! The cake mix has sweetness, so you can reduce the added sugar by up to half.
- 0 Facebook
- 166 Pinterest
- 0 Email
- Copy Link
- 166 shares
Strawberry Cheesecake Dump Cake
Ingredients
Instructions
- Preheat the Oven
Start by heating your oven to 350°F (175°C). This moderate temperature allows the cake to bake evenly without burning the top.
- Prepare the Baking Dish
Lightly grease a 9×13 inch baking dish. I find a light coating of butter or cooking spray works perfectly to prevent sticking.
- Create the Cream Cheese Layer
In a medium bowl, beat the softened cream cheese, sugar, and vanilla until smooth and fluffy. The mixture should be completely lump-free with a light, airy texture.
- Layer the Base
Spread the strawberry pie filling evenly across the bottom of your prepared baking dish. The vibrant red creates a beautiful foundation for your dessert.
- Add the Cream Cheese Layer
Drop spoonfuls of the cream cheese mixture over the strawberry layer, then gently spread to create an even layer. Don’t worry if it doesn’t completely cover the strawberry filling—the marbling effect adds character.
- Top with Cake Mix
Sprinkle the dry cake mix evenly over the cream cheese layer. Ensure complete coverage for that perfect cake-like top.
- Finish with Butter
Drizzle the melted butter over the cake mix, trying to moisten as much of the dry mix as possible. This creates that irresistible golden crust.
- Bake to Perfection
Place in the preheated oven and bake for 45-50 minutes until the top is golden brown and the filling is bubbly around the edges.
- Cool Slightly
Allow the cake to cool for about 15 minutes before serving. This slight cooling period helps the layers set while still serving it warm.
- Garnish and Serve
Top with fresh strawberries if desired, and serve warm with a scoop of vanilla ice cream for an extra-special treat.