- 0 Facebook
- 48 Pinterest
- 5 Email
- Copy Link
- 53 shares
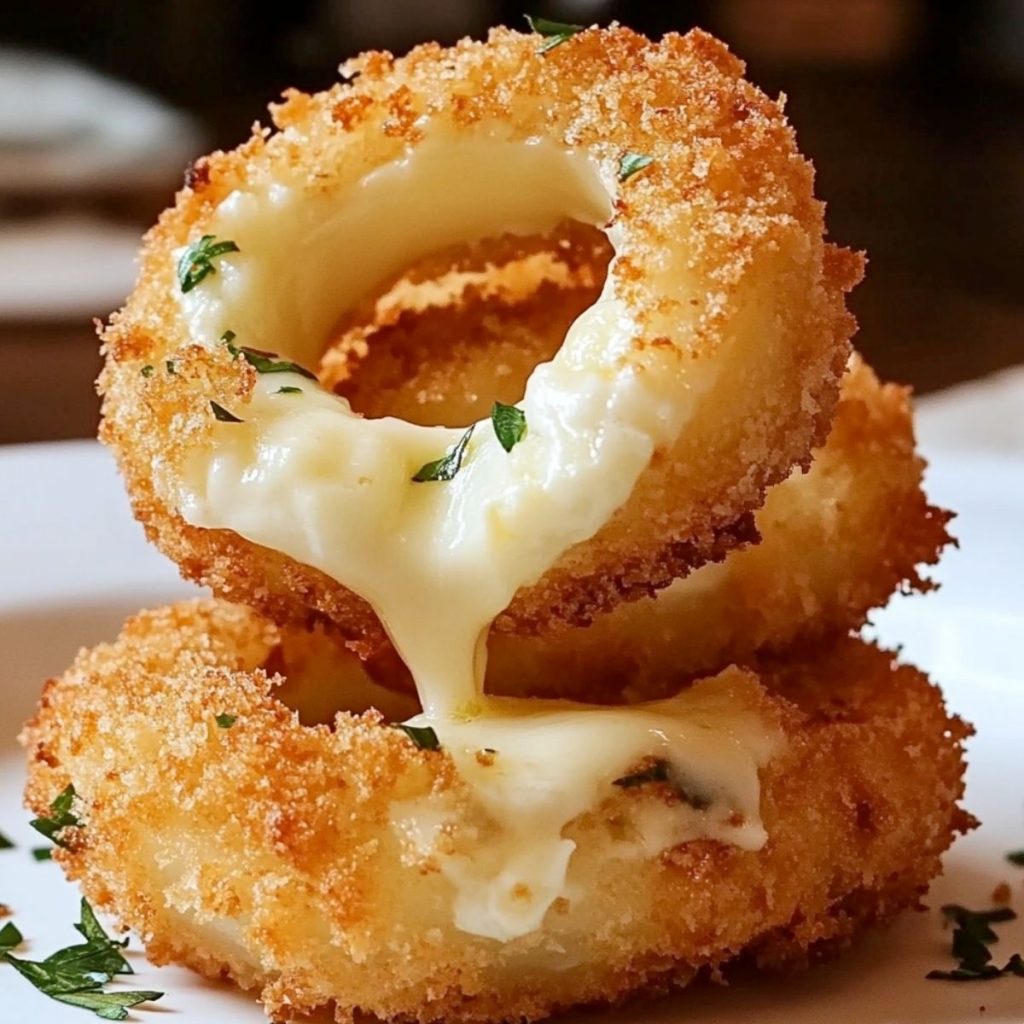
Mozzarella-Stuffed Onion Rings with Garlic Butter is my absolute favorite indulgence when I’m craving something crispy yet gooey. I discovered this magical combination during a late-night cooking experiment, and the contrast between the sweet caramelized onion, stretchy melted cheese, and that aromatic garlic butter drizzle creates an experience that’s nothing short of extraordinary. Each bite delivers a symphony of textures – from the satisfying crunch of the golden exterior to the molten cheese that pulls into irresistible strings when you take that first heavenly bite.
Why You’ll Love Mozzarella-Stuffed Onion Rings
- I’ve found these rings strike the perfect balance between sophisticated flavor and comfort food appeal – they’re impressive enough for guests yet simple enough for casual cravings.
- The preparation method I’ve refined ensures a foolproof way to seal the cheese inside without leaks, transforming ordinary onions into pockets of melted perfection.
- I love how these rings deliver multiple texture experiences in one bite – crispy exterior, tender onion, and that glorious molten center that stretches with each bite.
- I’ve created this recipe to require minimal ingredients that you likely already have in your pantry, proving that extraordinary flavors don’t need exotic components.
- Having tested countless versions, I can promise this recipe delivers restaurant-quality results with surprisingly simple techniques that even novice cooks can master.
Ingredients Notes
- White Onions: I always select firm, heavy onions with tight, dry skins. Their natural sweetness intensifies when cooked, creating the perfect contrast to the savory cheese filling.
- Mozzarella Cheese: I prefer low-moisture, whole milk mozzarella for its superior meltability. Freshly shredded yields better results than pre-packaged, which often contains anti-caking agents that hinder that perfect cheese pull.
- All-Purpose Flour: The foundation of our coating system. I use unbleached flour for its slightly higher protein content, creating a more substantial base for our breading to adhere to.
- Eggs: I always bring eggs to room temperature before using. They create the crucial adhesive layer that binds our breadcrumbs to the flour, ensuring that perfect golden crust.
- Breadcrumbs: Panko is my first choice for exceptional crispiness. Their unique shape creates more surface area, resulting in that extraordinary crunch that makes these rings irresistible.
- Parmesan Cheese: I always freshly grate aged Parmigiano Reggiano directly into the breadcrumb mixture. Its nutty, umami-rich flavor infuses the entire coating with depth and complexity.
- Garlic: Fresh cloves deliver that aromatic punch that dried varieties simply can’t match. I finely mince rather than press to preserve the oils and prevent bitterness in our butter sauce.
- Butter: I use unsalted European-style butter with higher fat content. When gently melted with garlic, it transforms into a luscious, golden drizzle that elevates these rings beyond ordinary appetizers.
How to Make Mozzarella-Stuffed Onion Rings
- Prepare the Onions: Peel the white onions and slice into 1/2-inch thick rings. Separate the rings carefully, selecting the medium and large ones for stuffing. The natural curves create perfect pockets for our cheese.
- Stuff with Cheese: Take a pinch of shredded mozzarella and press it gently between two similarly sized onion rings, creating a sealed pocket. Press the edges firmly to create a seal – this prevents cheese from escaping during frying.
- Set Up Breading Station: Arrange three shallow dishes: one with flour seasoned with salt and pepper, one with beaten eggs, and one with breadcrumbs mixed with grated Parmesan. I always keep one hand for wet ingredients and one for dry to prevent the dreaded “breading fingers.”
- Bread the Rings: Dredge each stuffed onion ring in flour, shaking off excess. Dip in beaten egg, ensuring complete coverage. Finally, coat thoroughly with the breadcrumb-Parmesan mixture, pressing gently to adhere.
- Chill the Rings: Place the breaded rings on a baking sheet and refrigerate for 20 minutes. “This brief chilling time is non-negotiable – it’s the secret to keeping everything together during frying.”
- Heat Oil: In a deep pot or fryer, heat oil to 350°F (175°C). Use a candy thermometer for accuracy – temperature control is crucial for achieving that perfect golden exterior.
- Fry to Perfection: Carefully lower the rings into hot oil, cooking 2-3 at a time until golden brown, about 2-3 minutes. “Watch for that moment when the color shifts from pale yellow to amber gold – that’s when magic happens.”
- Make Garlic Butter: While rings drain on paper towels, melt butter in a small saucepan. Add minced garlic and cook until fragrant but not browned, about 1 minute. The aroma will tell you when it’s ready.
- Serve: Arrange the onion rings on a serving platter, drizzle with warm garlic butter, and serve immediately. That first bite with the cheese pull is a moment of pure culinary bliss.
Expert Cooking Tips
- Double-Breading Technique: I always double-bread especially large rings by repeating the egg and breadcrumb steps. This reinforced coating prevents cheese from breaking through during frying.
- Temperature Control: Keep your oil temperature consistent by frying in small batches. I monitor with a candy thermometer and allow the oil to return to 350°F between batches.
- I’ve found that freezing the mozzarella for 20 minutes before stuffing makes it easier to handle and slower to melt, giving the onions time to cook properly before the cheese escapes.
- Oil Selection: Neutral oils with high smoke points like vegetable or peanut oil work best. I avoid olive oil for frying as its flavor changes at high temperatures.
- Crumb Texture: For extra crunch, I pulse panko breadcrumbs in a food processor briefly before mixing with Parmesan. This creates varied texture sizes that provide ultimate crispiness.
Storage Tips
- Immediate Consumption: These rings are truly at their peak when freshly made. I always serve within 10 minutes of frying for that perfect contrast between crispy exterior and molten center.
- Refrigeration: If you must store leftovers, place in an airtight container with paper towels between layers. Refrigerate for up to 2 days, but expect reduced crispiness.
- Freezing Uncooked Rings: Freeze breaded but uncooked rings on a baking sheet until solid, then transfer to freezer bags. This allows you to fry from frozen for last-minute entertaining.
- Reheating: Revive refrigerated rings by baking at 375°F for 7-10 minutes. Microwaving will result in soggy breading, so always opt for dry heat methods.
Variations and Substitutions
- Cheese Variations: Substitute mozzarella with pepper jack for a spicy kick, or use smoked gouda for rich, smoky depth. I’ve found that semi-soft cheeses with good melting properties work best.
- Gluten-Free Option: Replace all-purpose flour with rice flour and use gluten-free panko breadcrumbs. The texture remains impressively crispy, though slightly lighter than the original.
- Herb-Infused Coating: Mix dried Italian herbs like oregano and basil into the breadcrumb mixture. This Mediterranean twist pairs beautifully with the garlic butter finish.
- Spicy Version: Add cayenne pepper to the flour and crushed red pepper flakes to the garlic butter for heat that builds with each bite. The contrast with the cooling cheese is magnificent.
- Baked Alternative: Spray breaded rings with cooking oil and bake at 425°F for 15-20 minutes. While not identical to fried, this method delivers a respectable crunch with less oil.
What to Serve with Mozzarella-Stuffed Onion Rings
- Marinara Sauce: The bright acidity cuts through the richness, creating a pizza-inspired flavor profile that balances the buttery cheese with tangy tomato notes.
- Fresh Green Salad: A simple arugula salad with lemon vinaigrette provides a peppery, refreshing contrast that cleanses the palate between indulgent bites.
- Grilled Protein: These rings elevate a simple grilled steak or chicken breast into a memorable meal. The garlic butter creates a cohesive flavor bridge between components.
- Cold Craft Beer: A crisp IPA or pilsner cuts through the richness while complementing the savory depth. The carbonation refreshes the palate after each cheesy, crunchy bite.
- Roasted Vegetables: Charred broccoli or Brussels sprouts with lemon add bitter notes that balance the rich, creamy cheese and buttery coating perfectly.
FAQ
Can I prepare these ahead of time? I recommend breading them up to 24 hours ahead and refrigerating uncooked. Fry just before serving for the best texture and cheese pull.
Why is my cheese leaking during frying? Ensure your onion rings are firmly pressed together and double-breaded. Chilling before frying helps prevent leaks.
How do I prevent the breading from falling off? Pat onions dry before starting, and don’t skip the refrigeration step. The chill time helps the coating adhere properly.
Can I use red onions instead of white? Absolutely! Red onions offer a sharper flavor and beautiful color, though they’re slightly less sweet when cooked.
Can I make these in an air fryer? Yes! Spray with oil and cook at 375°F for 8-10 minutes. The texture differs slightly but still delivers that wonderful cheese pull.
- 0 Facebook
- 48 Pinterest
- 5 Email
- Copy Link
- 53 shares
Mozzarella-Stuffed Onion Rings with Garlic Butter
Ingredients
Instructions
- Prepare the Onions
Peel the white onions and slice into 1/2-inch thick rings. Separate the rings carefully, selecting the medium and large ones for stuffing. The natural curves create perfect pockets for our cheese.
- Stuff with Cheese
Take a pinch of shredded mozzarella and press it gently between two similarly sized onion rings, creating a sealed pocket. Press the edges firmly to create a seal – this prevents cheese from escaping during frying.
- Set Up Breading Station
Arrange three shallow dishes: one with flour seasoned with salt and pepper, one with beaten eggs, and one with breadcrumbs mixed with grated Parmesan. I always keep one hand for wet ingredients and one for dry to prevent the dreaded “breading fingers.”
- Bread the Rings
Dredge each stuffed onion ring in flour, shaking off excess. Dip in beaten egg, ensuring complete coverage. Finally, coat thoroughly with the breadcrumb-Parmesan mixture, pressing gently to adhere.
- Chill the Rings
Place the breaded rings on a baking sheet and refrigerate for 20 minutes. “This brief chilling time is non-negotiable – it’s the secret to keeping everything together during frying.”
- Heat Oil
In a deep pot or fryer, heat oil to 350°F (175°C). Use a candy thermometer for accuracy – temperature control is crucial for achieving that perfect golden exterior.
- Fry to Perfection
Carefully lower the rings into hot oil, cooking 2-3 at a time until golden brown, about 2-3 minutes. “Watch for that moment when the color shifts from pale yellow to amber gold – that’s when magic happens.”
- Make Garlic Butter
While rings drain on paper towels, melt butter in a small saucepan. Add minced garlic and cook until fragrant but not browned, about 1 minute. The aroma will tell you when it’s ready.
- Serve
Arrange the onion rings on a serving platter, drizzle with warm garlic butter, and serve immediately. That first bite with the cheese pull is a moment of pure culinary bliss.