- 0 Facebook
- 9 Pinterest
- 0 Email
- Copy Link
- 9 shares
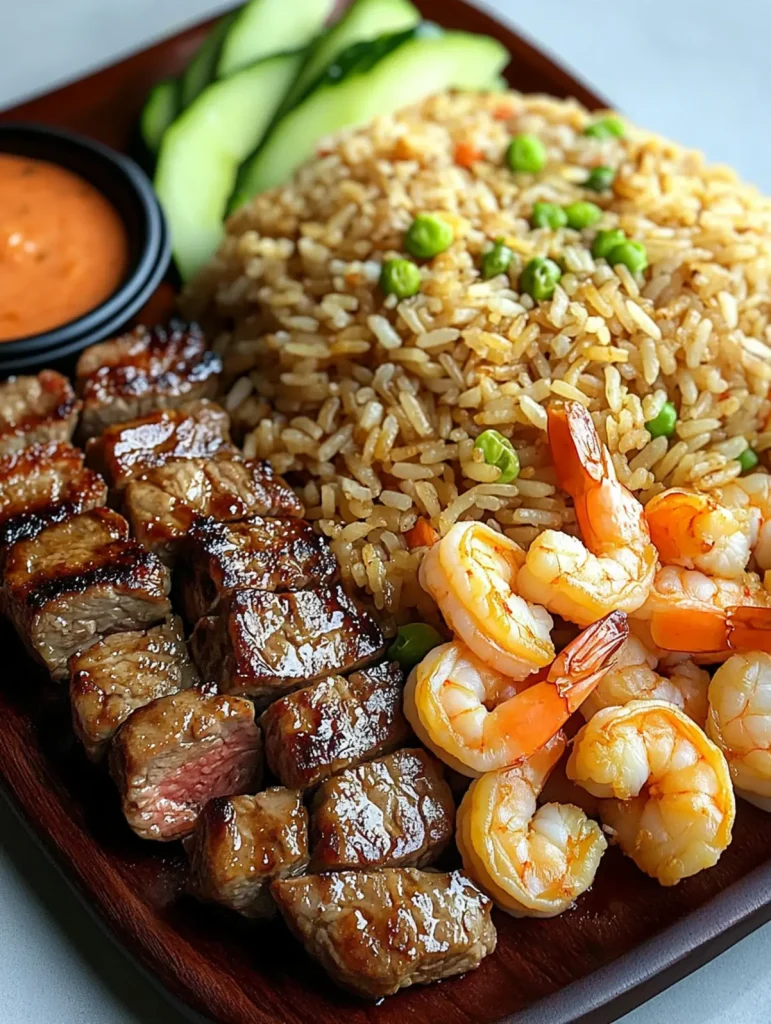
This sizzling Homemade Hibachi Steak, Shrimp & Fried Rice Platter brings restaurant-quality Japanese steakhouse magic straight to the dinner table. Tender sirloin chunks and plump shrimp cook to perfection in aromatic garlic butter, creating that unmistakable hibachi char and flavor. The colorful fried rice — studded with eggs, crisp vegetables, and green onions — adds the perfect savory foundation to this complete meal. Finished with a velvety homemade dipping sauce, this impressive yet surprisingly doable platter transforms an ordinary dinner into something extraordinary.
What Makes This Dish Stand Out
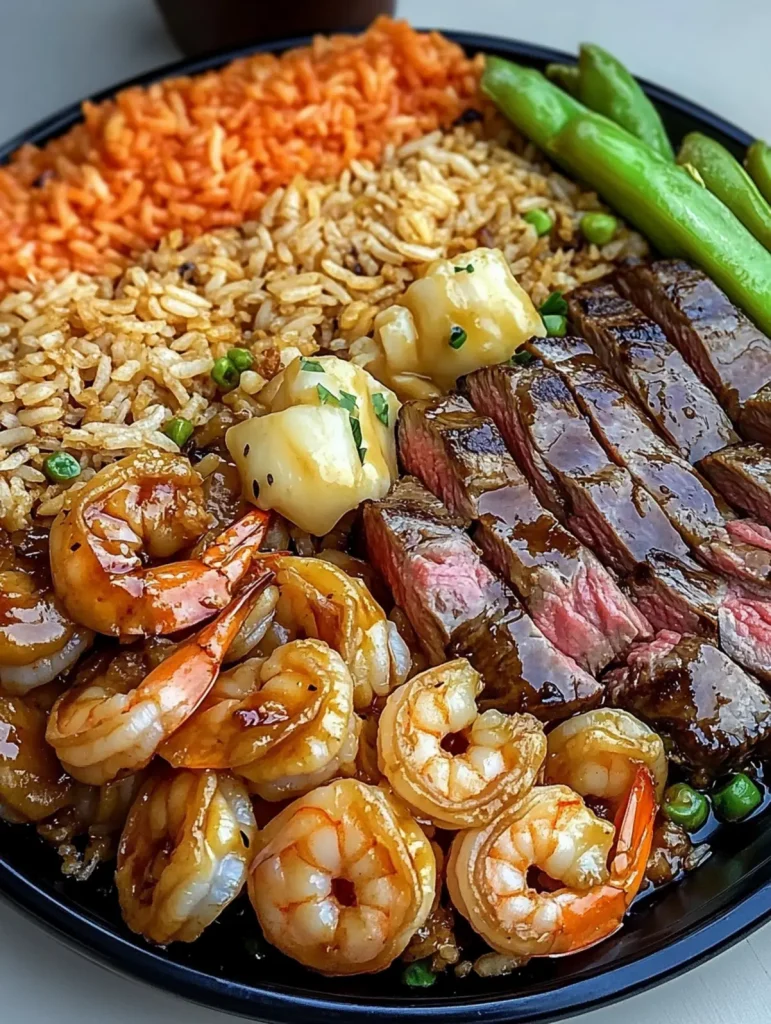
This Hibachi Steak, Shrimp & Fried Rice Platter delivers all the excitement of a Japanese steakhouse experience without leaving your kitchen. Here’s why it’s worth firing up your skillet tonight:
- Restaurant-Quality Results : The combination of high heat cooking and simple yet powerful seasonings creates authentic hibachi flavors that rival your favorite Japanese steakhouse.
- Impressive Yet Approachable : Despite its showstopping appearance, this complete meal comes together in just 35 minutes using straightforward techniques any home cook can master.
- Perfect Protein Duo : The contrasting textures of caramelized sirloin steak cubes and tender, succulent shrimp provide a luxurious protein experience that satisfies serious meat lovers.
- Built-In Flavor Insurance : Using day-old rice ensures each grain remains distinct and perfectly chewy, absorbing all the savory soy sauce and aromatic butter without becoming mushy.
- Customization Champion : The basic formula welcomes endless variations—swap in chicken, add mushrooms, increase the spice level, or create your own signature dipping sauce based on what’s already in your pantry.
Ingredient Notes: The Building Blocks of Hibachi Magic
Every component in this Hibachi Steak, Shrimp & Fried Rice Platter plays a crucial role in achieving that authentic Japanese steakhouse experience. Understanding each ingredient helps you recreate that unmistakable hibachi flavor and texture at home with confidence.
- Sirloin steak : Choose well-marbled sirloin for the perfect balance of tenderness and flavor. Cutting into uniform cubes ensures even cooking and those signature caramelized edges hibachi is known for.
- Shrimp : Look for large (16-20 count) shrimp for best results. The “peeled & deveined” variety saves prep time while still delivering that sweet, succulent texture that pairs beautifully with steak.
- Soy sauce : Regular soy sauce provides that classic umami foundation, but low-sodium works well if you’re watching salt intake. For extra authenticity, Japanese brands like Kikkoman offer more complex flavor than generic alternatives.
- Garlic butter : This compound butter creates that distinctive hibachi aroma. Store-bought versions work, but mixing 1 tablespoon softened butter with 1 minced garlic clove creates a fresher, more potent flavor.
- Sesame oil : Just a small amount adds tremendous nutty depth that defines hibachi cooking. Use toasted sesame oil for maximum impact; olive oil works in a pinch but lacks the signature Asian flavor profile.
- Salt & pepper : Kosher salt and freshly ground black pepper allow for proper seasoning control. Many chefs prefer coarse black pepper for hibachi dishes for added texture and visual appeal.
- Day-old white rice : The secret to perfect fried rice is using refrigerated, day-old rice. Fresh rice contains too much moisture and will turn mushy rather than achieving those desirable separate, chewy grains.
- Eggs : These add protein and silky texture to the fried rice. Room-temperature eggs incorporate more smoothly than cold ones straight from the refrigerator .
- Onions & green onions : Regular onions provide sweetness when caramelized, while green onions add fresh, bright flavor as a finishing touch. Save some green onion tops for garnish.
- Sesame oil or butter : A second addition for the vegetables creates that restaurant-style glossy finish. Butter adds richness while sesame oil enhances authenticity.
- Zucchini : Provides pleasant texture contrast and absorbs flavors beautifully. Choose firm zucchini with vibrant green skin for best results and visual appeal.
- Shredded carrots : These add natural sweetness, color, and subtle crunch. Pre-shredded carrots save time without sacrificing quality.
- Mayo : Forms the creamy base for the dipping sauce. Full-fat Japanese Kewpie mayonnaise offers extra richness and umami if available, though regular mayonnaise works well too.
- Ketchup : Balances the richness of mayo with tangy sweetness. Look for varieties without high fructose corn syrup for a cleaner flavor profile.
- Rice vinegar : Adds crucial acidity to the sauce. Unseasoned rice vinegar is preferable, as seasoned varieties contain added sugar and salt that may throw off the balance.
- Garlic powder & paprika : These dried seasonings add depth without overwhelming. For extra color and subtle smokiness, smoked paprika makes an excellent upgrade.
- Melted butter : A final drizzle mimics the theatrical butter finish of hibachi restaurants. Clarified butter or ghee works exceptionally well as it has a higher smoke point.
- Water : Only add as needed to achieve your preferred sauce consistency. Start with less—you can always thin the sauce more, but it’s difficult to thicken it once thinned.
How to Make Homemade Hibachi Steak, Shrimp & Fried Rice Platter
- Prepare all components before starting. Season the cubed steak and shrimp with salt and pepper, then set aside. Mix the yum yum sauce ingredients (mayo, ketchup, rice vinegar, garlic powder, paprika, and melted butter) in a small bowl, adding water if needed to reach desired consistency.
- Heat 1 tablespoon sesame oil in a large skillet or wok over medium-high heat. Add the beaten eggs and quickly scramble until just set but still slightly moist, about 30 seconds. Remove to a plate and set aside.
- Increase heat to high and add another tablespoon of oil to the same pan. Toss in the onions and carrots, stir-frying for 2 minutes until they begin to soften. Add the zucchini and cook for another 1-2 minutes until vegetables are tender-crisp. I like to keep them slightly firm for that authentic hibachi texture. Transfer to a bowl.
- Add the garlic butter and remaining oil to the hot pan. Once sizzling, add the steak cubes and cook for 2-3 minutes until browned on all sides but still slightly pink in the center. Push the steak to one side of the pan, add the shrimp to the empty space, and cook for 1-2 minutes per side until they turn pink and opaque.
- Drizzle 1 tablespoon of soy sauce over the proteins and toss to coat everything evenly. The soy sauce should caramelize quickly, creating that signature hibachi flavor. Transfer the meat and shrimp to a clean plate.
- Return the pan to high heat and add 1 tablespoon butter. Once melted, add the day-old rice, breaking up any clumps with your spatula. Spread it in an even layer and let it cook undisturbed for 1 minute to develop a slight crust on the bottom.
- Stir the rice and add the scrambled eggs, cooked vegetables, green onions (reserving some for garnish), and remaining tablespoon of soy sauce. Toss everything together until well combined and heated through, about 2 minutes.
- Serve the fried rice on plates or a large platter, topped with the steak and shrimp. Garnish with the reserved green onions and serve with the yum yum sauce on the side for dipping.
Remember: The key to great hibachi is cooking each component separately at high heat to develop those distinct flavors before bringing everything together at the end.
Serving Suggestions
This Hibachi Steak, Shrimp & Fried Rice Platter is a complete meal on its own, but a few thoughtful additions can elevate your homemade Japanese steakhouse experience to truly memorable heights.
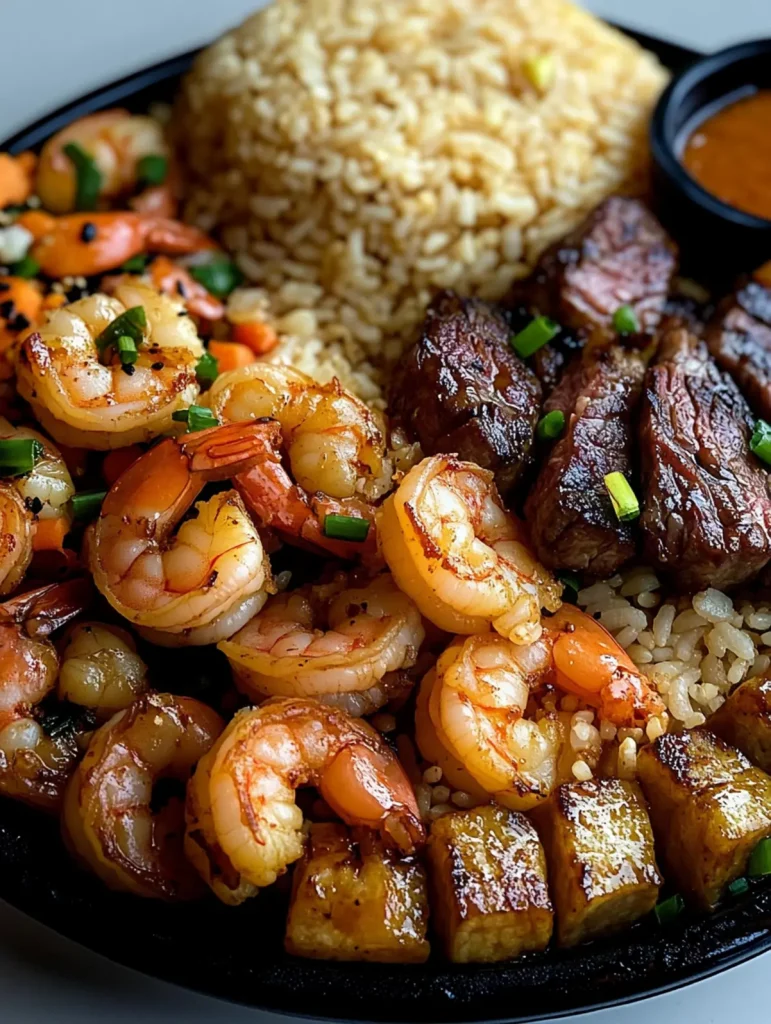
For authentic presentation, I like to serve this dish on a large, pre-warmed platter with the fried rice as the foundation, topped with the steak and shrimp arranged in separate sections. Sprinkle freshly sliced green onions over everything just before bringing it to the table, and serve the yum yum sauce in individual ramekins for dipping or drizzling.
Perfect accompaniments include a simple miso soup starter and a small side of quick-pickled cucumbers to cleanse the palate between bites. For a refreshing beverage pairing, try cold Japanese beer, hot green tea, or a pitcher of cucumber water with thin lemon slices – the clean flavors balance the rich, savory notes of the hibachi dishes.
This platter makes an impressive centerpiece for casual entertaining or date nights at home. For larger gatherings, consider setting up a DIY hibachi station where guests can customize their plates with additional toppings like toasted sesame seeds, crispy fried garlic, or sriracha for those who enjoy extra heat alongside that creamy yum yum sauce.
Tips for the Best Homemade Hibachi Steak, Shrimp & Fried Rice Platter
Make your hibachi experience truly restaurant-worthy with these practical insights:
- Use cold, dry rice: I’ve found that refrigerating rice uncovered overnight creates that perfect grain separation essential for authentic hibachi fried rice texture.
- Prep everything first: Hibachi cooking moves lightning-fast once you start. Having your steak cubed, shrimp cleaned, and vegetables chopped before heating your pan prevents anything from overcooking.
- Crank up the heat: Don’t be shy with your burner setting. That signature hibachi sizzle requires a screaming hot pan to properly caramelize the soy sauce on your steak and shrimp.
- Cook in batches: Overcrowding your pan creates steam instead of sear. For restaurant-quality results, give each component (vegetables, proteins, and rice) plenty of space to develop proper color.
- Season the yum yum sauce ahead: Let your sauce rest in the refrigerator for at least 30 minutes while preparing the other components—this allows the garlic powder and paprika to fully hydrate and develop deeper flavor.
Make Ahead Options for Hibachi Steak, Shrimp & Fried Rice Platter
This Hibachi Steak, Shrimp & Fried Rice Platter is a meal prep champion that saves precious time on busy weeknights! You can prepare the yum yum dipping sauce up to 3 days ahead and store it refrigerated in an airtight container. The vegetables can be chopped and stored separately for up to 24 hours in advance (keep zucchini separate to prevent moisture). Most importantly, use day-old rice that’s been refrigerated overnight—this actually improves the final texture by removing excess moisture. Season your steak and shrimp up to 4 hours ahead , keeping them covered and chilled. When ready to serve, simply follow the cooking steps as written, and you’ll have restaurant-quality hibachi flavors with half the prep work!
Storage & Freezing
This Hibachi Steak, Shrimp & Fried Rice Platter stores beautifully, making it perfect for meal prep or enjoying leftovers. Store the components in separate airtight containers in the refrigerator for 3-4 days. The yum yum sauce will keep for up to a week refrigerated, and might even taste better after the flavors have had time to meld.
For freezing, the fried rice portion freezes surprisingly well for up to 2 months. I recommend slightly undercooking the vegetables if you know you’ll be freezing portions, as they’ll soften more during reheating. The proteins, however, are best enjoyed fresh—frozen and reheated shrimp tends to become rubbery, while steak can lose its perfect medium doneness.
To reheat, the stovetop method works best for maintaining textures. Heat a skillet over medium heat with a small amount of sesame oil or butter, add the rice (and proteins if stored together), and stir frequently until heated through, about 4-5 minutes. A splash of water or extra soy sauce helps revive any dryness. Microwave reheating works in a pinch—just cover the dish with a damp paper towel and heat in 30-second intervals, stirring between each, to prevent the rice from drying out or the proteins from overcooking.
Variations & Substitutions
Don’t worry if you don’t have every ingredient on hand or want to customize this dish to your preferences—hibachi is wonderfully adaptable while still maintaining its signature appeal.
- Protein swaps: Not a steak fan? Substitute chicken thighs cut into bite-sized pieces (cook for 4-5 minutes until no longer pink) or try salmon chunks for a seafood-forward version. For a vegetarian option, firm tofu or tempeh work beautifully when pan-seared until crispy.
- Make it gluten-free: Replace regular soy sauce with tamari and verify your other condiments don’t contain hidden gluten. The rest of the recipe remains essentially unchanged while still delivering authentic hibachi flavor.
- Rice alternatives: While traditional white rice is classic, I sometimes use brown rice for extra nutrition or cauliflower rice for a lower-carb version. If using brown rice, be sure it’s completely cooled from the day before for best texture.
- Veggie variations: The basic vegetable mix can be customized based on what’s in your fridge. Bell peppers, mushrooms, broccoli florets, or snow peas all work wonderfully. Just adjust cooking times accordingly—harder vegetables need a little more time on the heat.
- Spice it up: Add a drizzle of sriracha to the yum yum sauce for heat, or incorporate a teaspoon of gochujang (Korean chili paste) into the rice for a Korean-fusion twist. A sprinkle of togarashi (Japanese seven-spice blend) as garnish adds authentic complexity.
- Flavor boosters: For extra umami depth, add a splash of mirin (sweet Japanese cooking wine) to the proteins or a teaspoon of oyster sauce to the rice. If you enjoy bright citrus notes, finish with a squeeze of lime juice just before serving.
Recipe FAQs
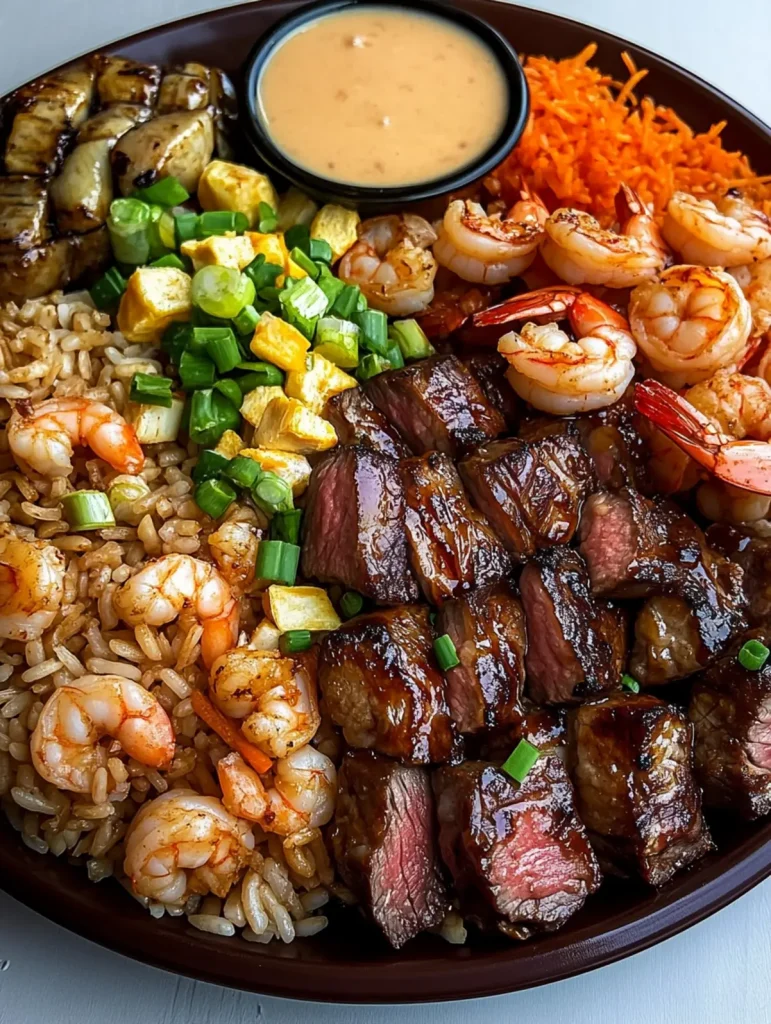
Why use day-old rice for hibachi? Fresh rice becomes mushy; day-old stays firm.
Can I substitute the sirloin steak? Ribeye or flank steak work beautifully too.
How do I prevent rubbery shrimp? Cook just until pink, about 2 minutes total.
Can I make the yum yum sauce ahead? Yes! It actually tastes better after refrigeration.
Is there a vegetarian version? Replace proteins with tofu and mushrooms.
What’s the best pan for hibachi cooking? I use a carbon steel wok for ideal heat.
- 0 Facebook
- 9 Pinterest
- 0 Email
- Copy Link
- 9 shares
Homemade Hibachi Steak, Shrimp & Fried Rice Platter
Ingredients
Instructions
Prepare all components before starting. Season the cubed steak and shrimp with salt and pepper, then set aside. Mix the yum yum sauce ingredients (mayo, ketchup, rice vinegar, garlic powder, paprika, and melted butter) in a small bowl, adding water if needed to reach desired consistency.
Heat 1 tablespoon sesame oil in a large skillet or wok over medium-high heat. Add the beaten eggs and quickly scramble until just set but still slightly moist, about 30 seconds. Remove to a plate and set aside.
Increase heat to high and add another tablespoon of oil to the same pan. Toss in the onions and carrots, stir-frying for 2 minutes until they begin to soften. Add the zucchini and cook for another 1-2 minutes until vegetables are tender-crisp. Transfer to a bowl.
Add the garlic butter and remaining oil to the hot pan. Once sizzling, add the steak cubes and cook for 2-3 minutes until browned on all sides but still slightly pink in the center. Push the steak to one side of the pan, add the shrimp to the empty space, and cook for 1-2 minutes per side until they turn pink and opaque.
Drizzle 1 tablespoon of soy sauce over the proteins and toss to coat everything evenly. The soy sauce should caramelize quickly, creating that signature hibachi flavor. Transfer the meat and shrimp to a clean plate.
Return the pan to high heat and add 1 tablespoon butter. Once melted, add the day-old rice, breaking up any clumps with your spatula. Spread it in an even layer and let it cook undisturbed for 1 minute to develop a slight crust on the bottom.
Stir the rice and add the scrambled eggs, cooked vegetables, green onions (reserving some for garnish), and remaining tablespoon of soy sauce. Toss everything together until well combined and heated through, about 2 minutes.
Serve the fried rice on plates or a large platter, topped with the steak and shrimp. Garnish with the reserved green onions and serve with the yum yum sauce on the side for dipping.
*Remember: The key to great hibachi is cooking each component separately at high heat to develop those distinct flavors before bringing everything together at the end.*
Notes
Use cold, dry rice: I’ve found that refrigerating rice uncovered overnight creates that perfect grain separation essential for authentic hibachi fried rice texture.
Prep everything first: Hibachi cooking moves lightning-fast once you start. Having your steak cubed, shrimp cleaned, and vegetables chopped before heating your pan prevents anything from overcooking.
Crank up the heat: Don’t be shy with your burner setting. That signature hibachi sizzle requires a screaming hot pan to properly caramelize the soy sauce on your steak and shrimp.
Cook in batches: Overcrowding your pan creates steam instead of sear. For restaurant-quality results, give each component (vegetables, proteins, and rice) plenty of space to develop proper color.
Season the yum yum sauce ahead: Let your sauce rest in the refrigerator for at least 30 minutes while preparing the other components—this allows the garlic powder and paprika to fully hydrate and develop deeper flavor.
Nutrition
| Serving Size | 1 plate |
|---|---|
| Calories | 600 calories |
| Sugar Content | 4g |
| Sodium Content | 800mg |
| Fat Content | 30g |
| Saturated Fat Content | 8g |
| Unsaturated Fat Content | 19g |
| Trans Fat Content | 0g |
| Carbohydrate Content | 60g |
| Fiber Content | 2g |
| Protein Content | 40g |
| Cholesterol Content | 200mg |