- 0 Facebook
- 18 Pinterest
- 0 Email
- Copy Link
- 18 shares
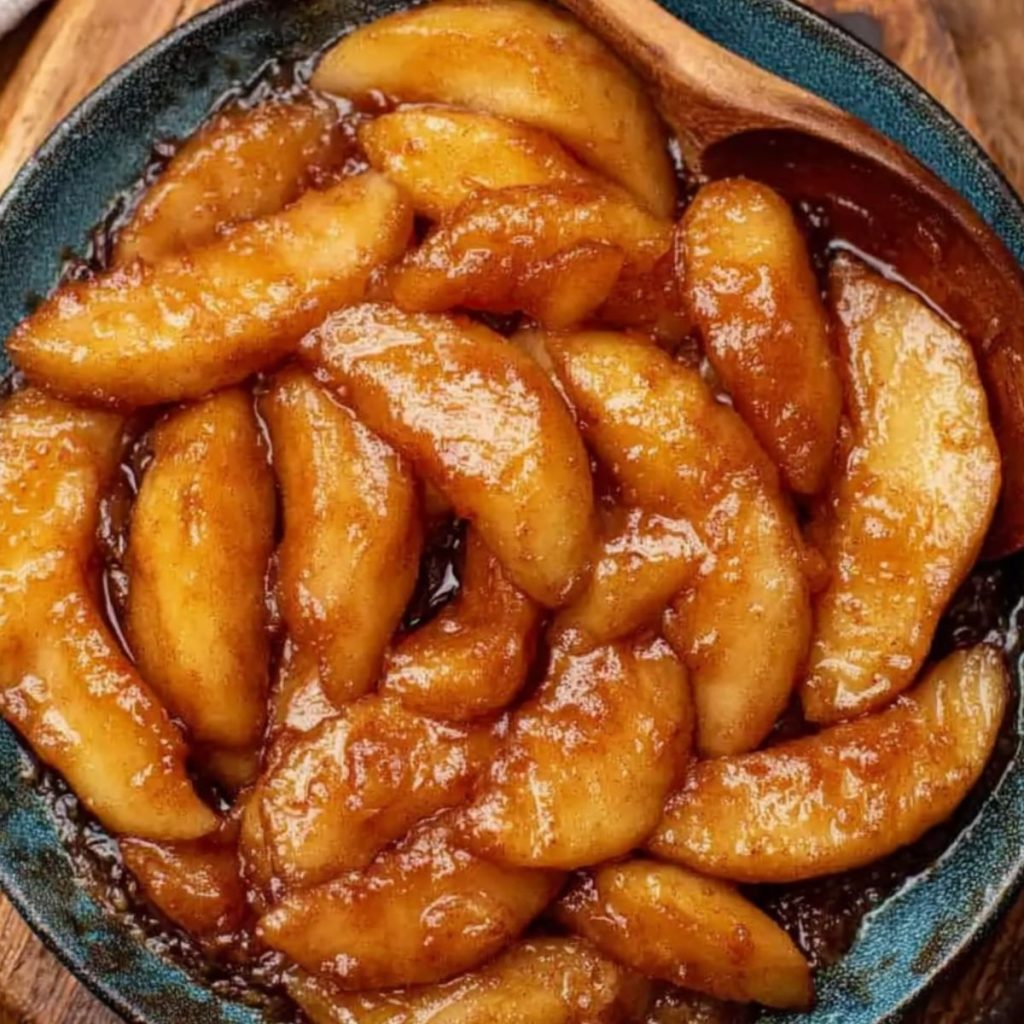
Tender, caramelized apples swimming in a buttery cinnamon-spiced sauce create pure comfort in every bite. These Caramelized Skillet Fried Apples transform tart Granny Smith apples into a decadent, golden-brown treat with just the right balance of sweetness and warm spices. The natural tartness of the apples holds up beautifully against the rich brown sugar syrup, creating a versatile dish that’s equally delicious spooned over vanilla ice cream or served alongside savory breakfast dishes like pancakes and waffles.
Why You’ll Love This Recipe
These skillet -fried apples deliver maximum comfort with minimal effort, transforming simple ingredients into a treat that feels like a warm hug on a plate.
- Perfectly Balanced Flavors : The natural tartness of Granny Smith apples creates the ideal counterpoint to the rich, caramelized brown sugar syrup.
- One-Pan Wonder : Everything comes together in a single skillet , making both preparation and cleanup refreshingly straightforward.
- Versatility Champion : These caramelized apples transition effortlessly from breakfast topping to dessert star, working beautifully with everything from oatmeal to ice cream.
- Foolproof Technique : The gradual cooking method ensures tender apples every time, avoiding the common pitfall of mushy or undercooked fruit.
- Intoxicating Aroma : The combination of cinnamon, nutmeg, and vanilla creates a home-filling fragrance that rivals any scented candle on the market.
Ingredient Notes
The magic of perfect fried apples lies in the quality and balance of ingredients, each playing a crucial role in developing that signature caramelized flavor and comforting texture that makes this dish so irresistible.
- Granny Smith apples : These tart, firm apples hold their shape beautifully during cooking and provide the perfect contrast to the sweet caramel sauce. Their natural acidity prevents the dish from becoming overly sweet and creates depth of flavor.
- Unsalted butter : Forms the rich foundation of the caramel sauce. Using unsalted butter allows precise control over the salt content while its milk solids contribute to that gorgeous golden-brown color as they caramelize.
- Light brown sugar or dark brown sugar : Contains molasses that creates that distinctive caramel flavor. Dark brown sugar offers a deeper, more robust molasses flavor, while light brown provides a more subtle sweetness—both work wonderfully in fried apples.
- Ground cinnamon : Adds warm, aromatic notes that enhance the natural sweetness of the apples. Look for fresh, fragrant cinnamon as older spices can lose their potency and flavor impact.
- Ground nutmeg : Brings a subtle woody, sweet complexity that complements the cinnamon perfectly. Freshly grated nutmeg offers the most vibrant flavor, but pre-ground works well too.
- Fine sea salt : Activates your taste buds and enhances all other flavors in the dish. Even in sweet recipes, salt is crucial for balanced flavor development—don’t skip it.
- Vanilla extract : Adds a rich, aromatic complexity that rounds out all the other flavors. Pure vanilla extract (rather than imitation) delivers the most authentic flavor and integrates beautifully with the caramelized sauce.
Step-by-Step Instructions
- Prepare the apples by washing, coring, and slicing them into ¼-inch thick wedges. I prefer leaving the peels on for texture and color, but you can peel them if you’d like.
- Melt the butter in a large skillet over medium heat until it begins to foam. Make sure the butter coats the entire surface of the pan.
- Add the apples to the melted butter and toss to coat completely. Cook for about 5 minutes, stirring occasionally, until the apples begin to soften slightly.
- Sprinkle the brown sugar, cinnamon, nutmeg, and salt over the apples and stir to combine. The sugar will begin to dissolve and create a beautiful caramel sauce.
- Reduce heat to medium-low and continue cooking for 10-12 minutes, stirring occasionally. You want the apples to be tender but not mushy—they should hold their shape when pierced with a fork.
- Pour in the vanilla extract during the last minute of cooking. I find this preserves the aromatic quality while still allowing it to blend with the other flavors.
- Remove from heat once the apples are tender and the sauce has thickened to a rich, caramel-like consistency. The sauce will continue to thicken slightly as it cools.
- Serve warm directly from the skillet for the most luxurious experience, or transfer to a serving dish if you prefer.
Expert Tips
Here’s how to elevate your caramelized skillet fried apples from good to absolutely irresistible:
- Apple selection matters : Granny Smith apples are ideal for this recipe because their firmness holds up during cooking, and their tartness balances perfectly with the sweet caramel sauce.
- Watch your heat : I’ve found that too high heat causes the butter and sugar to burn before the apples cook through. Medium-low is the sweet spot for developing that perfect caramelized flavor.
- Consistent slicing : Cut your apple wedges to a uniform ¼-inch thickness so they cook at the same rate, giving you perfectly tender fried apples throughout.
- Don’t rush the caramelization : Allow the brown sugar sauce to develop slowly around the apples—this patience creates that rich, complex flavor that makes homemade fried apples so special.
- Vanilla timing trick : Adding the vanilla extract in the final minute prevents its delicate flavor from cooking off while still allowing it to meld with the warm spices.
- Test for doneness : The perfect fried apple should be tender enough to cut with a fork but still hold its shape—never mushy. This texture balance is what makes this comfort dish so satisfying.
Variations & Substitutions
Feel free to make this recipe your own by tweaking the ingredients to match your taste preferences or what you have available in your pantry. The beauty of fried apples is their adaptability!
- Apple variety swap : While Granny Smith apples provide that classic tartness, Honeycrisp, Pink Lady, or Braeburn apples work beautifully for a slightly sweeter version. I sometimes use a mix of apple varieties for more complex flavor.
- Butter alternatives : For dairy-free or vegan versions, substitute the butter with coconut oil or a high-quality vegan butter. The flavor profile will shift slightly, but you’ll still get that delicious caramelization.
- Sweetener options : Replace brown sugar with maple syrup, honey, or coconut sugar for different flavor dimensions. Reduce the amount to about ⅓ cup if using liquid sweeteners since they’re typically sweeter.
- Spice it up : Add ¼ teaspoon of cardamom, allspice, or ginger to the cinnamon-nutmeg mix for a more complex spice profile. During fall, I love adding a pinch of cloves for that quintessential autumn flavor.
- Texture enhancers : Stir in ⅓ cup chopped walnuts, pecans, or even a handful of raisins during the last few minutes of cooking for added texture and flavor contrast.
- Boozy twist : For an adult version, add a tablespoon of bourbon, rum, or apple brandy along with the vanilla extract. The alcohol will cook off, leaving behind a wonderfully rich flavor that pairs perfectly with the caramel sauce.
Serving Suggestions
These warm, buttery fried apples are incredibly versatile and can transform ordinary meals into something special. Their sweet-tart flavor profile complements both sweet and savory dishes beautifully.
I love serving these caramelized apples still warm from the skillet, spooned over vanilla ice cream where the contrasting temperatures create pure magic as the rich caramel sauce melts into the creamy ice cream. For breakfast, these fried apples elevate classics like pancakes, waffles, or French toast to restaurant-quality status—simply spoon the apples and that luscious cinnamon-spiced sauce over the top and watch breakfast become the highlight of everyone’s day.
For a more elegant presentation, serve your fried apples in individual dessert bowls topped with a dollop of fresh whipped cream and a sprinkle of crushed graham crackers for a deconstructed apple pie experience. They also make an outstanding topping for oatmeal or yogurt parfaits, adding natural sweetness and warm spice flavor to your morning routine.
When hosting brunch, I like to create a little fried apple bar, serving them in a pretty dish alongside various breakfast items, letting guests customize their plates. The warm cinnamon and nutmeg aromas wafting through your home as these apples caramelize in the skillet are almost as delightful as the taste itself!
Make-Ahead Tips for Fried Apples
These comforting Fried Apples are perfect for meal prep enthusiasts who want homemade goodness without the morning rush! You can slice and core the apples up to 24 hours in advance—just toss them with a tablespoon of lemon juice to prevent browning and store in the refrigerator in an airtight container. The complete dish can also be made ahead and refrigerated for up to 3 days , maintaining all its caramelized flavor. When ready to serve, simply reheat gently in a skillet over medium-low heat for 3-4 minutes (adding a splash of water if needed to loosen the sauce), and you’ll have warm, tender apples that taste just as delicious as when freshly made.
Storage & Freezing
These caramelized skillet fried apples store beautifully, allowing you to enjoy their comforting flavor even when you don’t have time to cook from scratch. The butter-based caramel sauce may solidify when refrigerated but will return to its silky glory when properly reheated.
Refrigerator Storage: Store leftover fried apples in an airtight container in the refrigerator for up to 5 days. I find glass containers work best as they don’t absorb the cinnamon aroma and are less likely to stain than plastic. The flavor actually deepens after a day in the fridge, making these apples perfect for meal prep.
Freezing Options: While fried apples can be frozen for up to 3 months in a freezer-safe container, the texture does change slightly upon thawing—the apples become a bit softer. If you plan to freeze portions, consider cooking the apples just until barely tender, as they’ll soften further during reheating.
Reheating Methods: For the best texture and flavor, reheat refrigerated fried apples in a skillet over medium-low heat for 5-7 minutes, stirring occasionally. Microwave reheating works in a pinch (1-2 minutes, stirring halfway), but the stovetop method revitalizes the caramel sauce’s silky texture. If the sauce seems too thick after storage, add a teaspoon of water or apple cider while reheating to achieve that perfect consistency.
Recipe FAQs
Can I use other apple varieties? Honeycrisp or Jonagold work well too.
Do I need to peel the apples? No, peels add nice texture and color.
How do I prevent my sauce from burning? Keep heat medium-low after adding sugar.
Can I make this ahead of time? Yes, refrigerate and gently reheat for 5 minutes.
Is there a vegan alternative? Use plant-based butter instead.
What makes the sauce thicken properly? Patient cooking and natural apple pectin.
- 0 Facebook
- 18 Pinterest
- 0 Email
- Copy Link
- 18 shares
Caramelized Skillet Fried Apples: The Ultimate Comforting Treat
Ingredients
Instructions
Prepare the apples by washing, coring, and slicing them into ¼-inch thick wedges. I prefer leaving the peels on for texture and color, but you can peel them if you’d like.
Melt the butter in a large skillet over medium heat until it begins to foam. Make sure the butter coats the entire surface of the pan.
Add the apples to the melted butter and toss to coat completely. Cook for about 5 minutes, stirring occasionally, until the apples begin to soften slightly.
Sprinkle the brown sugar, cinnamon, nutmeg, and salt over the apples and stir to combine. The sugar will begin to dissolve and create a beautiful caramel sauce.
Reduce heat to medium-low and continue cooking for 10-12 minutes, stirring occasionally. You want the apples to be tender but not mushy—they should hold their shape when pierced with a fork.
Pour in the vanilla extract during the last minute of cooking. I find this preserves the aromatic quality while still allowing it to blend with the other flavors.
Remove from heat once the apples are tender and the sauce has thickened to a rich, caramel-like consistency. The sauce will continue to thicken slightly as it cools.
Serve warm directly from the skillet for the most luxurious experience, or transfer to a serving dish if you prefer.
Notes
Apple selection matters: Granny Smith apples are ideal for this recipe because their firmness holds up during cooking, and their tartness balances perfectly with the sweet caramel sauce.
Watch your heat: I’ve found that too high heat causes the butter and sugar to burn before the apples cook through. Medium-low is the sweet spot for developing that perfect caramelized flavor.
Consistent slicing: Cut your apple wedges to a uniform ¼-inch thickness so they cook at the same rate, giving you perfectly tender fried apples throughout.
Don’t rush the caramelization: Allow the brown sugar sauce to develop slowly around the apples—this patience creates that rich, complex flavor that makes homemade fried apples so special.
Vanilla timing trick: Adding the vanilla extract in the final minute prevents its delicate flavor from cooking off while still allowing it to meld with the warm spices.
Test for doneness: The perfect fried apple should be tender enough to cut with a fork but still hold its shape—never mushy. This texture balance is what makes this comfort dish so satisfying.
Nutrition
| Serving Size | 1/2 cup |
|---|---|
| Calories | 200 calories |
| Sugar Content | 18g |
| Sodium Content | 150mg |
| Fat Content | 9g |
| Saturated Fat Content | 5g |
| Unsaturated Fat Content | 3g |
| Trans Fat Content | 0g |
| Carbohydrate Content | 30g |
| Fiber Content | 3g |
| Protein Content | 1g |
| Cholesterol Content | 15mg |