- 0 Facebook
- 14 Pinterest
- 1 Email
- Copy Link
- 15 shares
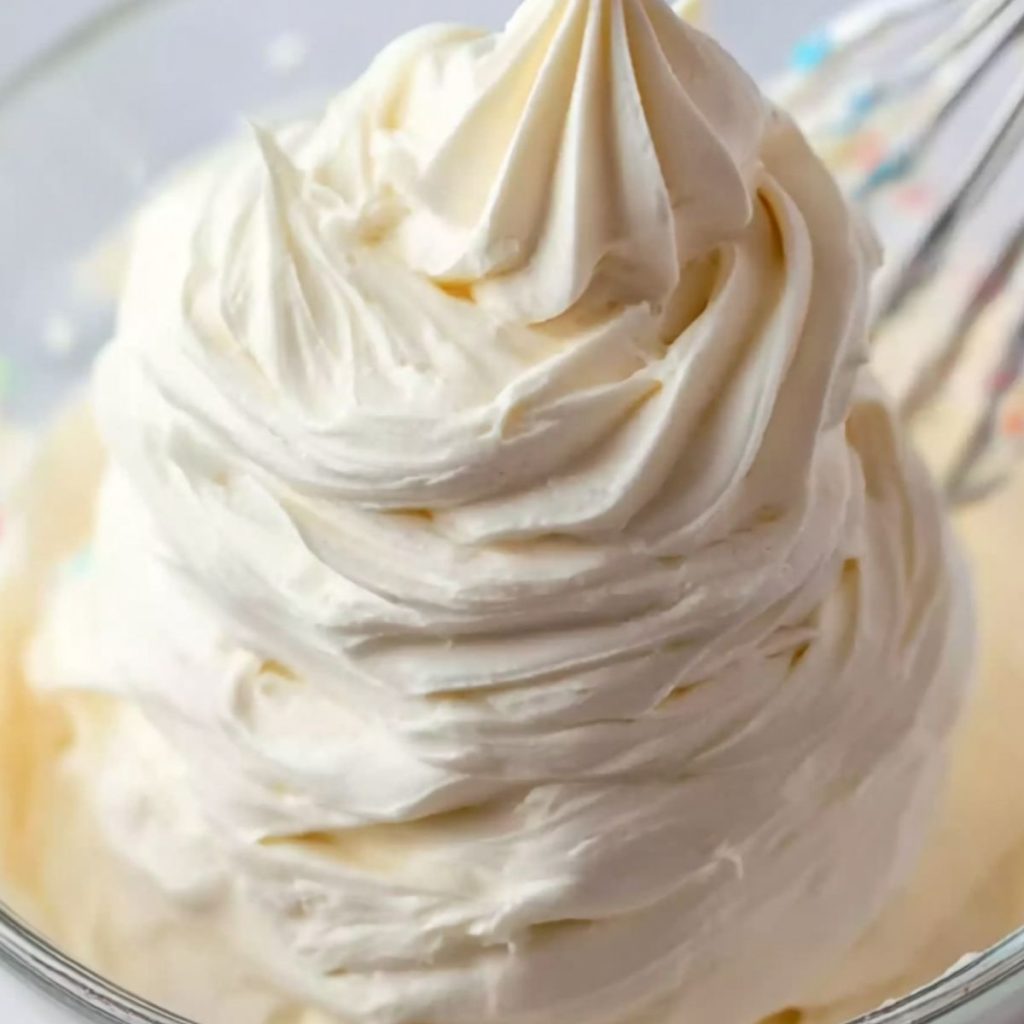
This buttercream frosting transforms ordinary desserts into extraordinary confections with its cloud-like texture and melt-in-your-mouth silkiness. Whipped to perfection with just four simple ingredients, it achieves that professional bakery quality that’s often missing from store-bought versions. The secret lies in properly creaming the butter until it’s almost white before incorporating the powdered sugar — creating that irresistible lightness that pipes beautifully and spreads with ease. A touch of heavy cream and pure vanilla extract adds richness that makes this frosting equally delicious on chocolate cake, vanilla cupcakes, or sandwiched between cookies.
Why You’ll Love This Recipe
This homemade buttercream frosting delivers bakery-quality results with surprising simplicity. Each velvety swirl proves that sometimes the classics, when done right, simply can’t be beaten.
- Professional-Quality Results : The technique of fully creaming the butter until it lightens in color creates that signature silky texture professional bakers charge premium prices for.
- Perfect Piping Power : This frosting holds its shape beautifully for decorative piping work while remaining soft enough to create smooth finishes on layer cakes.
- Make-Ahead Marvel : Prepared frosting keeps beautifully in the refrigerator for a week, making it perfect for busy bakers who need to split their dessert-making across multiple days.
- Customization Canvas : The base recipe serves as the perfect foundation for endless flavor variations—add citrus zest, espresso powder, or food coloring to match any occasion.
- Temperature Tolerant : Unlike many buttercreams that quickly melt at room temperature, the heavy cream in this recipe creates stability that stands up to display time at parties and gatherings.
Ingredient Breakdown with Tips
The secret to a truly exceptional homemade buttercream frosting lies in understanding exactly what each ingredient contributes to the final texture and flavor. Quality ingredients treated properly transform a simple frosting into something extraordinary.
- Unsalted butter, softened : The foundation of buttercream that provides structure and rich flavor. Ensure it’s properly softened (should indent slightly when pressed but not be melting) for the perfect creamy base that whips to incorporate air.
- Heavy whipping cream : This creates that silky, luxurious mouthfeel that sets professional buttercream apart. Its higher fat content (36-40%) produces a more stable frosting that holds its shape while remaining soft and spreadable.
- Powdered sugar : Also called confectioner’s sugar, it dissolves seamlessly into the butter for a smooth texture while providing sweetness and structure. Sifting before measuring eliminates lumps for the silkiest possible buttercream.
- Vanilla extract : Pure vanilla extract adds depth and warmth that enhances the overall flavor profile. High-quality pure extract (rather than imitation) makes a noticeable difference in taste, though clear vanilla can be substituted when a pure white frosting is needed.
How to Make The Ultimate Silky Buttercream Frosting Secret
- Beat the unsalted butter in a large bowl using an electric mixer on medium-high speed for 3-5 minutes until it becomes noticeably lighter in color and fluffy in texture. This extended beating is the true secret to silky buttercream!
- Reduce the mixer speed to low and gradually add 1 cup of powdered sugar. Once incorporated, add another cup and mix until completely combined. I always scrape down the sides of the bowl between additions to ensure everything mixes evenly.
- Add the final cup of powdered sugar and mix on low until just combined, then increase to medium speed and beat for another minute until the mixture looks light and fluffy.
- Pour in the heavy whipping cream and vanilla extract, then beat on medium-high speed for 2-3 minutes. The cream will transform the texture from stiff to silky smooth.
- Test the consistency by lifting some frosting with your spatula – it should hold a soft peak that gently folds over. If it’s too stiff, add another teaspoon of cream; if too loose, add a tablespoon of powdered sugar.
- Whip for a final 30 seconds on high speed to incorporate maximum air for the silkiest possible texture. The frosting should look almost white and feel incredibly smooth between your fingers.
- Use immediately for decorating, or store in an airtight container. This frosting pipes beautifully through decorating tips and spreads with effortless elegance on any dessert.
Remember to bring refrigerated frosting to room temperature and re-whip for a few minutes before using to restore that perfect silky texture.
Storage & Freezing
This homemade buttercream frosting keeps beautifully when stored properly, allowing you to prepare it ahead for special occasions or save leftovers for future treats. Proper storage ensures that silky texture and rich flavor remains intact.
For short-term storage, place your buttercream in an airtight container and refrigerate for up to 2 weeks. The texture will firm up considerably when chilled, so I always recommend removing it from the refrigerator about 30-45 minutes before use, then re-whipping it with your electric mixer for 2-3 minutes to restore that cloud-like consistency.
Buttercream freezes remarkably well for up to 3 months in freezer-safe containers. Thaw overnight in the refrigerator , then bring to room temperature and re-whip until silky. The high fat content from the butter and heavy cream helps preserve the texture during freezing, though you might need to add a teaspoon of cream while re-whipping if it seems dry.
If you notice any color change or separation after storage, don’t worry! A thorough re-whipping will bring your homemade buttercream frosting back to life, making it just as perfect for piping and spreading as when freshly made.
Make-Ahead Tips for Homemade Buttercream Frosting
This homemade buttercream frosting is a busy baker’s dream for meal prep! You can prepare the entire batch up to one week in advance and store it in an airtight container in the refrigerator , making it perfect for splitting dessert-making tasks across multiple days. The frosting will firm up when chilled, but the quality remains exceptional. When ready to use, simply bring it to room temperature (about 30-45 minutes on the counter) and re-whip with an electric mixer for 2-3 minutes to restore that signature silky texture. This make-ahead approach saves precious time on busy baking days while delivering the same professional-quality results that make homemade frosting so irresistible.
Variations & Substitutions
The beauty of this homemade buttercream frosting lies in its versatility. Start with the classic recipe as your foundation, then customize to suit your taste preferences or the specific dessert you’re making.
- Flavor infusions : Replace the vanilla extract with almond, maple, or coconut extract for a completely different profile. I often use lemon extract with a teaspoon of fresh zest for a bright, citrusy frosting that pairs beautifully with spring desserts.
- Dairy alternatives : For a dairy-free version, substitute plant-based butter sticks (not spread) and coconut cream instead of heavy whipping cream. The texture will be slightly different but still deliciously creamy.
- Chocolate transformation : Create chocolate buttercream by adding ½ cup of sifted cocoa powder after your final addition of powdered sugar. You may need an extra tablespoon of cream to maintain the silky consistency.
- Color customization : Gel food coloring works far better than liquid varieties, providing vibrant color without altering the frosting’s consistency. Start with just a toothpick tip of gel color and build gradually.
- Flavor boost : For a more sophisticated twist, add 2 tablespoons of quality bourbon, rum, or coffee liqueur in place of some of the cream for adult-oriented desserts.
- Swiss meringue alternative : If you find traditional American buttercream too sweet, try adding 2-3 tablespoons of mascarpone cheese to the finished frosting for a tangier, less sweet version that maintains that silky texture.
Tips for the Best Buttercream Frosting
These pro secrets will help you achieve that bakery-quality homemade buttercream frosting every single time:
- Room temperature matters : Butter should be soft enough to indent with light pressure but still hold its shape—about 65-68°F is ideal for maximum air incorporation.
- Extended beating is essential : I’ve found that beating the butter alone for a full 5 minutes creates that professional silky texture that’s impossible to achieve with shortcuts.
- Add sugar gradually : Dumping all 3 cups of powdered sugar at once creates lumps and graininess—adding in 1-cup increments allows each portion to fully incorporate.
- Heavy cream temperature : Using room temperature heavy cream (not cold from the refrigerator ) helps it blend seamlessly without causing the butter to seize or separate.
- Scrape the bowl frequently : Unmixed butter hiding on the sides or bottom of your mixing bowl can ruin your frosting’s texture—I scrape thoroughly between each ingredient addition.
- Taste before finishing : The vanilla extract amount is just a starting point—sometimes an extra splash elevates the flavor from good to unforgettable without affecting consistency.
Serving Suggestions
This homemade buttercream frosting isn’t just delicious—it’s the perfect canvas for creating memorable dessert experiences. The silky texture and rich flavor make everything it touches feel special.
I love using this frosting to create beautiful layer cakes with striking visual appeal. Try spreading a generous layer between cake layers, then use a decorating bag with different piping tips to create rosettes, stars, or ruffles on top. The stable texture from the heavy whipping cream helps these decorations hold their shape beautifully at room temperature.
For casual gatherings, frost a batch of cupcakes and finish with colorful sprinkles, fresh berries, or chocolate shavings. The contrast between the smooth buttercream and these toppings creates an irresistible presentation. When I’m feeling extra creative, I divide the frosting into small bowls and add different food colorings to create rainbow or ombré effects that always impress guests.
This versatile buttercream also works wonderfully for cookie sandwiches—spread between chocolate chip cookies, brownies, or macarons for an elevated treat. The subtle vanilla flavor complements almost any baked good without overpowering it, letting both elements shine.
Recipe FAQs
Can I substitute salted butter? Yes, but omit any additional salt.
How do I fix runny buttercream? Add more powdered sugar, tablespoon by tablespoon.
Why beat the butter for so long? This creates the signature silky texture.
Can I make colored buttercream? Absolutely! Add gel food coloring gradually.
Does buttercream need refrigeration? Yes, after 2 days at room temperature.
Can I use milk instead of heavy cream? Possible, but cream creates superior silkiness.
- 0 Facebook
- 14 Pinterest
- 1 Email
- Copy Link
- 15 shares
The Ultimate Silky Buttercream Frosting Secret
Ingredients
Instructions
- Beat
the unsalted butter in a large bowl using an electric mixer on medium-high speed for 3-5 minutes until it becomes noticeably lighter in color and fluffy in texture. This extended beating is the true secret to silky buttercream!
- Reduce
the mixer speed to low and gradually add 1 cup of powdered sugar. Once incorporated, add another cup and mix until completely combined. I always scrape down the sides of the bowl between additions to ensure everything mixes evenly.
- Add
the final cup of powdered sugar and mix on low until just combined, then increase to medium speed and beat for another minute until the mixture looks light and fluffy.
- Pour
in the heavy whipping cream and vanilla extract, then beat on medium-high speed for 2-3 minutes. The cream will transform the texture from stiff to silky smooth.
- Test
the consistency by lifting some frosting with your spatula – it should hold a soft peak that gently folds over. If it’s too stiff, add another teaspoon of cream; if too loose, add a tablespoon of powdered sugar.
- Whip
for a final 30 seconds on high speed to incorporate maximum air for the silkiest possible texture. The frosting should look almost white and feel incredibly smooth between your fingers.
- Use
immediately for decorating, or store in an airtight container. This frosting pipes beautifully through decorating tips and spreads with effortless elegance on any dessert.
Notes
Room temperature matters : Butter should be soft enough to indent with light pressure but still hold its shape—about 65-68°F is ideal for maximum air incorporation.
Extended beating is essential : I’ve found that beating the butter alone for a full 5 minutes creates that professional silky texture that’s impossible to achieve with shortcuts.
Add sugar gradually : Dumping all 3 cups of powdered sugar at once creates lumps and graininess—adding in 1-cup increments allows each portion to fully incorporate.
Heavy cream temperature : Using room temperature heavy cream (not cold from the refrigerator ) helps it blend seamlessly without causing the butter to seize or separate.
Scrape the bowl frequently : Unmixed butter hiding on the sides or bottom of your mixing bowl can ruin your frosting’s texture—I scrape thoroughly between each ingredient addition.
Taste before finishing : The vanilla extract amount is just a starting point—sometimes an extra splash elevates the flavor from good to unforgettable without affecting consistency.
Nutrition
| Serving Size | 1 tablespoon |
|---|---|
| Calories | 100 calories |
| Sugar Content | 17 grams |
| Sodium Content | 20 mg |
| Fat Content | 5 grams |
| Saturated Fat Content | 3 grams |
| Unsaturated Fat Content | 1 gram |
| Trans Fat Content | 0 grams |
| Carbohydrate Content | 11 grams |
| Fiber Content | 0 grams |
| Protein Content | 0 grams |
| Cholesterol Content | 15 mg |