- 0 Facebook
- 6 Pinterest
- 0 Email
- Copy Link
- 6 shares
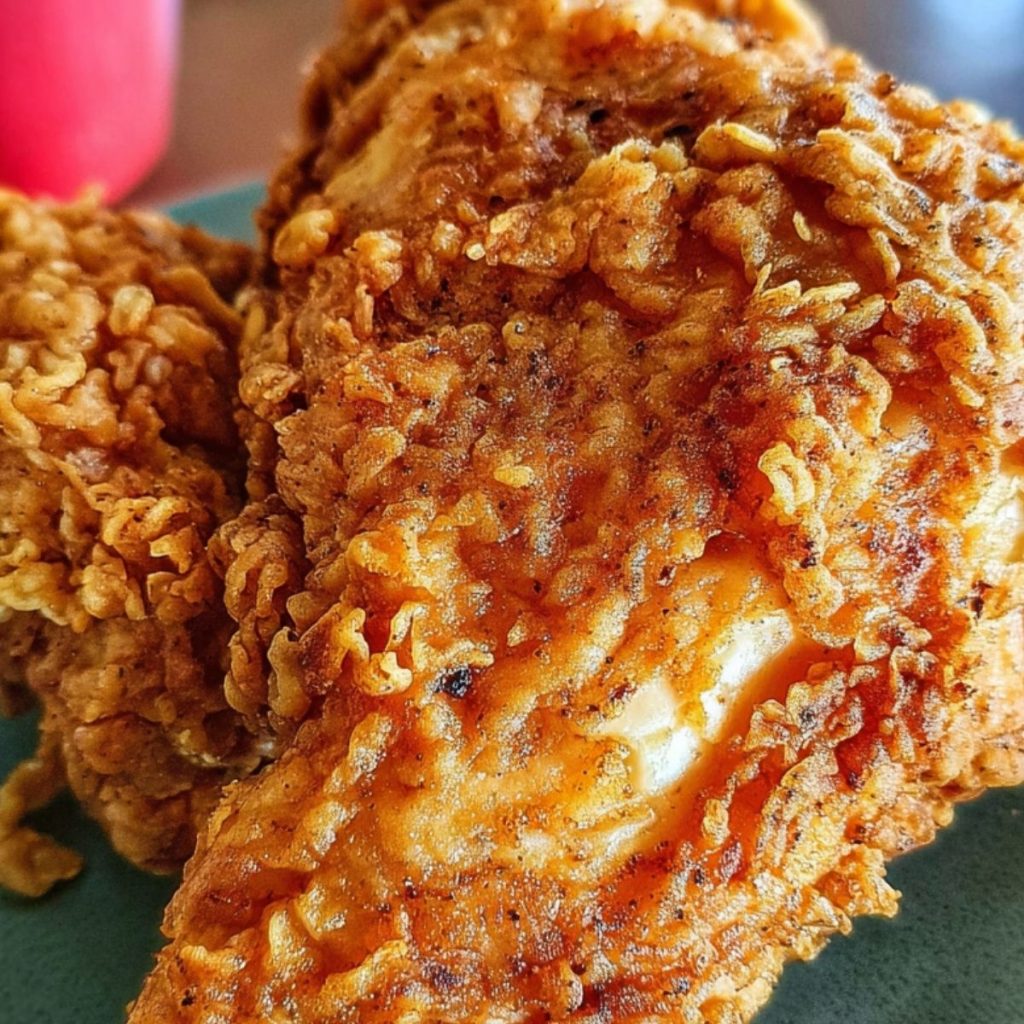
Golden, audibly crunchy on the outside with juicy, tender meat on the inside — this Better Than Takeout Crispy Fried Chicken delivers restaurant-quality results right from your own kitchen. The secret lies in the magical combination of flour and cornstarch coating that creates that unmistakable crackly exterior, while a tangy yogurt marinade ensures the chicken stays remarkably moist. A final brush of sweet-salty soy glaze takes these crispy morsels from excellent to extraordinary. Pair with crispy homemade fries or a bright coleslaw for the ultimate comfort food experience that puts the drive-thru version to shame.
Why You’ll Love This Recipe
This Better Than Takeout Crispy Fried Chicken delivers restaurant-quality results with surprisingly simple techniques. Every element has been carefully refined to create the ultimate homemade fried chicken experience.
- Unbeatable Crunch Factor : The magical combination of flour and cornstarch creates that distinctive audible crackle when you bite into the perfectly golden crust.
- Never-Dry Technique : The Greek yogurt marinade works as both a flavor enhancer and tenderizer, ensuring juicy, succulent meat inside that crispy shell.
- Balanced Flavor Profile : Eleven carefully selected spices blend to create depth without overwhelming heat, making this appealing to both adventurous eaters and those with milder preferences.
- Restaurant-Quality Hack : The post-fry soy glaze adds a sweet-savory dimension that elevates this chicken beyond standard homemade versions and rivals high-end restaurant offerings.
- Make-Ahead Friendly : The coating mixture can be prepared days in advance, and the chicken can marinate overnight for even deeper flavor and weeknight convenience.
Ingredient Breakdown with Tips
The secret to truly exceptional crispy fried chicken lies in understanding what each ingredient brings to the dish. Every component plays a crucial role in creating that perfect balance of crunchy exterior and juicy, flavorful meat that makes homemade fried chicken worth the effort.
- Boneless, Skinless Chicken Thighs : These are the foundation of this recipe, offering more flavor and moisture than breast meat. Thighs remain tender even when slightly overcooked, making them forgiving for frying beginners.
- All-Purpose Flour : Creates the base of your coating and provides structure to the crust. For extra tenderness, you can substitute up to half with cake flour.
- Argo® Corn Starch : The key to achieving that restaurant-quality crispiness. Corn starch creates a lighter, more delicate and shatteringly crisp exterior that stays crunchy longer than flour alone.
- Chili Powder : Adds a gentle warmth and depth of flavor without overwhelming heat. Look for standard American chili powder (which is a blend), not pure ground chilies.
- Garlic Salt : Provides both seasoning and savory depth in one ingredient. If you prefer to control salt levels separately, substitute with garlic powder and add salt to taste.
- Onion Powder : Contributes a sweet, aromatic quality that enhances the savory flavors. Always check that it’s fresh—older onion powder can lose potency.
- Dried Dill : An unexpected herb that adds brightness and complexity to the seasoning blend. Its subtle tang helps cut through the richness of fried food.
- Dried Ginger : Introduces a warm, slightly spicy note that amplifies the other spices. Ground ginger loses potency quickly, so replace it every six months for best results.
- Dry Mustard : Acts as a flavor enhancer that brings out the savory qualities of the chicken. If unavailable, substitute with half the amount of prepared mustard in the marinade.
- Black Pepper : Provides essential heat and aroma. Freshly ground offers significantly more flavor than pre-ground varieties.
- Nutmeg : Adds a subtle warmth and complexity that most people won’t identify but will definitely miss if omitted. A little goes a long way—don’t be tempted to add extra.
- Greek Yogurt : Creates a tangy marinade that tenderizes the chicken while adding moisture. Full-fat version works best, though 2% can be substituted in a pinch.
- Lemon Juice : Acts as both a flavor enhancer and tenderizer by gently breaking down muscle fibers in the chicken. Fresh is always preferable to bottled.
- Water : Thins the yogurt marinade to ensure even coating. In a pinch, buttermilk can be substituted for both the yogurt/water combination for a more traditional approach.
- Vegetable Oil : Ideal for frying due to its high smoke point and neutral flavor. Canola or peanut oil work excellently as alternatives.
- Soy Sauce : Forms the savory foundation of the glaze. Low-sodium versions allow better control over the final saltiness.
- Brown Sugar : Balances the saltiness of the soy sauce with caramel-like sweetness. Dark brown sugar provides deeper molasses notes than light brown.
- Cornstarch (for glaze) : Thickens the glaze to create a coating that clings perfectly to the crispy chicken. Always mix with cold water before adding to hot liquids to prevent lumps.
- Cold Water : Creates a slurry with cornstarch that prevents lumping when thickening the glaze. Must be cold to properly dissolve the cornstarch.
How to Make Better Than Takeout Crispy Fried Chicken
- Combine 2 cups of Greek yogurt, 1 tablespoon of lemon juice, and 1/2 cup of water in a large bowl. Add the chicken thighs, ensuring they’re fully submerged, and marinate for at least 30 minutes (I find overnight in the refrigerator yields the most tender results).
- Mix the dry coating ingredients in a large shallow dish: 2 cups flour, 1 cup cornstarch, chili powder, garlic salt, onion powder, dried dill, dried ginger, dry mustard, black pepper, and nutmeg until well combined.
- Remove chicken thighs from the marinade, allowing excess to drip off. Dredge each piece thoroughly in the seasoned flour mixture, pressing firmly to ensure the coating adheres to all surfaces.
- Heat 4-6 cups of vegetable oil in a deep frying pan or Dutch oven to 350°F (175°C). The oil should be about 2 inches deep – too little and the chicken won’t cook evenly, too much and you risk dangerous overflow.
- Carefully lower 3-4 chicken pieces into the hot oil (don’t overcrowd!) and fry for 6-7 minutes per side until deeply golden brown and crispy. The internal temperature should reach 165°F when tested with a meat thermometer.
- While the chicken fries, prepare the glaze by whisking together soy sauce and brown sugar in a small saucepan over medium heat. In a separate bowl, mix 1 tablespoon cornstarch with 4 tablespoons cold water until smooth, then whisk into the simmering soy mixture until it thickens to a glossy sauce.
- Transfer fried chicken pieces to a wire rack set over a baking sheet (not paper towels – they make the bottom soggy!). Brush each piece generously with the warm soy glaze for that restaurant-quality finish.
- Serve immediately for maximum crunch, or keep warm in a 200°F oven for up to 30 minutes if cooking multiple batches.
Remember: The oil temperature will drop when you add the chicken, so monitor with a thermometer and adjust your heat as needed to maintain around 350°F for perfectly crispy results.
Serving Suggestions
This Better Than Takeout Crispy Fried Chicken deserves to be the star of your meal, but the right accompaniments can elevate it even further into a memorable dining experience.
For a classic comfort food pairing, serve these glazed crispy thighs alongside creamy mashed potatoes or crispy french fries – the contrast between the crunchy chicken coating and fluffy potatoes is simply irresistible. I like to add a vibrant vegetable side like quick-pickled cucumber slices or tangy coleslaw with apple cider vinegar dressing to cut through the richness of the fried chicken.
For a more contemporary presentation, arrange the glazed chicken thighs over steamed jasmine rice with a sprinkle of sesame seeds and sliced green onions. The sweet-savory soy glaze pairs beautifully with Asian-inspired sides like simple stir-fried vegetables or a cucumber-radish salad dressed with rice vinegar.
When entertaining, I serve this crispy fried chicken family-style on a large platter with extra glaze on the side for dipping. Add small ramekins of chili crisp oil or honey-sriracha sauce for guests who enjoy an extra flavor boost. Complete your spread with cold beer, sparkling lemonade, or a crisp white wine to complement the bold flavors of the spice blend and sweet-salty glaze.
Make It Your Way: Variations & Substitutions
Every kitchen and cook is different, so don’t be afraid to adapt this recipe to suit your pantry and preferences. The beauty of homemade fried chicken is its flexibility!
- Spice level adjustments: Love heat? Double the chili powder and add 1-2 teaspoons of cayenne pepper to the flour mixture. For a milder version that’s kid-friendly, reduce the chili powder by half and emphasize the garlic and onion powders instead.
- Protein options: While chicken thighs offer the juiciest results, you can substitute boneless chicken breasts (pound them to even thickness first) or even chicken tenders for a quicker-cooking option. I’ve even used this coating on firm white fish for amazing fish and chips!
- Dietary adaptations: Make this gluten-free by swapping the all-purpose flour for your favorite cup-for-cup gluten-free flour blend. The cornstarch already helps with crispiness, so the transition works beautifully.
- Marinating alternatives: No Greek yogurt? Buttermilk makes an excellent substitute, or mix regular plain yogurt with a splash more lemon juice. In a real pinch, even regular milk with a tablespoon of vinegar will work as a quick marinade.
- Sauce variations: The soy glaze can be customized countless ways—add a tablespoon of honey for sweetness, mix in sriracha for heat, or stir in minced garlic and ginger for an Asian-inspired flavor profile. Sometimes I skip the glaze entirely and toss the hot fried chicken in buffalo sauce or brush with maple syrup for a sweet-savory finish.
- Cooking method flexibility: While deep frying gives the absolute best results, you can shallow fry in less oil (about 1 inch deep) if needed. For a lighter version, spray the coated chicken with cooking oil and air fry at 375°F for 12-15 minutes, turning halfway through—you’ll sacrifice some crispiness but still get delicious results.
Expert Tips for Better Than Takeout Crispy Fried Chicken
These insider tricks will help you achieve that perfect restaurant-quality crispy fried chicken at home:
• Double-dredge for extra crunch: After the first coating, dip chicken thighs back in the yogurt mixture, then dredge again in the flour-cornstarch blend for an extra-thick, shatteringly crispy crust.
• Watch your oil temperature: I’ve found that maintaining 350°F is crucial – too hot and the coating burns before the chicken cooks; too cool and you’ll get greasy, soggy chicken. An instant-read thermometer is essential.
• Rest before glazing: Let your fried chicken rest on the wire rack for 2-3 minutes before applying the soy-brown sugar glaze. This brief pause allows the crust to set, preventing it from becoming soggy.
• Prep the spice blend ahead: I often mix double batches of the seasoned flour (with all those wonderful spices like dried dill and nutmeg) and store the extra in an airtight container for up to 3 months – perfect for impromptu crispy fried chicken cravings!
• Serve with acid: The rich, crispy chicken thighs pair perfectly with something acidic like pickles, coleslaw with vinegar, or a squeeze of fresh lemon to cut through the richness.
Storage & Freezing
This Better Than Takeout Crispy Fried Chicken can be stored properly to enjoy later, though it’s definitely at its crispiest when fresh. Store leftovers in an airtight container in the refrigerator for up to 3 days. I recommend placing a paper towel in the container to absorb excess moisture, which helps preserve the coating’s integrity.
For freezing, allow the chicken to cool completely before placing pieces in a single layer on a baking sheet to flash-freeze for 1-2 hours. Once frozen, transfer to freezer bags or airtight containers, separating layers with parchment paper. The chicken will maintain good quality for up to 2 months in the freezer. Note that the soy glaze may penetrate the coating during freezing, slightly altering the texture.
To reheat refrigerated chicken, place pieces on a wire rack set over a baking sheet and warm in a 350°F oven for 10-15 minutes until heated through and the coating crisps up again. For frozen chicken, thaw overnight in the refrigerator before reheating using the same method, though you may need to add a few extra minutes. Avoid microwaving if possible—it will leave your once-crispy chicken disappointingly soggy. A quick trick: spritz frozen pieces with a little oil before reheating to help restore some of the original crunch.
Make Ahead Options
This Better Than Takeout Crispy Fried Chicken is perfect for meal prep enthusiasts who want restaurant-quality results without the weeknight stress! You can prepare the seasoned flour coating mixture up to 3 days in advance and store it in an airtight container. The chicken can marinate in the Greek yogurt mixture for up to 24 hours in the refrigerator (longer marinating actually improves tenderness and flavor). For maximum convenience, coat the marinated chicken pieces and arrange them on a baking sheet up to 4 hours before frying—just cover and refrigerate to maintain the coating’s integrity. When ready to serve, simply heat your oil and fry as directed, finishing with the fresh soy glaze for that signature sweet-savory kick that makes homemade taste even better than takeout.
Recipe FAQs
Can I use chicken breast instead of thighs? Yes, but thighs stay juicier when fried.
How long should I marinate the chicken? At least 30 minutes, overnight for best results.
Can I make the coating gluten-free? Substitute with gluten-free flour blend plus cornstarch.
Why use cornstarch in the coating? Creates that signature shatteringly crispy crust.
Is there a way to make this without frying? I don’t recommend it for authentic crispy chicken.
Can I prepare the glaze ahead of time? Yes, reheat gently before brushing on chicken.
- 0 Facebook
- 6 Pinterest
- 0 Email
- Copy Link
- 6 shares
Better Than Takeout Crispy Fried Chicken
Ingredients
Instructions
Combine 2 cups of Greek yogurt, 1 tablespoon of lemon juice, and 1/2 cup of water in a large bowl. Add the chicken thighs, ensuring they’re fully submerged, and marinate for at least 30 minutes.
Mix the dry coating ingredients in a large shallow dish: 2 cups flour, 1 cup cornstarch, chili powder, garlic salt, onion powder, dried dill, dried ginger, dry mustard, black pepper, and nutmeg until well combined.
Remove chicken thighs from the marinade, allowing excess to drip off. Dredge each piece thoroughly in the seasoned flour mixture, pressing firmly to ensure the coating adheres to all surfaces.
Heat 4-6 cups of vegetable oil in a deep frying pan or Dutch oven to 350°F (175°C).
Carefully lower 3-4 chicken pieces into the hot oil and fry for 6-7 minutes per side until deeply golden brown and crispy.
While the chicken fries, prepare the glaze by whisking together soy sauce and brown sugar in a small saucepan over medium heat.
Transfer fried chicken pieces to a wire rack set over a baking sheet. Brush each piece generously with the warm soy glaze.
Serve immediately for maximum crunch, or keep warm in a 200°F oven for up to 30 minutes.
Notes
Double-dredge for extra crunch: After the first coating, dip chicken thighs back in the yogurt mixture, then dredge again in the flour-cornstarch blend for an extra-thick, shatteringly crispy crust.
Watch your oil temperature: Maintaining 350°F is crucial.
Rest before glazing: Let your fried chicken rest on the wire rack for 2-3 minutes before applying the soy-brown sugar glaze.
Prep the spice blend ahead: Mix double batches of the seasoned flour and store the extra in an airtight container.
Serve with acid: The rich, crispy chicken thighs pair perfectly with something acidic like pickles or coleslaw with vinegar.
Nutrition
| Serving Size | 1 thigh |
|---|---|
| Calories | 450 calories |
| Sugar Content | 2g |
| Sodium Content | 800mg |
| Fat Content | 30g |
| Saturated Fat Content | 5g |
| Unsaturated Fat Content | 20g |
| Trans Fat Content | 0g |
| Carbohydrate Content | 30g |
| Fiber Content | 1g |
| Protein Content | 30g |
| Cholesterol Content | 120mg |