- 0 Facebook
- 15 Pinterest
- 0 Email
- Copy Link
- 15 shares
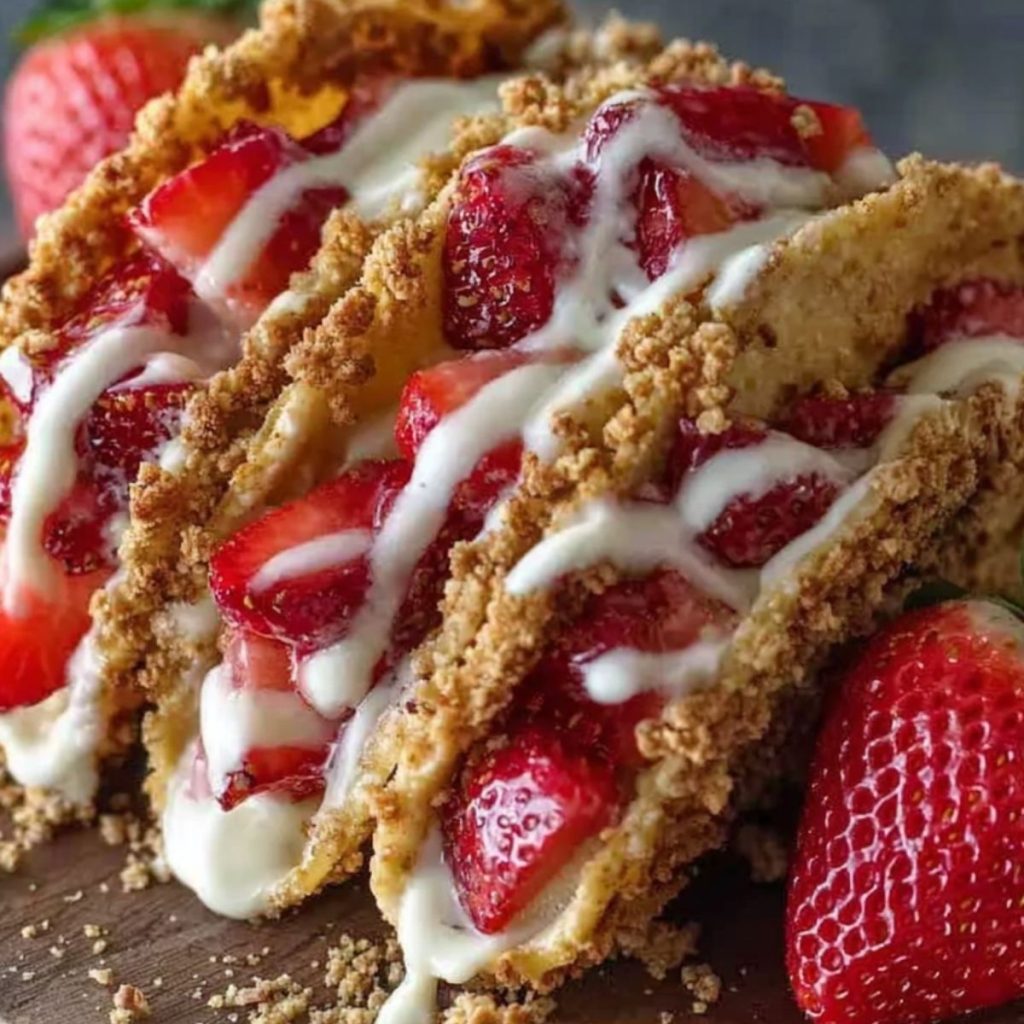
These strawberry crunch cheesecake tacos transform ordinary tortillas into a dessert sensation that’s both elegant and playful. Crispy flour shells cradle velvety cheesecake filling, while the signature strawberry crunch topping adds a delightful textural contrast with each bite. The sweet-tart berry flavor mingles perfectly with creamy white chocolate, creating a dessert that looks as beautiful as it tastes. Serve these unique treats with fresh strawberries on the side for a show-stopping finale to any meal.
Why You’ll Love This Recipe
These Strawberry Crunch Cheesecake Tacos combine classic dessert flavors with a fun, unexpected presentation that makes them perfect for everything from casual family nights to special celebrations.
- Perfectly Balanced Textures : The crispy baked tortilla shells provide the ideal contrast to the silky-smooth cheesecake filling, while the strawberry crunch adds that satisfying crackle with every bite.
- Quick Assembly Magic : Transform simple ingredients into an impressive dessert in just 20 minutes of prep time—perfect for those last-minute dessert emergencies or when the sweet tooth strikes unexpectedly.
- Crowd-Pleasing Presentation : These picture-perfect dessert tacos consistently earn wide-eyed reactions and “where did you get this recipe?” questions whenever they make an appearance at gatherings.
- Versatile Serving Options : The tacos work beautifully as individual desserts for dinner parties, can be arranged on a platter for buffet-style serving, or cut in half for elegant bite-sized treats at larger gatherings.
- Foolproof Success : The technique of brushing tortillas with butter before baking guarantees that perfect crisp shell that holds up to filling without becoming soggy—a professional touch that ensures dessert success every time.
Ingredient Notes
Each component in these Strawberry Crunch Cheesecake Tacos plays a vital role in creating the perfect balance of textures and flavors that make this dessert so irresistible. Understanding how these ingredients work together helps ensure your tacos turn out picture-perfect every time.
- Flour tortillas : Choose large (8-10 inch) tortillas for the perfect taco-sized dessert shells. Look for fresh, pliable tortillas without tears or dry edges, as they’ll form more uniform shells when baked.
- Unsalted butter : Brushing tortillas with melted butter creates that gorgeous golden-brown color and adds a subtle richness. The unsalted variety allows you to control the final flavor balance of your dessert.
- White chocolate : Opt for high-quality white chocolate bars rather than chips, as they melt more smoothly. The creamy sweetness creates the perfect binding agent for the strawberry crunch while adding luxurious flavor.
- Strawberry crunch : This signature element combines crushed cookies with freeze-dried strawberries for that iconic pink-speckled appearance and berry flavor. Make extra to store in an airtight container—it keeps well and makes a delicious topping for ice cream or yogurt.
- Cheesecake filling : A smooth, room-temperature cream cheese base ensures easy spreading inside your taco shells. For the richest flavor, use full-fat cream cheese and fold ingredients gently to maintain that airy texture.
- Fresh strawberries : Choose vibrant, fully ripe berries for garnishing. Their natural acidity beautifully cuts through the richness of the cheesecake and white chocolate components.
Step-by-Step Instructions
- Preheat your oven to 350°F (175°C). Lightly brush both sides of each flour tortilla with melted butter, making sure to cover the entire surface for even browning.
- Drape each tortilla over the bars of your oven rack, creating a taco shell shape. Bake for 5-7 minutes until the shells turn golden brown and crispy. I find that checking at the 5-minute mark prevents any over-browning.
- Remove the taco shells carefully and allow them to cool completely on a wire rack. They’ll continue to harden as they cool, creating the perfect crisp vessel for your filling.
- Break the white chocolate into small pieces and melt in a microwave-safe bowl, heating in 30-second intervals and stirring between each until smooth. Be patient here—overheating can cause the chocolate to seize.
- Mix about half of the melted white chocolate with the strawberry crunch topping until well combined. Set aside both the mixture and the remaining plain melted chocolate.
- Fill each cooled taco shell with a generous scoop of cheesecake filling, spreading it evenly inside the shell. The filling should be thick enough to hold its shape but still creamy.
- Drizzle the remaining plain white chocolate over each filled taco, then immediately sprinkle with the strawberry crunch mixture before the chocolate sets.
- Let the tacos set for about 10 minutes before serving. These beauties are best enjoyed right away while the shells are still perfectly crisp and the contrasting textures are at their peak!
Tips for the Best Strawberry Crunch Cheesecake Tacos
Here are my tested tricks for making these showstopping dessert tacos perfect every time:
- Perfect your shell shape : For evenly shaped taco shells, drape tortillas between oven rack bars with equal spacing. I sometimes use aluminum foil rolls to create custom molds if needed.
- Watch that white chocolate : Melt white chocolate slowly and remove from heat when a few pieces remain – they’ll melt with residual heat. This prevents the chocolate from seizing or becoming grainy.
- Cool completely : Allow your tortilla shells to cool fully before filling. I’ve learned the hard way that warm shells can start to soften your cheesecake filling and compromise that perfect texture contrast.
- Make-ahead magic : Prepare the shells and strawberry crunch mixture up to a day ahead, but fill just before serving. This keeps the Strawberry Crunch Cheesecake Tacos at their crispy best.
- Filling consistency matters : Your cheesecake filling should be firm enough to hold its shape but soft enough to spread. If it’s too runny, chill it for 20 minutes; if too firm, let it warm slightly at room temperature.
Make-Ahead Tips for Strawberry Crunch Cheesecake Tacos
These Strawberry Crunch Cheesecake Tacos are a meal prep dream for busy dessert lovers! You can bake the crispy tortilla shells up to 2 days ahead and store them in an airtight container at room temperature (they’ll actually maintain their crunch better this way). The cheesecake filling can be prepared and refrigerated for up to 3 days in advance, and the strawberry crunch mixture stays fresh in a sealed container for up to a week. When ready to serve, simply let the chilled filling come to room temperature for easier spreading (about 15 minutes), then assemble your tacos with the white chocolate drizzle and toppings—you’ll have an impressive dessert ready in just 5 minutes with all the homemade flavor intact!
Serving Suggestions
These Strawberry Crunch Cheesecake Tacos deserve a presentation that’s as special as their unique flavor combination. With just a few thoughtful additions, you can transform this already impressive dessert into an unforgettable finale for any meal.
I love arranging these tacos on a long white rectangular platter, slightly overlapping them and surrounded by fresh strawberry halves for a pop of vibrant color. For an extra-special touch, serve each taco on individual dessert plates with a small scoop of vanilla bean ice cream alongside—the creamy coldness creates a delightful temperature contrast with the crispy taco shells.
For drinks, these pair beautifully with coffee-based beverages like a cappuccino or latte, which balance the sweetness perfectly. If you’re serving these at a celebration, consider a sparkling rosé or even a strawberry mimosa for a festive touch. For family gatherings, I’ve found that a simple strawberry-infused water with mint leaves makes a refreshing non-alcoholic option that complements the dessert’s flavors.
When entertaining, consider setting up a DIY Strawberry Crunch Cheesecake Taco bar with pre-baked shells, the cheesecake filling in a piping bag, and small bowls of white chocolate drizzle and strawberry crunch topping. Guests can assemble their own dessert tacos, making the experience interactive and memorable—perfect for birthday parties or casual get-togethers.
Storage & Freezing
These Strawberry Crunch Cheesecake Tacos are best enjoyed fresh, but if you need to store leftovers, there are some important considerations to maintain their delightful textures and flavors.
For short-term storage, place assembled tacos in an airtight container and refrigerate for up to 2 days. The crispy shells will gradually soften as they absorb moisture from the filling, so I recommend placing a paper towel beneath them to absorb excess moisture. For best results, store the components separately if possible – keep the baked shells at room temperature in a sealed container, and refrigerate the filling and toppings separately.
While freezing complete tacos isn’t recommended (the shells become soggy when thawed), you can freeze the cheesecake filling for up to a month. When ready to serve, simply thaw overnight in the refrigerator , then fill freshly-made taco shells. The strawberry crunch topping also freezes beautifully in an airtight container for up to 3 months – a great way to have it on hand for spontaneous dessert making!
To revive slightly softened shells, place them on a baking sheet in a 325°F oven for 3-5 minutes. This quick reheat will restore some crispness without burning the shells or melting the filling. Let them cool slightly before serving for that perfect crisp-creamy contrast that makes these Strawberry Crunch Cheesecake Tacos so irresistible.
Variations & Substitutions
These Strawberry Crunch Cheesecake Tacos are wonderfully versatile—feel free to customize them based on your preferences or what you have on hand. Here’s how to make them uniquely yours:
- Shell alternatives : Substitute flour tortillas with cinnamon sugar tortillas for extra sweetness, or try mini waffle cones for a fun ice cream parlor twist. I’ve even used pre-made fortune cookies (cracked open) for bite-sized versions that disappear in seconds at parties!
- Berry flavor swaps : Replace the strawberry crunch with raspberry or blueberry by using those freeze-dried fruits instead. Each brings its own unique tartness that pairs beautifully with the creamy cheesecake filling.
- Chocolate options : White chocolate works perfectly, but dark or milk chocolate creates a delicious contrast with the strawberry flavors. For a marbled effect, drizzle with both white and dark chocolate before adding the crunch topping.
- Dietary adaptations : Make these gluten-free by using corn tortillas or gluten-free flour tortillas. For a dairy-free version, substitute the butter with coconut oil and use plant-based cream cheese and dairy-free white chocolate.
- Flavor boosters : Add a tablespoon of lemon zest to the cheesecake filling for a bright citrus note, or incorporate a teaspoon of almond extract for subtle nutty warmth that enhances the strawberry flavor.
- Mini dessert platter : Create bite-sized versions using small tortillas cut with a round cookie cutter, then fold into mini tacos. These make perfect two-bite desserts for larger gatherings where guests want to sample several treats.
Recipe FAQs
Can I make these tacos ahead of time? Best assembled just before serving.
What’s in the strawberry crunch topping? Crushed cookies and freeze-dried strawberries.
Can I use corn tortillas instead? Flour tortillas work best for dessert tacos.
How do I prevent soggy taco shells? Cool completely before filling.
Can I use dark chocolate instead? White chocolate pairs better with strawberry flavors.
How long will leftover strawberry crunch keep? Up to two weeks in an airtight container.
- 0 Facebook
- 15 Pinterest
- 0 Email
- Copy Link
- 15 shares
Irresistible Strawberry Crunch Cheesecake Tacos
Ingredients
Instructions
Preheat your oven to 350°F (175°C). Lightly brush both sides of each flour tortilla with melted butter, making sure to cover the entire surface for even browning.
Drape each tortilla over the bars of your oven rack, creating a taco shell shape. Bake for 5-7 minutes until the shells turn golden brown and crispy. I find that checking at the 5-minute mark prevents any over-browning.
Remove the taco shells carefully and allow them to cool completely on a wire rack. They’ll continue to harden as they cool, creating the perfect crisp vessel for your filling.
Break the white chocolate into small pieces and melt in a microwave-safe bowl, heating in 30-second intervals and stirring between each until smooth. Be patient here—overheating can cause the chocolate to seize.
Mix about half of the melted white chocolate with the strawberry crunch topping until well combined. Set aside both the mixture and the remaining plain melted chocolate.
Fill each cooled taco shell with a generous scoop of cheesecake filling, spreading it evenly inside the shell. The filling should be thick enough to hold its shape but still creamy.
Drizzle the remaining plain white chocolate over each filled taco, then immediately sprinkle with the strawberry crunch mixture before the chocolate sets.
Let the tacos set for about 10 minutes before serving. These beauties are best enjoyed right away while the shells are still perfectly crisp and the contrasting textures are at their peak!
Notes
Perfect your shell shape : For evenly shaped taco shells, drape tortillas between oven rack bars with equal spacing. I sometimes use aluminum foil rolls to create custom molds if needed.
Watch that white chocolate : Melt white chocolate slowly and remove from heat when a few pieces remain – they’ll melt with residual heat. This prevents the chocolate from seizing or becoming grainy.
Cool completely : Allow your tortilla shells to cool fully before filling. I’ve learned the hard way that warm shells can start to soften your cheesecake filling and compromise that perfect texture contrast.
Make-ahead magic : Prepare the shells and strawberry crunch mixture up to a day ahead, but fill just before serving. This keeps the Strawberry Crunch Cheesecake Tacos at their crispy best.
Filling consistency matters : Your cheesecake filling should be firm enough to hold its shape but soft enough to spread. If it’s too runny, chill it for 20 minutes; if too firm, let it warm slightly at room temperature.
Nutrition
| Serving Size | 1 taco |
|---|---|
| Calories | 300 calories |
| Sugar Content | 15g |
| Sodium Content | 120mg |
| Fat Content | 15g |
| Saturated Fat Content | 9g |
| Unsaturated Fat Content | 4g |
| Trans Fat Content | 0g |
| Carbohydrate Content | 40g |
| Fiber Content | 2g |
| Protein Content | 4g |
| Cholesterol Content | 25mg |