- 0 Facebook
- 10 Pinterest
- 1 Email
- Copy Link
- 11 shares
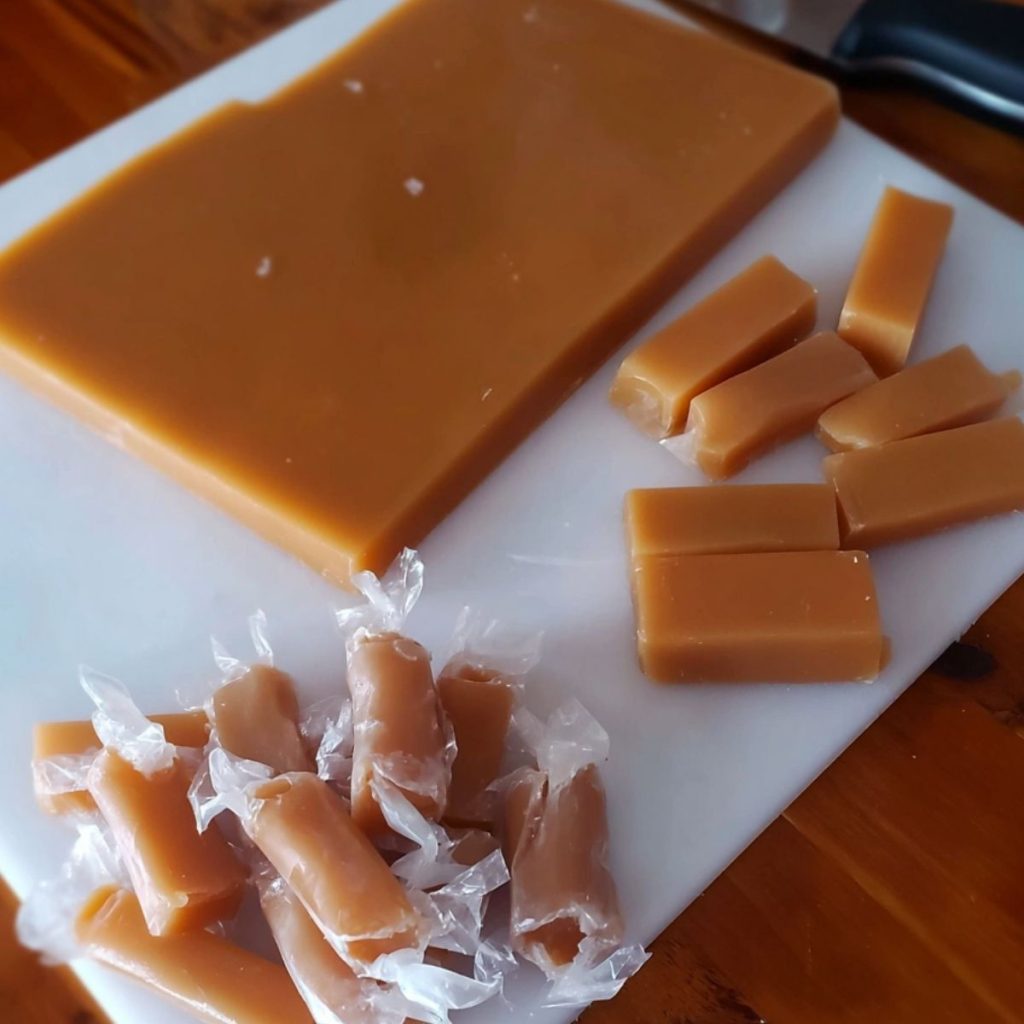
These buttery, melt-in-your-mouth homemade caramels deliver surprising luxury with minimal effort — just six minutes from start to sweet satisfaction. Golden ribbons of caramel with the perfect chewy texture offer that irresistible balance of deep butterscotch notes and vanilla warmth that store-bought versions simply can’t match. A light sprinkle of flaky sea salt on top creates that magical sweet-savory contrast that makes these treats truly special. Wrap them individually in wax paper for charming handmade gifts, or keep the batch close for moments of pure indulgence.
Why It’s a Trusted Favorite
These Six Minute Caramels have converted even the most skeptical home cooks into confident confectioners. Here’s why this recipe deserves a permanent spot in your collection:
- Foolproof Simplicity : The microwave method eliminates the need for candy thermometers or constant stovetop monitoring, making this recipe accessible to beginners and experts alike.
- Gift-Worthy Results : These caramels set up with the perfect chewy texture that strikes the ideal balance between soft and firm—professional-quality treats anyone would be proud to share.
- Flavor Customization Potential : The basic recipe creates a beautiful buttery canvas that welcomes variations like chocolate drizzles, crushed pretzels, or even a pinch of cardamom for seasonal flair.
- Quality Control Advantage : Homemade means no artificial preservatives or flavors—just pure, pronounceable ingredients creating that authentic caramel richness that’s increasingly rare in commercial candies.
- Time-Tested Technique : The quick microwave intervals prevent scorching while still allowing the sugars to caramelize properly, creating that complex depth of flavor typically associated with much more labor-intensive methods.
Ingredient Breakdown with Tips
The secret to perfect Six Minute Caramels lies in understanding how each ingredient contributes to the final texture and flavor. Quality ingredients make all the difference between ordinary candy and these unforgettable homemade treats.
- Salted butter : Provides rich, creamy flavor and essential fat that gives caramels their signature melt-in-your-mouth quality. Use European-style butter with higher butterfat content for extra richness if available.
- Light corn syrup : Prevents sugar crystallization, ensuring your caramels stay perfectly smooth and chewy. This ingredient is crucial for texture stability and cannot be skipped for reliable results.
- Granulated sugar : Creates the basic sweetness and helps form the proper candy structure. For even cooking, ensure the sugar is fully incorporated before microwaving.
- Light brown sugar : Adds depth with its molasses content, bringing that distinctive caramel flavor profile. Pack it firmly when measuring to ensure consistency across batches.
- Sweetened condensed milk : Contributes creaminess, body, and that distinctive caramel color when heated. Avoid substituting evaporated milk, which lacks the sugar content needed for proper setting.
- Vanilla extract : Enhances all other flavors while adding its own aromatic warmth. Pure vanilla extract delivers noticeably better flavor than artificial varieties, especially in simple recipes like this.
- Table salt : Balances sweetness and intensifies flavor perception in the caramel itself. This small amount works like a flavor enhancer rather than making the caramels taste salty.
- Sea salt (topping) : Creates that irresistible sweet-savory contrast that elevates homemade caramels to gourmet status. Flaky varieties like Maldon or fleur de sel work best as they provide both texture and visual appeal.
How to Make Irresistible Homemade Caramels: Buttery & Sea-Salted Bliss
- Prepare your workspace by lining an 8×8 inch pan with parchment paper and lightly coating it with cooking spray. This prevents sticking and makes removing the finished caramels effortless.
- Melt the butter completely in a large microwave-safe bowl (I recommend using a 2-quart glass bowl to prevent overflow) for about 30-45 seconds until fully liquified.
- Add the corn syrup, granulated sugar, brown sugar, sweetened condensed milk, vanilla extract, and table salt to the melted butter. Stir until all ingredients are thoroughly combined into a smooth mixture.
- Microwave the mixture on HIGH for 2 minutes, then remove and stir thoroughly. The mixture will begin to bubble around the edges – this is exactly what you want to see happening!
- Return the bowl to the microwave for another 2 minutes on HIGH. When you remove it this time, the mixture should be bubbling more vigorously and have transformed into a beautiful golden caramel color.
- Carefully pour the hot caramel mixture into your prepared pan, using a silicone spatula to spread it evenly. Work quickly as the caramel starts setting fast.
- If using sea salt topping, sprinkle it across the surface while the caramel is still warm. I find this makes all the difference – those little bursts of saltiness against the sweet caramel create an irresistible flavor contrast.
- Allow the caramels to cool completely at room temperature for at least 2 hours before cutting into squares or rectangles. For the cleanest cuts, lightly oil your knife between slices.
Storage & Freezing
These Six Minute Caramels can be stored at room temperature for up to two weeks when kept in an airtight container with parchment paper between layers to prevent sticking. For the best texture and flavor, I recommend keeping them in a cool, dry place away from direct sunlight.
For longer storage, caramels can be refrigerated for up to one month. The cooler temperature will make them firmer, so you might want to let them come to room temperature for about 15 minutes before enjoying if you prefer a softer chew. If your caramels begin to stick together in humid conditions, a light dusting of cornstarch between pieces works wonders.
While these caramels can technically be frozen for up to three months, freezing may slightly alter their texture. If you do freeze them, wrap each piece individually in wax paper first, then place in a freezer-safe container or zip-top bag. Thaw completely at room temperature before serving. The buttery, sweet flavor remains intact, but you might notice they’re slightly less chewy than fresh batches after freezing and thawing.
Make Ahead Options
These Six Minute Caramels are perfect for busy home cooks who love planning ahead! You can prepare the entire batch up to two weeks in advance and store them in an airtight container at room temperature, where they’ll maintain their perfect chewy texture. For gift-giving occasions, wrap individual caramels in wax paper up to one week ahead—they’ll stay fresh and look beautifully professional. The caramel mixture itself can even be made and poured into the prepared pan the night before a busy day, then cut into squares the following morning when you have more time. This make-ahead flexibility means you can enjoy homemade luxury treats without the last-minute rush!
Serving Suggestions
These Six Minute Caramels are delightful on their own, but there are plenty of creative ways to showcase and enjoy these buttery treats!
I love serving these caramels on a wooden board alongside fresh apple slices – the tart, crisp fruit creates a perfect contrast to the sweet, chewy candy. For holiday gatherings, I arrange them on a tiered serving plate with other small treats like shortbread cookies and chocolate truffles for an impressive homemade dessert display.
For gifting, wrap individual caramels in wax paper with twisted ends and present them in a small decorative tin or cellophane bag tied with ribbon. They make charming additions to care packages, hostess gifts, or holiday treat boxes. If you’re feeling adventurous, try dipping half of each caramel in melted dark chocolate before serving – the combination of buttery caramel, sea salt, and rich chocolate is absolutely divine.
These caramels also make a wonderful accompaniment to after-dinner coffee or espresso, as the bitterness of the coffee beautifully balances the sweet, vanilla-infused caramel flavor. For a decadent dessert, try chopping a few caramels and sprinkling them over vanilla ice cream with a drizzle of warm salted caramel sauce for the ultimate caramel lover’s treat.
Expert Tips
After making hundreds of batches of these caramels, I’ve learned a few secrets that guarantee perfect results every time:
- Bowl size matters: Use a 2-quart microwave-safe bowl even though the ingredients only fill about half. The Six Minute Caramels mixture bubbles vigorously and can overflow in smaller containers.
- Watch the texture: The perfect caramel changes color distinctly between the first and second microwave intervals – from pale yellow to a rich amber that indicates proper sugar caramelization.
- Perfect your salt technique: When adding sea salt topping, wait 30-60 seconds after pouring so the caramel firms slightly – this prevents the salt from sinking and disappearing into your beautiful creation.
- Temperature affects chewiness: For softer Six Minute Caramels, reduce the second microwave interval by 15 seconds. For firmer candies that hold shape better when gifting, add 15 seconds (watching carefully to prevent scorching).
- Cutting strategy: Refrigerate the set caramels for 10 minutes before cutting – they’ll be firm enough to slice cleanly but not so hard that they crack or crumble at the edges.
Variations & Substitutions
Don’t be afraid to put your own spin on these delicious caramels! The base recipe creates perfect results, but there are plenty of ways to customize based on what you have on hand or your flavor preferences.
- Dairy-free option : Replace the butter with coconut oil or a plant-based butter stick for a dairy-free version. The texture will be slightly different, but still deliciously chewy with that signature caramel flavor.
- Corn syrup alternatives : I sometimes substitute honey or pure maple syrup for the corn syrup when I want a different flavor profile. These natural sweeteners add their own distinctive notes while still preventing sugar crystallization.
- Flavor infusions : Add 1/4 teaspoon of almond extract alongside the vanilla, or try 1/2 teaspoon of espresso powder for coffee-flavored caramels that pair beautifully with chocolate.
- Texture additions : Fold in 1/3 cup of toasted chopped nuts (pecans, walnuts, or almonds) just before pouring into the pan for added crunch and flavor complexity.
- Chocolate lover’s twist : Once set, dip half of each caramel piece in melted dark, milk, or white chocolate and sprinkle with sea salt for an elevated treat that looks professional.
- Spice it up : Add 1/4 teaspoon of cinnamon, a pinch of cardamom, or a tiny dash of cayenne for caramels with a subtle warming effect that’s especially welcome during colder months.
Recipe FAQs
Can I substitute the corn syrup? Glucose syrup works; honey changes flavor significantly.
How do I know when my caramels are done? They’ll turn golden amber after 4 minutes.
Why did my caramels turn out too hard? You likely microwaved them slightly too long.
Can I add chocolate to these caramels? Drizzle melted chocolate after they’ve cooled completely.
How do I prevent my caramels from sticking together? Wrap individually in wax paper when completely cool.
Can I double this Six Minute Caramels recipe? Yes, use a larger bowl and add 1 minute cooking time.
- 0 Facebook
- 10 Pinterest
- 1 Email
- Copy Link
- 11 shares
Irresistible Homemade Caramels: Buttery & Sea-Salted Bliss
Ingredients
Instructions
Prepare your workspace by lining an 8×8 inch pan with parchment paper and lightly coating it with cooking spray. This prevents sticking and makes removing the finished caramels effortless.
Melt the butter completely in a large microwave-safe bowl (I recommend using a 2-quart glass bowl to prevent overflow) for about 30-45 seconds until fully liquified.
Add the corn syrup, granulated sugar, brown sugar, sweetened condensed milk, vanilla extract, and table salt to the melted butter. Stir until all ingredients are thoroughly combined into a smooth mixture.
Microwave the mixture on HIGH for 2 minutes, then remove and stir thoroughly. The mixture will begin to bubble around the edges – this is exactly what you want to see happening!
Return the bowl to the microwave for another 2 minutes on HIGH. When you remove it this time, the mixture should be bubbling more vigorously and have transformed into a beautiful golden caramel color.
Carefully pour the hot caramel mixture into your prepared pan, using a silicone spatula to spread it evenly. Work quickly as the caramel starts setting fast.
If using sea salt topping, sprinkle it across the surface while the caramel is still warm. I find this makes all the difference – those little bursts of saltiness against the sweet caramel create an irresistible flavor contrast.
Allow the caramels to cool completely at room temperature for at least 2 hours before cutting into squares or rectangles. For the cleanest cuts, lightly oil your knife between slices.
Notes
Bowl size matters: Use a 2-quart microwave-safe bowl even though the ingredients only fill about half. The Six Minute Caramels mixture bubbles vigorously and can overflow in smaller containers.
Watch the texture: The perfect caramel changes color distinctly between the first and second microwave intervals – from pale yellow to a rich amber that indicates proper sugar caramelization.
Perfect your salt technique: When adding sea salt topping, wait 30-60 seconds after pouring so the caramel firms slightly – this prevents the salt from sinking and disappearing into your beautiful creation.
Temperature affects chewiness: For softer Six Minute Caramels, reduce the second microwave interval by 15 seconds. For firmer candies that hold shape better when gifting, add 15 seconds (watching carefully to prevent scorching).
Cutting strategy: Refrigerate the set caramels for 10 minutes before cutting – they’ll be firm enough to slice cleanly but not so hard that they crack or crumble at the edges.
Nutrition
| Serving Size | 1 square |
|---|---|
| Calories | 120 calories |
| Sugar Content | 15g |
| Sodium Content | 10mg |
| Fat Content | 6g |
| Saturated Fat Content | 4g |
| Unsaturated Fat Content | 2g |
| Trans Fat Content | 0g |
| Carbohydrate Content | 18g |
| Fiber Content | 0g |
| Protein Content | 1g |
| Cholesterol Content | 15mg |