- 0 Facebook
- 9 Pinterest
- 0 Email
- Copy Link
- 9 shares
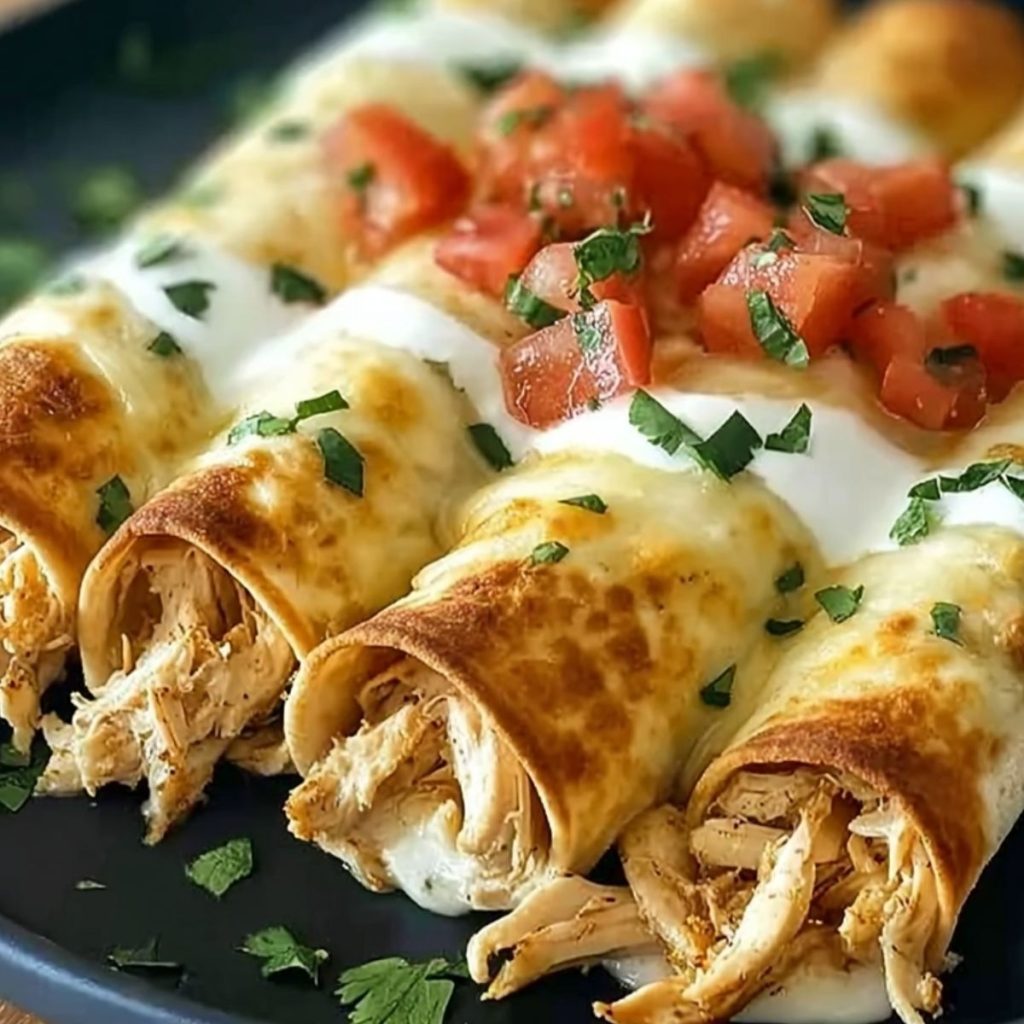
These golden-crispy baked chicken taquitos transform simple ingredients into an irresistible meal that outshines any restaurant version. Creamy cheese melts into perfectly seasoned shredded chicken, all wrapped in tortillas that develop delightful crunch edges in the oven without the mess of deep-frying. The combination of smoky cumin and zesty salsa creates depth of flavor that makes each bite more satisfying than the last. Serve with cool guacamole or sour cream for the perfect temperature contrast that brings the whole dish together.
Why You’ll Love This Recipe
These taquitos deliver restaurant-quality results with surprisingly minimal effort, bringing satisfaction without the takeout price tag. Here’s why they stand out:
- Crispy Without Frying : The baking method creates that satisfying crunch around the edges while keeping the filling moist and eliminating the hassle and calories of deep frying.
- Make-Ahead Marvel : These taquitos can be assembled up to 24 hours in advance and refrigerated until you’re ready to bake, making them perfect for busy weeknight planning.
- Customization Champion : The basic recipe serves as a foundation that easily adapts to spice preferences, cheese varieties, and even protein swaps like shredded beef or black beans for vegetarian options.
- Family-Friendly Favorite : The handheld format appeals to kids and adults alike, while the balanced flavors satisfy sophisticated palates without overwhelming sensitive taste buds.
- Texture Perfection : Each bite delivers three distinct textures—the crispy exterior, the soft tortilla layer, and the creamy, cheesy chicken filling—creating a sensory experience that keeps everyone coming back for more.
Ingredient Breakdown with Tips
The secret to turning simple ingredients into crave-worthy Baked Cream Cheese Chicken Taquitos lies in understanding what each component brings to the dish. Every ingredient plays a specific role in creating that perfect balance of textures and flavors that makes homemade taquitos superior to takeout versions.
- Shredded chicken : Provides the protein foundation and absorbs surrounding flavors beautifully. Rotisserie chicken saves significant time while offering more moisture and flavor than plain baked chicken breast.
- Cream cheese : Creates the luxurious, creamy texture that holds the filling together. Allow it to fully soften at room temperature for 30-45 minutes to ensure it blends smoothly with other ingredients.
- Shredded cheese : Adds stretchy, melty goodness that binds the filling. Monterey Jack offers mild creaminess, while cheddar provides sharper flavor; consider using a combination of both for depth.
- Salsa : Contributes moisture, acidity, and complex flavor with minimal effort. Choose chunky varieties for texture or smooth for easier rolling; homemade fresh salsa elevates the dish even further.
- Ground cumin : Delivers earthy, warm undertones essential for authentic Mexican flavor. Toasting whole cumin seeds and grinding them fresh intensifies the aromatic quality.
- Chili powder : Adds color and mild heat without overwhelming the palate. Look for pure chili powder without added salt for better flavor control.
- Salt and pepper : Crucial for enhancing all other flavors; season conservatively as both the rotisserie chicken and cheeses already contain salt.
- Green onions/cilantro : Brightens the rich filling with freshness and color. Green onions offer milder flavor for cilantro-averse diners while still providing visual appeal.
- Tortillas : Serve as the crispy-edged vessel for your filling. Corn tortillas provide more authentic flavor but can crack when cold; flour tortillas are more pliable and beginner-friendly.
- Cooking spray/olive oil : Creates the golden, crispy exterior that mimics frying. A high-quality oil mister provides even coverage with minimal added fat.
- Dipping sauces : Balance the richness with cooling elements. Prepare these while the taquitos bake so flavors have time to develop.
- Garnishes : Add bright color, fresh flavor, and textural contrast to the finished dish. Prep all garnishes in advance for an impressive presentation that elevates the homemade experience.
Let’s Cook It
- Preheat your oven to 400°F (200°C) and line a baking sheet with parchment paper or spray it with cooking spray to prevent sticking.
- Mix the shredded chicken, softened cream cheese, shredded cheese, salsa, cumin, chili powder, salt and pepper in a large bowl until well combined. I find using my hands works best to ensure everything is evenly incorporated.
- Warm the tortillas slightly in the microwave for 20-30 seconds between damp paper towels – this makes them more pliable and less likely to crack when rolling.
- Place about 2-3 tablespoons of the chicken mixture on the lower third of each tortilla, then roll it up tightly. Don’t overfill or they’ll burst open while baking!
- Arrange the rolled taquitos seam-side down on the prepared baking sheet, making sure they don’t touch. Lightly brush or spray the tops with oil for that crispy, golden finish.
- Bake for 15-20 minutes until the edges turn golden brown and crispy. The filling should be heated through and the cheese should be melty when you cut into one.
- Let the taquitos cool for 2-3 minutes before serving – trust me, giving them this brief rest helps prevent burned mouths and allows the filling to set slightly.
- Serve immediately with your choice of dipping sauces and garnishes for a restaurant-worthy presentation that’s surprisingly simple to achieve.
These taquitos freeze beautifully! After rolling (but before baking), freeze them on a baking sheet until solid, then transfer to a freezer bag for quick dinners later.
Tips for the Best Creamy Baked Chicken Taquitos: Better Than Takeout
These insider tricks will take your Baked Cream Cheese Chicken Taquitos from good to restaurant-quality with minimal extra effort:
- Room temperature cream cheese : Ensure your cream cheese sits out for at least 30 minutes before mixing. Cold cream cheese creates lumps that won’t distribute evenly through the chicken mixture.
- Double-warm those tortillas : I’ve found that warming tortillas both before filling and after rolling (just 10 seconds in the microwave) dramatically reduces cracking during the final shaping.
- Create a filling assembly line : Position your tortillas alongside the chicken mixture and arrange them slightly overlapping on your work surface—this speeds up the rolling process before the tortillas cool down.
- Seam-side strategy : If your taquitos keep unraveling, secure them with toothpicks during the first half of baking, then remove for the final browning. The melted cheese will act as natural glue.
- Two-temperature baking : For the ultimate texture contrast, bake at 400°F for 15 minutes, then switch to broil for the last 2 minutes—this creates extra-crispy edges while keeping the filling creamy.
Variations & Substitutions
Don’t be afraid to make these taquitos your own! The basic recipe is delicious as written, but there are plenty of ways to customize based on what you have on hand or your family’s preferences.
- Protein swaps : While rotisserie chicken is perfect for convenience, you can use any cooked, shredded protein. I’ve made these with leftover turkey after Thanksgiving, pulled pork, or even flaked white fish for a seafood twist.
- Make it vegetarian : Skip the chicken and use 2 cups of mashed black beans or refried beans mixed with sautéed bell peppers and corn for a hearty meat-free version that’s equally satisfying.
- Cheese options : The combination of cream cheese plus shredded cheese creates the perfect creamy texture, but feel free to experiment! Pepper jack adds a nice kick, while a Mexican cheese blend creates authentic flavor. Dairy-free cream cheese and shredded alternatives work surprisingly well for those avoiding dairy.
- Tortilla choices : Corn tortillas offer more authentic flavor but can be trickier to work with. If using corn, briefly fry each tortilla in a little oil for 3-5 seconds per side before filling—this makes them much more pliable. For a low-carb option, try using thin sliced zucchini strips or large lettuce leaves for fresh “taquito” wraps (though these won’t be baked).
- Heat level adjustments : The recipe as written is family-friendly, but heat-seekers can add diced jalapeños, a few dashes of hot sauce, or cayenne pepper to the filling. For a smoky kick, try adding a half teaspoon of chipotle powder along with the other spices.
- Fresh herb boost : Cilantro is traditional, but if you’re in the cilantro-tastes-like-soap camp, try fresh oregano, basil, or even a handful of finely chopped spinach to add color and nutrition without overpowering the other flavors.
Storage & Freezing
These Creamy Baked Chicken Taquitos are perfect for meal prep and freezing, making them an excellent option for busy weeknights. With proper storage, you can enjoy their crispy-creamy goodness well beyond the initial serving.
For refrigerating leftovers, allow the taquitos to cool completely before storing them in an airtight container. They’ll maintain their quality in the refrigerator for 3-4 days. When reheating, avoid the microwave which can make them soggy—instead, place them in a 350°F oven for 7-10 minutes to restore their crispy exterior while keeping the filling warm and gooey.
Freezing these taquitos is incredibly convenient and can be done in two ways. For make-ahead convenience, prepare the taquitos up to the rolling stage, but don’t bake them. Place them on a parchment-lined baking sheet, freeze until solid (about 1-2 hours), then transfer to a freezer-safe bag or container where they’ll keep for up to 3 months. When ready to enjoy, bake straight from frozen at 400°F for 20-25 minutes until golden and crispy. I’ve found that brushing them with a little extra oil before baking from frozen helps achieve that perfect crunch when cooking from frozen.
Already baked taquitos can also be frozen, though they won’t be quite as crispy when reheated. Wrap them individually in foil before placing in a freezer bag to prevent freezer burn and preserve the creamy filling’s texture. The cream cheese filling might separate slightly after freezing, but the taste remains delicious—just be sure to reheat them thoroughly in a 375°F oven until heated through (about 15 minutes).
Make Ahead Options
These Baked Cream Cheese Chicken Taquitos are a meal prep champion, perfect for busy weeknight planning! You can prepare the entire chicken and cream cheese filling up to 2 days in advance and store it covered in the refrigerator (the flavors actually improve overnight). The taquitos can be fully assembled and arranged on your baking sheet up to 24 hours before cooking—simply cover tightly with plastic wrap and refrigerate until ready to bake. For longer storage, assemble the taquitos and freeze them on the baking sheet until solid, then transfer to freezer bags for up to 3 months. When ready to serve, bake frozen taquitos directly from the freezer, adding just 5-7 extra minutes to the cooking time for that same golden, crispy perfection.
Serving Suggestions
These Baked Cream Cheese Chicken Taquitos are more than just a meal—they’re an experience that deserves thoughtful presentation. I love creating a colorful taquito spread that makes dinner feel special, even on busy weeknights.
Arrange your golden-crisp taquitos on a large platter with small bowls of dipping options surrounding them. The classic trio of guacamole, sour cream, and fresh pico de gallo creates a beautiful color palette while offering variety for every bite. For an elevated touch, thin the sour cream with a splash of lime juice and drizzle it over the taquitos instead of serving it on the side—this restaurant-style presentation always impresses guests.
For a complete meal, pair these taquitos with a bright, acidic side to balance the creamy filling. A simple cabbage slaw dressed with lime juice and a touch of honey complements the rich chicken and cheese beautifully. Alternatively, a side of Mexican street corn salad or cilantro-lime rice rounds out the meal with authentic flavors that stand up to the bold spices in your taquitos.
These versatile taquitos also shine as party appetizers—cut them in half crosswise before arranging on a serving board with toothpicks for easy grabbing. When entertaining, I supplement the usual dips with a creamy avocado-jalapeño sauce that adds just enough heat to highlight the cumin and chili powder in the filling. Complete your fiesta with ice-cold Mexican beer or a batch of homemade horchata for a refreshing counterpoint to these savory, crispy treats.
Recipe FAQs
Can I use corn tortillas instead of flour? Yes! Warm them longer to prevent cracking.
How do I prevent the taquitos from unfolding? Place seam-side down on the baking sheet.
Can I freeze these taquitos? Absolutely! Freeze before baking for best results.
Is rotisserie chicken necessary? Any cooked, shredded chicken works perfectly.
Can I make these spicier? Add diced jalapeños or increase chili powder.
How do I reheat leftovers? I recommend oven at 350°F for crispiest results.
- 0 Facebook
- 9 Pinterest
- 0 Email
- Copy Link
- 9 shares
Creamy Baked Chicken Taquitos: Better Than Takeout
Ingredients
Instructions
Preheat your oven to 400°F (200°C) and line a baking sheet with parchment paper or spray it with cooking spray to prevent sticking.
Mix the shredded chicken, softened cream cheese, shredded cheese, salsa, cumin, chili powder, salt and pepper in a large bowl until well combined. I find using my hands works best to ensure everything is evenly incorporated.
Warm the tortillas slightly in the microwave for 20-30 seconds between damp paper towels – this makes them more pliable and less likely to crack when rolling.
Place about 2-3 tablespoons of the chicken mixture on the lower third of each tortilla, then roll it up tightly. Don’t overfill or they’ll burst open while baking!
Arrange the rolled taquitos seam-side down on the prepared baking sheet, making sure they don’t touch. Lightly brush or spray the tops with oil for that crispy, golden finish.
Bake for 15-20 minutes until the edges turn golden brown and crispy. The filling should be heated through and the cheese should be melty when you cut into one.
Let the taquitos cool for 2-3 minutes before serving – trust me, giving them this brief rest helps prevent burned mouths and allows the filling to set slightly.
Serve immediately with your choice of dipping sauces and garnishes for a restaurant-worthy presentation that’s surprisingly simple to achieve.
Notes
These taquitos freeze beautifully! After rolling (but before baking), freeze them on a baking sheet until solid, then transfer to a freezer bag for quick dinners later.
Ensure your cream cheese sits out for at least 30 minutes before mixing to prevent lumps.
Warming tortillas both before filling and after rolling helps reduce cracking.
If your taquitos keep unraveling, secure them with toothpicks during the first half of baking.
Bake at 400°F for 15 minutes, then switch to broil for the last 2 minutes for extra-crispy edges.
Nutrition
| Serving Size | 2-3 taquitos |
|---|---|
| Calories | 220 calories |
| Sugar Content | 2g |
| Sodium Content | 350mg |
| Fat Content | 12g |
| Saturated Fat Content | 5g |
| Unsaturated Fat Content | 4g |
| Trans Fat Content | 0g |
| Carbohydrate Content | 18g |
| Fiber Content | 1g |
| Protein Content | 15g |
| Cholesterol Content | 45mg |