- 0 Facebook
- 2 Pinterest
- 2 Email
- Copy Link
- 4 shares
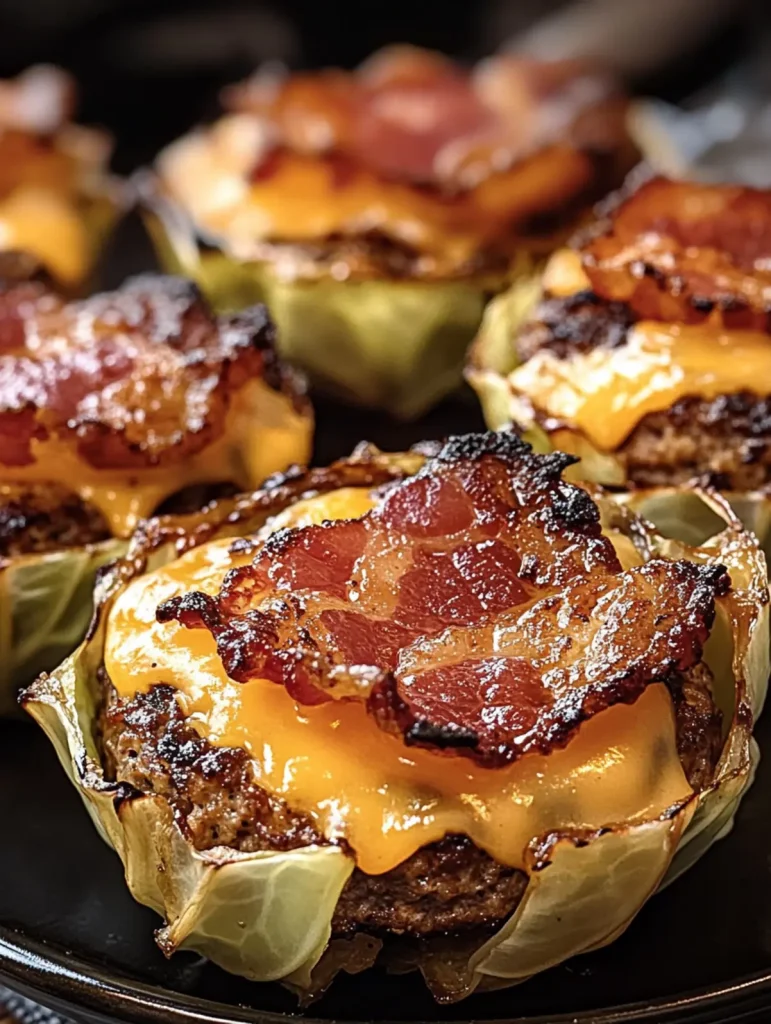
Smoky bacon, juicy beef, and molten cheddar tuck neatly into tender cabbage leaves, turning everything people love about a cheeseburger into a handheld bite (no bun required). The filling comes together in one skillet with sautéed onion, garlic, and smoked paprika, then bakes until the edges turn golden and the cheese melts into every nook. A drizzle of tangy burger sauce and a few extra pickle slices make these the homemade answer to a drive-thru craving.
Why You’ll Love This Recipe
Why Make Crispy Bacon Cheeseburger Cheddar Cabbage Cups?
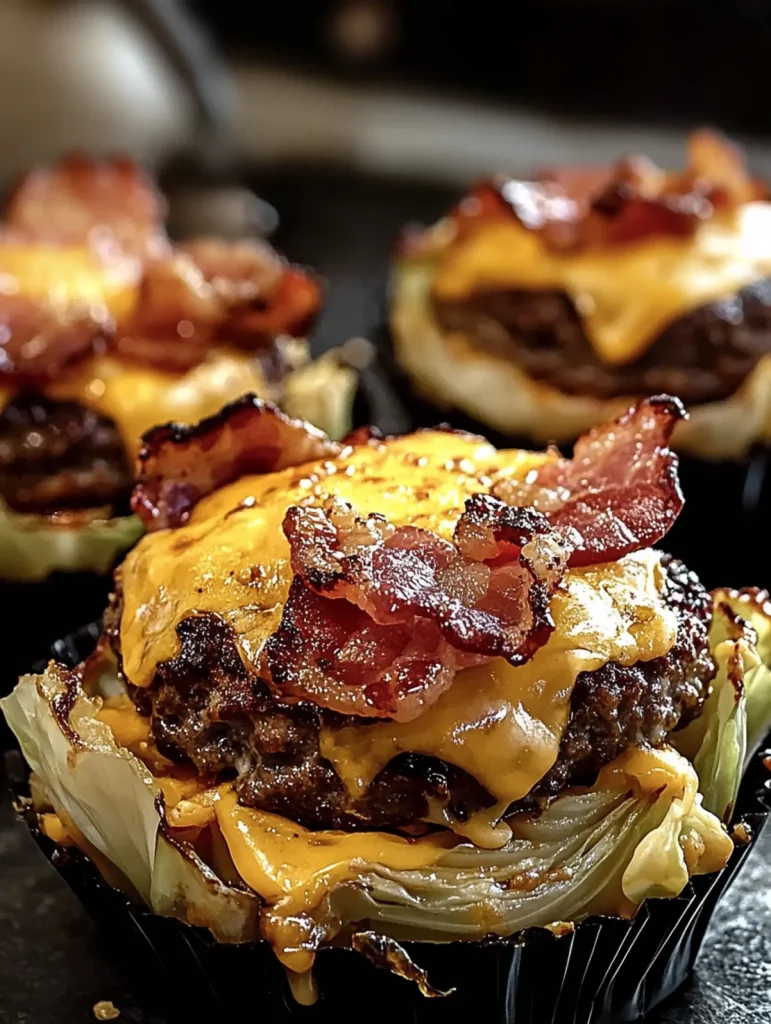
These cups take everything people love about a cheeseburger and tuck it into a tender, golden-edged cabbage leaf. Here’s what makes them worth a spot in your weeknight rotation.
- Burger Flavor, No Bun : Smoked paprika, crispy bacon, and sharp cheddar deliver classic cheeseburger flavor, while pickles and burger sauce add the tangy bite everyone expects.
- One- Skillet Filling : Onion, garlic, and beef cook in a single pan, so cleanup stays easy and the savory browned bits end up right in the filling.
- Tender Cabbage Trick : Briefly blanching or steaming the leaves makes them pliable, so they fold without tearing and turn sweet and silky in the oven .
- Balanced Sauce Magic : Pickle juice in the burger sauce cuts through the richness of bacon and cheddar, keeping every bite bright instead of heavy.
- Family-Friendly Crowd Pleaser : Burger lovers and picky eaters alike tend to go for these, and one batch serves six with little fuss.
- Meal-Prep Friendly : Leftovers keep in an airtight container in the fridge for up to three days, and reheating in the oven re-crisps the cheese and bacon.
Ingredient Notes
Great Crispy Bacon Cheeseburger Cheddar Cabbage Cups start with a few smart ingredient choices, since each one adds its own layer of savory, smoky, creamy, or tangy flavor. Here’s what to look for and how to get the best results from each.
The Cups and Filling
- Green cabbage (1 medium head) : Choose a heavy head with tightly packed, pale green leaves. Trim the thick center rib on each leaf after blanching so it folds easily without tearing. Savoy cabbage works as a more tender substitute.
- Ground beef (1 lb) : An 80/20 blend keeps the filling juicy and flavorful. Drain any excess fat after browning so the cups bake up rich, not greasy.
- Bacon (6 slices, cooked and crumbled) : Bacon adds smoky, salty crunch. Cook it until fully crisp and blot it on paper towels so it stays crunchy inside the filling. Thick-cut bacon gives meatier crumbles.
- Cheddar cheese (1½ cups, shredded) : Sharp cheddar brings the bold, tangy flavor that makes these taste like a true cheeseburger. Shred it from a block, since pre-shredded cheese often contains anti-caking agents that keep it from melting as smoothly.
- Dill pickles (½ cup, sliced) : Pickles add the briny crunch every cheeseburger needs. Pat them dry and chop them before mixing in to keep extra moisture out of the filling.
- Onion (1 small, finely diced) : Onion adds sweetness and savory depth. A fine dice softens quickly in the skillet and blends into the beef instead of leaving crunchy bits.
- Garlic (2 cloves, minced) : Fresh garlic gives a warmer, more aromatic flavor than jarred. Add it after the onion softens and cook for about 30 seconds, just until fragrant, so it doesn’t turn bitter.
- Olive oil (1 tbsp) : A light drizzle helps the onion and garlic soften and pick up color. For extra smoky flavor, a spoonful of reserved bacon drippings makes a tasty swap.
The Seasonings
- Smoked paprika (1 tsp) : This brings the smoky, grill-style flavor and a warm reddish color to the beef. Choose a fresh jar, since older paprika tastes dull and flat.
- Garlic powder (1 tsp) : Garlic powder spreads evenly through the meat for steady background flavor. Check the label for pure garlic, not garlic salt, to keep the seasoning balanced.
- Onion powder (½ tsp) : A small amount rounds out the savory, diner-style taste of the beef. It’s a handy pantry stand-in if the onion needs a little extra boost.
- Salt (½ tsp) : Salt sharpens every other flavor in the filling. Bacon, cheddar, and pickles are all naturally salty, so taste before adding more.
- Black pepper (½ tsp) : Freshly ground pepper adds gentle heat and a little bite. A pepper mill gives noticeably better aroma than pre-ground.
The Burger Sauce
- Mayonnaise (¼ cup) : Mayo forms the creamy base of the sauce. Full-fat mayo gives the smoothest, richest texture, though plain Greek yogurt can replace part of it for a lighter version.
- Ketchup (2 tbsp) : Ketchup adds a touch of sweetness and tang. Stick with a classic tomato ketchup so the sauce stays balanced.
- Yellow mustard (1 tbsp) : Mustard brings the sharp, familiar tang of a drive-thru burger. Plain yellow mustard works best, as stronger varieties can overpower the sauce.
- Pickle juice (1 tbsp) : This thins the sauce slightly and adds a bright, briny kick that cuts through the richness. Use the brine from your dill pickle jar for the best flavor match.
- Smoked paprika (½ tsp) : A pinch in the sauce echoes the smoky notes in the beef and ties the whole dish together. Stir it in well and let the sauce rest for a few minutes so the flavor blooms.
How to Make Irresistible Crispy Bacon Cheeseburger Cheddar Cabbage Cups
- Preheat the oven to 375°F and lightly grease a 9×13-inch baking dish . Core the cabbage and blanch the leaves in boiling salted water for 2 to 3 minutes, until bright green and pliable, then drain, pat dry, and shave down the thick center ribs.
- Heat the olive oil in a large skillet over medium heat and sauté the diced onion for 3 to 4 minutes, until soft and translucent. Add the minced garlic and cook for about 30 seconds. I like to pull the pan off the heat the moment the garlic smells fragrant, since it turns bitter fast.
- Add the ground beef to the skillet and break it into small crumbles with a wooden spoon. Cook for 6 to 8 minutes, until browned with no pink remaining, then stir in the smoked paprika, garlic powder, onion powder, salt, and pepper and drain any excess fat.
- Remove the skillet from the heat and let the beef cool for 2 minutes. Fold in the crumbled bacon, 1 cup of the cheddar, and the chopped pickles, so the cheese softens without melting into a puddle.
- Whisk the mayonnaise, ketchup, mustard, pickle juice, and smoked paprika in a small bowl until smooth. It’s normal if the sauce seems a little thin at first, since it thickens as it rests in the fridge.
- Spoon about ¼ cup of filling onto each cabbage leaf, fold the sides in, and roll or tuck it into a snug cup. Secure each with a toothpick and set them seam-side down in the baking dish . I usually overlap two small leaves for a sturdier cup, and the remaining ½ cup of cheddar goes on top.
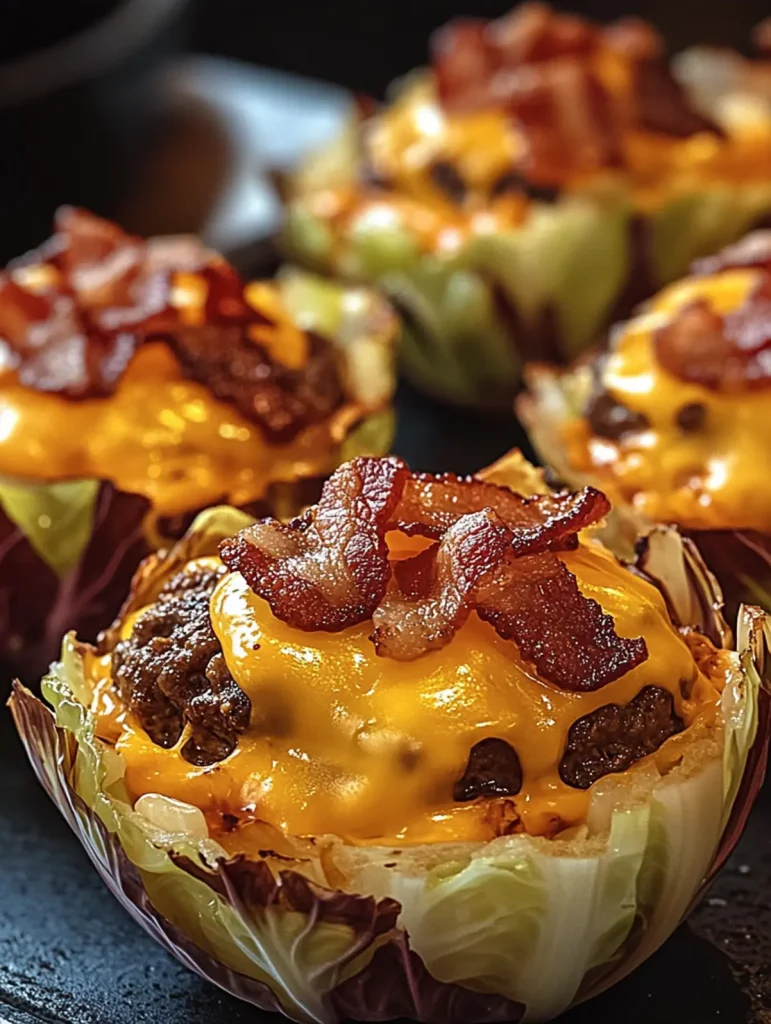
- Bake for 18 to 20 minutes, until the cheese is bubbly and golden and the cabbage edges are lightly browned. Let the cups rest for 5 minutes, then remove the toothpicks.
- Serve warm with a generous drizzle of burger sauce and a few extra pickle slices on top. I always keep extra sauce on the table, because everyone ends up wanting more.
Tip: If the cabbage leaves tear while rolling, patch the gap with a small leaf scrap. It will bake together seamlessly.
Reminder: Store leftovers in an airtight container in the refrigerator for up to 3 days, and reheat in a 350°F oven to re-crisp the cheese and bacon.
Storage & Freezing
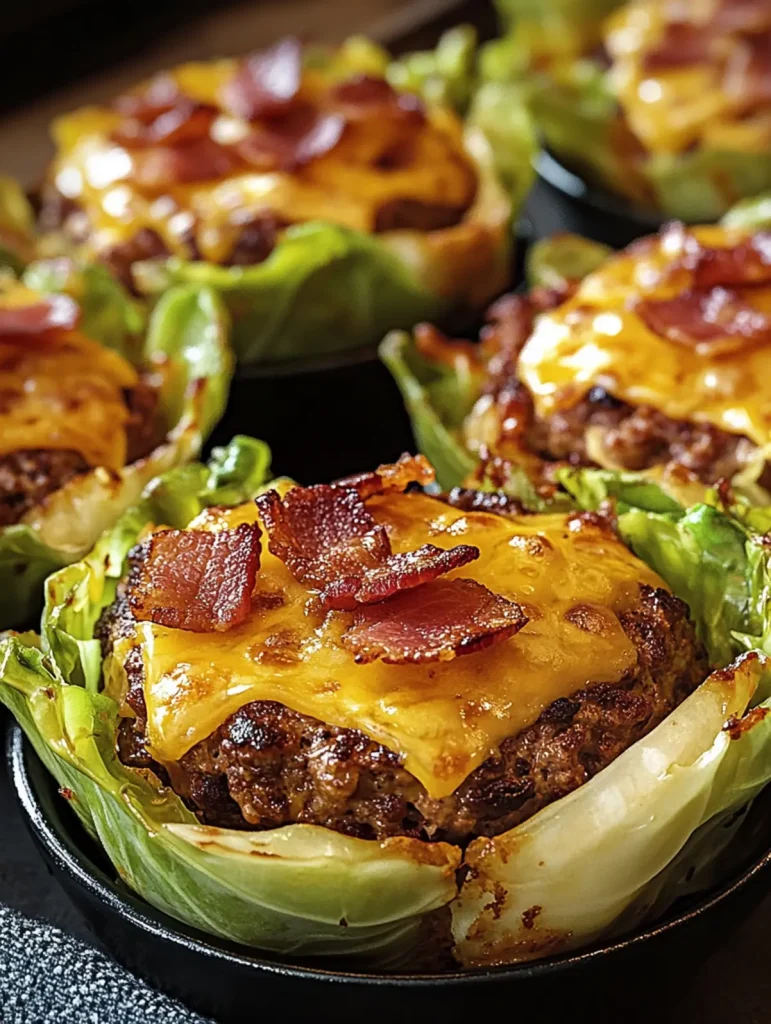
- Refrigerator (up to 3 days): Cool the cups within 2 hours of baking, then pack them in a single layer in an airtight container, with a folded paper towel on top to absorb cabbage moisture. Leftover Crispy Bacon Cheeseburger Cheddar Cabbage Cups will soften a bit as the bacon and cheddar lose their crunch, but the flavor holds up well. Store the burger sauce in a separate jar, where it keeps for about 3 days and thickens as it rests.
- Freezer (up to 2 months): Cabbage releases water once frozen, so the leaves turn softer, more like a classic stuffed cabbage roll. The beef, bacon, and cheddar freeze very well. Let the baked cups cool completely, freeze them on a parchment-lined tray for about an hour, then transfer them to a freezer-safe bag or container with the air pressed out. I pull out the toothpicks first so they don’t poke through the bag. Skip freezing the mayo-based sauce, since it separates and turns grainy when thawed. Whisk up a fresh batch instead, and add fresh pickle slices after reheating, because frozen pickles go limp.
- Thawing: Thaw frozen cups overnight in the refrigerator rather than on the counter. Slow thawing keeps the filling from getting watery and keeps the cabbage from turning mushy.
- Reheating: Use a 350°F oven , not the microwave, which steams the cabbage and leaves the bacon rubbery. Cover the dish with foil and warm refrigerated cups for 12 to 15 minutes, or thawed cups for 18 to 20, until the centers reach 165°F. Then uncover them for the last 5 minutes so the cheddar re-crisps and the bacon firms back up. If I’m short on time, I use a toaster oven for one or two cups.
Serving Suggestions
- Plate them warm, sauce on top: Let the cups rest for 5 minutes after baking, pull out the toothpicks, and serve two or three per plate for a main course. Drizzle the burger sauce over the top just before serving so the cheddar stays crisp underneath, and add a few pickle slices for a tangy finish. I keep a small bowl of extra sauce on the table for dipping, because it disappears fast. For a crowd, arrange the cups on a platter with the sauce in the center.
- Add something crisp and something fresh: These Crispy Bacon Cheeseburger Cheddar Cabbage Cups are rich with beef, bacon, and cheddar, so they pair well with sides that bring crunch and acidity. Oven-baked fries or sweet potato wedges give you the classic burger-and-fries feel without a deep fryer. A cucumber and tomato salad tossed with red onion and a sharp vinaigrette cuts through the richness. Skip heavy sides like mac and cheese, which compete with the cheddar and make the meal feel weighty.
- Pick drinks that refresh: A cold lager or pilsner suits the smoky paprika and bacon, and its light bitterness resets your palate between bites. For a non-alcoholic option, iced tea with plenty of lemon or sparkling water with lime matches the brightness of the pickle-brined sauce.
- Match the size to the occasion: For a weeknight dinner, serve the cups with a simple side salad. For game day or a party, use smaller inner leaves to make bite-sized versions and set out the sauce for dipping. Smaller cups may need a few minutes less in the oven, so check them early.
Variations & Substitutions
These cabbage cups are forgiving, so feel free to adapt them to your pantry, your diet, or whatever flavor you’re craving. Here are a few tested swaps that keep the cheeseburger spirit intact.
- Swap the protein : Ground turkey or chicken works well. Add an extra tablespoon of olive oil since it’s leaner, and cook until it reaches 165°F.
- Change the cheese : I sometimes swap half the cheddar for pepper jack to add gentle heat, while Monterey Jack melts extra creamy and mild.
- Pork-free option : Replace bacon with crisp turkey bacon, or skip it and add an extra ½ teaspoon smoked paprika to keep the smoky flavor.
- Make it vegetarian : Use 1 lb finely chopped cremini mushrooms plus ½ cup walnuts instead of beef and bacon, cooked until dry so the filling stays hearty.
- Pickle alternatives : Out of dill slices, use well-drained dill relish for classic tang, or chopped pickled jalapeños for a spicy kick.
- Keep it low-carb : I use sugar-free ketchup in the burger sauce when cooking for low-carb eaters. The cups themselves are already naturally low in carbs.
Make-Ahead Tips for Crispy Bacon Cheeseburger Cheddar Cabbage Cups
These Crispy Bacon Cheeseburger Cheddar Cabbage Cups are perfect for meal prep, and yes, you can make them ahead of time! Blanch the cabbage leaves, pat them very dry, and refrigerate them in a sealed container for up to 2 days , so they stay pliable. Cook the beef filling (with the bacon, cheddar, and pickles folded in) and whisk the burger sauce up to 24 hours in advance, storing both in the refrigerator . When dinner rolls around, simply fill, roll, and top with cheese, then bake an extra 3 to 5 minutes since the filling starts out cold. You’ll get the same golden, bubbly results with half the effort!
Tips for the Best Irresistible Crispy Bacon Cheeseburger Cheddar Cabbage Cups
- Dry leaves thoroughly : After blanching, pat each cabbage leaf completely dry. Leftover water steams the filling and keeps the cheddar on top from turning golden.
- Shave the ribs flat : Use a paring knife to slice the thick center rib flush with the leaf, so the cup folds snugly without cracking.
- Cool the beef briefly : I let the skillet sit off the heat for two minutes before folding in the cheddar, so it softens instead of melting into grease.
- Blot bacon and pickles : Press cooked bacon on paper towels and pat chopped pickles dry. This keeps the filling crisp-tender instead of soggy.
- Shred cheddar yourself : Sharp cheddar shredded from a block melts smoother and browns better than pre-shredded, which is coated with anti-caking starch.
- Make sauce first : I whisk the burger sauce before assembling and chill it. The smoked paprika blooms and the sauce thickens by serving time.
Common Questions About Irresistible Crispy Bacon Cheeseburger Cheddar Cabbage Cups
- Can I use savoy cabbage instead of green cabbage? Yes, savoy is more tender and folds easily.
- How do I keep the bacon crisp inside the filling? Blot it well, then fold it in last.
- Can I freeze leftovers, and for how long? Yes, up to 2 months, but skip freezing the sauce.
- What if my cabbage leaves tear while rolling? I patch tears with a small leaf scrap.
- 0 Facebook
- 2 Pinterest
- 2 Email
- Copy Link
- 4 shares
Irresistible Crispy Bacon Cheeseburger Cheddar Cabbage Cups
Ingredients
Instructions
Preheat the oven to 375°F and lightly grease a 9×13-inch baking dish. Core the cabbage and blanch the leaves in boiling salted water for 2 to 3 minutes, until bright green and pliable, then drain, pat dry, and shave down the thick center ribs so the leaves fold without cracking.
Heat the olive oil in a large skillet over medium heat and sauté the diced onion for 3 to 4 minutes, until soft and translucent. Add the minced garlic and cook about 30 seconds, removing the pan from the heat as soon as the garlic becomes fragrant to avoid bitterness.
Add the ground beef to the skillet and break it into small crumbles. Cook 6 to 8 minutes, until browned with no pink remaining. Stir in the smoked paprika, garlic powder, onion powder, salt, and pepper, then drain any excess fat.
Remove the skillet from the heat and let the beef cool for about 2 minutes. Fold in the crumbled bacon, 1 cup of the cheddar, and the chopped pickles so the cheese softens without melting into a puddle.
Whisk the mayonnaise, ketchup, mustard, pickle juice, and smoked paprika in a small bowl until smooth. The sauce may seem thin at first; it thickens as it rests in the fridge.
Spoon about ¼ cup of filling onto each cabbage leaf, fold the sides in, and roll or tuck it into a snug cup. Secure each with a toothpick and set them seam-side down in the baking dish. Overlap two small leaves for a sturdier cup if needed. Sprinkle the remaining ½ cup of cheddar on top of the cups.
Bake for 18 to 20 minutes, until the cheese is bubbly and golden and the cabbage edges are lightly browned. Let the cups rest for 5 minutes, then remove the toothpicks.
Serve warm with a generous drizzle of burger sauce and a few extra pickle slices on top. Keep extra sauce on the table for anyone who wants more.
Notes
Dry leaves thoroughly: After blanching, pat each cabbage leaf completely dry to prevent steaming the filling and keep the cheddar on top from staying pale instead of browning.
Shave the ribs flat: Use a paring knife to slice the thick center rib flush with the leaf so the cup folds snugly without cracking.
Cool the beef briefly: Let the skillet sit off the heat for two minutes before folding in the cheddar so the cheese softens instead of melting into grease.
Blot bacon and pickles: Press cooked bacon on paper towels and pat chopped pickles dry to keep the filling from getting soggy.
Shred cheddar yourself: Sharp cheddar shredded from a block melts smoother and browns better than pre-shredded varieties.
Make sauce first: Whisk the burger sauce before assembling and chill it so the smoked paprika blooms and the sauce thickens by serving time.
If a cabbage leaf tears while rolling, patch the gap with a small leaf scrap; it will bake together seamlessly.
Storage — Refrigerator (up to 3 days): Cool the cups within 2 hours, pack in a single layer in an airtight container with a folded paper towel on top to absorb moisture. Store sauce separately in a jar; it keeps about 3 days and will thicken as it rests.
Freezer (up to 2 months): Freeze baked cups on a parchment-lined tray for about an hour, then transfer to a freezer-safe bag or container. Do not freeze the mayo-based sauce; make a fresh batch when serving.
Thawing & Reheating: Thaw overnight in the fridge. Reheat in a 350°F oven (covered) for 12 to 15 minutes for refrigerated cups or 18 to 20 minutes for thawed cups, then uncover for the last 5 minutes to re-crisp the cheddar and bacon. Avoid the microwave, which can make the cabbage soggy and the bacon rubbery.
Nutrition
| Serving Size | 1 serving (about 2 cabbage cups) |
|---|---|
| Calories | ≈415 kcal |
| Sugar Content | ≈3 g |
| Sodium Content | ≈760 mg |
| Fat Content | ≈34 g |
| Saturated Fat Content | ≈15 g |
| Unsaturated Fat Content | ≈17 g |
| Trans Fat Content | ≈0.5 g |
| Carbohydrate Content | ≈6 g |
| Fiber Content | ≈2 g |
| Protein Content | ≈26 g |
| Cholesterol Content | ≈120 mg |