- 0 Facebook
- 10 Pinterest
- 15 Email
- Copy Link
- 25 shares
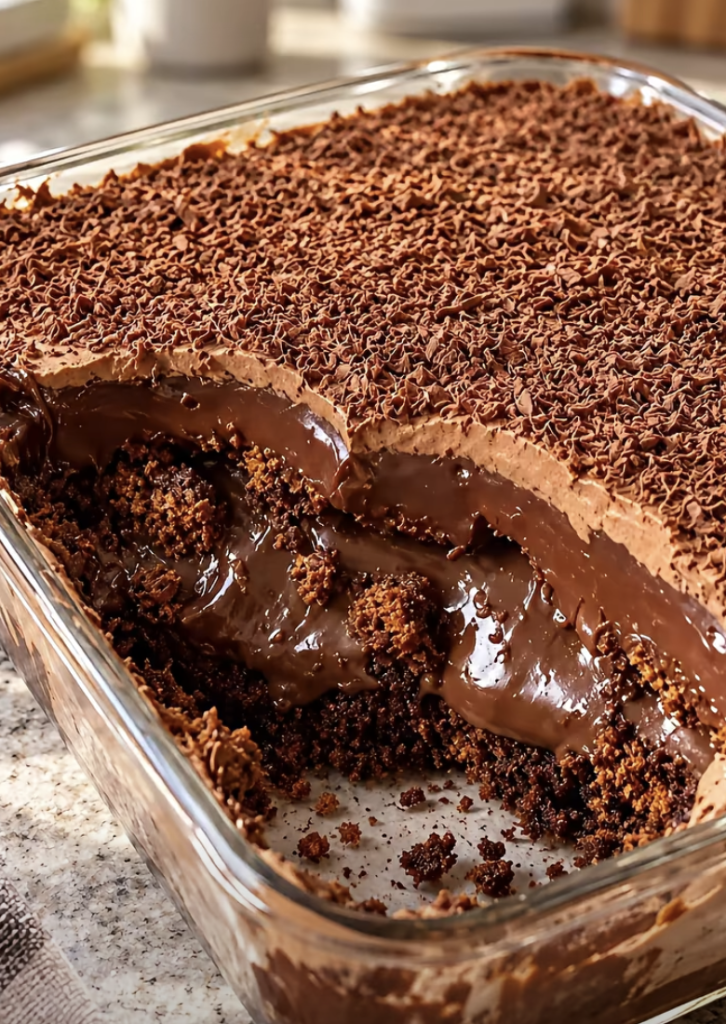
Four layers of pure chocolate, stacked one on top of the other: a tender cocoa cake, a silky whipped filling, a velvety stovetop pudding, and a glossy ganache that sets like a mirror. Each part is simple on its own (just a few bowls, a saucepan, and a whisk), but together they create a dessert that’s deeply rich, spoonable, and gloriously over the top. Serve it in generous slices with fresh berries or a scoop of vanilla ice cream, and fast-food sweets will feel like a distant memory.
Why You’ll Love This Recipe
Why Is 4-Layer Chocolate Heaven So Good?
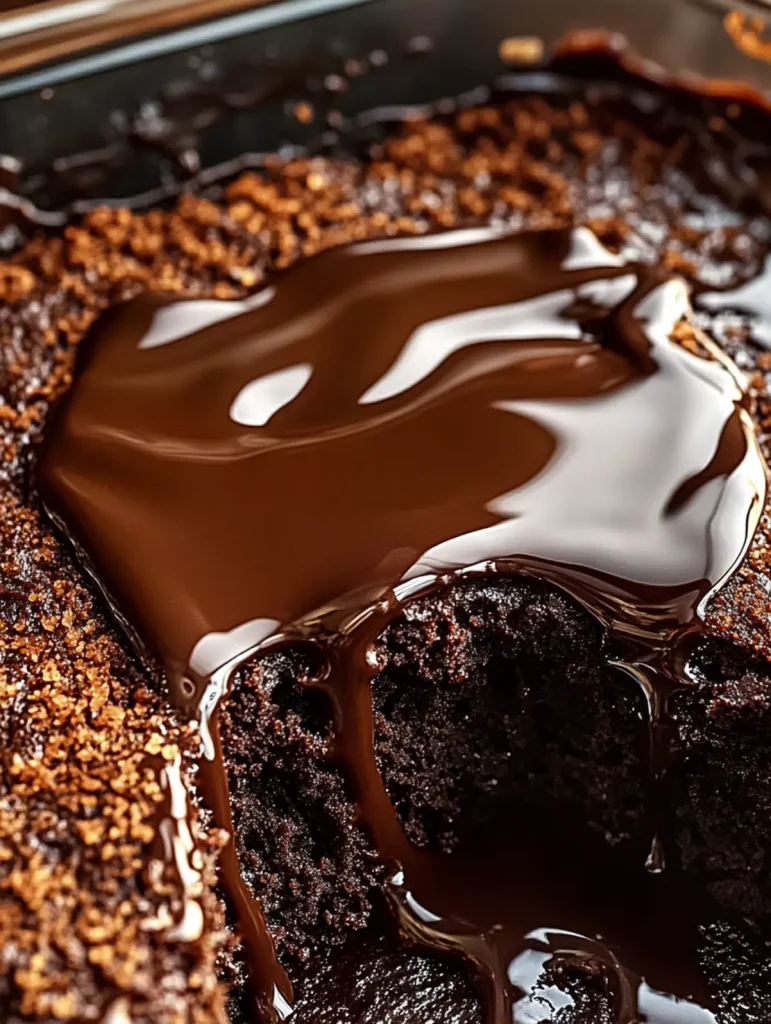
This Indulgent 4-Layer Chocolate Heaven Cake You’ll Crave looks like a bakery showstopper, but it’s built from four simple, approachable steps. Here’s what makes it worth the time in your kitchen.
- Four Distinct Textures : Tender cocoa cake, silky filling, velvety pudding, and glossy ganache each bring a different mouthfeel, so every forkful tastes layered rather than one-note.
- Moist Cake Base : Hot water blooms the cocoa and keeps the crumb tender, so the base stays soft even after chilling beneath the pudding.
- Simple Stovetop Pudding : Cornstarch thickens the pudding quickly, and whisking constantly over medium heat prevents lumps and gives a smooth layer that holds its shape when sliced.
- Balanced Chocolate Flavor : Semi-sweet chips and unsweetened cocoa keep the richness deep but never cloying, so fresh berries or vanilla ice cream make a perfect contrast.
- Glossy Ganache Finish : Letting the ganache cool slightly before pouring gives a mirror-like shine and clean edges, with a light cocoa dusting for a bakery-style look.
- Make-Ahead Friendly : Each layer is prepared separately, and leftovers keep covered in the fridge for up to three days, which suits dinner parties and celebrations.
Ingredient Notes
Great chocolate desserts start with good ingredients, and this 4-Layer Chocolate Heaven cake is no exception. Here is what each ingredient does, what to look for, and how to swap it if needed.
Quick note: measure carefully and bring cold ingredients like eggs and milk to room temperature for the smoothest results.
Layer 1: Chocolate Cake Base
- All-purpose flour : Gives the cake its structure without making it heavy. Spoon it into the measuring cup and level it off, since scooping straight from the bag packs in extra flour and dries out the crumb.
- Unsweetened cocoa powder : Delivers the deep chocolate flavor and dark color. Regular or Dutch-process both work here, and sifting removes lumps so the batter mixes smoothly.
- Granulated sugar : Sweetens the cake and keeps the crumb tender and moist. Standard white sugar is best, as it dissolves easily into the thin batter.
- Baking powder : Helps the cake rise and stay light. Check the expiration date, because old baking powder loses strength and leads to a flat, dense base.
- Baking soda : Reacts with the cocoa’s natural acidity for extra lift and a softer texture. Measure it precisely, since too much leaves a soapy aftertaste.
- Large eggs : Bind the batter and add richness and structure. Room-temperature eggs blend in more evenly, and warming them in a bowl of warm water for a few minutes works if they’re cold.
- Milk : Adds moisture and softens the crumb. Any milk works, and unsweetened plant milks like almond or oat are a reliable dairy-free swap.
- Vegetable oil : Keeps the cake moist even after chilling, which butter can’t do as well. Canola or another neutral oil is a good substitute.
- Vanilla extract : Rounds out and deepens the chocolate flavor. Pure vanilla extract has a warmer, more complex taste than imitation.
- Hot water : Blooms the cocoa to intensify its flavor and creates a tender, moist crumb. The batter will look thin, which is exactly right.
Layer 2: Creamy Chocolate Filling
- Heavy whipping cream : Provides the silky, luscious texture of the filling. Choose a cream with at least 36% fat, as lighter creams won’t set or whip as richly.
- Semi-sweet chocolate chips : Bring balanced, mellow chocolate flavor and body. Look for chips with a good cocoa percentage (around 50-60%), or use finely chopped baking chocolate for an even smoother melt.
- Unsalted butter : Adds gloss, richness, and a velvety mouthfeel. Unsalted lets you control the seasoning, but salted butter works if you skip any added salt elsewhere.
Layer 3: Chocolate Pudding
- Whole milk : Creates a creamy, full-bodied pudding. Lower-fat milk makes a thinner, less satisfying layer, so whole milk is worth using here.
- Granulated sugar : Sweetens the pudding and balances the bitterness of the cocoa. Whisk it in with the dry ingredients before adding the milk to prevent clumping.
- Unsweetened cocoa powder : Builds the pudding’s deep chocolate flavor. Sift it with the cornstarch so it blends without lumps.
- Cornstarch : Thickens the pudding into a smooth, sliceable layer. Whisk it well and keep stirring as it heats, then let it bubble gently for a minute to fully activate its thickening power.
- Semi-sweet chocolate chips : Melt into the hot pudding for extra richness and a glossy finish. Stir them in off the heat so they melt smoothly without scorching.
- Vanilla extract : Adds warmth and rounds out the chocolate. Stir it in at the end, since heat can dull its aroma.
Layer 4: Chocolate Ganache Topping
- Semi-sweet chocolate chips : Form the glossy, bittersweet-sweet finish on top. Chips hold their shape a bit more than bar chocolate, so let the ganache sit a minute before stirring until fully smooth.
- Heavy whipping cream : Melts the chocolate into a silky, pourable glaze. Heat it until just steaming, not boiling, to keep the ganache shiny rather than grainy.
- Unsweetened cocoa powder, for dusting : Adds a bakery-style finish and a hint of bitterness against the sweet ganache. Dust it through a fine-mesh sieve for an even, professional look.
Step-by-Step Instructions
- Heat the oven to 350°F (175°C) and line the bottom of an 8-inch springform pan with parchment. Whisk the flour, cocoa powder, granulated sugar, baking powder, and baking soda in a large bowl, then mix in the eggs, milk, vegetable oil, and vanilla until no dry streaks remain.
- Stir in the hot water until the batter is smooth and pourable. It will look thin, which is exactly what you want for a moist crumb.
- Pour the batter into the pan and bake for 25 to 30 minutes, until a toothpick comes out with just a few moist crumbs. Cool completely in the pan, about 30 minutes, before adding any layers.
- Heat the heavy whipping cream in a saucepan until steaming, then pour it over the chocolate chips and butter. Let it sit for 1 minute and whisk until glossy, chill for 30 to 40 minutes until thick, and beat with an electric mixer for 1 to 2 minutes until it holds soft peaks, and spread it over the cooled cake. I like to chill it until it feels like soft frosting, since a warm filling will soak into the cake.
- Whisk the sugar, cocoa powder, and cornstarch in a clean saucepan, then slowly whisk in the whole milk until smooth. Cook over medium heat, whisking constantly, for 6 to 8 minutes until it bubbles and coats the back of a spoon, then let it bubble gently for 1 minute.
- Remove the pudding from the heat and stir in the chocolate chips and vanilla until glossy. Cool for 10 minutes, stirring once or twice, then spread it over the filling and chill for at least 30 minutes until set.
- Heat the cream for the ganache until just steaming and pour it over the chocolate chips. I let it rest for a full minute before whisking until smooth, then cool it for about 10 minutes until it thickens slightly but still pours.
- Pour the ganache over the chilled pudding, tilting the pan so it spreads evenly to the edges, and refrigerate for at least 2 hours until firm. Dust with cocoa powder through a fine-mesh sieve, release the springform ring, and slice with a hot knife wiped clean between cuts, which is my trick for sharp, tidy layers.
Tip: If the pudding forms a skin while it cools, press a piece of plastic wrap directly onto its surface, or whisk it briefly before spreading to bring back a smooth texture.
Quick reminder: each layer should be cool, but not cold and stiff, before the next one goes on. Warm layers melt into each other, and fully chilled ones are hard to spread.
Serving Suggestions
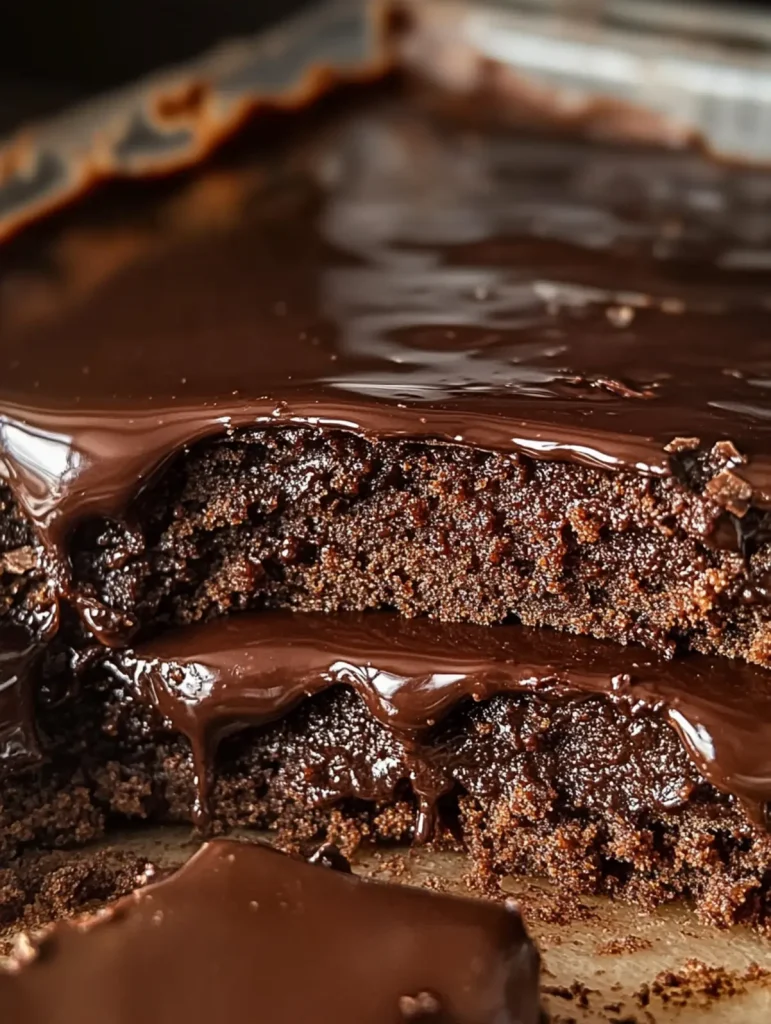
- Plate it cool, not ice-cold: Slice the cake with a hot knife , wiping the blade clean between cuts, then let each slice sit at room temperature for 15 to 20 minutes. The ganache softens slightly and the chocolate flavor opens up. Because this 4-Layer Chocolate Heaven cake is so rich, I cut 8 modest slices and lay each one on a small plate so the layers show from the side. Add a light dusting of cocoa and a few flakes of sea salt just before serving.
- Add something tart or cold: Fresh raspberries, sliced strawberries, or a spoonful of macerated cherries cut through the pudding and ganache, while a scoop of vanilla ice cream melts into the warm-from-the-counter edges. If you prefer less sweetness, a dollop of unsweetened whipped cream or crème fraîche gives a softer contrast without competing with the filling.
- Pour a drink that stands up to the chocolate: Strong black coffee or an espresso balances the sweetness and highlights the cocoa. For something cozier, a cold glass of whole milk suits the pudding layer. For adults, a ruby port, a fruity Zinfandel, or a dry sparkling rosé has enough acidity to refresh your palate between bites.
- Match the setting: For a birthday or dinner party, bring the cake to the table whole on a stand, release the springform ring in front of guests, and slice at the table. For a quiet weeknight treat, serve a single slice with coffee. For a crowd, make it a day ahead, since the layers set more firmly overnight and slice more cleanly, then add berries and ice cream at the last minute.
Expert Tips
- Sift the cocoa : Cocoa powder clumps easily, and lumps won’t dissolve in the thin batter. Sifting it with the flour gives a smooth, even crumb.
- Chill filling to frosting : I chill the chocolate cream until it spreads like soft frosting; warm filling soaks into the cake and blurs the 4-Layer Chocolate Heaven layers.
- Whisk pudding constantly : Cornstarch settles and scorches on the pan bottom. Keep whisking into the corners, and let it bubble gently for one minute so it fully thickens.
- Stir chocolate in off-heat : Add the chips and vanilla after removing the pan. Residual heat melts them smoothly, and the vanilla keeps its aroma instead of cooking off.
- Rest the ganache : I let the cream sit on the chips a full minute, then cool the ganache 10 minutes so it pours glossy without melting the pudding.
- Slice with a hot knife : Dip a long knife in hot water, wipe it dry, and press straight down. Repeat between slices for clean, sharp layers.
Storage & Freezing
- Refrigerator (up to 3 days): Cover the cake loosely with plastic wrap or move slices to an airtight container, since the pudding and cream filling soak up fridge odors quickly. The oil in the cake base keeps the crumb moist even when cold, and the ganache stays glossy if nothing touches it. I wait to dust with cocoa until serving, because moisture in the fridge turns the dusting blotchy. Because the layers contain eggs, milk, and cream, keep it chilled until you’re ready to serve, and discard slices left out for more than 2 hours.
- Freezing (best as slices, up to 1 month): This 4-Layer Chocolate Heaven cake freezes with one caveat: the cornstarch pudding can turn slightly watery or spongy once thawed. For the best result, freeze individual slices on a parchment-lined tray for about 2 hours, then wrap each tightly in plastic and foil. The cake base and ganache freeze beautifully on their own, so if you’re planning far ahead, I’d freeze the cooled, wrapped cake base for up to 2 months and build the other layers fresh.
- Thawing: Move frozen slices to the refrigerator overnight, unwrapping them only once they’ve thawed so condensation doesn’t pool on the ganache. Never thaw at room temperature, because the cream filling and pudding warm unevenly and can turn soft and weepy. If a little liquid does collect on the pudding, blot it gently with a paper towel before serving.
- Serving leftovers (no reheating needed): This cake is meant to be served cold, so skip the microwave, which would melt the filling and pudding into the cake. Instead, let a chilled slice sit at room temperature for 15 to 20 minutes to soften the ganache and bring out the chocolate flavor. For tidy slices, use the hot- knife trick from the recipe, wiping the blade clean between cuts. Add fresh berries or a scoop of vanilla ice cream just before serving.
Variations & Substitutions
This cake is forgiving, so feel free to adjust it to your pantry, your guests’ dietary needs, or your mood. These swaps keep the four layers intact and have held up well in my kitchen.
- Make it dairy-free : Swap in chilled full-fat coconut cream for the heavy cream, dairy-free chips, and plant butter, then use oat or soy milk in the pudding.
- Go gluten-free : Replace the all-purpose flour with a 1:1 gluten-free baking blend. The crumb will be slightly more delicate, so cool the cake completely before layering.
- Deepen with coffee : I replace the hot water with hot brewed coffee for a deeper, more bakery-style chocolate flavor, and it won’t taste like coffee.
- Adjust the sweetness : Bittersweet chips give a more grown-up flavor in the ganache. Milk chocolate suits kids but sets softer, so chill an extra hour.
- Add a berry layer : Spread 2 to 3 tablespoons of seedless raspberry jam over the cooled cake before the filling for a tart contrast that cuts the richness.
- No springform pan : Line an 8-inch round cake pan with parchment, leaving an overhang to lift the cake out, or serve slices straight from the pan.
How to Make 4-Layer Chocolate Heaven Ahead of Time
Yes, you can make this cake ahead, which makes it a dream for busy hosts! Bake the cake base up to 24 hours in advance, cool it completely in the springform pan, and cover it tightly so it stays moist. Then assemble all four layers and refrigerate the finished 4-Layer Chocolate Heaven, covered, for up to 3 days so the flavors meld. To prevent a skin, press plastic wrap onto the pudding as it cools, and let each layer cool (but not chill hard) before stacking so it spreads smoothly. Just before serving, dust with cocoa, release the ring, and slice with a hot knife . It’s just as delicious, with zero last-minute stress.
Frequently Asked Questions
Why is my cake batter so thin? Thin batter bakes into a moist crumb.
Why did my chocolate filling soak into the cake? It was too warm; chill until soft-frosting thick.
How do I stop pudding from forming a skin? Press plastic wrap directly onto the surface.
Can I freeze the 4-Layer Chocolate Heaven cake? Yes, as slices; the pudding may turn slightly watery.
How long do leftovers keep in the fridge? Up to three days, covered.
How do I get clean, sharp slices? I use a hot knife, wiped between cuts.
- 0 Facebook
- 10 Pinterest
- 15 Email
- Copy Link
- 25 shares
Indulgent 4-Layer Chocolate Heaven Cake You'll Crave
Ingredients
Instructions
Heat the oven to 350°F (175°C) and line the bottom of an 8-inch springform pan with parchment. Whisk the flour, cocoa powder, granulated sugar, baking powder, and baking soda in a large bowl, then mix in the eggs, milk, vegetable oil, and vanilla until no dry streaks remain.
Stir in the hot water until the batter is smooth and pourable. It will look thin, which is exactly what you want for a moist crumb.
Pour the batter into the pan and bake for 25 to 30 minutes, until a toothpick comes out with just a few moist crumbs. Cool completely in the pan, about 30 minutes, before adding any layers.
Heat the heavy whipping cream in a saucepan until steaming, then pour it over the chocolate chips and butter. Let it sit for 1 minute and whisk until glossy, chill for 30 to 40 minutes until thick, then beat with an electric mixer for 1 to 2 minutes until it holds soft peaks. Spread this filling over the cooled cake; chill until it feels like soft frosting to prevent soaking.
Whisk the sugar, cocoa powder, and cornstarch in a clean saucepan, then slowly whisk in the whole milk until smooth. Cook over medium heat, whisking constantly, for 6 to 8 minutes until it bubbles and coats the back of a spoon, then let it bubble gently for 1 minute.
Remove the pudding from the heat and stir in the chocolate chips and vanilla until glossy. Cool for 10 minutes, stirring once or twice, then spread it over the filling and chill for at least 30 minutes until set.
Heat the cream for the ganache until just steaming and pour it over the chocolate chips. Let it rest for a full minute before whisking until smooth, then cool for about 10 minutes until it thickens slightly but still pours.
Pour the ganache over the chilled pudding, tilting the pan so it spreads evenly to the edges, and refrigerate for at least 2 hours until firm. Dust with cocoa powder through a fine-mesh sieve, release the springform ring, and slice with a hot knife wiped clean between cuts for sharp, tidy layers.
Tip: If the pudding forms a skin while it cools, press a piece of plastic wrap directly onto its surface, or whisk it briefly before spreading to return a smooth texture. Quick reminder: each layer should be cool but not ice-cold before the next goes on—warm layers will melt into each other and fully chilled ones are hard to spread.
Notes
Sift the cocoa with the flour to avoid lumps and ensure a smooth, even crumb.
Chill the whipped filling until it spreads like soft frosting; warm filling soaks into the cake and blurs the distinct layers.
Whisk the pudding constantly to prevent scorching and to ensure the cornstarch activates fully; let it bubble gently for one minute.
Stir chocolate into off-heat pudding or cream to let residual heat melt chips smoothly and preserve vanilla aroma.
Let the ganache rest on the chips for a full minute, then cool about 10 minutes so it pours glossy without melting the pudding.
Slice with a hot knife: dip in hot water, wipe dry, and repeat between slices for clean edges.
Storage — Refrigerator (up to 3 days): cover loosely or transfer slices to airtight containers; wait to dust with cocoa until serving. Freezing (best as slices, up to 1 month): freeze individual slices on a tray, then wrap tightly. Thaw overnight in the refrigerator and blot any excess moisture before serving.
Nutrition
| Serving Size | 1 slice |
|---|---|
| Calories | 520 kcal |
| Sugar Content | 36 g |
| Sodium Content | 220 mg |
| Fat Content | 30 g |
| Saturated Fat Content | 17 g |
| Unsaturated Fat Content | 12 g |
| Trans Fat Content | 0.5 g |
| Carbohydrate Content | 58 g |
| Fiber Content | 4 g |
| Protein Content | 6 g |
| Cholesterol Content | 95 mg |